Tamiya 1:32 Mustang

Elm City Hobbies said:
Mine will be Canadian...just got to find the right markings!! ;D

That a Cool Idea..... Canadian War surplus... we had such a great Airforce back then.....
all sort of cool airplanes...

_IGP2302_copy_2.jpg
 
And you know those guys are not that unreasonable with the price.

Scott, maybe it's my paranoia kicking in, checked out Tamiya website and saw the Spitfire Merlin, it uses the same parts from the looks of it. Maybe it's just that aftermarket hasn't picked up on this yet.
 
Did some digging around, looks like the Spitfire guys are doing much the same. Not sure why aftermarket folks haven't picked up on this but I doubt I would pay for ignition wires alone. There's more wiring to do anyways. Thank you for the comments and indulging on my evil capitalist conspiracy theories. ;D
 
Elm City Hobbies said:
Nothing new for Tamiya really, but this should be the same engine that is in the MkXVI Spitfire, and they didn't release an upgrade set post kit release for it. But one never knows.

i second this... there is little difference between the Packard made Merlin, and the Rolls Royce made Merlin, the the Merlin V-1650-7 is very similar to the Merlin 66 by what i understand. if i can remember correctly the IX Super marine Spitfire was also powered buy the Merlin 66...

i checked and they make a 1/32 Tamiya IXc supermarine spitfire, do they make after market parts for that for the engine?

if not do you think you might be able to make some spark plug wires from soldering wire or old phone wire?
 
13aceofspades13 said:
if not do you think you might be able to make some spark plug wires from soldering wire or old phone wire?

Working on it... 8)

Using brass wire with bits of cut off brass tubing for the fittings coming off the conduit.
 
I have a scheme...

I think I found the scheme I want to do for this build.

7th Fighter Group, the Sundowners.

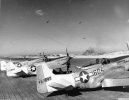
This picture caught my eye.


342-FH-3A-42218-67970AC_462nd_fs_604_607_44-72861.jpg
Check out the double mast.

It comes from the 7th Fighter website

462nd FS, looks like really simple markings to replicate and a pretty clean scheme to showcase NMF.
 
looks like he photo edits models a little too, the more i see this kit built, the more i want it.
 
Elm City Hobbies said:
Here is something to give you a kick in the butt to get you moving on building this.

Article on Hyperscale of Brett Green's finished Mustang.

http://www.hyperscale.com/2011/galleries/p51dtamiyateaser32_1.htm

Looks good in Brit/CDN colors!!

The part where the antenna mast attaches is nice, Tamiya supplied precut locators for different styles of antennas that you'd find on different model Mustangs. They have the cut outs of this Dual Mast setup. I have learned that the 7th Fighter Command Mustangs were modified as VLR Mustangs, the dual antennas were for homing signal "Uncle Dog".

Seventh Fighter Command frankly regarded Uncle-Dog as the greatest invention to come out of the war. It consisted of a pair of VHF antennae side by side on the 51 's aft fuselage, tuned one-quarter wavelength apart. Whichever antenna got a signal first would transmit to the pilot's earphones and suppress the other signal. The right-hand antenna gave a Morse Code letter U (dit-dit-dah) "Uncle from the phonetic alphabet. The left-hand antenna gave the letter D "Dog" (dah-dit-dit). The pilot then turned in the appropriate direction and refined the heading by watching his compass. When both signals were received simultaneously the pilot heard a steady hum, which meant he was on course for base or for the transmitting aircraft.

Pretty cool eh? 8)
 
Saul has been pointing me in the right direction on this build and identifying the VLR options and modifications, again I thank Saul for that! Getting obsessed with this engine but after seeing Mo's and John's builds I can see how much or little that's going to be seen.


P51D026.jpg
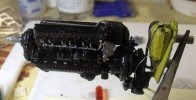
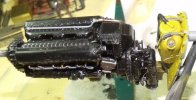
Adding Fuel, Oil, coolant and electrical plumbing or as close as I can. Really just giving a representation of it. Tamiya has supplied some major plumbing lines but they come into play when we close up the fuselage later on.

P51D027.jpg
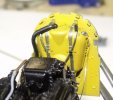
I stole a jerry can fill cap from 1:35 stowage for the hydraulic tank.

P51D028.jpg
Added solder for extra plumbing coming off the tank.

P51D029.jpg
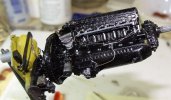
Added lines for the oil pump.

P51D030.jpg

Now I hope I can put this down and move on to the cockpit and see what's next for this little gem.
 
Nice. I like those wires and pulgs. I'd suggest using a few other shades of black or sheens of black for some of the caps and bolted on bits to suggest different materials like caps, machined, and cast metals just to give some variation to the GB.
 
Lots more painting to be done yet. It's a bad habit I have, I start painting too soon most times and make a mess of it. But you're right about the varying tones and materials. Thanks!
 
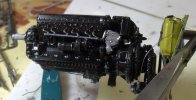
I sprayed the engine with Alclad Klear product, it's their glossy clear coat that just came out. Really hard clear coat, read someone do a review on it and said they would never use future again. Went over it with Migs Dark wash and i'll let that setting a while before cleaning it up.

Moved on into the cockpit, whoever said you don't need aftermarket was sadly mistaken, some half round knobs, like the Bomb Release lever. some of the stuff could be a little over thick and would benefit from aftermarket. Don't get me wrong, the parts look good and will look good OOB. But I can't leave it alone. There's always something more that can be done.

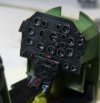
The IP is nice but I'm not sure about the decal behind the clear IP, they seem to far recessed. But the IPs themselves are interesting, they are slightly opaque, I painted the back of the IP black so the dials stand out better now.
P51D031.jpg
The convex dials really sort of magnifies the decals. Neat effect.

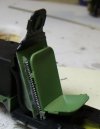
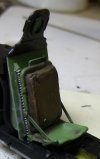
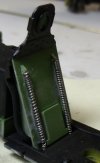
The kit seat and armor plate backing looks ok, the seat is suppose to ride on two spring loaded rods. Tamiya represented this with just to half round sliders..that had to go. Drawing on Jerry Rutman's treatment of his resin cockpit for the Dragon kit, I took a .5mm rod and wrappped solder around it making it look like a spring, sorry I didn't get a picture of the kit part before chopping it up.
P51D032.jpg
so here's my treatment.

P51D033.jpg
Here's the kit seat.

P51D034.jpg
Here's Jerry Rutman's set. Rutman's seat looks a bit shorter than the kit one, I'm not going to bother trying to find out which is right, far as I know, both are. The kit cushion is just square and blah, Jerry's has character. I want to use this seat so I gotta hit Jerry up for another seat for the Dragon kit that I intend to finish soon.

Thanks for looking! hope you like it.

 

Latest posts

Back
Top