Tamiya 1:32 Mustang

Myke said:
Sahweet work! What are those belts made of?

PAPER! It's die cut belts, really nice stuff. a lot easier to work with than prepainted PE, once you start folding that stuff the paint chips. The RB Production buckles are really nice. they are scored deeply at the bend points and hold their shape well.

Myke said:
Nice find on the decals too. I see what you mean about needing some detail there. That's too much to not have on a quality kit like this.

The Tamiya stuff is well appointed but still needs that extra umph... ;D
 
In doing more research on the VLR aircraft I found on one of the other forums that they have identified parts that would be used, such as the battery mount in the engine compartment. That makes this a little easier.

Also given the fact that on the spin area where the antennas are mounted, there are flashed over holes where this dual antenna setup would be, leaves no doubt that Tamiya will be releasing a VLR version in the future. Leave it to me to pick a subject where I have to struggle when the kit is around the corner... :bangs head slowly on desk

I know, this thread is worthless without pictures. When the decals come in there will be more.
 
Moon Puppy said:
Eastrock said:
Nicely done MP, but if your still lack with the interior details.. scratchbuilding some parts will do

The physical details are there, the decals are not.

Here's an image of the fuel selector switch

577_fuelselector.jpg

I just can't paint that tight! guess I'll be looking for some Eduard pe.
You are aware that Barracuda Studios is coming out with a resin IP and sidewalls for this kit, right?
http://www.themodellingnews.com/2011/08/latest-news-from-barracudacals.html#more
 
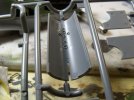
I think it's clear that Tamiya intends to have different variants of the Mustang from this kit. Here is the bottom half of the spin, where the antenna mate, you can see multiple flashed over holes where different antenna configurations are going to be supported, including my dual mast setup for the AN/ARA-8 homing radio.

P51D038.jpg

P51D039.jpg
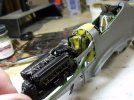
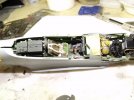
Dry fitting everything.

P51D040.jpg
The rear radio set (I don't know what model number it is) is not called for on this kit. I'm going to make use of it because the ARA 8 homing radio would have been mounted there. I have not found a clear picture of what that VHF set looked like, I have found some installation diagrams of how wire harnesses were run. There may be some modification of the radio rack, I think that's some sort of sump for the battery sitting there, most likely not needed if the radio is mounted there. This second radio also has locator pins on both the bottom and side. Multiple mounting configurations, multiple versions of the kit. ;D

Still lots more painting to do, I'm using Migs, Neutral and Dark washes here. Man I hope those decals show up soon!
 
fantastico mate!
awesome work. looks like everything fits together pretty nicely.
 
this thing is going to be a beast. may i ask what color you are using for the interior green and engine bay?
 
Testors enamel Zinc Chromate and Green Chromate for the cockpit. I know this is probably not 100% correct, especially with the cockpit, but it's what I"m going with.
 
Moon Puppy said:
Testors enamel Zinc Chromate and Green Chromate for the cockpit. I know this is probably not 100% correct, especially with the cockpit, but it's what I"m going with.

correct or not it looks great! thats why i asked :)
 
I'm reading that Interior Green would be the proper color inside the cockpit but I'm further along than going back to redo that.

If you plan on doing a Mustang and you want to do it accurately, let me suggest signing up at the http://p51sig.com/index.php Helpful bunch of guys there who know more about the Mustang and all it's variants that we care to know. They have set me on the right track on several issues and I really appreciate them. Hope Scott and the crew don't mind me plugging another forum.
 

Latest posts

Back
Top