AH-60L DAP Blackhawk

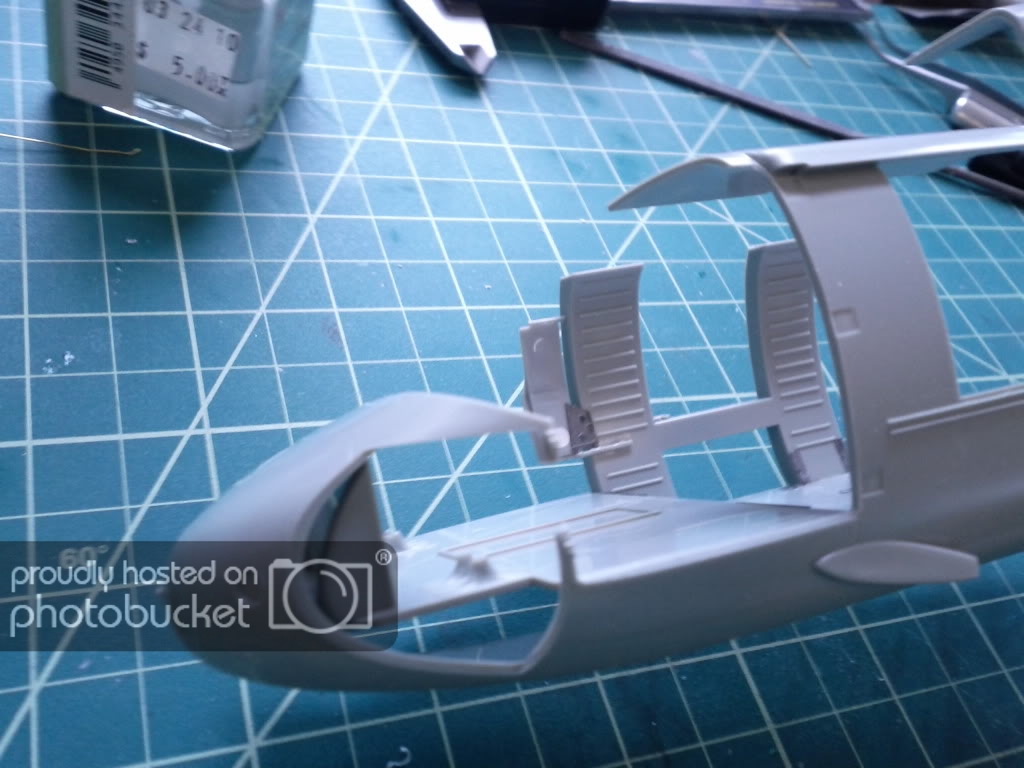
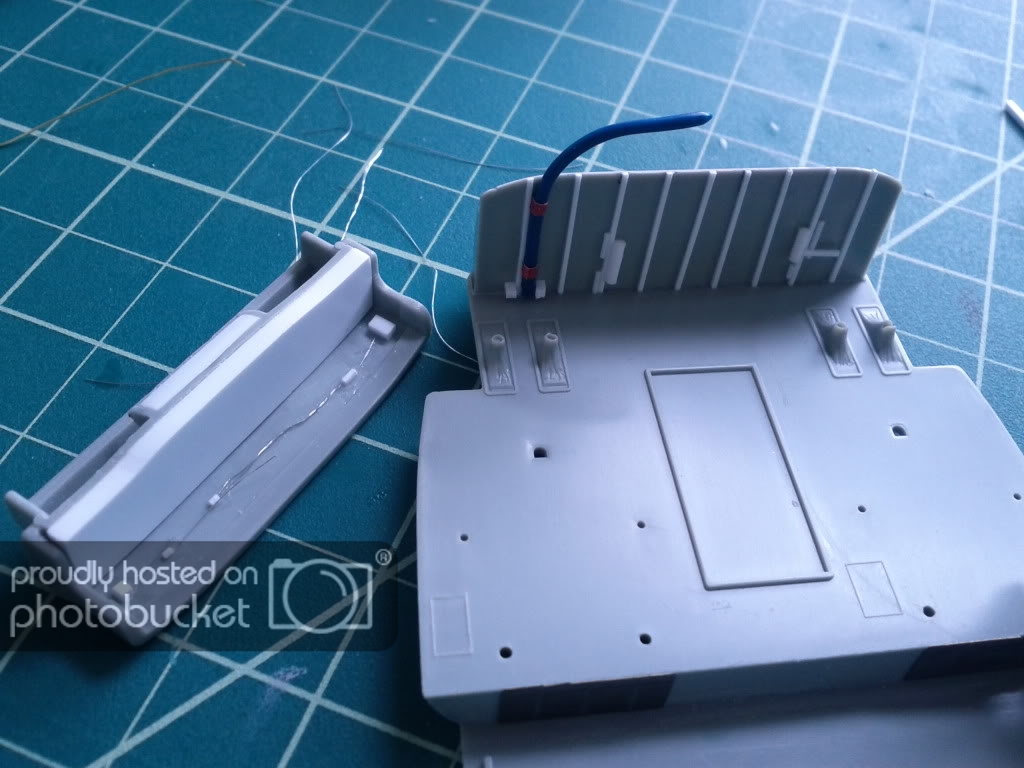
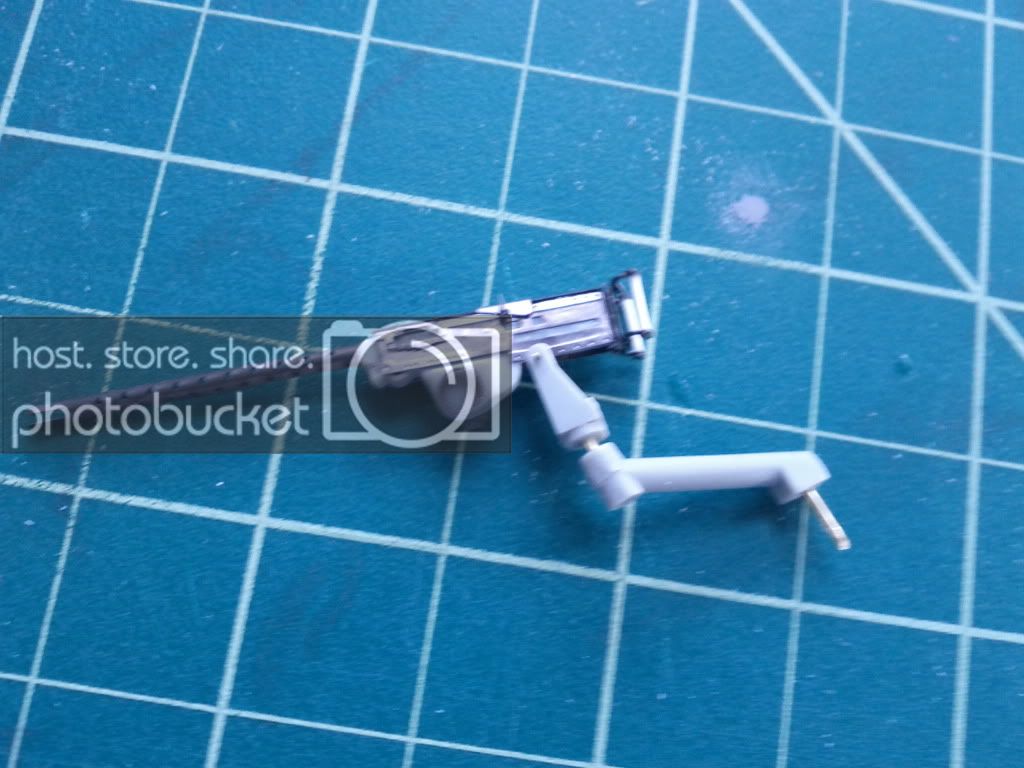
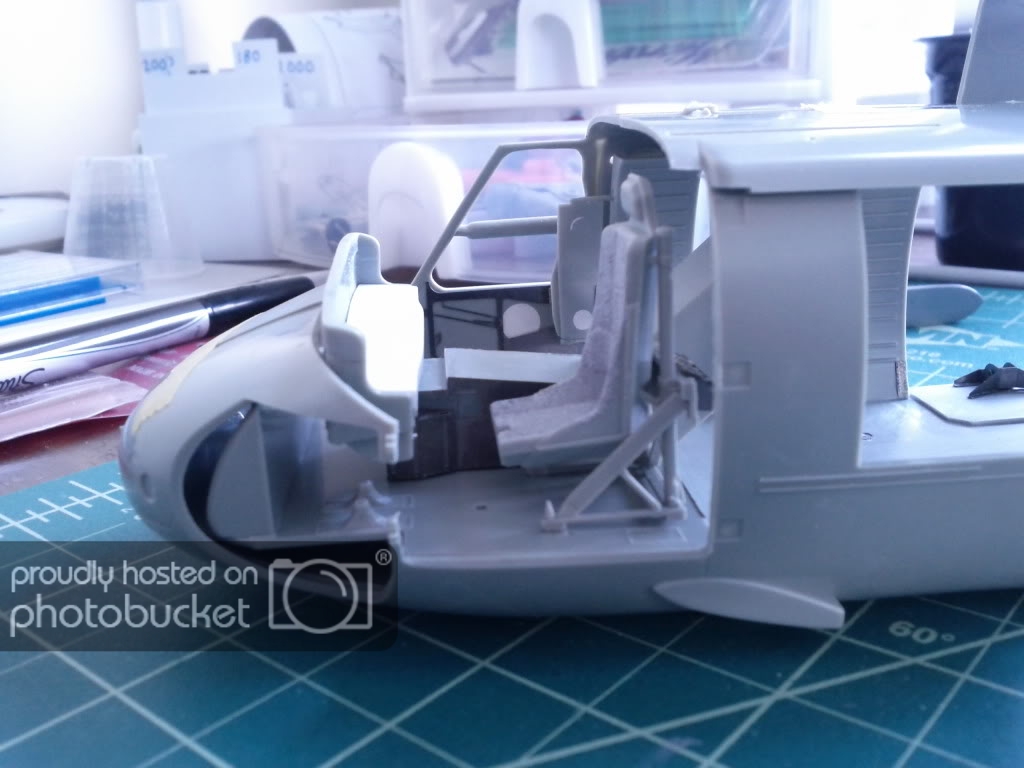
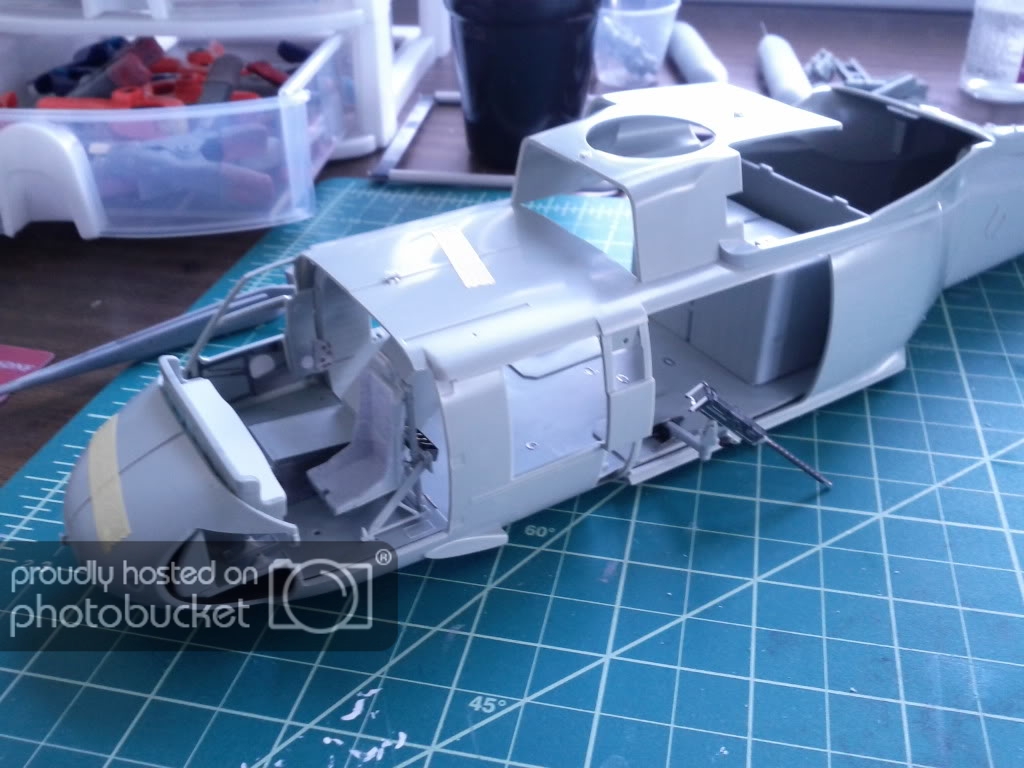
One of the cool things about this kit is that it has all the plastic for every version of this choppah. So aside from the Mini Guns, there are two other guns on the kit as well, I'm sure they both wouldn't be on this gunship, if either of them, but they are too cool to leave off. The other SCORE is that since I bought the photoetch interior sets for both the UH and MH-60, I ended up with the photo etch for BOTH guns!! WIN (See my initial video for an explanation on all that)

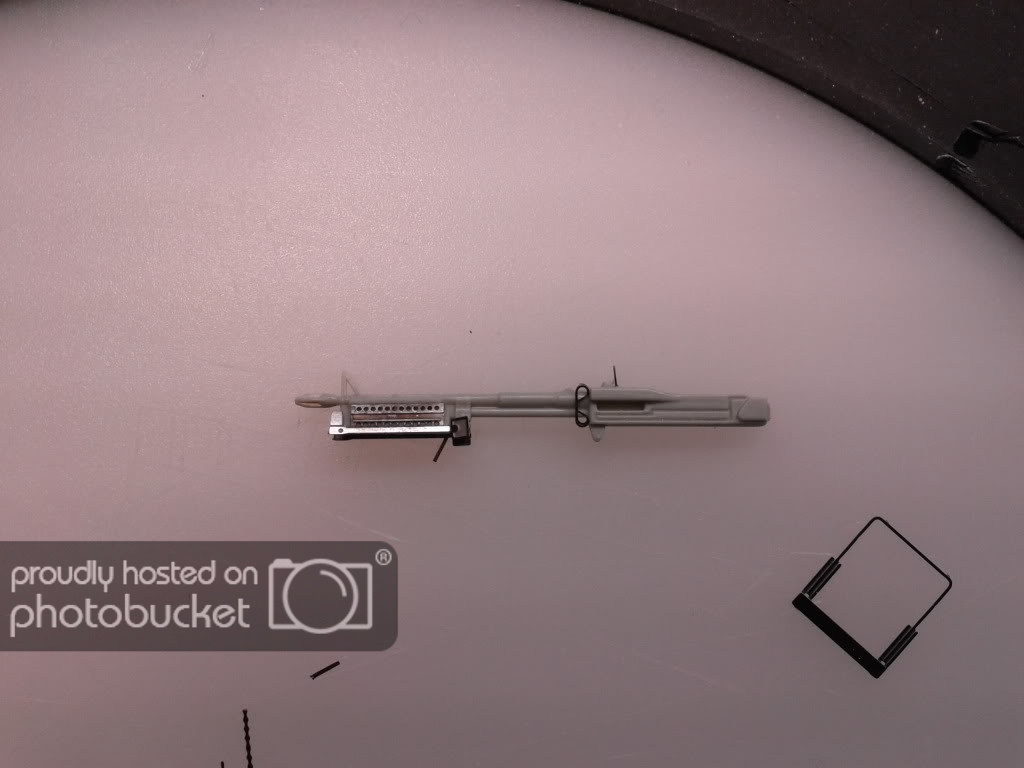
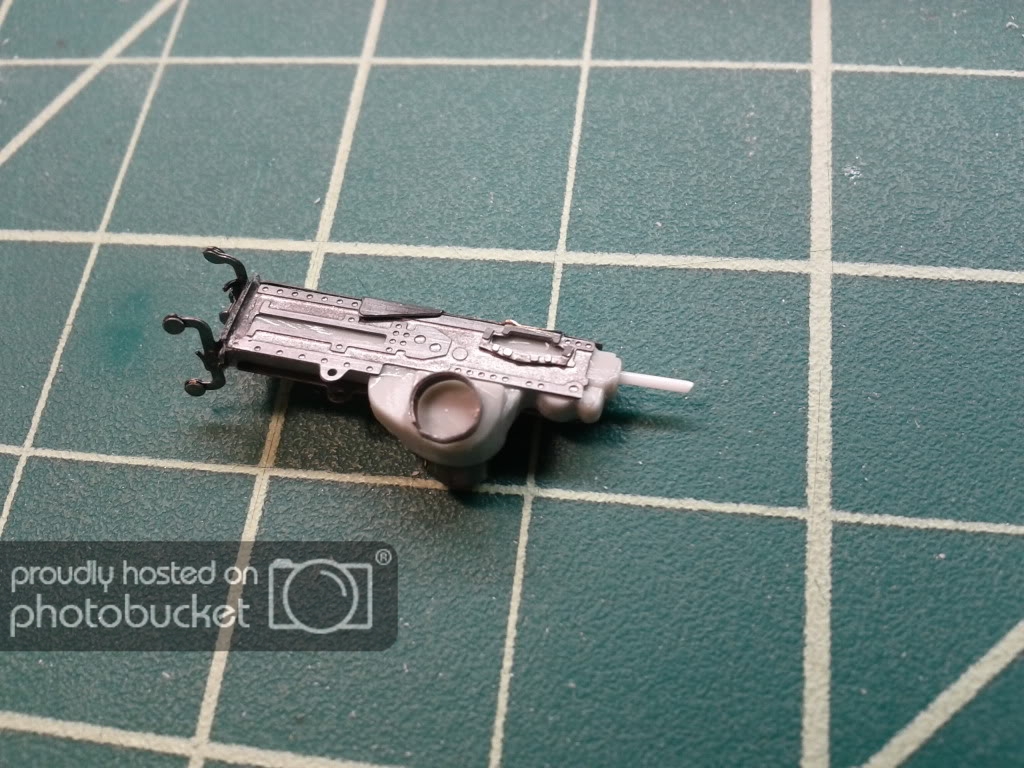
I started work on the other gun tonight, and had to stop after 5 pieces of PE so the CA could harden up. Only 8 more pieces and it's done.

IMG_20110425_004106.jpg


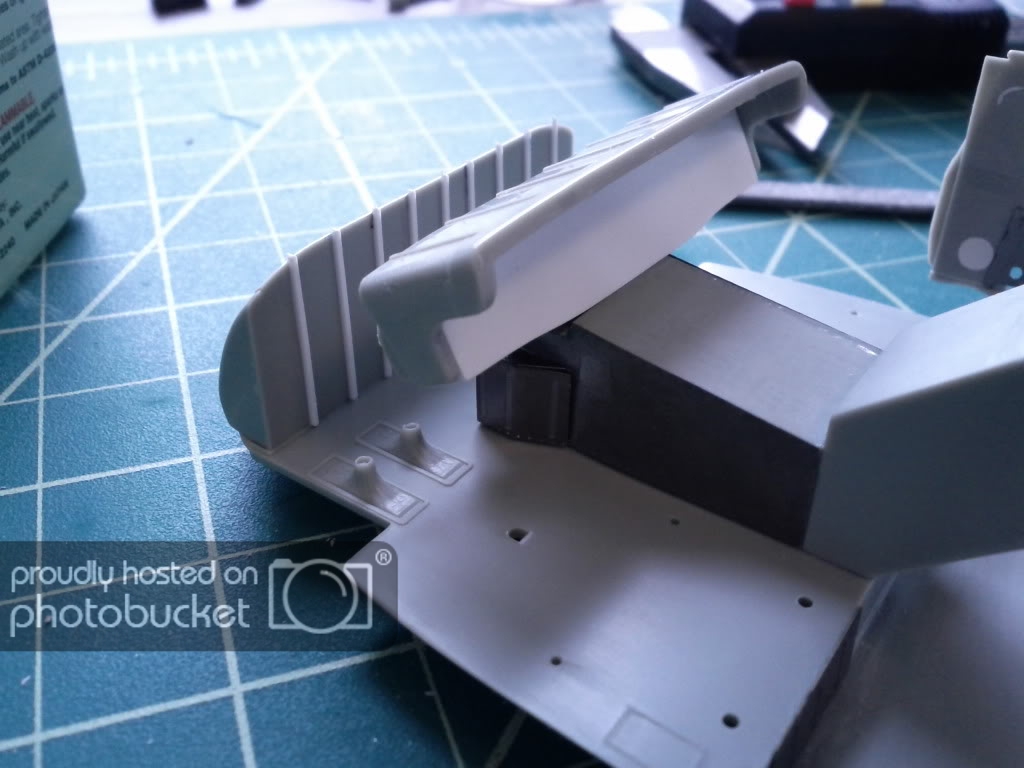
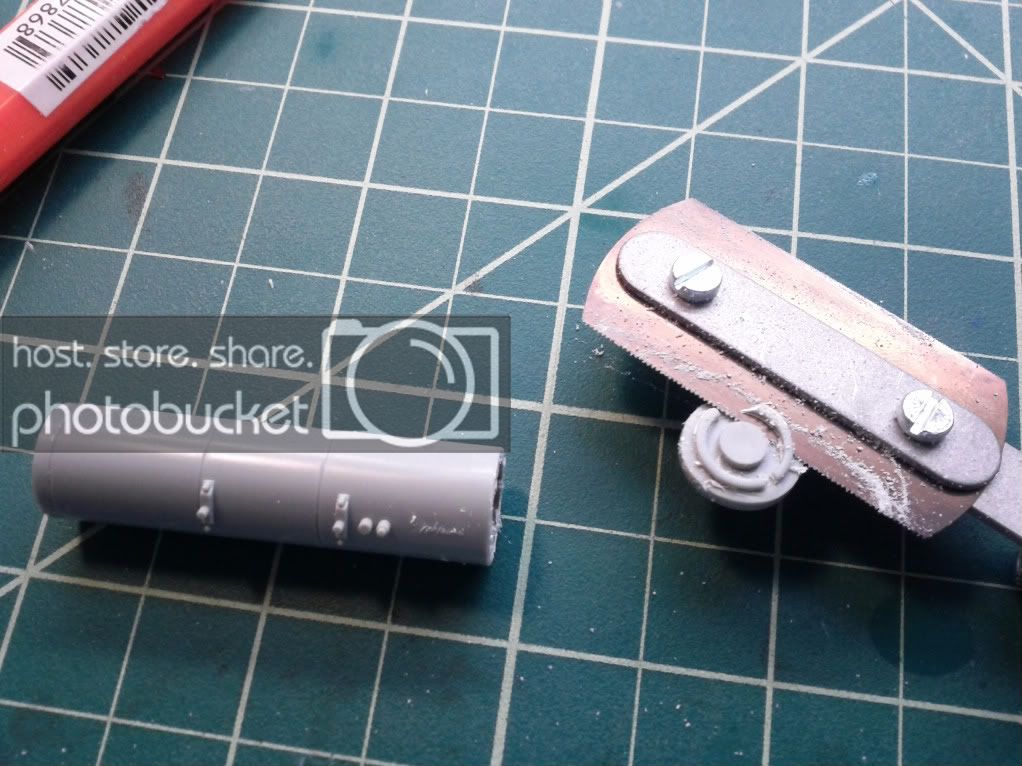
Before I could put the Barrel on the other gun, it needed a small guide stub. Drilled hole and glued in some 1MM plastic rod. Barrel can be added tomorrow after the glue dries.

IMG_20110424_235802.jpg


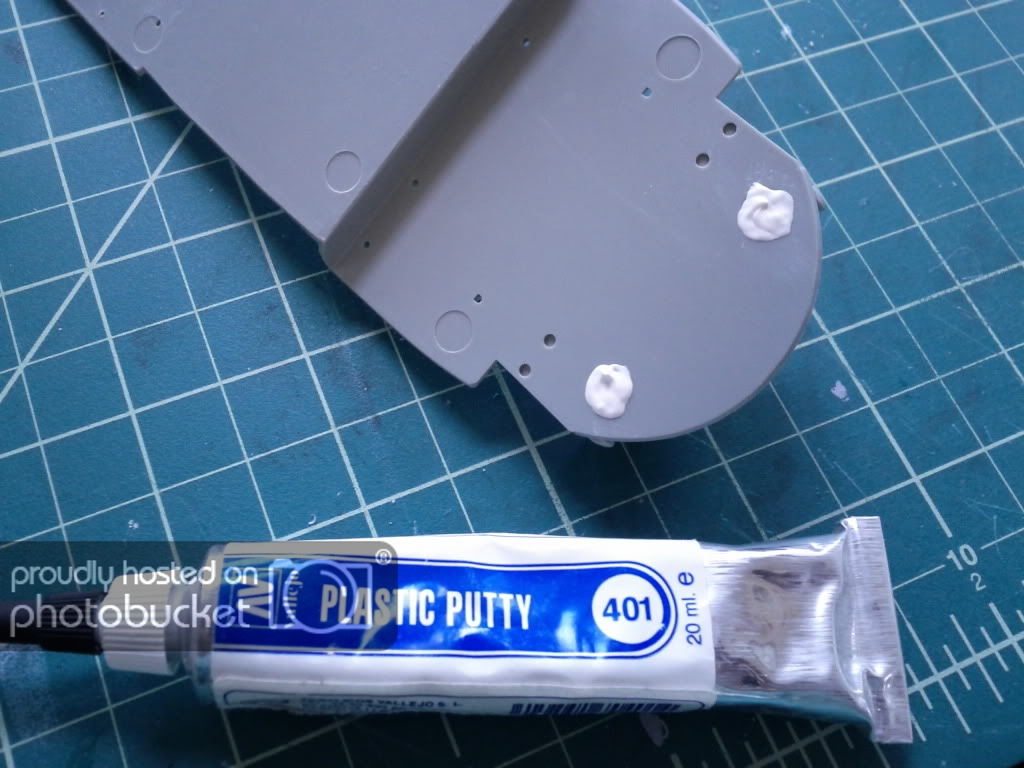
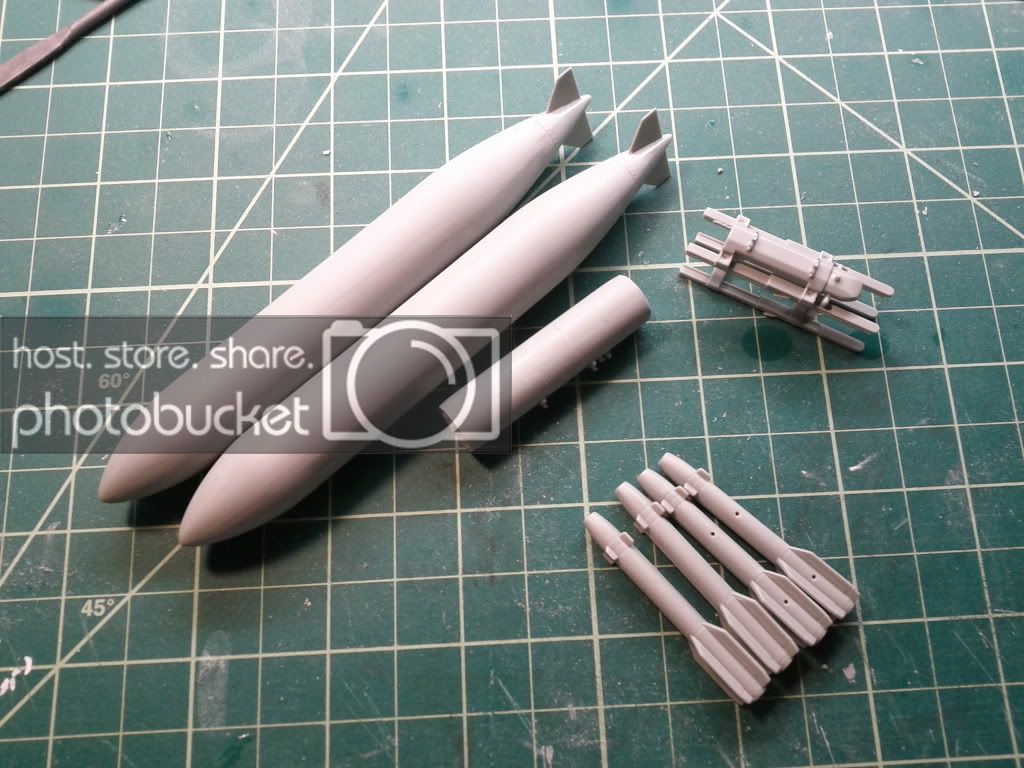
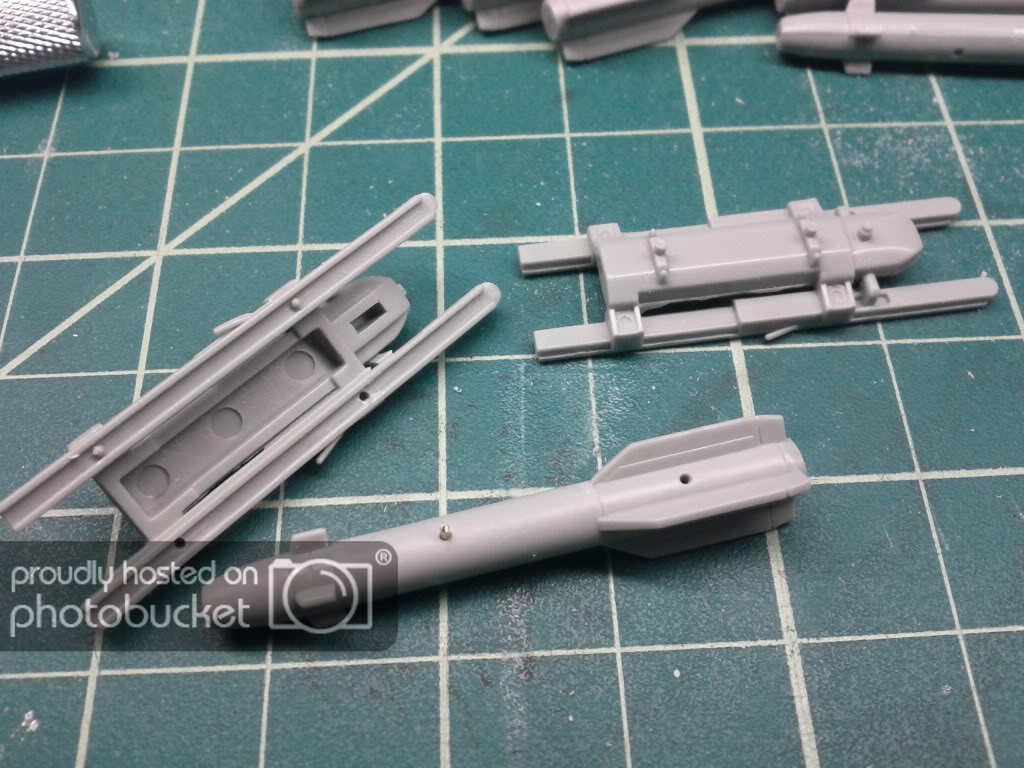
Fuel tanks, hellfire missles, and the missle rack all sanded and ready for cleaning, priming, and painting.

IMG_20110424_235547.jpg


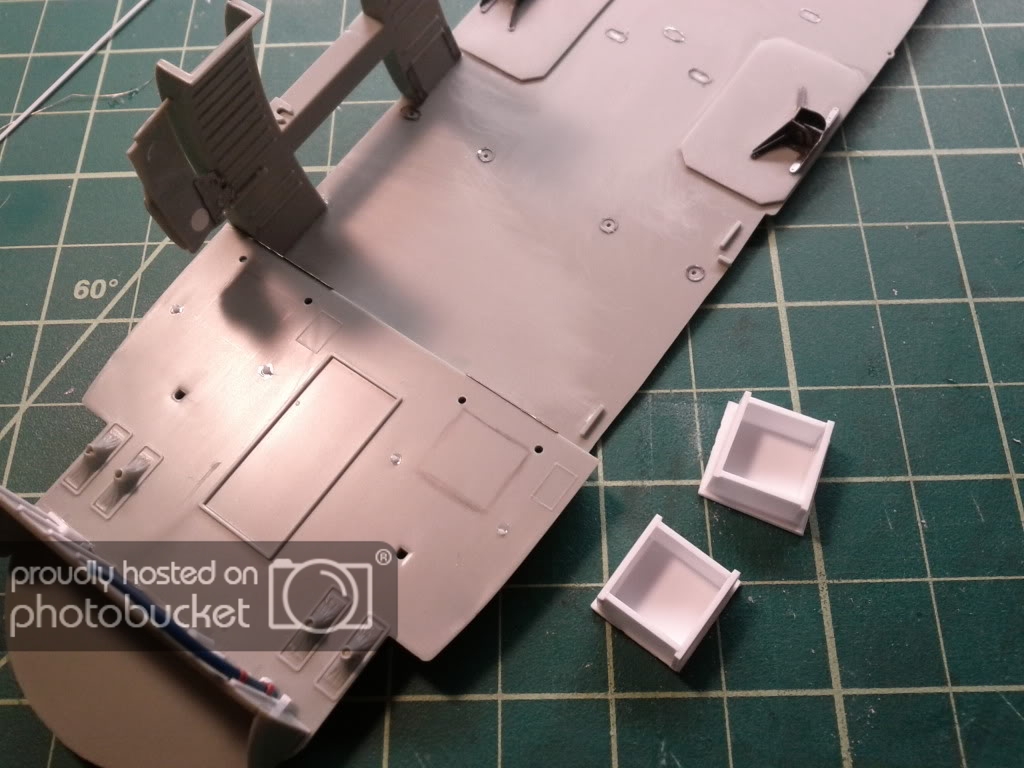
The plastic guide pins were too small so they needed fixed. Drill holes in the missles and the rack. Once painted and finished all you have to do is add a drop of tamiya thin cement and the plastic rod and it attaches super easy and super clean.

IMG_20110424_195306.jpg


Should have much more done tomorrow. I'd love to get a good video out but there is just so much work to do on this kit that I haven't had time to do anything other than photos.

Thanks for all the nice compliments too. I appreciate it!
 
Details Galor. Awesome!

Keep it up man! Make me want to crack open mine! LoL

Love the P.E. Wicked how much more details it add!

Later!
 
Today's activities included:
Complete Side mount gun
Dry Fit Test
Rocket Pod Mod

I started out this morning staring at the crap that was the Rocket Pods. I built both with the intention of only mounting one. After filling and sanding one, I decided that it had to go. Even after filling, the end caps just don't fit, and after cleaning them up, it had a torpedoed look to it. So I've cut the end caps off, drilled out the holes and am going to apply them to this 10 MM plastic tubing. After that i'll have to scribe in the panel lines and of course at the pylon mounts. But it's going to look a LOT better.

IMG_20110425_141010.jpg

IMG_20110425_232131.jpg


Next up I wanted to finish up the gun so I could FINALLY do some dryfitting. I added a pin to the gun mount, a pin at the base to attach to the deck, and a tiny pin at the attachment point under the gun so that it will move up and down, as well as around in a circle.

IMG_20110425_183003.jpg


And here are some dry fitting shots to get an idea of what this will kinda look like.

IMG_20110425_183149.jpg

IMG_20110425_183155.jpg

IMG_20110425_183202.jpg

IMG_20110425_183210.jpg

IMG_20110425_183239.jpg
 
One other thing I wanted to share for the day....

I had this great idea of lifting up the nose and detailing all the avionics that sit in that bay. After hemming and hawing, it just doesn't look feasible. While it's completely possible, I want to preserve and show off the detail that sits on top of the hood, as well as the radar cone and FLIR.

As you can see, since the body is in two vertical halves, it will be tough to cut that hood out and have it hinge properly.

IMG_20110425_183457.jpg


So instead of the hood, I'm going to cut open up the tail and build a bay to show the tail propeller drive shaft. I'm still looking for photos of that so if you guys know of any out there it would be greatly appreciated if you could share their location. The bay opens up on a natural "hinge" where the seam lines meet, and I've got plenty of plastic and extra photo etch to make something that will look pretty cool I think.

IMG_20110425_183442.jpg
 
nice to see all the work taking shape.... its so big ! One must do a lot of research to make sure nothing goes a mist ! Love that P.E. set... I might get one for mine.... I didn't know it needed it but just the 50 cal is blowing my mind !!! it adds the WOW in Wow !!!!

The work on the Rocket Pods looks amazing.... are you gonna add the Tubes after drilling the Rocket holes??? just asking ! I am not Pushing for more work... you have done so much already !!!

What do you use to fix those BIG sink holes in the Doors interior details... Styrene disks ??? or putty ?


Best of luck with the project.... looks amazing !!!
 
Yea, the research has been interesting. There is only one group that actually uses this as a Gunship (so far as I can tell), and even those photos vary a great deal. Some have the ESSS wings with only one pylon, and the next photo has the wings with TWO pylons on it. Some have the fueling boom on it, and others don't. It's obvious that it's very easily modified to meet the mission needs. So with that in mind, I do have a bit of creative license to configure it how I want.

Funny you should ask about the tubes. I was just online here looking for some Microtubing to see if it would fit. If it all fits in then i'm definately putting it in. I think it will be pretty cool to have the ability to look through the tubes.

For all the pin ejector marks I will try to smooth them out with a micro chisel and sanding, but if it's too deep then I'll sand down the edges and fill it with Vallejo putty. I love that stuff. It dries and sands beautifully, and you can thin it with water and just pour it in to fine cracks like you can do with Mr. Surfacer 500/1000 products.

Thanks for watching the build, and the compliments Mr. Schweinhund.
 
Really like the idea of the pins on the hellfire missiles. I have a similar issue but was just going to try and hold them steady till the glue set.

Love the work you are putting into the chopper. When my build is finished I will definitely do more, but with the PE. It really does make a difference.

Good job on the rocket pods also. All in all it's been a great build to follow so far. Thanks for sharing.
 
Very nice work! I saw this kit at the hobby shop today and had to resist. You make it look like a fun build!
 
The detailing continues.
I'm now narrowing my focus down (or back rather) to just the cockpit. I'll get everything done there and then move backwards to the cabin.

The area under the cockpit needs to have some plastic added to it as it will be visible through the clear parts, as somewhat indicated by the 1st photo here.

IMG_20110427_093402.jpg


Since this will be visible, better not take a chance and fill in those HUGE ejection pin holes. I prefer Vallejo Putty. It's water based, sands and finishes beautifully, has a perfect applicator, and can be thinned with water for small cracks.

IMG_20110427_093731.jpg


Something I spotted in photos that previously eluded my eye, is the giant holes that are underneath the cockpit seats. The seats themselves actually sit on rails just over these boxes. There are also a number of panels that I will later scribe in all around the cockpit floor. Being flat black they pop out really well with some dusty weathering. Here is where the boxes will go. I've built them, flooded them with Tamiya extra thin cement, and am waiting overnight for them to harden up before cutting holes in the floor and installing them. These will get detailed and be painted a sort of bright yellow ochre if that makes sense.

IMG_20110427_233636.jpg


Back on top there is much work to be done under and behind the dash. Detailing work has begun on that as seen here with some ribbing added.

IMG_20110427_092955.jpg


And by the end of my hour on the workbench today I managed to finish the wiring on the dashboard cover, and some detail behind the dash on the firewall. Still much more detail to add though under the dash to connect everything.

IMG_20110427_132715.jpg


Thanks as always for looking. I start my shortened work week tomorrow so not sure how much I'll get done over the next few days.
All the best
Myke
 
very nice ! excellent video's loads of detail on the build look forward to seeing more ;D. when you come to paint n weather the inside could you do a video that seem's to be something i cock up or can't get right thanks .

john
 

Latest posts

Back
Top