Underlord's Falcon (WIP)
- Thread starter Underlord
- Start date
schweinhund227
New Member
- Joined
- Jun 24, 2009
- Messages
- 2,511
Let there be Light !!! 
Keep up the good work !
Keep up the good work !
Underlord
I pronounce them Dee-kal and Tam-eye-ah.
- Joined
- May 19, 2011
- Messages
- 115
Even though I had 11 days off, I didn't get much work done on the Falcon. At this point I think I'm in danger of not completing on schedule. Ah well, I'll give it a try anyway!
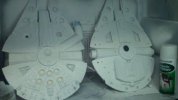
Got her all primed up
I used some Aves Apoxie Sculpt to reinforce the sidewalls and fill in some of the major holes in the underside! Wow there were holes big enough for a 20g wire to run through!
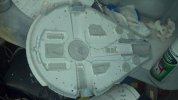
(a relatively sloppy but effective application)
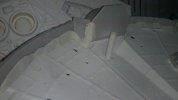
A quick run around the panel lines with matte black for some pre-shading
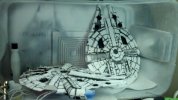
Then the first coat of the main color. This is a 50/50 mix of Model Master's Light Gray FS36492 and Model Master's Camoflge Gray (that's how they spell it!) FS36622. Saw that somewhere on here, and I like how it's coming out.
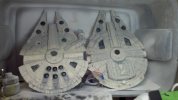
Next up? Mask off the other colored panels and shoot them, as well as the sidewalls themselves.
What else have I been doing? I picked up a 1:1 figure! PacSun is going out of business at my local mall and I got this guy for $25! Now I have a "home" for my leather armor and motorcycle helmet (Maybe a Vader or Stormtrooper uniform build in my future!

Got her all primed up

I used some Aves Apoxie Sculpt to reinforce the sidewalls and fill in some of the major holes in the underside! Wow there were holes big enough for a 20g wire to run through!

(a relatively sloppy but effective application)

A quick run around the panel lines with matte black for some pre-shading

Then the first coat of the main color. This is a 50/50 mix of Model Master's Light Gray FS36492 and Model Master's Camoflge Gray (that's how they spell it!) FS36622. Saw that somewhere on here, and I like how it's coming out.

Next up? Mask off the other colored panels and shoot them, as well as the sidewalls themselves.
What else have I been doing? I picked up a 1:1 figure! PacSun is going out of business at my local mall and I got this guy for $25! Now I have a "home" for my leather armor and motorcycle helmet

JohnSimmons
For Spud: I was once Merseajohn
- Joined
- Jan 4, 2011
- Messages
- 5,645
Nice job there underlord! That base coat looks spot on. 
ModelMakerMike
"It's Slobberin' time""
- Joined
- May 28, 2011
- Messages
- 1,838
Oh yeah. 
Underlord
I pronounce them Dee-kal and Tam-eye-ah.
- Joined
- May 19, 2011
- Messages
- 115
Got an hour and a half to work on the falcon tonight... LET THE DETAIL PAINTING BEGIN!
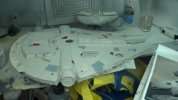
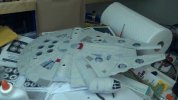
wow... if there is any skill I'm "worst" at... it's detail painting. This ship will help sharpen those skills a bit! So many panels to pick out in a few different colors! I did like how painting the center area of the exhaust ports in gunmetal came out.
The red shows up WAY too red in these pictures, but it does look about right in person.
Next up? Damage!
ozzyguanche
New Member
- Joined
- Nov 3, 2011
- Messages
- 66
Painting has always scared the crap out of me. If thats your weak point your doing extreemly well.
Looking forward to your next step.
Ozzy
Looking forward to your next step.
Ozzy
Omegaman55
Member
- Joined
- Nov 12, 2011
- Messages
- 76
Same here! Not looking forward to but at the same time I am, first time for me using an airbrush!!! Agghhhh!ozzyguanche said:Painting has always scared the crap out of me. If thats your weak point your doing extreemly well.
Looking forward to your next step.
Ozzy
Anyway, Underlord, you're doing a great job! Keep it up so I can grab ideas!
Underlord
I pronounce them Dee-kal and Tam-eye-ah.
- Joined
- May 19, 2011
- Messages
- 115
I'm pretty sure there are only two more ideas planned for this build that I haven't seen others do.
1) the stand... I'm going to be mounting this next to my Star Wars ANH poster in my rec room. I plan on angling the engines so that the Modler's Brand light tape lit engines illuminate the poster. It will be angled like it is flying out of the poster and along the wall. To do this, I've kept the bottom turret open. I found that some PVC pipe I have fits perfectly in that hole so I picked up a 90 degree angle piece. I'll run a short length into the falcon and another length from the elbow back to the wall. Obviously I'll be running my power line through it. I'll be using a ton of aves apoxie sculpt and some braces made of the thickest plastistruct card I could get at my LHS. I'll be integrating a 1/8 inch headphone jack and plug into the connection so the falcon can be removed for cleaning... errumm.. zooming around the room!
2) The other step I have yet to do is using some plastic sheet to build a backstop for that modeler's brand light tape. Some brases to hold it steady.
Other than that, I'm planning on drilling out the damage, scaring up some blast points, weathering and assembling.... only a few short weeks 'till February!
Underlord
I pronounce them Dee-kal and Tam-eye-ah.
- Joined
- May 19, 2011
- Messages
- 115
I had a rough day at work, so my wonderful wife suggested I go work on my model after dinner!
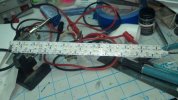
Not a lot done today, mostly testing LED connections. I had one bad LED and three bad wires. That is the problem with solid core wire salvaged from cat 5... the wire snaps really easy. Anyway... Once I got all my regular LEDs wired and connected to a 1/8" (3.5mm) headphone jack, and my wall wart wired to the plug, I decided to work on the engines. I bought MMT's Modeler's Brand light tape in blue, but I already had some bright white double density. The Modeler's Brand is even more dense than the double density tape I had.
I cut a strip of .060 styrene sheet the same hight as the engine clear piece from the Blue Moon kit. After connecting wire to the +/- pads on each strip, I removed the backing tape and layered blue, white, blue in overlapping layers.
I then took some .800 styrene sheet and cut some brases out, and glued them to the backing. This allows me to position the light tape back far enough so the individual LEDs won't show hot spots... or so I thought. I'm still getting hot spots! I'll have to use some wax or parchment paper, or perhaps some cotton balls all stretched out to get rid of those hot spots!


Underlord
I pronounce them Dee-kal and Tam-eye-ah.
- Joined
- May 19, 2011
- Messages
- 115
@Grendels... I really want those puppies to light up bright. I'm going to be mounting her as if she's flying out of the ANH poster. The engines will light up the poster!
@scratchy... First time with resin upgrades, first time lighting... I've gotta put some extra effort into this 'cause I've invested tons to get here! I wish I had 1/10th the detail that you're putting into your 144 FMMF!
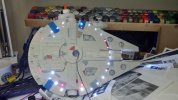
And now... LIGHT TEST! Here's the underside. I think they are a little too bright, but since everything is wired together, the only way I can dim them is to lower the voltage which will dim my engines too.
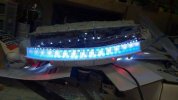
Here's what the engines look like through the clear resin. Major hot-spot issues!
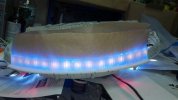
I tried parchment paper, but it almost completely obscures the blue.
I tried wax paper, better, but it doesn't get rid of the hot spots.
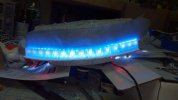
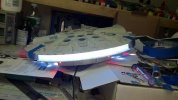
But if I adjust my camera just right, it looks GOOD!
@scratchy... First time with resin upgrades, first time lighting... I've gotta put some extra effort into this 'cause I've invested tons to get here! I wish I had 1/10th the detail that you're putting into your 144 FMMF!
And now... LIGHT TEST! Here's the underside. I think they are a little too bright, but since everything is wired together, the only way I can dim them is to lower the voltage which will dim my engines too.

Here's what the engines look like through the clear resin. Major hot-spot issues!

I tried parchment paper, but it almost completely obscures the blue.

I tried wax paper, better, but it doesn't get rid of the hot spots.

But if I adjust my camera just right, it looks GOOD!

ozzyguanche
New Member
- Joined
- Nov 3, 2011
- Messages
- 66
Lighting looks awwsoommme!
Ozzy
Ozzy
Grendels
Active Member
- Joined
- Nov 24, 2009
- Messages
- 9,092
What about spraying some clear blue on the parchment paper. That would fix the issue of the color change.....
Or frosting the resin with some window frost paint.
window frost paint
Or frosting the resin with some window frost paint.
window frost paint
Similar threads
- Replies
- 0
- Views
- 1K
