Underlord's Falcon (WIP)
- Thread starter Underlord
- Start date
JohnSimmons
For Spud: I was once Merseajohn
- Joined
- Jan 4, 2011
- Messages
- 5,645
Good job with the cockpit and frame work man!
Underlord
I pronounce them Dee-kal and Tam-eye-ah.
- Joined
- May 19, 2011
- Messages
- 115
I finally got a chance to do some more work... After inspecting the back wall I found it completely unacceptable, and scratch built one. I started with two circles the same size as the kit clear part. I then lined up where the lights were on one circle and cut those and the door inside dimension out. I glued those pieces to the back of the solid disc. From the back I cut out the door on the front piece. I then added a rectangle-ish piece on the inside portion and again cut out the interior door from the back. That left me with a relief protrusion for the padded portion of the door way, a lightable light bar and an open door. I took one of the door pieces and glued it onto yet another circle, this time made of clear plastic so the door itself sits deeper than the back wall. I cut out the outer space outfitters rear door pieces to fit around my crafted door. I still have to drill some holes for the fiber blinking lights to complete the part.
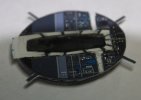
Next I did a quick and dirty paint job to the assembled base cockpit area...
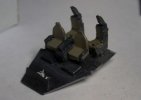
I also started building up the console with it's fiber optic holes. I used a broken drill bit cut into small sections for my control sticks, then used some white glue to add a "handle"... not as nice as I hoped, but at this scale and with my skills, it's good enough. Still need more detail paint and some toggle controls.
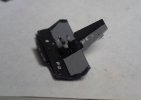
I wasn't sure if I could pull off blinking computer lights on the overhead controls, so I tried with the free versions listed here. I cut out some thin plastic to give some more ridgidity to the flat sections, glued on the paper controls and drilled out some fine holes for fiber. I'm hoping I can get enough of a bend in the fiber to allow running the fiber down, under the floor and back into the hallway where the 4060 lighting circuit will hide.
Next up is completing the console paint, running fiber and building a light box for behind the back wall.

Next I did a quick and dirty paint job to the assembled base cockpit area...

I also started building up the console with it's fiber optic holes. I used a broken drill bit cut into small sections for my control sticks, then used some white glue to add a "handle"... not as nice as I hoped, but at this scale and with my skills, it's good enough. Still need more detail paint and some toggle controls.

I wasn't sure if I could pull off blinking computer lights on the overhead controls, so I tried with the free versions listed here. I cut out some thin plastic to give some more ridgidity to the flat sections, glued on the paper controls and drilled out some fine holes for fiber. I'm hoping I can get enough of a bend in the fiber to allow running the fiber down, under the floor and back into the hallway where the 4060 lighting circuit will hide.

Next up is completing the console paint, running fiber and building a light box for behind the back wall.
JohnSimmons
For Spud: I was once Merseajohn
- Joined
- Jan 4, 2011
- Messages
- 5,645
Nice update! Looking forward to the 'blinky' lights!
panzerace007
New Member
- Joined
- Dec 17, 2010
- Messages
- 2,118
Lookin Really Cool !! Great Job on th Cockpit !! ROCK-ON !!
ModelMakerMike
"It's Slobberin' time""
- Joined
- May 28, 2011
- Messages
- 1,838
Even MORE awesome!
Grendels
Active Member
- Joined
- Nov 24, 2009
- Messages
- 9,092
Scott Girvan said:Very cool. I'm wondering the the fiber optics on the sides...a bit of heat and bend a right angle...might work.
Be very careful when you bend fiber optics. If you bend them too far, they will kink, and then they cannot carry light any more. You want to keep them with gentle bends.
The way to think of this is that a fiber optic is much like a garden hose. You can loop it all you want and water will flow, but if you kink it, water stops.
Also watch out what glues you use. PVA or epoxy is fine, CA or styrene glue will melt it.
fumblethumbs
New Member
- Joined
- May 22, 2011
- Messages
- 963
Looking good underlord! You're making some nice strides on this build.
Underlord
I pronounce them Dee-kal and Tam-eye-ah.
- Joined
- May 19, 2011
- Messages
- 115
Minor update...
I build the light box for the light bars on the back wall of the cockpit...
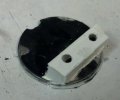
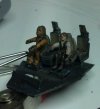
Painted up Han & Chewie
Strung the fiber for the nav computer (Gee I hope I can get enough of a bend out of them to get them in place, but I won't know if I don't try!)
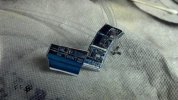
and added some switches to the console and of course the fiber.
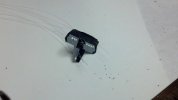
Once the elmer's glue sets up I'll try a light test and try fitting the overhead in place. I've got the routing for the forward console all set, but I'm still not sure about the nav computer fiber. We will see! No guts, no glory!
I build the light box for the light bars on the back wall of the cockpit...

Painted up Han & Chewie

Strung the fiber for the nav computer (Gee I hope I can get enough of a bend out of them to get them in place, but I won't know if I don't try!)

and added some switches to the console and of course the fiber.

Once the elmer's glue sets up I'll try a light test and try fitting the overhead in place. I've got the routing for the forward console all set, but I'm still not sure about the nav computer fiber. We will see! No guts, no glory!
JohnSimmons
For Spud: I was once Merseajohn
- Joined
- Jan 4, 2011
- Messages
- 5,645
Great job! Youve made those bad figures shine!
ModelMakerMike
"It's Slobberin' time""
- Joined
- May 28, 2011
- Messages
- 1,838
It's looking great!
;D
;D
Underlord
I pronounce them Dee-kal and Tam-eye-ah.
- Joined
- May 19, 2011
- Messages
- 115
A little more work... (sorry for the "bad" pictures, only had my phone with me this time)
I trimmed down the edges following Scott Girvan's example, and cut out notches etc...
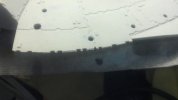
Trimmed off the risers along the back top/bottom for the resin replacements from my blue moon kit...
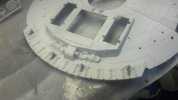
sanded down the detail behind the exhaust vents for the replacement pieces. I had to wet flat sand down the replacements (some sort of panzer tank part IIRC) because they were too thick. I clamped them down into place so they would stay flush. I'll still need to fill in the flat sides with some putty.
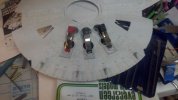
This update brought to you by my lovely dremel tool! I'd still be trying to remove the risers without it!
I trimmed down the edges following Scott Girvan's example, and cut out notches etc...

Trimmed off the risers along the back top/bottom for the resin replacements from my blue moon kit...

sanded down the detail behind the exhaust vents for the replacement pieces. I had to wet flat sand down the replacements (some sort of panzer tank part IIRC) because they were too thick. I clamped them down into place so they would stay flush. I'll still need to fill in the flat sides with some putty.

This update brought to you by my lovely dremel tool! I'd still be trying to remove the risers without it!
Similar threads
- Replies
- 0
- Views
- 1K
