Underlord's Falcon (WIP)
- Thread starter Underlord
- Start date
ModelMakerMike
"It's Slobberin' time""
- Joined
- May 28, 2011
- Messages
- 1,838
Yeeeessssssss....
Coming along nicely.

Coming along nicely.
JohnSimmons
For Spud: I was once Merseajohn
- Joined
- Jan 4, 2011
- Messages
- 5,645
ooooh nice work, where did you get the panzer parts from?
Underlord
I pronounce them Dee-kal and Tam-eye-ah.
- Joined
- May 19, 2011
- Messages
- 115
merseajohn said:ooooh nice work, where did you get the panzer parts from?
Yeah, what Scott said! These are from the Blue Moon kit. I've heard that Dragon makes the right sized tank if you wanna make your own. The Blue Moon kit I got was quite worn. Lots of flash, clean up required on the details etc. I'm not really looking forward to working with the sidewalls. There will be a lot of re-shaping and clean-up required, in addition to the brass wire/tube work. But hey... this is all a learning process and we do have until February, right?
Underlord
I pronounce them Dee-kal and Tam-eye-ah.
- Joined
- May 19, 2011
- Messages
- 115
Scott Girvan said:Looking forward to seeing that cockpit assembled and lit up. I think I'll copy cat you on this.
That sir, would be a huge honor! I know it's been said before, but thank you very much for your time, energy and for bringing this group of awesome people together!
As for the cockpit der blinkenlichten see: http://en.wikipedia.org/wiki/Blinkenlights...
I've done a few test fittings and I think there is enough room to run the fiber around the back wall on the outside. The key for me will be glueing the nav computer side walls to the back wall before installing the whole thing into the cockpit tube. Then once installed, fill in the outside with aves to complete the light-block. I know I'm going to have to cut away part of the cockpit tube piece because of the smaller sidewalls, so it will be a while before it gets installed. I used .25 fiber for most of the circuits on the back wall, and .50 for the sides. If I had to do it again, I would use .50 for most, and some .25 just for variety. It does look best with white LEDs, but I might put a few red blinkers in there too.
thestickyone
New Member
- Joined
- Aug 24, 2010
- Messages
- 71
that's one big ass kit with alot of fine detailing looks a killer def keep watching this. looks like your doin a cracking job on it.
Joseph Osborn
New Member
- Joined
- May 6, 2009
- Messages
- 75
Okay, you've proven that the kit figures can work so I'll follow your example and use them instead of trying to find replacements 
Underlord
I pronounce them Dee-kal and Tam-eye-ah.
- Joined
- May 19, 2011
- Messages
- 115
The figures actually are crap. I did some tricks I learned when I was painting D&D miniatures, and that helped, but they really are bad. I wish I bent the arms before gluing and painting. They're so robotic! Anyway, read up on figure painting techniques and you'll make 'em passable like I did. Three colors for the skin tone, never use black or white, shade in the creases of the clothing, and think about who you're painting them to be.
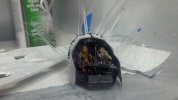
Anywho... another minor update. I know folks want to see the lit cockpit, so I attached the pieces and started gouging out the sides of the neck to allow the fiber to pass. I still need to put in a front piece of the console since it's crooked.

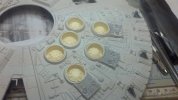
While I had the CA and dremel handy, I installed the exhaust pieces.

Once this glue is set I'll be sanding down the tops of the exhaust pieces. Lesson learned, if you're going to do the exhaust and the panther decks, do the exhaust first. Sanding those exhaust vents with the panther decks in place is awkward... oh yeah, and a light test
Anywho... another minor update. I know folks want to see the lit cockpit, so I attached the pieces and started gouging out the sides of the neck to allow the fiber to pass. I still need to put in a front piece of the console since it's crooked.

While I had the CA and dremel handy, I installed the exhaust pieces.

Once this glue is set I'll be sanding down the tops of the exhaust pieces. Lesson learned, if you're going to do the exhaust and the panther decks, do the exhaust first. Sanding those exhaust vents with the panther decks in place is awkward... oh yeah, and a light test
panzerace007
New Member
- Joined
- Dec 17, 2010
- Messages
- 2,118
Good Stuff !!! I dig th addition of th Panzer Parts ( German Panther Rear Deck) . I've got th similar planned for th Black Falcon. I've gathered some 1/72nd scale Panzer kits & am Knee Deep in removing Details.
I 'like what you have goin !! Rock-it !!
I 'like what you have goin !! Rock-it !!
Underlord
I pronounce them Dee-kal and Tam-eye-ah.
- Joined
- May 19, 2011
- Messages
- 115
Here in Connecticut we got a foot of snow last Saturday followed by power outages that decimated my free time. Between feeding the fire, and then caring for family once we got our power back, I haven't had any time to work on the falcon... That is until today!
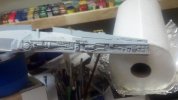
I installed the blue-moon sidewalls. I had to remove a lot of location pins from the kit parts, and clean sidewalls to make them fit. Instead of wire, I used styrene rod for the pipes.

Then, frustration hit. I tried to fit my cockpit in the tube and failed. I'm going to have to re-route the fiber down and under the floor from the side panel nav computers, cut out a channel in the backwall, and hope for the best.

so, I decided to take a little time off and do my first vinyl kit... A 1/6th Quark. Head over to my flickr page if you want to see the face paint job.
http://www.flickr.com/photos/32327918@N03/with/6320291424/
I installed the blue-moon sidewalls. I had to remove a lot of location pins from the kit parts, and clean sidewalls to make them fit. Instead of wire, I used styrene rod for the pipes.

Then, frustration hit. I tried to fit my cockpit in the tube and failed. I'm going to have to re-route the fiber down and under the floor from the side panel nav computers, cut out a channel in the backwall, and hope for the best.

so, I decided to take a little time off and do my first vinyl kit... A 1/6th Quark. Head over to my flickr page if you want to see the face paint job.
http://www.flickr.com/photos/32327918@N03/with/6320291424/
ModelMakerMike
"It's Slobberin' time""
- Joined
- May 28, 2011
- Messages
- 1,838
Kewl work.....and quite the remarkable job on Quark!
;D;D;D
;D;D;D
Similar threads
- Replies
- 0
- Views
- 1K
