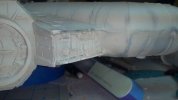
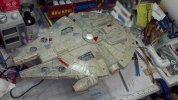
Underlord's Falcon (WIP)

Well, I moved the cockpit wiring over to the "hotter" side of the circuit and it looks much better. I did try the window frosting spray ghat Grendels suggested. After masking off the clear resin piece I gave it two good coats of the stuff. It helped a little, but not enough. Next thing to try is cotton balls. I also did a light leak test and found tons of places where I'll be jamming in aves once the halves are closed. If you're using the blue moon kit, pay attention to where the cockpit tube attaches to the sidewalls. I suggest attaching the sidewalls to the TOP side to make sure you get the alignment right. I put mine on the bottom side and I'll have a 1/4" gap to fill with sheet styrene and aves. Nothing changed enough for a picture, but I owed you guys an update on frosting the engines.

Oh... just remembered... The window frosting label says to use it outside... umm... I would think you would want to frost the inside of the window! *ponder*
 
Got a little done this weekend. I closed her up, removed the mask on the gunners windows and added the gun. After a little fiddly work removing the bleed through it should be nice. Too bad I can't really see those gunners walls.
6820512965_3545793a38.jpg

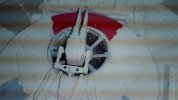
I learned that I need more practice with photo-etch parts! Put in the engine grills and really messed up that aft port exhaust vent... but that's ok, I'll just blacken it up after paint and call it "battle damage" :)
6820514853_b867908fa2.jpg

I miss-aligned the outer port vent too. I guess I was getting a little too excited about installing my first photo-etch!
6820517255_6db025e993.jpg

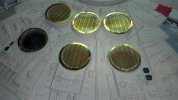
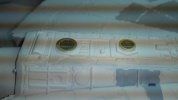
There were HUGE gaps left because I installed the sidewalls on the bottom first, so I broke out my Aves Apoxie Sculpt and filled them in. Once they have a chance to cure up, I'll hit 'em with a sanding stick and touch-up paint.
6820520245_989947324c.jpg

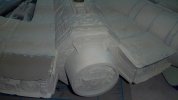
I even filled in the gap for the cockpit neck and sculpted it smooth. I like how this came out. I went all the way around filling in gaps that had any light leak.
6820521797_a1f83f3404.jpg

Next up is sanding, touch-up paint, then seal it for weathering! I think I'm right on schedule to finish this month, but thankfully there is an extra day this February!!
 
ozzyguanche said:
Yep photo etch can be fiddly, but looks all fine to me. Nice work on the cockpit tube are too.

Ozzy

Thanks Ozzy, you're the king of this kit, so I really appreciate your input! I'm so glad that everyone takes my VERY green status into consideration when commenting. You guys/gals are the BEST!

I really need to break out my good SLR to take some pictrues. Using my phone's camera makes the work look so much better 'cause you can't see the imperfections! The photoetch is really banged up on a couple of these. If this was a Star Trek Federation ship, I'd have to putty and sand them before I'll be happy. Thankfully I'm coining this one as "pre-ANH" Falcon, so I'll just slap on some battle damage! Besides, most people that will see this in person might not even know what the Millennium Falcon is, and those that do will probably not know all the details.

I was considering creating a decal for atop the cockpit, but considering there are so many problems that are bigger than that, it probably isn't worth the effort.
 
I have got pics of some of the stickers that were used on the falcon if you need them,including the cockpit one.

ozzy
 
Underlord said:
ozzyguanche said:
Yep photo etch can be fiddly, but looks all fine to me. Nice work on the cockpit tube are too.

Ozzy

Thanks Ozzy, you're the king of this kit, so I really appreciate your input! I'm so glad that everyone takes my VERY green status into consideration when commenting. You guys/gals are the BEST!

I really need to break out my good SLR to take some pictrues. Using my phone's camera makes the work look so much better 'cause you can't see the imperfections! The photoetch is really banged up on a couple of these. If this was a Star Trek Federation ship, I'd have to putty and sand them before I'll be happy. Thankfully I'm coining this one as "pre-ANH" Falcon, so I'll just slap on some battle damage! Besides, most people that will see this in person might not even know what the Millennium Falcon is, and those that do will probably not know all the details.

I was considering creating a decal for atop the cockpit, but considering there are so many problems that are bigger than that, it probably isn't worth the effort.

One thing to remember about the falcon is that it is the fastest hunk of junk in the galaxy. Dings, dents scratches all fit in with her. So don't worry about any of it. It probably belongs.
 
Grendels said:
Underlord said:
ozzyguanche said:
Yep photo etch can be fiddly, but looks all fine to me. Nice work on the cockpit tube are too.

Ozzy

Thanks Ozzy, you're the king of this kit, so I really appreciate your input! I'm so glad that everyone takes my VERY green status into consideration when commenting. You guys/gals are the BEST!

I really need to break out my good SLR to take some pictrues. Using my phone's camera makes the work look so much better 'cause you can't see the imperfections! The photoetch is really banged up on a couple of these. If this was a Star Trek Federation ship, I'd have to putty and sand them before I'll be happy. Thankfully I'm coining this one as "pre-ANH" Falcon, so I'll just slap on some battle damage! Besides, most people that will see this in person might not even know what the Millennium Falcon is, and those that do will probably not know all the details.

I was considering creating a decal for atop the cockpit, but considering there are so many problems that are bigger than that, it probably isn't worth the effort.

One thing to remember about the falcon is that it is the fastest hunk of junk in the galaxy. Dings, dents scratches all fit in with her. So don't worry about any of it. It probably belongs.

Totaly agree, I was just saying to another falcon builder after he was scratching some parts of his own, and not totaly happy with the results. That from my point of view (Having seen the 5 foot falcon in person) its the imperfections that make the Falcon, and its the model builders that put that into thier models that create the same sence of imperfection.

I think you are doing just that.

Ozzy
 
Thanks guys! Personally, I like Trek ships more to look at, but after my X-Wing and now the Falcon, I think I like building Star Wars better.. I suspect I'd be an armor guy if I wasn't SciFi!

Anyway... After watching FichtenFoo's videos on discoloration of the Falcon, I figured I'd give it a go. I picked up some oils at the local craft store, some new brushes and some turpenoid. I really like the results so far! two more steps to go on the bottom then I can start on the top... only one problem... while working on the bottom, I broke off the guns from the top. They were a little off center, and very brittle, so I am going to replace the bar holding it with some brass rod later.

Here's what the bottom looks like now..
6858005749_f10da7fcb6.jpg
 
Underlord, it looks great!
Fichten Foo's method is what I kinda used for my REPUBLIC.
I can't wait til I do anothe Star Wars build so I can really dirty something up. ;)
Your Falcon is Suhweet!
 
I didn't buy the specific brand recommended and used by FichtenFoo. A.C. Moore was having a 20% off sale on Winsor & Newton oils, and I had a coupon. I found that Payne's Grey, Burnt Sienna, and Raw Sienna worked best for me. I added some Mars Black in spots for a washed oil spill look. I think Fichen Foo's "starship filth" is probably Payne's Grey :)

Now the pain of Oils sets in... I won't be able to do my next phase for 2 more days! I hope I get my schedule down to be done with the ship this month! :) I have some geeky friends coming over in March and I want this to be displayed by then! :)
 
Oils rule! It's funny I've used oils my whole life and until I watched Fitches videos they confirmed for me that oils are indeed legit in weathering.
 
UGH! The oils are STILL wet! I may just have to figure out a way to put it on the mount so I can get the top started while the bottom dries. In the meantime, I'll have to start building something else :)
 
Underlord said:
UGH! The oils are STILL wet! I may just have to figure out a way to put it on the mount so I can get the top started while the bottom dries. In the meantime, I'll have to start building something else :)

I have seen the video for this color modulation technique, but have never actually done it myself. I really like the way it looks in the end and have since found several other tutorials on this technique. What I am curious about however is this; Can you speed up the drying time of these oils using a hair dryer or heat gun on low? or can you just seal the oils with a clear coat? I think there are additives you may add to oil paints to speed up the drying process, but again, I have no experience with this. I hope to be educated more on this method.
 
I have never tried to speed them up. I have just let the sit for a week or two. Oils are very easy to work with, but the price you pay for that ease is curing time.
 
I used that technique on my Republic, and D-7 builds, and didn't have a problem with them sitting for about 24 hours. Maybe it had something to do with he turpenoid?
 

Latest posts

Back
Top