Underlord's Falcon (WIP)
- Thread starter Underlord
- Start date
Underlord
I pronounce them Dee-kal and Tam-eye-ah.
- Joined
- May 19, 2011
- Messages
- 115
Thanks for the awesome encouragement guys! Thanks for the ideas too!!
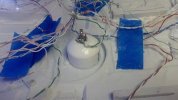
@Grendels I already glued in the light tape structure, so hitting the inside of the clear resin engine cover with window frost paint would be a bit tricky... sounds like a GOOD idea though! I only had non-bleached parchment paper in the house. That stuff is the same color as brown shipping paper. I'll check the store for some white parchment paper and hit that with some clear blue. That just might be the ticket!
@Solander mat finish lacquer painted on the inside of the clear resin, especially if I made it globular might work well too. I wonder if there is any translucent blue lacquer paint I could mix in it to get a light blue hue at the same time... I'll pop on down to my local art store and see what I come up with!
JohnSimmons
For Spud: I was once Merseajohn
- Joined
- Jan 4, 2011
- Messages
- 5,645
Great job!! Try putting a few folds into the baking paper.....
Grendels
Active Member
- Joined
- Nov 24, 2009
- Messages
- 9,092
Another thing to try is to use some Tamiya flat base. That stuff is just like the frosting paint if you thin it down with half flat base and half future. And since you are using half future, you could probably brush it on.
Let us know what you do to fix it. I should be catching up with you in the next week or two.
Let us know what you do to fix it. I should be catching up with you in the next week or two.
NecronautDrummer
Member
- Joined
- Sep 25, 2011
- Messages
- 804
Don't take my word for it, but I think future cut with ammonia will create an airbrush-able acrylic matte finish. Please test it before you try, though!
Would using higher-value resistors on the appropriate LED's dim down your floodlights & nav lights?
Would using higher-value resistors on the appropriate LED's dim down your floodlights & nav lights?
Underlord
I pronounce them Dee-kal and Tam-eye-ah.
- Joined
- May 19, 2011
- Messages
- 115
NecronautDrummer said:Don't take my word for it, but I think future cut with ammonia will create an airbrush-able acrylic matte finish. Please test it before you try, though!
Would using higher-value resistors on the appropriate LED's dim down your floodlights & nav lights?
The clear part for the engine came with the blue moon kit. I don't have any of that material that I could test with, and ammonia kinda scares me
Yes, yes, using higher value resisters on the underside LEDs would have made them dimmer, but I really don't feel like re-doing my wiring harness from scratch. I've been beating myself up about that since I saw it. I'll know better next time, and I'll configure my wiring so that I can change resisters much easier.
Grendels
Active Member
- Joined
- Nov 24, 2009
- Messages
- 9,092
I don't know if I would mix future with ammonia, the label on the back of the package for future states that ammonia will strip future from a floor. So if anything you will be thinning it down. I doubt it will change it to matte.
Is it possible to add a resistor to the front of your wiring between the power supply and the wiring harness? That might be the easy way to dim them down a bit. If you do this, make sure you use more than a quarter watt resistor (Like the ones that come with LED's) You will be putting too much current through it. And I would test it for at least 5 hours before you seal up the model.
Is it possible to add a resistor to the front of your wiring between the power supply and the wiring harness? That might be the easy way to dim them down a bit. If you do this, make sure you use more than a quarter watt resistor (Like the ones that come with LED's) You will be putting too much current through it. And I would test it for at least 5 hours before you seal up the model.
Underlord
I pronounce them Dee-kal and Tam-eye-ah.
- Joined
- May 19, 2011
- Messages
- 115
@Grendels I've got her plugged into a variable (12v max) wall wart. I picked up a bunch of these and tested them. Those that actually came close to the posted ratings (about half) I kept in a model making stash. I can bump it down to 9v, but then the engines really dim down. I'll try a high wattage/amperage resistor, but it isn't all that bad for what I'm using her for. I may also "weather" down the LEDs making them show less light.
Grendels
Active Member
- Joined
- Nov 24, 2009
- Messages
- 9,092
I don't think I was clear enough in my post, sorry about that. What I was suggesting is to put a resistor in the wiring harness between the power supply and the landing lights. This will leave your engines with enough voltage to be bright because you are not changing up their voltage, but at the same time you are dimming down the lights you need dim.
I don't know how you wired this together. So this may not be possible. I know that I am going to wire my landing, watch your head lights together on a separate switch from the cockpit, engine lights. That way I can turn them on and off at will. Also if I decide to make a landed version, I will be good to go with that. I can have just the landing lights on.
I don't know how you wired this together. So this may not be possible. I know that I am going to wire my landing, watch your head lights together on a separate switch from the cockpit, engine lights. That way I can turn them on and off at will. Also if I decide to make a landed version, I will be good to go with that. I can have just the landing lights on.
Ziz
New Member
- Joined
- Sep 24, 2011
- Messages
- 186
Grendels said:I don't think I was clear enough in my post, sorry about that. What I was suggesting is to put a resistor in the wiring harness between the power supply and the landing lights. This will leave your engines with enough voltage to be bright because you are not changing up their voltage, but at the same time you are dimming down the lights you need dim.
I was just going to suggest the same thing - make a Y adapter inside the model at the power jack. One side runs straight 12v, the other has a resistor to cut it down to 9v.
Underlord
I pronounce them Dee-kal and Tam-eye-ah.
- Joined
- May 19, 2011
- Messages
- 115
Ziz said:Grendels said:I don't think I was clear enough in my post, sorry about that. What I was suggesting is to put a resistor in the wiring harness between the power supply and the landing lights. This will leave your engines with enough voltage to be bright because you are not changing up their voltage, but at the same time you are dimming down the lights you need dim.
I was just going to suggest the same thing - make a Y adapter inside the model at the power jack. One side runs straight 12v, the other has a resistor to cut it down to 9v.
I was hoping to be "done" with the wiring, but you guys have convinced me to chop out what I need to, and add a big fat resistor for the running lights. I'll leave the engines and the front spots on the high current side. Thanks guys for keeping me on the "right" track!
Underlord
I pronounce them Dee-kal and Tam-eye-ah.
- Joined
- May 19, 2011
- Messages
- 115
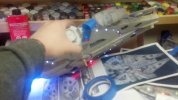
Another small update... While installing the BIG 1/2 watt 470ohm resistor, I went ahead and installed my "mounting" bracket. I took an end cap for 3/4" PVC pipe, cut about 1/4" off of it to make sure I had headroom between the 1/8" jack and the back of my gunners box. I then sanded the rounded end down enough to be able to catch threads from the 1/8" jack on the other side. A little CA is all that is holding it together for now...reinforcement from Aves will be needed after everything sets up.

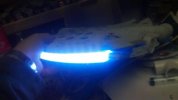
Once that was in place, I moved the positive power leads from the engines over behind the 1/2 watt resistor so they can be nice and bright, while the rest is dim. Engines are still nice and bright!

While the running lights are juuuuuuust right!

Only one problem with it... the cockpit is now too dim. Next time I have the soldering iron hot, I'll have to move those leads over to before the resistor too.


Once that was in place, I moved the positive power leads from the engines over behind the 1/2 watt resistor so they can be nice and bright, while the rest is dim. Engines are still nice and bright!

While the running lights are juuuuuuust right!

Only one problem with it... the cockpit is now too dim. Next time I have the soldering iron hot, I'll have to move those leads over to before the resistor too.

ozzyguanche
New Member
- Joined
- Nov 3, 2011
- Messages
- 66
Nice work Underloard, there is always something that slows things down isnt there!
Ozzy
Ozzy
JohnSimmons
For Spud: I was once Merseajohn
- Joined
- Jan 4, 2011
- Messages
- 5,645
Excellent glad you sorted that little brightness issue 
Underlord
I pronounce them Dee-kal and Tam-eye-ah.
- Joined
- May 19, 2011
- Messages
- 115
scratchy: I used to have big trouble if I didn't clean off the top of my jar and it's lid because the paint would dry causing the lid to be really hard to remove. By keeping the paint upside-down (tuied umop-apidsn) the lid stays wet and never dries out. It also has the added bonus that you can SEE what color it is 
ModelMakerMike
"It's Slobberin' time""
- Joined
- May 28, 2011
- Messages
- 1,838
That looks really good....
Like the contrast of the brightness between the landing lights, and the engine!
The engine looks super bright.
;D ;D ;D
Like the contrast of the brightness between the landing lights, and the engine!
The engine looks super bright.
;D ;D ;D
Similar threads
- Replies
- 0
- Views
- 1K
