Tamiya 1:32 Mustang

Only in the Pacific Glorfindel.. ;D

Thanks guys, I've sealed them with AlcladII aqua clear coat and letting that cure for a couple of days, or more. I'd really hate to get to working with these and have the finish get wonked out somehow. the plan is to wrap the base with BMF, cut it to the correct length and them mount...sounds good on paper. ::)
 
omg...Omg...OMG!!! Can't tell you the feeling I have right now. Satisfaction.

The antenna are done.

OK so I didn't wait a couple of days, patience is not one of my things.
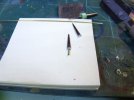
P51D128.jpg

I took BMF and wrapped the base of them, measuring 22 scaled inches being exposed. I did some rough guestimations based on pixel count and overall hight of the antenna to come up with 22 inches being expose. If I'm wrong, too late. Measured twice, cut once. So far so good..found the size of teh hole on the spine and drilled out the bottom of the antenna oh so carefully, found .8mm rod worked well for support, cut a length and started test fitting. Looked good. I beveled off the bottom of the antenna slightly to get the curvature of the spine, test fit again. looked good...CA time.
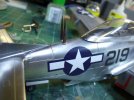
P51D129.jpg
Lesson learned. Should have had the antenna in place when painting NMF. That way the root of the mount would look more uniformed and seamless. Ended up drybrushing MM Chrome to clean up where the CA marred the alcladII finish. Maybe a clear coat will blend the two. It's not bad but I can see it.
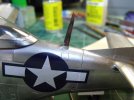

P51D130.jpg
I promise to never, EVER attempt to scribe a access panel freehand again. that's suppose to be the access panel for the antenna, it would have been a field modification, I think the guys in the field would have done a better job that this.
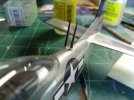
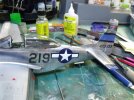
P51D131.jpg

P51D132.jpg

I'm a happy camper folks! I tried some of Ian Hill's dry pigment work, putting any mask on this scares the bejesus out of me but I can see the effect he's talking about. Look at this picture around the ammo bay covers, I used burnt umber pigments around there.
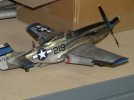
P51D133.jpg

I may do some more pigment work on it, already dirtied up the tires. I'll try and get some better pictures this weekend if weather permits and call this DONE!
 
I agree, those are rockin'!! Hey Pup, you could try post it notes for the piggy application. They don't stick much. Lookin' awesome MP!
 
Jeff that's what the antenna are sitting on in the first picture, and they scare me as well! Anything sticky around this thing just scares me..

Thanks for the kind words guys. 8)
 
Well daggone man! That is looking amazing!

Please tell though..., what is Ian Hill pigments?
 
Myke said:
Well daggone man! That is looking amazing!

Please tell though..., what is Ian Hill pigments?

Myke, Ian Hill is one of the Masters at Modelers' Alliance, he described a dry pigment application to me so I gave it a shot. waiting for his feedback to know if I did it right.

Thansk for the kind words guys.
 
You plan on keep that a secret ;)

Let me know what he thinks, and if you don't mind give us the scoop on process buddy. ;D
 
Here's a shot today out on the tarmac (the foot path to the garage...)

Wish I would have fixed those ailerons.

P51D134.jpg
You can tell I had an orange shirt on...
 
Bad ass model, dude! I am impressed with your perseverance. I also appreciate your documenting things build. I read all 23 pages! Thanks and well done!
 
Bless your heart for enduring all that! I cringe thinking about the masking issues. Thanks for the kind words everyone.
 

Latest posts

Back
Top