King Tiger group build?

Wow these dios are looking fantastic guys i'm blown away by what your doing. The creativity in the sets is amazing.

blitz
ps sorry i aint been around in a while been uber busy with err stuff.
 
My Build came to a Dead Stop ! :eek:
That was a few weeks ago !!!!
But today I found some Left over ATAK Zim. and wondered ! what if I made a cast of that and cut it to fit my Turret ?

So I got a small mould made and now some resin is curing... I mean its Paper thin !!! the resin I mean ! I had to use a Brass Plate to help forming this Thin sheet of Zim.... Well lubed with some Release Agent and the weight is insuring the Resin stays in those
Zim pockets...

I only did it cuz I had to !!! There was no way I was going to buy another 40$ Atak Kit just for 4" of Zim... Oh no !
The RTV and Resin I had already !!! ..... so the money had been spent !!!

I'll take some shots of that tomorrow ! and let you know if I am back on Track ! excuse the punt !


Norm

Out !


Well it worked !
its thin enough ... to work with !


[attachment deleted by admin]
 
Hi guys ! and Thanks !


I took time to Use some of that Flat Zim I was able to Copy and Used it on the Turret sides !!
and the Mantlet !

I still have the Rear Turret Hatch to do ....

Gave the whole tank a COAT of Mr. Surfacer 500 and will keep working at it !!!

anyway !

Take Care !

[attachment deleted by admin]
 
More of the dio.
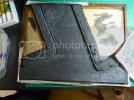
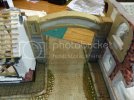
Painted the cobbles and pavements a base colour of black and started to dry brush many, many greys and browns.
P1000596.jpg

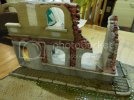
Started to paint the buildings, I'm about 1/2 way there. Added a light coating of mud to the road, but more on that later. Added some still water to the gutters, most of which will be covered with debris and mud.
P1000604.jpg
P1000606.jpg

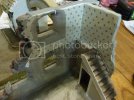
Started to add some wall paper to the upstairs and stain the steps on the stairs, added white gloss to the woodwork, still to add loads to the inside of this building.
P1000603.jpg

Used small corrigated cardboard with the paper outer stripped to represent corrigated iron sheets for the roof of the small garage, painted black and then rust colour.
P1000600.jpg

Using more balsa wood to create a damaged roof for the two storey building (not finished yet).
P1000599.jpg

My rubble which is a mix of home made bricks and blocks, sand and cat litter, loads of other items will be added to this, wood, roof tiles, damaged sections of brick walls, etc, etc.
P1000608.jpg

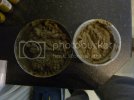
Been experimenting with mud and just about got it right , which do you prefer? The dio will portray a wet/damp day in early December 1944.
P1000610.jpg

Thanks for looking Joolz. ;D
More later.
 
I like the darker one !!! Gunky and Sticky ! Farmer Type of Rich earth !!!

The other one seems too SANDY coloured ! But I aim not an Expert ! don't
forget to mix some Static Grass in there as well.... to mimic the natural Turf that got
Churned by Tank and Bombs...

Nice touch with the Wall Paper.... and the roof Frames....

Take your time.....


Norm.
 
That is looking very cool.
Due to new commitments I am slacking but, did manage to get all the Zim on.
Looks like yeeeech but maybe better once painted.
I had pretty good success with thinned Squadron Green Putty. I think. . .
 
Mac said:
That is looking very cool.
Due to new commitments I am slacking but, did manage to get all the Zim on.
Looks like yeeeech but maybe better once painted.
I had pretty good success with thinned Squadron Green Putty. I think. . .

One of the problems with Squadron Putty is that... IT SHRINKS ! Even more so when Dilluted ! it just dries to Darn Quickly !!! Many modelers have moved to a more Stable compounds ! Like AVES putty which doesn't shrink ! it's a 50/50 Epoxy style putty !!!! Don't know if you heard of it ??? it takes about 1 hr. to cure and 3hrs to completely set ! which gives you some time to play !!!
Tamiya Polyester Putty Stinks Way too much !!! to be usefull ! I mean its like Car Bundo !!! my God ! I get nose bleeds just thinking of it !!!


Don't be ashamed of your Zim ! It's not easy ! and that's why so many Keep away from it ! If it looks to Thick you can always SAND it down a bit !!

As for me, It's my second attempt ! and I resorted to use pieces from an Old JagdTiger ATAK kit I had !!! so... it's looks kinda OK ! and hopfully I can Give mine a good paint Job and Move on to better things...


I mights even Give my Production Turret K.T. a Redo !!! I was never Happy with the Paint Scheme I did back then... and have them both parked Next to each other..

Keep up the good work !!!


Norm

OUT !
 
Shark said:
the wall paper looks great, what did you use?

Hi Shark,
Got them off ye olde interweb, check out http://www.jennifersprintables.com/ for loads of free Dolls house printables.
Norm, I agree with you on the darker mud, and thanks for the tip about adding static grass. Nice one!

More coming soon.
Later Joolz. ;D
 
Been so dang busy I haven't been able to get to the bench in weeks. Gonna try to get some time in this weekend, but wifey-poo has quite the list going. Ah well, makes me appreciate it even more when I do get time I suppose. Nice to check in and see how the rest of you are doing though, some great work being done here.
 
I guess this Build will Drag well in 2010 !!! So don't feel bad if you have not done any progress on your
King T. The Crazy Season is well underway and.... only 26 days till Xmas....

I had to kick my Butt and try to finish my Zimm.... on the back of my turret !.... So I pourred a very thin sheet and Cut it all in small strips..... it looks ok ! Not my Best but.... with that done.... I was able to give the whole Tank a Pre shade of Flat black and a thin base coat of Dark Green !....

DSC07031.jpg


I will give the Sand and Dark brown a Go later this week !!! the Modelkasten Tracks were a B i ch to assemble.... and they are my last...
way way too fragile... Fruji is the way to go....

I'll post a few pictures.... later on !


Things are looking.... the part ! I am happy !!!

Later guys !


Norm

Out !
 
I can't get those plastic indy links either! I tend to handle the model the wrong way and I too kept breaking them. Took the plunge and tried Friulies and never looked back. All I've managed to get done so far on this build is starting the tracks, got about half of 1 side assembled now. I strive to try at least 1 new trick on every build, so on this one I've decided to try the zimmerit stuff. Still undecided on which method to try 1st, but I'm leaning towards putty.
 
Well , while we are on the subject of tracks, I went ahead and got my friuls, and my metal barrel ;D
I bought The ATL-41's I think they were and the barrel was made by modelpoint. I was a bit miffed however that the barrel didnt include a muzzle brake, but since this is only my second armour kit, I wouldnt really know if Im expected to use the kit brake with this. Fit is pretty dire, so gonna need some filling in there. Pic below, sorry for the shoddy quality but my camera is pretty lame. I put the kit tracks in the pic for comparison, I think the friuls look miles better!

Ive pretty much completed the assembly of the tracks - what an effort! Expect some pretty raw fingers after doing an hour or so of these. I think I got the hang of it though after a while. What I did was trim if required, pinch the links together, and then pin-vice a bit through the holes while they are connected, this allows the supplied wire to go through much easier than drilling the links separately. It was much easier to see what you are doing with the teeth facing you, but this also meant my thumb was always resting on the teeth which is where the raw fingers came from.
The pins still need trimming and a dab of CA popped in the end though, but I need to test fit them a few times on the model before I commit to this. You get more links than you need in the set, so Ill need to add/remove some links until It looks right. Ive left one wire longer so I can easily remove the tracks for painting.

Its quite time consuming though and pretty repetitive, I tried to convince my other half that it was a load of fun, and managed to get a few links out of her lol! ;)


[attachment deleted by admin]
 
maybe we should point out.... that They Tamiya Tracks don't fit the Tank what so ever !!!

if someone gets them ON ! My hat to you ! as they are too short ! and if you get them ON !
Your IDLER will be Sunked Inward over the Rear Road wheel it won't be Funny ! My gutt feeling told
me to remove it quickly as the parts were getting damaged... i.e. the Idler Shaft ! and the Front
Sproket was being Pulled back.... Not a nice sight !

oh yeah.... it is true the Tracks on the Real tank were not Equal on both sides... due to the Suspension
Design !!! that's why some will look at the Rear and Go Hummm!!!! Weird !!! but it's normal !

Nice work on those Frujil.... metal tracks.... BTW.... I still have a JagdTiger to finish.... and tried those Frujil on
a BergePanther I have... I fell in love !!! and I will stay away from those ModelKasten like the plague !

Let's keep working on those Guys.... We are bound to have some Nice Beasties.... to show our Friends...

Norm

out !
 
Thanks for all the info your tracks. I want to get a set but haven't any idea of who made a good product.
 
Shark said:
Thanks for all the info about the tracks. I want to get a set but haven't any idea of who made a good product.

HERE Those are the ones we Agree on !! to be your best bet ! they have basically Everything... or almost !
it seems to be expensive... but in the END... it makes your Model look and feel a lot better !!!
and you don't have to get them DIRECT... A good Hobby Shop will carry or will order them for ya !

and I am only a Small voice... about my choice of Aftermarket stuff... others may not agree with me... so...
if you are happy with the Vinyl Bands or Dragon's Easy Tracks... hey ! it's all Good !

Hope to start Seeing a few of you SHOWING OFF their Tiger II !!!

Take care !

Norm

OUT !


Oh ! Here is little Update on the Tiger Paint Scheme...

DSC07037_resize.jpg
 

Latest posts

Back
Top