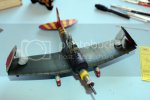
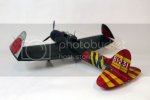
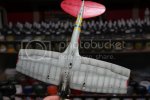
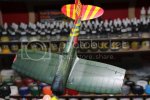
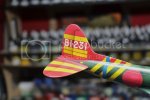
D3A1 Val 1/48 Hasegawa competition build

My pleasure Scrach. They are great products and as I said before Jon Page is a great guy to deal with. He custom built my paint rack for me and I just love it!

Chris
 
Finally I've got a chance to update the Val build. Unfortunatley I'm having some work done in the house, and it's making getting to the bench impossible. Hopefully things will get back to normal soon and I can get the D3A1 finished.

So I did get the few decals on and sealed with a coat of Klear ready for weathering. It's either a love it or hate it product, but I have to admit I find using Flory's clay wash easy to use with great results. Slop it on, let it dry, then just whipe it off with a damp (water) kitchen towl.

IMG_0613_zpsdz5vhhy0.jpg

IMG_0615_zpsixbi5saw.jpg

IMG_0616_zpskikmklhv.jpg

IMG_0617_zpscmfipfeu.jpg

IMG_0618_zpsxekrpr4l.jpg

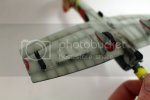
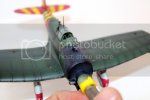
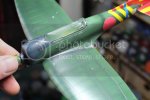
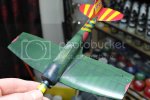
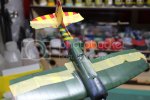
I got the Aotake colour on the end of the wings, showing some of the "internal" structure of the wing.

IMG_0621_zpsfy214039.jpg

I got some of the chipping done on the wing root. I'll maybe add some more later but I think it's important to do chipping at different stages of the build so there's a different texture to these areas. Just like the real thing, not all of the chipping will happen at the same time, so it's important to have some more weathered than others.

IMG_0622_zpsireg6bpz.jpg

IMG_0624_zpswjoksr8w.jpg

Then it's time for more masking.....

IMG_0626_zpsp1oih0mp.jpg

IMG_0625_zpsvc5z43zo.jpg

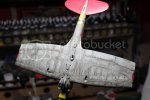
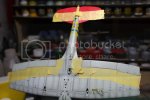
Using Tamiya Smoke X19 I lightly spray the root of the control surfaces. Then once the masks are off I go over the panel lines building up the colour lightly. I also started the exhaust stains on the bottom of the Val. I'll add to that later. The joy of using Tamiya smoke this way is that at the minute it looks a bit heavy with a bit of an oily shine to it. Once you put a flat coat on things it just blends in and calms down.

IMG_0627_zpsekgazxdu.jpg

IMG_0628_zpslascokfp.jpg

IMG_0629_zpsctks33ps.jpg

That's about all for tonight. Thanks again for checking out the build. Not long to go before I call this one a done.

Chris
 
Man...great update. Lots to talk about here. I agree that the Flory washes work great and really are nice for what they do. I recently resubbed to his site and have been watching alot of his videos. Great stuff.

I really agree with your chipping philosophy; very true. By staggering the actual timing (layer timing) you can achieve much more realism. I'll have to work more with the X19. Great tips.

Anyways, this is by far my favorite green with red and yellow stripes airplane in the contest so far. Killer work man.

Question: What is your chipping technique? Color used?
 
Hi Scott. I'm So pleased you're enjoying the build, and your kind words are high praise indeed. ;D

I usually only use either the flory dark dirt wash, or the black wash. I use the dark dirt for my panel lines, but the black is great on metal parts like engines etc, gives them a really oily look. Great stuff. I don't know if your able to get the stuff where you are, but if you want to try them out, I'll send you a couple of bottles over.

When using the tamiya smoke, keep your airbrush moving mate. If you don't it pools very easily. When you first start airbrushing it, it looks like your not putting anything on. You need to build it up slowly. I usually turn my model so the light is shining off it. makes seeing where your airbrushing a lot easier. The thing I love about it is this. Weathering can be a tricky thing sometimes and is easily overdone. With this stuff you want to take it to the stage were it looks like you've done just a little too much. Usually with other product that's too late and there's nothing really you can do about it, but with a flat our satin varnish over it, it settles down and blends in taking it back a step. I hope that makes sense. Hopefully you'll see what I mean when I get more of the build done.

As far as my chipping method. I use a good quality very fine brush. In this case a winsor & Newton series 7 for miniatures. The paint is Vallejo model air aluminium. I like using this as its already thinned so is easy to work with. And of course magnifying head gear like the ones you were wearing in your apache video. Later I'll use a silver primacolor pencil after the flat coat is on. I just take my time and do one part at a time.

Thanks again mate for checking out the build. Since I've started posting on sma I've been blown away by the talent that's on here. I've been getting plenty of ideas and a load of inspiration myself.

I hope I answered your questions okay but if not give me a shout.

Chris
 
Wow- looking fantastic Chris.

I have a different philosophy to chipping- I actually like to chip the aircraft properly.
I always spray a complete coat of aluminium all over the area to be chipped- a protective coat of Klear/Future, then a coat of Worn Effects from AK. Once this dries- I shoot the proper colour on. Later on I use a cocktail stick and rub the paint away, leaving the aluminium showing through. Having great fun replicating this on the wing of my P-51- doing it in reverse this time- Zinc Chromate undercoat then chipping away the silver paint.
 
Thanks Alan. :D

The problem with using that technique mate is you don't have quite the same control, and if you accidently do too much or take a bit of paint off you didn't want, you can't undo it. With painting it, I can just wipe it off and do it again. Personally I feel if it's done right you wouldn't be able to tell the difference anyway. I've used the chipping medium technique several times before (for years in fact), and still use it at times. But I don't think it's appropriate in this case. As I wanted to keep the chipping light, and adding so much work, another layer of paint, glosss coat, chipping medium... was unwarranted. Besides as I stated I wanted to layer the chipping with weathering, again something that is very hard or next to impossible with the chipping medium. I still look to guys like JM Villalba, Chris Wauchop, and Brett Green for inspiration and technique, and none of them use the chipping medium. They all have stated they prefere to paint and use the prismacolor pencil for chipping (for control). Each to their own though and I'm glad that technique works for you. I will continue to use it but when it's warranted, but just not in this case. Thanks though for checking out my build, and I appreciate your comments.

Chris
 
Thanks Chris. Great talk man.

I think it's clear that there is indeed more than one to skin a cat...or chip a 1/48 scale model aircraft. ;) Model on.
 
Nice update mate :) This is gonna look Da Bomb ;D

Personally I prefer an artist pen for chipping my aircraft , it gives lots of control and simply wipes off if I don't like it . I find the chipping fluids a bit to heavy for aircraft myself , but do use them on armor . I also like to layer the chipping as you mentioned ..old ..to new ,I think it helps add a bit more depth to the surface .

Alan , did P51's have Zinc chromate on the outer skins ? I didn't know that ?

Chris.
 
Chris- I have read that on the painted p-51 wing the primer used was Yellow Zinc Chromate.
I have actually taken most of it off now as I don't like the way it looked- just a bit on one wing, that I am actually going to paint over.
I use the prsimacolor pencils as well for chipping- I like to use the medium method for wing roots and areas where the chipping would have the worn look as well as exposed metal. Usually on propellors, access panels, etc, I would use the pencil or silver paint.
 
I had the pleasure of seeing this in the flesh today :) I have to be honest ,the photos just dont do it justice !
Stunning !! Absolutely Stunning !

Dont he look happy ;D ;D

chris.jpg


Chris.
 
Thanks mate. Appreciate that, unlike this photo! Lol I look a right miserable sod! Not one of my better photos... Lol

I should hopefully get a good update on the build on tomorrow night.

Chris
 
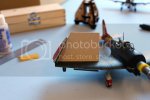
Before I get started on my build update, I just want to say a big thank you to Chris S. I'm having work done at my house, and I had to pack all of my modelling stuff up..... :'( With me working on this build not only for this competition, but also for the IMSS show in Dublin this weekend, I really couldn't afford the time away from the bench. So he kindly offered me the space at his shop to work! So that's me in the photo above working at a table made out of chairs and a piece of wood upstairs in the Modellers Nook. Chris..... you're a legend!

Also want to appologuise about the photos. They're not great and I didn't have a chance to photo every stage like I have been due to my benchless circumstances, but I'll try and fill in the gaps as I go along.

So on with the build.... I got a few of the sub assemblies attached, like the wheels, dive flaps, and bombs before getting a flat coat on everything. I love the transformation flat varnish gives a model.
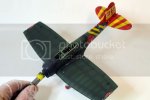
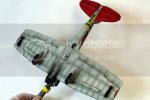
IMG_0635_zps9dmkjjot.jpg

IMG_0636_zpslnkc88us.jpg

IMG_0634_zpsu268pf65.jpg

I started weathering with some oils and pigments before attaching the canopy, main bomb and swing arm to the lower surface. Just want to say again that I'm not going nuts with the weathering, this was a early war aircraft and I wanted to build a used but well maintaned bird. So the use of the oils etc was more to blend the previous paint work, to dull down the chipping and to add a vew streaks and stains here and there.
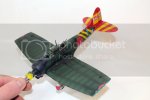
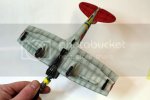
IMG_0642_zpsc7yectmf.jpg

IMG_0643_zpsgm4dncy6.jpg

IMG_0645_zps37akxdpq.jpg

IMG_0646_zpsjufq4atn.jpg

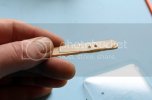
I then started work on finishing the wing folds. I drilled out the clear parts and filled with Tamiya clear paint to make them look like bulbs. This took a steady hand I can tell you... lol
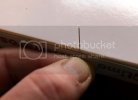
IMG_0638_zpstq0kst4g.jpg

IMG_0641_zpsx2yvssmd.jpg

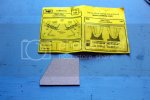
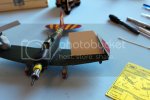
Once the lights were on I created a jig out of cardboard to ensure both wings were set at the same angle.
IMG_0651_zpsi4ukhklp.jpg

IMG_0655_zpsyrlubvbc.jpg

IMG_0653_zpsiq5qefuq.jpg

IMG_0652_zpsvsgne8yx.jpg

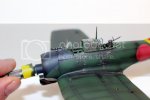
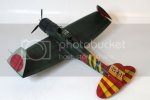
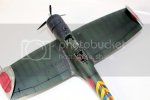
Once the wings had set, I added the arial wire from EZ line (great stuff if you haven't tried it, it's slightly elastic so it doesn't break if you happen to knock it. It comes in a couple of different thicknesses as well depending on your scale), the engine cowl and prop were also added. I did a little final chipping here and there with a prismacolour pencils to finish......
IMG_0658_zpsh6acqkf8.jpg

IMG_0659_zpsv6g1qyjw.jpg

IMG_0665_zpsqgfqxxpl.jpg

IMG_0662_zpsx5kmayh9.jpg

So that's it for this one. I'll be taking the Val along with a few others to the Irish model soilder societies annual competition this weekend in Dublin (wish me luck). If you're about this neck of the woods, come on down and check it out in the flesh, say hi and enjoy a great show. I'll get some better photos taken when I get back and can get the home studio up and running again.

Thanks for checking out the build, and thanks again for all your comments. As always though, if you have any questions, querys, or comments about thw lattest update, just give me a shout. ;D

Chris
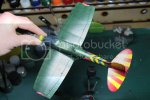
 
Exceptional finish Chris!! She is a real beauty!! A real treat to have been able to follow along with you on this!! ;)
 
Thanks Todd mate. Really appreciate that. As I've said, the photos are a bit dark, will get better ones on soon mate.

Chris
 
Just a quick up date. Just back from the biggest show and competition we have here in Ireland. I'm shocked and delighted to have picked up 8 awards ( 1 commended, 2 bronze, 2 silver, 2 golds, and the AK award for best weathered vehicle)! One of the golds was for the Val ( best 1/48 aircraft). Over the moon to say the least. I'll get some photos on soon.

Chris
 
Congratulations Chris. I'm not surprised by your medals you're very talented and I'm def learning a lot by just watching your build, I'm sure the scale model addict mag will rope you in to do an article or at least I hope so. Will really like to read a full breakdown of your how to's.....
 
Thank you so much kallie. I really appreciate your kind words they really do mean a lot. I'm just glad you enjoyed the build.
 

Latest posts

Back
Top