King Tiger group build?

I've done a few sets of Friuls now, and I love 'em. They can be a kit in themselves, especialy the set for this beast. I have a set here with the sprockets to match them, and this set (ATL-41) has all the little connecter bars to go between the links. If you've never done a set of these remember to be patient, it's all soft metal.
 
I would break my usual way of things for a set of Fruils, but then the $$$ sets me right back into the cheap mode.
 
So this is my first time at recreating vegetation. This is going to be a creeper climbing the corner of the damaged garage in the king T dio. Its made from three types of wire, then covered in acrylic caulking mixed with raw umber paint, then painted with three other shades of brown, next comes two shades of green and a few brown leaves as its winter, right.
P1000574.jpg
Joolz.
 
Mac, I hear ya brother! I got a good deal on my track sets (I purchased 10 sets in the same order) but still, for the price of 1 set I picked up my KT kit, an aluminum barrel, a resin mantlet & muzzlebrake and a PE set. But I still like them, much better than trying to tie the tracks down to get that sagging appearance.
 
It's nice to see you guys go to TOWN with your DIOs ! but I don't see much Tiger II in your shots... ???

are any of US * YOU * doing any kind of progress on their Tigers ??

I know I am kind of Stuck with mine.... put it aside a bit after my ModelKasten Tracks started to Break up in more pieces then they came in !

but I'll settle down and glue them Solid ! ... The Tamiya tracks that came with my kit ! ( are too short ) they won't drape over .... and if I try to
install them as is ! They will pull the idlers wheels and Sprockets so thight; I fear they may break ! I am still debating on installing the ModelKasten tracks
or draping the Tamiya ones keeping the upper one Loose in order to keep going with this Build ! so instead of crawling to a complete stall !

I started to apply Zim on my Tiger, not because of a "Time line issue" but rather because it's a Porsche turret ! and since I didn't want to pay for the 50$ Atak conversion set specially designed for it ! I decided to use some left overs from my "JagdTiger" Atak set to boost my progress but... in vain ! the turret is proving to be harder to do than I expected ! So... more down time ! till I figure out a way to keep doing this Zim... arrggh !

anyway ! Here are some shots of where I stand ! and of course... no Dio either ! slow.... too slow !!


[attachment deleted by admin]
 
Thanks schweinhund227 ;)
Regarding my King T, most of my wheels are ready to attach , all the hull is clean of sprue, dry fitted and ready to go and that's it. I want to see what Scott has completed before I start with the main construction of the KT. As my dio is uncharted territory for me I wanted to get a head start on it .
Joolz

PS The Zim looks great ;D
 
Well. . . my zim looks as if it were applied by some ham handed political prisoner that really didn't want to do it.
But I shoulder on. . .except this week my wife is off work and the honey do list I have been putting off while working on the dio is going to really bite me. . .SO I will be going slowly.
 
Mac said:
Well. . . my zim looks as if it were applied by some ham handed political prisoner that really didn't want to do it.
But I shoulder on. . .

LOL ! Don't worry too much about it ! I have seen Zim in person on a Panther Near here... and Let me tell you ! It does look like Concrete and in some spots, it was Laid pretty Thick and it didn't look Glamorous like some peoples or Big companies are trying to make it look ! of course ! if it looks real ! it wouldn't sell !!!

Over the years ! many Master modelers have Out done themselves and often were published in magazines... Giving us the Ultimate "Zim look" that we all are trying to Emulate in vain !!! But... When someone comes near Zim ! you are often disgusted by the overall appearance of it! but we need to remember; it wasn't a Fashion Show ! It was war and like you have said ! Most likely applied by some "Poor soul", trying to survive till the next day !

Peoples are afraid of Zim ! because it has the potential to Ruin their model ! it's understandable !

Can't wait to see the other Zimmed Up !!! Tigers...

I'm sure Scott will make us Proud ! LOL

see ya !
 
Good to know! My Zim is looking pretty . . .bad!
I have one more side to do and think I am getting the hang of it Now!
Squadron Green Putty thinned with Testor's Liquid Cement and applied with a coffee stirrer,allow to set and use the zim application tool and clean it off every pass. Still looks a bit on the shaky side but my tank was supposedly hit by 13 75MM shells so some was bound to get knocked off. . .
 
Mac said:
Good to know! My Zim is looking pretty . . .bad!
I have one more side to do "Snip" my tank was supposedly hit by 13 75MM shells. So some was bound to get knocked off. . .
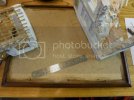
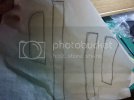
Heh ! now that's funny ! yes in deed ! That Cement like slash Epoxy Compound ! did peel off .... and are you going to Do it with the Impacts ??? that should be pretty Cool ! if you do ?

Take a few shots.... :p no punt intended !
 
Depends. . .on how easy the zim I put on is in coming off!
I had the devil of a time getting it on!
We will see.
I usually like to really wear up my armor but as this was one of the first Kings off the line, it cannot be too battered. Unless being hit 13times, but as I said that was a claim and the picture evidence I have does not support that many hits.
 
More on the King T dio! ;D
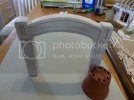
Foam arch painted with water, pva, acrylic caulk and plaster of paris mix.
P1000576.jpg
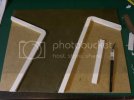
Next onto creating the pavements/sidewalks. Mark the layout and transfer to grease proof paper, invert image and rub on the back to transfer the pattern to a scrap board.
P1000580.jpg
P1000581.jpg
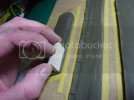
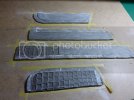
Marked the area with tape and filled the area with modelling clay (the non air drying stuff). Pushed the design of the path into the surface (kerb stones and large square cobbles)
P1000583.jpg
P1000584.jpg
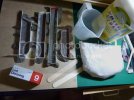
Made a simple frame around each mould and mixed up some plaster of paris with pva for added strength. Half filled the moulds and then added strips of gauze for greater strength, then topped up the moulds (tapping the moulds all the time to eliminate air bubbles).
P1000586.jpg
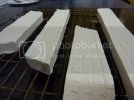
The pavement straight from the mould
P1000590.jpg
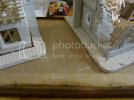
The dressed pavement placed on the Dio.
P1000591.jpg
Next the same process for the cobbled street surface, but half the thickness and with a camber to the cast.
P1000592.jpg
P1000593.jpg
Later Joolz. ;D
 
Work Stoppage on the Tiger!
I bought a Games Workshop store and am cleaning and trying to get it back into a functioning mode.
bear with me!
 
Hi All. ;)
Well Here's the latest installment. The cobbled street, which I tried to recreate with a segmented arch pattern, which can be seen all over European streets.
The cast cobble street straight from the mould.
P1000594.jpg
The cast section placed on the base. Hmm OK me thinks?
P1000595.jpg
Later Joolz.
 
I tell you for true, that is some really fine work Joolz.
You should be very proud of it.
 

Latest posts

Back
Top