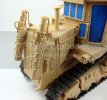
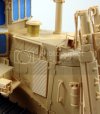
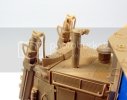
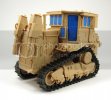
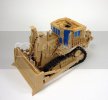
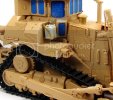
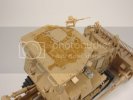
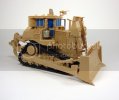
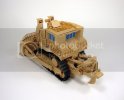
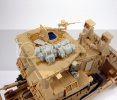
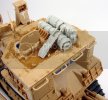
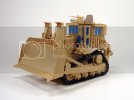
D9R - Meng 1/35 Armored Bulldozer

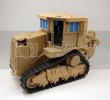
OK, I wasn't planning on an update so soon but I was asked a question on masking for the windows and thought I would toss up a picture that might shed some light...they do say a picture is worth a thousand words!
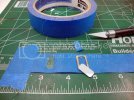
D9TracksandMasking009_zps10825be4.jpg

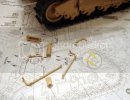
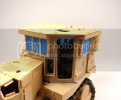
I took ordinary painter's tape and taped this to my mat with the sticky side up. I traced one of the small lower window frames onto a piece of styrene card stock. Once the piece was cut out, simply stick the template on the tape and trace the template with a sharp #11. This works well since the tape holds the template pretty much until cutting is complete and then aid in picking up the mask since it is stuck to the template....peel off with some tweezers and apply!! Insta-masks for the D9R!! Especially nice since all of the windows are the same size, just keep cutting!!
D9TracksandMasking010_zpsc92049d8.jpg

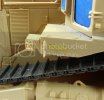
You can also see I had the chance to fit the tracks last night!! So its on to tiny pieces then onto the Blade!! Getting close now!!!
D9TracksandMasking012_zps44b73161.jpg

I am thinking the masks came out decent!! Thanks for stopping by!!!

[attachment deleted by admin]
 
spud said:
were your tracks too long Todd ? neat way of masking too

Stop at 42! At least what I counted! 43 was laying on the top of the bogies. You can see I just ended up using the extra links instead of the ones on A. The ones on A are suppose to be the "end links"..oh well, after a little dirt and dust I can almost grantee nothing will be noticed!!

Hope the tape thing helps out a few on this one...pretty quick and dirty and you can keep moving forward!!! ;)
 
Wow, looking the bees knees it does TRM ........... Great job so far on this build. ;D
 
Thanks fellas! Glad to have you along for the ride here! Should be rolling through construction this week and with any luck be sitting pretty for the weekend!! ::)
 
JohnSimmons said:
It's really taking shape T, looks great man.

Thanks John!! Missed you a couple days ago here...I had some interview to manage there I think!! ::) Thanks again btw the way!! It was received well my friend!!


OK, nearing the end here. There was many little parts strewn throughout steps 27 to 34; grab handles,step, lights. I was slowed up a bit by another quick project and general life items...blah blah blah!! Here is where the big Cat stands for me...

D9nearingconstructionend003_zps8c882643.jpg

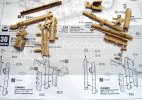
The lifting hydraulics fall next inline here. There are two different configurations for thiskit...one the IDF and the others for the USMC! Step 30 lays out the IDF.

D9nearingconstructionend005_zps4933a562.jpg

D9nearingconstructionend007_zps6362c2d2.jpg

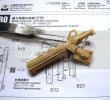
Not to bad of a constuction with these. A couple of few gates to be removed but the remnants are removed rather easily. The tops on the IDF version have two pice cover plates that need to be assembled. There are two different cover plates which actually can be used on the IDF version. This less armored protected and a bit higher but after consulting the "bible" the Desert Eagle Book, both are shown being used. The backs of the larger shield will need a little sanding and maybe a touch of filler for the joint but look pretty close. The rear plate could use 4 corner bolt heads, which I will be adding, but not necessarily needed if you don't feel like going that route.

D9nearingconstructionend009_zpsdfc0afd1.jpg

D9nearingconstructionend011_zps7e803a67.jpg

D9nearingconstructionend013_zps226b4b7b.jpg

There was a nice little intake screen added to the set which nicely enhances the intake. You will notice a bit of filler on top. The main intake part is two pieces joined and the was a bit of a sink on both sides. I am not sure if this is common with all runs of the kit, but easily filled and sanded.

D9nearingconstructionend015_zps848ca078.jpg

D9nearingconstructionend017_zpsa8c63403.jpg

So everything seems to come together quickly once the cab section is all done and you get past the armor and grab handles.

D9nearingconstructionend019_zpsd6384e95.jpg

Next stop....

D9nearingconstructionend021_zps7d3b0a10.jpg

The Blade!

Hitting the bench for a bit tonight so this should move forward a bit. As always, thanks for hanging out for a bit.

[attachment deleted by admin]
 
Tres nice Todd. Great to see this moving along....Armorcon is getting close man. Time for some sick days..cough, cough...
 
Make sure and shave your head before you start pin washes or your gonna pull all your hair out ;D

Some really fantastic detail in that Todd!!!
 
Scott Girvan said:
Tres nice Todd. Great to see this moving along....Armorcon is getting close man. Time for some sick days..cough, cough...

Merci! No pressure there... ::) LOL!! I still can't bring myself to call in sick yet!! Maybe 15 years now! ;) 2 good weekend and a couple nights.... ;D


Big-John said:
Make sure and shave your head before you start pin washes or your gonna pull all your hair out ;D

Some really fantastic detail in that Todd!!!

Thank BJ!!! ;) I did just get a buzz a little while ago, plus I weather with oven mitts on so I don't hurt myself... :-X.... ;D I was thinking I should just AB the wash on and wipe off the excess...LOL!!!!! :p


adampolo13 said:
I dunno about you T but I feel a bit of a sniffle coming on myself! haha

Great job so far dood!!!!

Thanks Adam!! As for those sniffles, it might be allergies...you should get it checked out maybe... ;D ;D ;D ;D
 
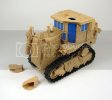
Well....I think the construction is done! Things will be moving to the booth soon. I will be showing some of the painting process but the bulk will be saved for the feature for Armorama...but then again, I will have the dio to construct too...so plenty of pics to go around!! Forward...

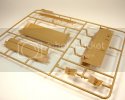
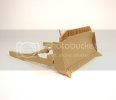
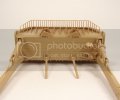
The blade!!

D9-Aurora-PaulPhillips004_zps2f01c74f.jpg

This was straight forward, clean up some parts and they fall together. There are two shield type cover plates on the rear of the blade. The instructions show them being installed in two slots...they didn't want to fit with the tab...I found it just easier to remove the tabs and glue the suckers on!

D9-Aurora-PaulPhillips006_zpsf1e8da71.jpg

With a sharp eye, you will see two EPM's on the top two inside plates of the blade...fill....sand...gone. After this blade came together, it was just a matter of sticking the pieces together.

D9-Aurora-PaulPhillips022_zps6ca1461c.jpg

I think it is a rather impressive looking model all around. In the next pic you will see a couple of things that look out of place...one being the white handle on the cab mount. This part was broken in half in the kit. Tinny bugger, I could not find the other half. I made one in a few minutes with some rod stock, sanded the bottom flat and a couple bolts and I was back on track. The other is the fuel cans. These are not the ones from the set. Now I have not heard any issues with the cans fitting in this part anywhere online...but they were a touch small. Since I have the Black Dog IDF Accessories Set, I have two fuels cans that fit superbly in the PE rack.

D9-Aurora-PaulPhillips008_zps380b082c.jpg

Moving to the top, I wanted to add some of the Basalt anti-skid effects. This looks not too bad up close but is a bit heavy at the moment but I am waiting until completely dry and I will scrub this back a little. I used Cinnamon. The granules are spot on for the scale I think. After looking over some of the pretty pictures in the Dessert Eagle Book, D9 Variants, there are several pics of the topside. They are from two different D9's. It is clear the application is installers' choice as to where the coverage goes....

D9-Aurora-PaulPhillips012_zps8b2a3dc0.jpg

So that covers 99.8% of the build. I have the blade's horizontal stabilizer to install which get a cap that glues on...if it goes on now, I will not be able to remove the blade for painting.

D9-Aurora-PaulPhillips036_zps520447c0.jpg

D9-Aurora-PaulPhillips028_zpsb2056523.jpg

I had to give some of the BD IDF Set a little dry fit.....

D9-Aurora-PaulPhillips042_zpse6ae1fc9.jpg

I have a ton to choose from with the set, so there is a few other pieces and I will mix and mingle them to get something that looks decent.

D9-Aurora-PaulPhillips044_zps6ac969db.jpg

A little raised blade action for the last shot....

D9-Aurora-PaulPhillips047_zps07d9fea4.jpg

So there you have it, construction done! I do have one handle to add to the cabin door that I missed. Other than that...time to prep this big girls for some Primer!!! Wish me luck!!

As always, thanks for hanging out!!

[attachment deleted by admin]
 

Latest posts

Back
Top