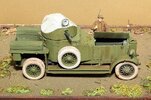
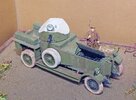
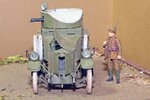
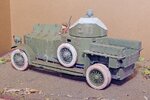
Roden 1914 Pattern RR Armored Car

Thanks for the likes

Micheal - There is a list at the beginning of step 13 which tells you which brass part uses which form. As an example the 3 has an arrow pointing at 1M, which means you use form 1M to shape the 3 brass pieces labeled 3 etc.

I managed to get the basic assembly done this morning. This wasn't easy. There are a lot of parts that have to fit together very accurately to work. Basically the running boards have to fit and in order to do so the fenders, body and bed all have to be in the correct location and it isn't easy getting everything there. My solvent smeared instruction greatly added to the challenge. I'll expnd on that a little in my next post, it's time for dinner right now.

Here is the point it's at now.
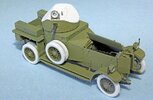
AA-024-L.jpg

AA-025-L.jpg

NOw it's time for the last of the details and then the fun part with weathering etc.
 
Thanks for the likes

Micheal - There is a list at the beginning of step 13 which tells you which brass part uses which form. As an example the 3 has an arrow pointing at 1M, which means you use form 1M to shape the 3 brass pieces labeled 3 etc.

I managed to get the basic assembly done this morning. This wasn't easy. There are a lot of parts that have to fit together very accurately to work. Basically the running boards have to fit and in order to do so the fenders, body and bed all have to be in the correct location and it isn't easy getting everything there. My solvent smeared instruction greatly added to the challenge. I'll expnd on that a little in my next post, it's time for dinner right now.

Here is the point it's at now.
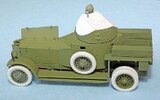
View attachment 110945

View attachment 110946

NOw it's time for the last of the details and then the fun part with weathering etc.
I'm liking the white tyres, really sets the car off. Pantherman
 
Thanks for the compliments.

I spent about an hour tonight playing with some Vallejo Maroon wash and Burnt Umber pigment. Didn't do any scratches, mud etc, and it still needs the glass on the lights and a few other details but I'm mostly happy with this. need to add a little more pigment to the front of the rear tires and clean the turret a bit, but for minumal effort it looks decent IMO. Main point of building this was just to kind of get back into the swing of working plastic models.

The base is the remains of a christmas scene that I still had laying around. I'm always tempted to blur my photos so every imperfection doesn't show up so well. But that is the best way I've found to really critique my work. Really like the figure behind the car just need to strighten his bayonet :)

AA-028-L.jpg
 
I'm going to call this finished at this point. I'm not really all that satisfied with the results of the weathering, but it was a good model to get back into the swing of things. Like usual there are a lot of things I would do different if I was to build another one. The first is finishing and weathering the tires and wheels before putting them on the model. Parts of them are hard to get to. Also just need to take more time on the weathering but was ready to move on. I didn't do any type of preshadowing on the body and think that makes a huge difference in the end appearance. Need to put a wash on the wheels as well. I did just the tight front and didn't think it looked better till I took the pictures and now think that added a lot. Well onto something new.

AA-050-L.jpg

AA-053-L.jpg

AA-055-L.jpg
 

Latest posts

Back
Top