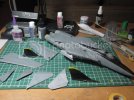
Tomcat build

Man that is looking toooo cooool.
Making that build look easy! Can't wait to see some more!
 
Great progress Myke. And nice to find a "How to" article on bulding a Hasy Tomcat too, Ill be starting my F-14A as soon as I get my War Wheels entry built.
 
This Big Bad Kitty is Awesome in 1/48

Nice work so far buddy !!! Keep up the good work !

Nice touch with the Tabs to help merge the TUB to the Body !!! I don't know what they all separate this plane like that ??? oh well..

Yours is on its way to SHINE my man !

will be following !!!
 
OK where were we. I was ticking along on this build and then my kid gives me a flu that would rival the black plague. On my back for a couple of weeks but I finally drag my butt out to catch up on real life and finally get back to this build. So when I left off most of the main bits were together and I was smoothing and scribing where needed.
The kit lets you open a couple of panels to reveal some details such as the gun. I figured I put the ladder down but I did not the gun exposed so I decided to close things up, should be easy... Guess again
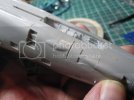
c1.jpg

I guess the hasegawa quality control team was out to lunch when this part of the mould was machined. It is not impossible to fix but you need to correct the bumps and also do some filling as well. I added a plastic card shim and reshaped the bumps out of putty.
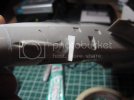
c2.jpg

Next the nose gave me all kinds of problems pretty much needed a ring of putty to work it out
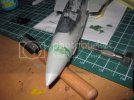
c3.jpg

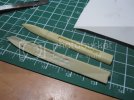
For this build I am using some black box pallets and bob racks. They cast out of resin and look really good. Unfortunately they did not sit well on the bottom of the fuselage. I found that if I kind of hollowed out the insides I could get them to sit flat.
c4.jpg

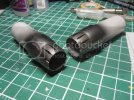
The engine nozzles were next on the list no real problems, I like the colour that I came up with basically a custom mix of alcads
c5.jpg

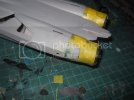
Now one thing about the nozzles usually these would be something that I would not attach until the model was basically done. The problem is that the kit is designed in such a way that you cannot do that. The problem is that pieces that sidle up beside the nozzles were designed by the same team the made the gun covers. A bit of care and tape is needed to blend this into the fuselage.
c6.jpg

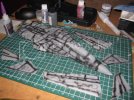
After all this is sorted out we can get to paint and preshading
c7.jpg

Followed by the initial coat

c8.jpg

I also figured that I would use “salt technique” to weather this bird I am trying to get the look while it was deployed
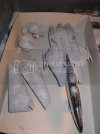
c9.jpg

Wish me luck
 
Looks like good progress.
Suddenly, the seams on my bird don't look so bad.
Yours were much worse before your filling job.
 
Can I get a quick tutorial on the salt technique please? My War Wheels build's getting really close to the paint stages, and it seems to be a really popular technique.
-What does it simulate? paint chipping, surface relief, etc.?
-At what paint stage should it be applied?
-How do you do it?

Looks like you're not letting what sound to be like pretty common Tomcat kit complaints get you down, grobber. Looks good so far!
Thanks in advance for the quick tutorial everyone, and happy modelling! ;D
 
The salt technique goes like this (for the most part):

Spray your base color
Get some salt. Sea Salt, the larger stuff
You can grind/crush some of it to get a variety in sizes of salt
Moisten your model with water
Put salt on it (basically the salt becomes a mask)
Let it set a bit so the salt will stay put
Spray your next color
With a stiff brush wipe/scrub off the salt revealing the color underneath.

This simulates chipped paint. Could also be used for subtle color variation too if your top color is only slightly different than the base coat.
 
Yeah what he said!

Basically that is it, some folks do it after decaling I have had some bad reactions so I do not, just some post weathering after decaling to blend stuff together. Also it can be a bit of a crap shoot I have seen some go bad so that the whole kit will need to be repainted. So typically I will do it after base coat.

For me I am trying to get that grimy look planes get on carriers due salt, cramped quarters etc for this am using very very very thinned mixture of well thinner, Tamiya Smoke, Gunze Soot and the darkest grey that I used on the plane.

As for the salt application I just airbrush tap water over it and apply salt with a salt shaker, I put it on pretty thick (remember to put it back or the wife will start asking questions about how much sodium you are taking in). After all is dry I either rinse off in the sink or with the aribrush

The other this I typically at least 2 rounds of this to ensure things are randomized.

Rob
 
Excellent progress Grobber. Looks really good, looking forward to see what your salt weathering looks like.
 
Hi All

Just a quick update on the salt assault it went well OK I have seen better and I seen worse. The photos make it look a little more stark then it actually is. Any ways I think I might lighten up the sides a bit

d1.jpg

d3.jpg

d4.jpg

d5.jpg

d6.jpg

d7.jpg

On to more weathering !! It is a process
 
Nice, I like the look a lot! Do you mind explaining the process a bit? I've seen salt used to create a chipped paint effect on WWII era aircraft (with bare metal showing through underneath) but I've never seen it used like this.
 
Oh boy LOL you described it in full detail already. I need to get my head checked!

Hodges said:
Nice, I like the look a lot! Do you mind explaining the process a bit? I've seen salt used to create a chipped paint effect on WWII era aircraft (with bare metal showing through underneath) but I've never seen it used like this.
 
Hodges said:
Oh boy LOL you described it in full detail already. I need to get my head checked! In my defense I think I got distracted by the pretty pictures.

Hodges said:
Nice, I like the look a lot! Do you mind explaining the process a bit? I've seen salt used to create a chipped paint effect on WWII era aircraft (with bare metal showing through underneath) but I've never seen it used like this.
 

Latest posts

Back
Top