"Snowy Wind" - Yukikaze: Tamiya's 1/350th Scale Japanese Navy Destroyer

Spud and All,

I just spoke with Iain from AK Interative again. Busy busy man ...always on the run. He told me that in the near future that The Needle Juice will be available through The AK site. ...all this as he was "running out". ;D He might have some time to talk later.

;)
 
the AK site over herer could do with having the payment page changed to english one reason and the 9euro shipping i wont buy direct from them.
 
Sorry spud...thinking he was meaning the AK USA site. I will update when I get more info. ;)
 
Wow im just caching up here man that great work as usual


Cheers


Neo
 
This video and review/build log WIP is very well done. Clear and detailed. Great job so far. I'd like to see more in the future.
 
Hiya noname!!! Thank you buddy!! ;) Been doing a little PE work and getting into some of the super-structure. Hope to have an update soon. ;D
 
Needle juice! I heard it called A.B. lub. must be the same stuff ?

I guess you have to make sure it doesn't come in contact with the Paint Cup area? Or is it impervious to any kind of paints?

Just asking! Since I think it's the first time I hear it being mentioned here!

Thanks in advance!

Norm.
 
Still plugging away guys! Hope to have an update tomorrow or first thing on Saturday!! ;D

Norm....I could assume that it is similar ??? Have not had any issues with it coming in contact in the paint cup....yet. One drop is all I use spread out over the entire needle. Nice and smooth! ;)
 
Hello All,

Thanks for hanging in there while I progressed a little more.

So I will get right to it….

In moving forward on this I will need to install some of the photo-etch and paint some sections while I construct others. Like a little game of chess. I don’t want to go too far making to difficult to paint or detail some areas.

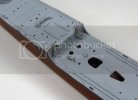
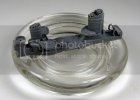
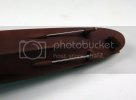
First thing I needed to take care of and the hull can be left alone for a while, were the propeller shafts. I drilled out the shaft brackets and glued them to the hull. I placed each of the shafts into my cordless Dremel and gave them some turned texture with some 600 grit sandpaper and then fastened them in place with a little CA.
1-9-2012002.jpg

These shafts would typically be painted. I this scale I like to leave these unpainted. This can add some depth.

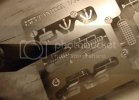
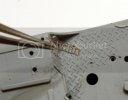
Here I needed to begin work on the PE ladders leading from the Main Weather Deck up to the Forecastle.
Yukikazehull3010.jpg

Yukikazehull3013.jpg

Both ladders installed.

1-9-2012006.jpg

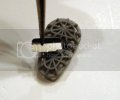
I began construction of the Central Superstructure which included work on the fore and aft funnels (smoke stacks)
1-8-12updates010.jpg

External Exhaust piping…

1-8-12updates011.jpg

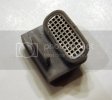
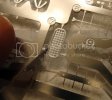
Installed a PE grill for a main vent on the Central Superstructure.
1-8-12updates015.jpg

1-8-12updates016.jpg

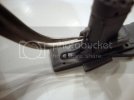
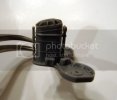
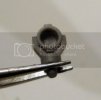
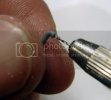
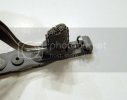
There are two intake funnels on either side of the superstructure that need to be installed. I drilled out the ends on these to add some depth to them.
1-8-12updates018.jpg

1-9-12---2006.jpg

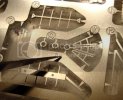
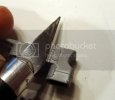
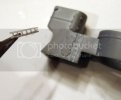
Since the Aftermarket PE Railing Sheet has some ladders included….I will be using them. In preparation of these add-ons, I need to remove the plastic molded ones on the superstructure sections.
1-8-12updates023.jpg

1-8-12updates025.jpg

Aft Funnel

1-9-12---2004.jpg

The superstructure coming together…

1-9-2012009.jpg

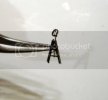
Aft Bridge radio antenna.

1-8-12updates028.jpg

1-8-12updates032.jpg

Cleaning up the Searchlight

1-9-12---2011.jpg

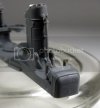
Where the Central Superstructure stands right now…
1-13-2012update026.jpg

1-13-2012update023.jpg


1-13-2012update021.jpg

A couple railing and ladders and this will start looking pretty good I think.

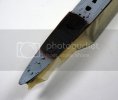
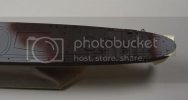
At this point I needed to paint a couple of sections on the deck before moving forward. These areas on the weather deck were painted a red/brown mix. I applied a base coat of Vallejo Rotbraun and then lightly dusted Badger’s Roof Brown.
1-13-2012update003.jpg

1-13-2012update006.jpg

Both these sections look a little dark right now. I will gradually lighten some of this as I go.

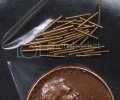
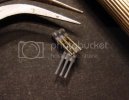
I will leave you with what I left off with last. “AA” I have a couple parts to add on to the guns onboard. Here is a little taste….changing barrels.

1/350 Barrels for IJN Yukikaze Class Destroyer (34pcs)
1069.jpg

Cut the old ones out, drill new holes and glue!!
1-13-2012update019.jpg

There are 3 or 4 more pieces to go on to each gun setup. I will tackle these as I Progress on with the other parts of the kit.

As always, thank you for stopping by!! ;)
 
T, the PE really adds to the overall look. I like what your doing, build, pics and explanations, great overall.
 
Nice T some day i will build a ship, your build is very cool the pe is nice too, oh I hope it was difficult ild hate for it to be easy on ya :)
 
Thanks Roy!!! Long ways to go on this still!! But it is the weekend!!! ;D With any luck I can get down stairs to get some painting in!! 8)

Thanks Spud...glad you got my back buddy!!! ::)......I think!! :-\
 
Coming along nicely. Those cannon barrels are near microscopic. Did you max out the zoom on your camera? ;D

The photos, explanation, and build are all fantastic. What is the length of the completed kit?
 
Hello Myke...Thank you!!! ;) Yeah, a bit tough to snap that pic...I will have to make a better effort at it once all the other pieces are on the gun. The overall length should finish out at 338mm stem to stern ;D
 
Geez, you've really made some strides on this T! Excellent fine detail work there Buddy. As you are demonstrating, even OOB there is quite a bit that can be done to improve the look. Adding the turning texture on the shafts is a prime example. Great job!

Something that is looking WAY out of whack to me (and it is completely the kit) is the size of the diamond plate on deck as it appears in photo 3. With the ladder for reference, those diamond nubs have to be running over 12" long. Maybe the kit has it right...I've never actually been on a ship like this one.

Keep up the great work T!!
 
Thanks a bunch for the kind words FT and thanks for hanging in there on the build!! ;)

As for the deck, I felt the same way until saw this.....

s286589.jpg

Picture is for discussion purposes only

This was a picture from 1947, just before the Yukikaze was handed over to the Chinese. The plate tread was HUGE!! ;)
 

Latest posts

Back
Top