TimM63
Well-Known Member
- Joined
- Mar 6, 2023
- Messages
- 928
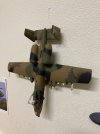
Funny you mention the A-10. I just completed one not too long agoI would glue and putty it. But that is just me. Interesting you just started that build. I just started a Tamiya A10 Thunderbolt II. I have basically the same problem with the fuselage. I glued, using rubber bands to hold it together for drying, and had my grandson spread Tamiya quick setting extra thin cement on the seam while I held the nose and cockpit area of the fuselage in the proper position to eliminate a gap. We will see shortly if the cockpit fits properly. I built 20 aircraft models back in the 90's and early 2000's. All of them either Revell or Monogram. I spent more time filling, sanding, and making stuff fit then actually putting them together. But that was the fun of it. Still is. I want to build a chopper next. Haven't decided which one yet. I will watch your build and see how it goes and get an idea of what I am getting into. Keep up the good work!
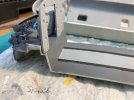
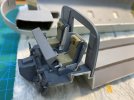
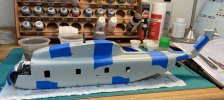
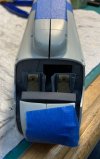
How does the canopy fit with the gap?Testing the fit of the body. There is one spot in front that doesn’t want to come together.
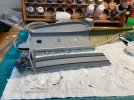
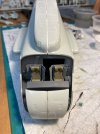
Not sure if I should sand down the back plate of the cockpit or glue and putty it.
I didn’t think about that. After checking the fit, the canopy fits perfect with the gap. I think I will just glue it and fill it with putty.How does the canopy fit with the gap?
You are welcomeI didn’t think about that. After checking the fit, the canopy fits perfect with the gap. I think I will just glue it and fill it with putty.
Thanks Down Time
")
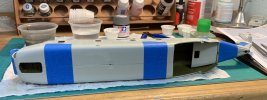
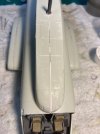
Good jobStarting to fill gaps.
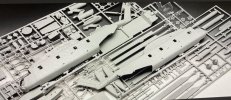
That's alot of gaps to fill. Has most of the revell kit been the same? I have only built one revell kit and it was fairly good for the joints.Starting to fill gaps.
Most of the parts fit together well. Just had the issue with the main body fitting around the cockpit.That's alot of gaps to fill. Has most of the revell kit been the same? I have only built one revell kit and it was fairly good for the joints.
Pantherman
Sprue-goo? Please explain.What about using "Sprue-goo"? I made some a few days ago in case I ever have any gaps to fill in.
A modelers best friend, youtube for details.Sprue-goo? Please explain.
I used a half bottle of Tamiya extra thin with spru trimmings added until reaching the correct consistency. Works a treat.Sprue-goo is a mixture of sprue tree shavings and glue. I use Testors orange tube glue. The glue melts the shavings and creates a goo that can be used as putty filler. I have used this solution many times to fill in gaps. It files and sands great and is the original color of the sprue tree. Plus it also acts like glue to bond the gap together.