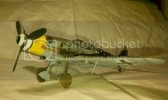
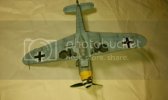
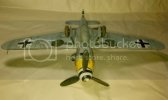
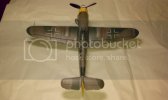
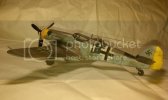
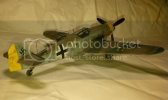
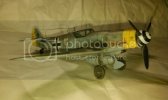
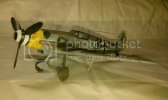
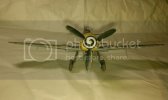
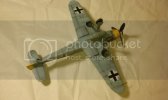
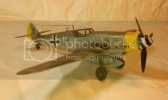
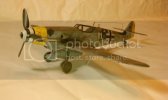
Revell 1/48 Bf109g10

RocketSilo

New Member
Joined
Jan 22, 2011
Messages
392
Decided to start annother build , and take a break from my seahawk.
The decals for the Seahawk were so bad that they were taking away from the model.
I have made progress tho and will upload the finished model in my Seahawk post soon.
I used vinegar on the decals and it really helped blend them in better.

This BF109 is my first ever 1/48 model, I've done a couple 1/72 and 1/144 planes and a few car models.
of course I had to pick something hard(to me a tleast) but it's coming along pretty good !
I'm almost done , the canopy is still masked off, I have to paint a few details and add the antennie bits and string.

The only problem I had was the decals were damaged beyond use they either got hot or moist.
I contacted Revell and have some on the way...finally.
I didn't want to wait so I masked most of the emblems and numbers, I was able to use a few small decals from the sheet..It's kind of a good thing I think the painted emblems came out really good !I even painted the spinner..lol

I tried a little weathering too.This was alot of fun so far.
Here it is so far with my cellphone pics .I'll post some proper pics when I'm done In the next couple days.


[attachment deleted by admin]
 
Looks pretty good. Looks like you had an issue with the canopy fogging, though.
Nice work on this.
 
thanks , the canopy is still masked with clear tape.
It's supposed to be a dark grey so I held off unmasking it
 
RocketSilo said:
I tried a little weathering too.This was alot of fun so far.

Looks quite good, looking forward to see more of this. The 109 is one of my favourite subjects :)
 
yay !...almost done !..all the final bits are on and I'm waiting for glue to dry so I can finish stretching the antenna wires.
I have a few tiny parts to paint and need to spray the exhaust smoke stains.

it's a good kit, the only fit problems I had were the lower intake was deformed a bit , I had to really clamp it hard ,followed by filling and sanding.
The front canopy section seemed too small and did not fit the back half .there are small gaps but not a deal breaker.

I managed to smear some glue inside the canopy trying to get the armor plate in place, it's that hypo cement so I was afraid to try and clean it somehow.. it's very clear but still noticeable.

I'm on my 3rd antenna mast , I dropped the first into the carped right away, made another from stretched sprue but it flicked across the table when I tried to stretch the wire, it wasn't cured enough. I made another from sprue , and letting it dry longer. what a pain !

If it happens again I will drill a hole in the canopy to actually insert the mast down into.

this evening I'll get some final pics up
 
RocketSilo said:
yay !...almost done !..all the final bits are on and I'm waiting for glue to dry so I can finish stretching the antenna wires.
I have a few tiny parts to paint and need to spray the exhaust smoke stains.

it's a good kit, the only fit problems I had were the lower intake was deformed a bit , I had to really clamp it hard ,followed by filling and sanding.
The front canopy section seemed too small and did not fit the back half .there are small gaps but not a deal breaker.

I managed to smear some glue inside the canopy trying to get the armor plate in place, it's that hypo cement so I was afraid to try and clean it somehow.. it's very clear but still noticeable.


I'm on my 3rd antenna mast , I dropped the first into the carped right away, made another from stretched sprue but it flicked across the table when I tried to stretch the wire, it wasn't cured enough. I made another from sprue , and letting it dry longer. what a pain !

If it happens again I will drill a hole in the canopy to actually insert the mast down into.

this evening I'll get some final pics up

i had the same issue as you are having with this kit right now, i did not even mess with the clear armored plate, in the canopy, that would have screwed up my canopy so bad...

i have built... 4 of these, and i can name most the flaws in the kit, and most of the upsides, the upside of this kit is its engraved panel lines allow for nice details, and it really is a well put together kit. however it does not come with a pilot.... and as you stated i also had issues with the intake scoop in the nose, it does not exactly come together evenly and sometimes requires some encouragement... also the gun ports in the nose above the engine, are poorly engraved, i always engrave those a little deeper, beacuse if you don't the paint fills them in a lot! the antennas have broken off all four of my BF-109s beacuse they are not so good and easily.... break.

so far your model looks awesome, better than my "more original looking" BF-109.
 
camera is at work , so I had to use my phone camera , didn't come out too bad .
the only mod was I added some little break lines to the gear legs.
I used createx paints and liquitex acrylic matt varnish for the final coat.
all the markings were painted on except for the "Rosemarie" and the real tiny stuff.
I also had to paint the prop spiral ..I could not get the decal to work at all...lol
the photos don't pick up the purple hue to the upper camo..it looks more brown in the pics

IMAG0143.jpg
IMAG0142.jpg
IMAG0141.jpg
IMAG0139.jpg
IMAG0138.jpg
IMAG0137.jpg
IMAG0136.jpg
IMAG0135.jpg
IMAG0134.jpg
IMAG0133.jpg
IMAG0129.jpg
IMAG0127.jpg
 
Thanks for the comments ,,I learned a lot from the forum and this project.

Now that I'm done ...I received my replacement decals from Revell..
Unfortunately, they are for a totally different model, a Bell Airacobra..!
If,I can find one on ebay missing the decals, I'm set
 

Latest posts

Back
Top