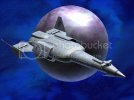
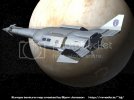
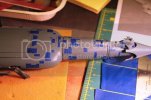
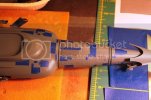
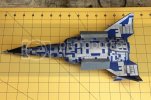
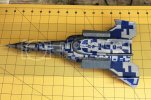
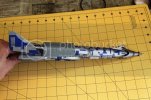
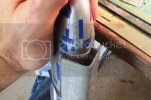
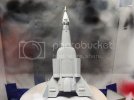
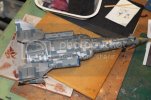
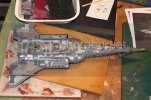
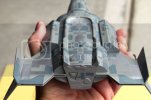
Leif Ericson Galactic Cruiser

Thanks for the nice comments guys. Yes, this is a lot of work and I'm really looking forward to when this build is done! It should make quite the display piece I think.

Today's progress...

Worked on a lot of little things today.

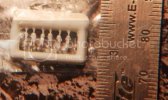
I wanted the launch bay doors to look like they interlocked so I cut 5 sections of thin styrene strip to 1/2" lengths and glued them to the edges of the doors staggered so they go together like woven fingers:
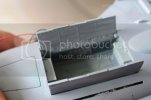
IMG_2337.jpg

I did a lot of work to finish up the sensor dome which I now looks less like a ball and more like an array.
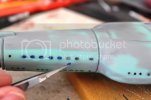
After drilling some holes and inserting some really small flat headed pins (delicate work) around the perimeter at the base of each facet of the rhinestone I drilled a hole thru the stem and up into the clear plastic of the rhinestone:
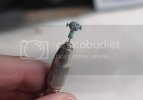
IMG_2330.jpg

The entire array including the rhinestone was painted with Mr Surfacer. After it dried I drilled a round hole in the center of each facet to allow light to shine thru.

A 3 inch length of .5mm fiber was glued up thru the stem into the bottom of the rhinestone:
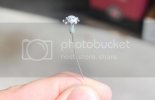
IMG_2331.jpg

A nail set was used to make small circular tape masks for the holes drilled out of each facet:
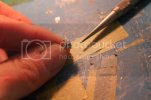
IMG_2332.jpg

The array was dipped in Future to seal the tape masks and, after drying, sprayed with Tamiya Bare Metal Silver:
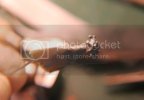
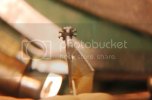
IMG_2333.jpg
IMG_2334.jpg

I'm hoping when the array is inserted in the opening atop the bridge the fiber strand, which bends in the direction of the main high brightness LED, will transmit the light up into the rhinestone causing the ports in each facet to glow.

Next I took some aluminum tubing of the right diameter to fit over the barrel of the phaser projector and beveled one end with a grinding stone spinning in my dremel's flexi-shaft held in a Panavise.
Then I cut the metal tube in my mini cutoff saw and glued it to the plastic tip of the phaser projector:
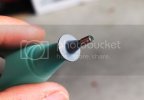
IMG_2335.jpg

It's a small thing I know but I think it's a nice upgrade over the simple kit part. The metal gives it more of the appearance of a gun barrel now.

Moving to the stern I made a cover from two thicknesses of styrene sheet and epoxied it to the slide switch that controls the launch bay lights:
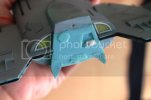
IMG_2336.jpg

The last thing I did was to mix up some AVES and fill in some major gaps in the stern and along the nexus where the upper and lower wingtips meet.
I also smoothed the seams in the forward part of the hull alternating between sanding sticks and my seam scraper. Then I covered the seams with Tamiya polyester putty and set the whole thing aside to dry for the night.

Comments welcome!
 
Today's update...
Work progressed with puttying and sanding....
Blue tape was used to mask off the windows for application of Tamiya Basic polyester putty:
IMG_2340.jpg
The model was puttied with AVES, sanded, puttied with Tamiya Basic, sanded, and brushed with Mr Surfacer:
IMG_2338.jpg
The stern after cleanup with needle files, puttying and sanding:
IMG_2341.jpg
Lloyd over on the Tholian Web forum asked if I was making the basketball hoops for the launch bay so...
Solid core tinned wire was wrapped around the end of a dental pic to make loops. These were then glued into holes drilled into two tiny styrene backboards:
IMG_2342.jpg
Leftover decals from my stash were applied to make the red squares above the hoops on the backboards:
IMG_2343.jpg
The finished backboards with hoops were coated with Krylon and set aside to dry:
IMG_2347.jpg
The nosecone shield was glued to the hull with styrene cement.
I noticed some gaps between the webbing on the inside of the shield and the hull so I cut some lengths of Evergreen channel tubing and slid them into the gaps before brushing them with Ambroid ProWeld:
IMG_2345.jpg
I needed to cut oval and round window masks from tape for the hull, neck and bridge so I ground 1/8" diameter brass tubing to a sharp edge with my dremel's grinding wheel.
Then I squeezed the 1/8" tubing with pliers to an oval shape. It was the perfect size for the windows.
IMG_2355.jpg
The window masks were punched from blue tape using a tack hammer and placed over eack window with tweezers:
IMG_2353.jpg
The window masks all in place and coated with Future to seal the edges:
IMG_2356.jpg
Lastly, the engine shroud grills were coated with primer and sprayed with Tamiya Bare Metal Silver:
IMG_2346.jpg
Thanks for all the kind words everyone!
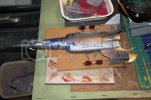
 
Getting close to the end of this one, and it will be a beauty. Those basketball hoops will just add that extra bit.
 
Can definitely see the end-line on this one coming.
Nice touch with those tiny little basketball hoops
 
Stuff from last night...

I finished masking the cracks around the bay doors and the slots where the engine shrouds attach and the ion engine tabs slide into the hull. Then I gave her a spray with Tamiya Ocean Grey 2 for the first coat:

IMG_2373_zps37e81385.jpg

I had found this satin fine mesh ribbon at Michaels the other day and thought it might work for making nets for the basketball hoops:

IMG_2357_zps959b7bc6.jpg

I cut a square of it and wrapped it around the end of my dental pick, gluing it together with craft glue to form a tube:

IMG_2358_zpsca4f8a57.jpg

After the glue dried I carefully trimmed two tiny nets and glued them to the hoops with white glue:

IMG_2372_zps71f9d232.jpg

That was it for last night.

Thanks for reading!
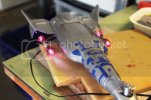
 
Today's progress...

Doesn't look like I did much but if you've ever sat for hours cutting small bits of tape and carefully placing them on a model while measuring with a ruler and drafting calipers to achieve symmetry between the port and starboard paneling then you'll understand...

IMG_2375.jpg

The drawings I'm using as a guide are CGI images created by artist Paul Lloyd of the I.N.S.S. MacArthur. I really like the look of the hull paneling:

Loyd_macarthur4.jpg
Loyd_macarthur.jpg

Here is as far as I got today. I'm about halfway there with this first masking:

IMG_2378.jpg
IMG_2379.jpg

What I can't divine from Mr Lloyd's drawings I make up as I go along.
Aztec paneling really is a matter of gestalts I think.

The engine shrouds were primed then sprayed with Tamiya Ocean Grey 2:

IMG_2382.jpg

After I finish masking off this layer I'll seal the tape with Future and give the hull a shot of Krylon Gloss Black lacquer followed by a coat of Tamiya Bare Metal Silver.
I'll spray the shrouds first and use light passes with the Krylon just in case the Tamiya and Krylon paint react badly together.
I can easily remove any messed up paint layers from the shrouds; repainting the main hull would be a big pain as you can well imagine.
Anyway, assuming all goes well with the black and silver layers I'll mask off the silver panels.
Then she gets a layer of Tamiya Medium Sea Grey followed by more masking and verbal humiliation, followed by evening punishment...

Woops! Sorry... where did that come from? Must have been channeling Michael Palin on SNL there for a moment... anyway...

Then it will be time to remove the masks (some of the dark grey masks will stay where I want stripes) before the final coat of thinned down Model Master Camouflage Grey enamel is airbrushed on to unify the layers and create the right level of subtlety to the paneling.
I may give her a quick overall brush of Future acrylic to act as a barrier layer but I really think I'll be fine laying enamel right over the lacquers coats.
Any of you master painters out there with an opinion on that please chime in with any advice you'd care to offer.

As always, thanks for all your comments!
 
eh up buddy,wow you`ve done a proper good job on this build mym8,it`s mint!top marks ace :eek:
 
Okay fellow addicts, here are today's updates...

After masking the Ocean Grey panels I sealed everything with Future and gave her a coat of gloss black laquer and set aside to dry:

IMG_2383.jpg
IMG_2390.jpg

The shrouds were given a coat of Bare Metal Silver over the dark grey masks:

IMG_2385.jpg

Followed by masking the silver panels:

IMG_2391.jpg

After sealing with Future the shrouds received a coat of Tamiya Medium Sea Grey:

IMG_2397.jpg

After the black lacquer had dried I did a little masking over the black where I want some black stripes on the finished model:

IMG_2396.jpg

I wanted to show this image as a reminder of what a great designer Matt Jefferis was.
I always loved the low angle shot of the Enterprise between the nacelles and over the hump of the bridge looking forward into the unknown.
This angle kind of reminds me of that:

IMG_2394.jpg

To wrap up today's post here are some pics of the finished Scout Ship.
All that's left is a few layers of Dullcote:

IMG_2398.jpg
IMG_2399.jpg
IMG_2406.jpg
IMG_2403.jpg
IMG_2407.jpg

Thanks for reading!
 
She's going to be gorgeous when you get her done.
My hat's off to you for the work you've put into this
 
Thirded!

This is outstanding mate. I'm a big fan of your work and really appreciate you taking the time to describe your methods. Fascinating stuff! 8)
 
Igard said:
Thirded!

This is outstanding mate. I'm a big fan of your work and really appreciate you taking the time to describe your methods. Fascinating stuff! 8)

Thank you sir!

Small update from yesterday and this morning...

The model was sprayed with Tamiya Bare Metal Silver after the dark grey panel masks were sealed with Future.
The silver really went on nicely over the gloss black :

IMG_2410-1.jpg
IMG_2409-1.jpg
IMG_2408-1.jpg

The ion engine wires were trimmed prior to soldering. I also started some of the masking for the silver panels:

IMG_2411-1.jpg

Once the engines are wired in and glued to the hull it will be time to attach the shrouds.
They are fairly rigid and will require some flexibility to slide into the slots in the hull.
I may end up having to heat them along their glue joints to get them to flex.
This will be a delicate operation.

Wish me luck!
 
Today's updaste...

Now that the hull is painted silver it's time to attach the ion engines and their shrouds to the hull...

After soldering the power was turned on to see if the engines still lit up:

IMG_2412.jpg

Oh yeah... they still lit up!

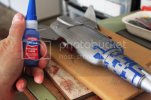
After brushing on some Liquid Electrical Tape to the solder joints and letting it dry for 15 minutes or so, I broke out a bottle of Locktite "Professional Liquid" Super Glue to attach the ion engines to the hull.
Never used it before but it said it dries fast and it did!
No kicker needed with this stuff:

IMG_2417.jpg

I removed the cardboard paint masks and slid the shrouds into place laying strips of aluminum foil tape down where they would slide over the hull and into their slots.
The tape was to protect the silver paint from scratching.
Here's the Leif after the shrouds were locked down with Locktite applied carefully along the top slots to get the tabs to stay down in their slots.
I think I was getting some pushback from all the wiring inside the hull along the sides of the launch bay.
Once I dabbed on a little of the Locktite though and forced the shrouds down tight to the hull it only took about 5 seconds for the glue to cure.
I didn't need to glue the tabs in lower slots at all:

IMG_2428.jpg

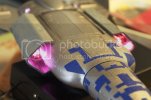
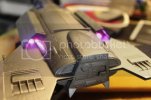
I did a quick light test with the engines powered up inside their shrouds:

IMG_2421.jpg
IMG_2426.jpg

I have to say I'm pretty pleased with how they look.

Once I've finished painting the hull I'll attach the brass PE engine grills to the front and back of the shrouds.
They are painted silver and will look awesome with the engines lit up behind them.

Now to finish masking the silver panels...

Thanks again for reading!
 
Progress continues...

Frank2056 over on Hobbytalk was kind enough to send me these 1/500 scale Preiser figures:

IMG_2430.jpg

I'm going to postulate that the Leif has force field technology that would allow crewmen to occupy an open launch bay without the need for space suits.
Alternatively, I might go ahead and have them in some kind of environmental suits in the bay; perhaps playing 3-on-3 basketball with the doors open... call it "hoops under the stars" or something.

Anyway, back to the Leif...

I decided that since the nose of the scout ship had a black anti-glare panel in front of the windows the Leif would too so I masked off the upper nose shield in preparation for spraying with Testors flat black enamel:

IMG_2431.jpg

The anti-glare panel after painting:

IMG_2432.jpg

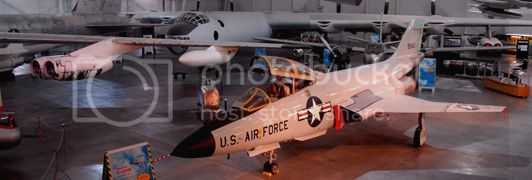
I also think it appropriate that, as the Leif is part of the Strategic Space Command which evolved from the Strategic Air Command, it should have something in common with the aircraft of the latter.
As seen in the photo below the black nose panel was a common characteritic of Strategic Air Command aircraft:

175-eFLYER-FA01-00.jpg


Here is the ship after finsihing all the masking of the silver panels:

IMG_2434.jpg
IMG_2435.jpg
IMG_2436.jpg

I added some strip styrene just inside the engine shroud openings so when I glue the photo-etch grills in place there will be something to glue to where the grills meet the rounded hull:

IMG_2438.jpg

Test fit with one of the forward grills:

IMG_2439.jpg

The "glue strip" is painted silver and should also help block any light from bleeding thru when the engines are lit up.

Here's the ship now after I sprayed her with an overall coat of Tamiya Medium Sea Grey:

IMG_2440.jpg

Next up... removing the masks!

Thanks for reading!
 
The Leif Ericson... UNMASKED!

It took like 3 hours to remove most if not all of the masks and finish the touchups.
I left the black nose panel masked as well as the upper tips of the wings which are be black as well.
I also left the silver vents on the sides of the shrouds masked. They may end up being steel.
I may spray the black wingtips with an overspray of the finishing coats to mute the black; still haven't decided on that but I think black might look nice on the tailfins to tie in with the black on the nose.
Anyway here are the pics...

Top:

IMG_2453.jpg

Bottom:

IMG_2454.jpg

Side:

IMG_2452.jpg

Forward top:

IMG_2450.jpg

Forward bottom:

IMG_2455.jpg

Rear top:

IMG_2451.jpg

Rear bottom:

IMG_2449.jpg

Before I airbrush the final unifying coats I'm going to do some experimentation and spray a piece of thin styrene sheet with the 3 colors medium sea grey, ocean grey, and silver) and try out overspraying with a mix of primarily thinned down light grey; I say primarily since I'm thinking light grey mixed with a little steel for a metallic look.

See ya!
 
Some nice panel work here.
Light coat to tone down the contrast, and it'll look frigging fantastic
 

Latest posts

Back
Top