Leif Ericson Galactic Cruiser

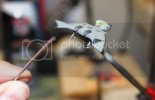
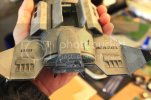
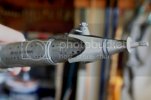
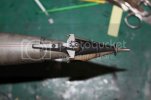
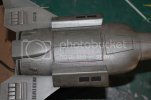
Spent some more time on the scoutship yesterday. I wanted to jazz up the stern of the ship a little by adding engine bells so I took some 1/16" diameter aluminum tubing and cut off about a half inch length to fit in my dremel's chuck. Then I spun it while shaping it with my pointy scribing tool and needle file. I ended up with two 1/16" long or so tapered engine bells which I sawed off using my miter saw and glued on top of the original kit exhaust openings.

Here's how she looked before:
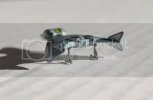
IMG_2403.jpg

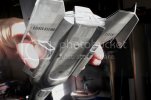
And after:

IMG_2540.jpg
IMG_2541.jpg

It's a nice little improvement don't you think?


Here's a shot of the underside showing the black gear wells which were made from some leftover black decal material out of my stash:
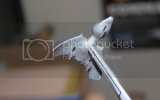
IMG_2545.jpg

Moving on...

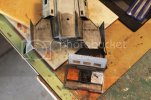
The PE grills had some small gaps around their edges where I glued them to the shroud plastic so I filled them with AVES.
Once the AVES dries I brushed on some Tamiya silver leaf around the edges and let dry.

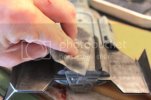
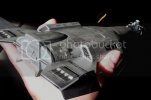
Decaling went well with some minor tweaks needed to get some of the stern decals to fit. I used MicroSet under the decals to snug them down followed by MicroSOL on top:
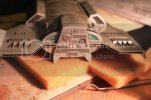
IMG_2543.jpg

One nice thing was the uppermost decal on the stern had a squarish spot right in the middle that I could punch out and fit right over the red stern light in the top center of the stern plate.
Serendipity to be sure and it looks great IMO.
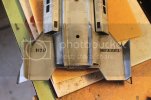
The wings got the "UNITED STATES" decals starboard side on top and port side on the bottom. The number "8121" can be seen fuzzily on the opposite wing surfaces top and bottom. I went with this number as an homage to Matt Jefferies who base born on 8-12-21.

The upper surface and sides of the neck and shrouds got their decals:
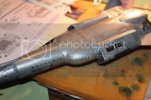
IMG_2544.jpg

I had to modify the red stripes framing the launch bay, shortening the ones front and back and using the excess to extend the stripes on the sides of the bay opening. Nothing I'm sure you guys haven't had to do from time to time.

Today I'll finish up the decaling and let dry overnight.
Then I'll seal the decals with Glosscote followed by a shot of DullcoteThen I'll do a little weathering.
After that, more Dullcote to seal and, if it's too flat, I'll hit her with Krylon clear Matte spray which is more like a Testors satin finish to my eye.
Later on today or tomorrow I'll add the crew figures to the bay.
I'm thinking of using a clear water based craft glue made by Elmer's to glue their feet to the floor of the bay rather than CA.
Lastly, I'll dab the windows with Future to make them glossy again.
Then it'll be time for finished pics.

Thanks for reading!
 
Today's pics...

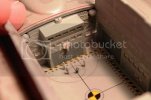
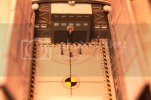
Space hoops...

Brass wire used to apply CA to feet after initial positioning with tweezers.I changed my mind about the Elmer's:

IMG_2550.jpg


Cadet takes a foul shot playing half-court basketball in the open bay under the stars...

IMG_2552.jpg
IMG_2553.jpg
IMG_2551.jpg

With VEGA scout ship:

IMG_2555.jpg
IMG_2554.jpg

The VEGA vacates the bay for departmental league games.
It has also, on ocassion, rescued overzealous players who underestimated the strength of their jumps and left the bay entirely on overzealous dunk attempts! After three such incidents the Captain issued an order that "Space Jams" would only be allowed with the doors closed...
 
Thankee kindly peza!

Well I finished the weathering with black pastel chalk over a coat of Dullcote then sealed with another shot of Dullcote. I wanted the ship to look like she'd been in service for a decade or so.
I gotta say I am pretty good at the subtle streaking thing. The Leif is capable of atmospheric entry so it is absolutely appropriate that she bear some evidence of that.
It's amazing how the pastel chalk muted and blended all the grey and silver hull paneling.
Applying the pastel chalk with a moistened sponge applicator then rubbing with a soft cloth really gave the hull a nice patina-somewhere between steel and titanium.
She looks altogether menacing.

I also gave the launch bay floor a thick coat of Future which made the drops of CA visible at the feet of the basketball players disappear.
I may just leave it glossy; it looks kind of neat with light reflecting off of it rather than having a flat finish.

I have some pics of the weathering process to post.
Can't wait to show you guys!
 
Weathering pics...

I use Tamiya Weathering Master pastel chalks. The color on the container says "Gunmetal".

Applying the chalk with a moist foam makeup applicator:
IMG_2556.jpg

Rubbing with an old dry handiwipe. For nooks and crannies I use a microbrush and q-tip. If the weathering looks too heavy it's easily wiped off with a little water:
IMG_2557.jpg

After weathering:
IMG_2558.jpg
IMG_2559.jpg
IMG_2560.jpg
IMG_2564.jpg
IMG_2561.jpg
IMG_2562.jpg

The chalk is sealed with another coat of Dullcote.
Today I'll go back and touch up the windows and impulse engines with Future.
 
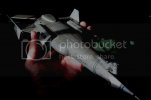
Well I finished her up at lunch today. Brushed on some Testors chrome paint to the little diddly-bobs (pinheads) on the forward sensor array. I even added a touch of chrome to the tops of the crewmen's helmets. They really pop now. The scout looks great in the bay with its shiny floor. Here are a few pics of the finished ship to hold you over until I can take better ones this weekend with better lighting and backdrops...

IMG_2586.jpg
IMG_2585.jpg
IMG_2587.jpg
IMG_2580.jpg
IMG_2581.jpg
IMG_2572.jpg
 
Oh' wow, Trek that came out sweet. Nice touch with the light streaking on the nose cone if my eyes don't deceive me. You have some mighty fine work on there son.
 
Wow, aftermarket parts for the SSC starship...makes me wish I'd never given way my kit! The words just stuck in my throat how cool and long overdue the aftermarket goodies are!
 
She's an awesome looking....Frigate?
Great job on her!
Was there just one set of P.E. parts?
Looks fantastic. Waiting for the better final pix. :) ;D ;D ;D
 
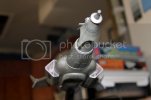
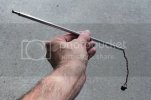
In preparation for taking the "good" pics I decided I wanted something other than the kit stand for shooting purposes so I rigged up an aluminum tube with a DC power plug on one end wired to a power jack on the other:
IMG_2590.jpg

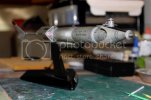
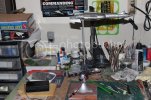
The "power stick", if I may call it that, is clamped in my portable vise which is mounted to a heavy wooden block. The battery box plugs into the power jack wired to the stick. Here's a picture of the setup:
IMG_2591.jpg

With the lights lowered I turned on the juice. Success!
IMG_2594.jpg
IMG_2595.jpg

I also took a second plastic tube that fits over the aluminum stick and painted it bright green for when I take the greenscreen pics.
I plan on taking a few pics on the stand with a neutral backdrop, some against my black starfield, and some against my greenscreen in case any artists out there want to do some composites; unfortunately, I don't have any software like Photoshop myself so I'm hoping someone out there would like to collaborate. I plan to make a short video too.
 
Re: Leif Ericson Galactic Cruiser-FINISHED PICS!!!

Hey there fellow addicts! So this weekend I overdosed on photography and took 143 finished photos and 1 video. I had to stop when my battery ran down. Here's a sample from the "space" pics... I'll be posting more tomorrow...

LeifEricson001small.jpg
LeifEricson002small.jpg

LeifEricson015small.jpg
LeifEricson017small.jpg
LeifEricson024small.jpg
 

Latest posts

Back
Top