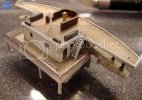
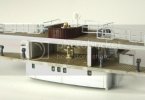
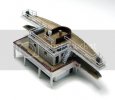
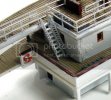
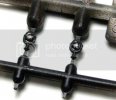
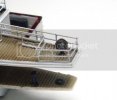
Hasegawa 1/350 N.Y.K. Line Hikawa Maru

LOL...That works fine Luigi!!! ;) Thank you very much!! Having some fun here..."Name of the Game"!!! ;D
 
I appreciate you stopping by Q...thank you very much for the kind words!! ;)
 
What can i say that hasn`t already been said bro.............apart from, fabulous, sensational,superb, brilliant, ya know, the usual thoroughly deserved comments that ya builds require ;) ;), awesome work buddy and keep her rollin` ;D
 
This is neat T. I dig those little steps. Should be nice to look at when complete. I gotta do a ship someday.
 
Hiya Boots!! Thanks for swinging by and for the kind words!! Shucks...you making me blush!! ::)

Hey Matt!!! Thank you!! As much as the PE can be a PITA from time to time, it's almost a necessary evil to some degree on the ships...railings at least! The steps are pretty nice...Hasegawa makes an exceptional Photo Etch Set for this kit...nothing flimsy at all!! That is half the battle...I have picked up railings before and the bend right over under their own weight!!! Would love to see a ship hit your bench someday!!! :eek:

Should be able to have another update on this tomorrow.....still sluggish after the Thanksgiving Day supper!!! ;D
 
Hello!!

Sliding this one in right at the beginning of this long holiday weekend...for the US base individuals anyway!! ;) Happy Thanksgiving!!!

OK...onto another update.

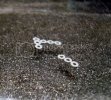
While working on the bridge section, lots of the tiny parts needed to be prepped for installation along the way. FIrst up, I needed to get a jump on some of the Life Rings. These are attached to the backside of the bridge, so they needed to be constructed and then painted.

SMAupdate9022.jpg

Yes, these are pretty small. Each ring is made up from 3 PE circles; using PVA glue to fasten together these were not too bad to put together.

SMAupdate9024.jpg

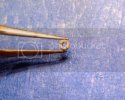
I found it easier to slide the rings over on leg of my tweezers so they can be detail painted.

SMAupdate9025.jpg

SMAupdate9034.jpg

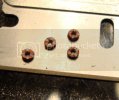
Made a couple extras as I was in the mood to paint!!

Next came buttoning up of the bridge superstructure. All the deck sections just about glued together, now came the railing and ladders.

SMAupdate9011.jpg

SMAupdate9017.jpg

SMAupdate9070.jpg

SMAupdate9061.jpg

SMAupdate9078.jpg

All the sweet little details that were added to this kit start to stand out. One of the last tiny details to be added to this section is the two search lights that flank the top of the bridge. These were drilled out already in the kit, which made my life easier.. ;D I added a dab of Silver paint to the inside and then one small blob of Krystal Klear, with a toothpick tip, to the inside of each life. When the Krystal Klear dries, it is virtually...well, crystal clear ;)

SMAupdate9052.jpg

Here is the light finally installed.

SMAupdate9074.jpg

That was all I could muster at the moment. I will attempt to get this section mounted into the ship this weekend as I prepare the entire facade of the bride's superstructure.

As always, I thank you for having a LQQY!!! ;)


[attachment deleted by admin]
 
Wow, I would have been impressed with the life rings alone. But noooooo, you gotta hit us with those search lights!!! Looks like your the one in the spot light though.

Great Job man. I hope you had a very happy thanksgiving.
 
Thank you Adam!! LOL...Thinking the toughest part on the rings was the painting. ::)

Happy Thanksgiving to you too!!! ;)
 
LOL....Thanks John!! Not torturing myself with the PE and plastic....it the rigging will be the ...ummm, "fun" part!!! :p

Thank you very much Luigi!!! ;)
 
I still have a whole Sunday in front of me but as this long weekend winds down it is time for another quick update one this one.

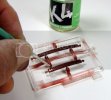
After assembling the larger section of the central deck and finishing up the bridge superstructure it was time to get the facade of the bridge's superstructure underway. First a little detail painting need to be done on the clear window sections. There is a thin molded line that surrounds each window frame. Each one of these needs to be painted. Tough job if I had to go at this by hand. Fortunately I have some K4 "Paint Off". This stuff is great in small tight areas, like cockpits, for the removal of paint to show details earlier painted and then sealed. In this case, I painted the entire clear piece in the Mahogany color I was using for the railings and steps. Next, by taking a fine pointed brush, applied some of the Paint Off to the recessed glass sections and in second, using the brush, I was able to remove the paint leaving the paited exterior.
SMAupdate9049.jpg

The window section was placed into the facade and glued, using Krystal Klear. I needed this to sit for a few while it dried, so it was on to some other details.

First came some of the railing work and Davits, the curved thingies that hold up the life boats, and work my way around the entire top edge as these piece almost needed to be put on in order by how they are located to one another.
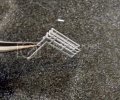
SMAupdate10024.jpg

Mind the bench....which is the kitchen table. I prefer to do most of construction here as I have access to everything and everyone on the house from one central location...if I am needed. ;D
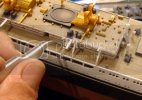
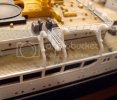
SMAupdate10020.jpg

SMAupdate10027.jpg

Some precarious bending on the stern area but went well with the aid of a couple small paint brushes to get the shape right.
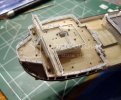
SMAupdate10038.jpg

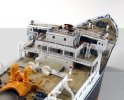
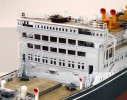
It was time to attach the bridge section and facade now. These two section sort of interlock; the facade needed to line up and almost lock into each of the decks along the front.
SMAupdate10054.jpg

Things begin to shape up quickly once most of the deck components come together.
SMAupdate10059.jpg

Not to easy in this last picture to see the dark blackish-red color of the window frames, but they do show up just enough to offset the big white face of the facade of the bridge.

I have some life boats that need to be attached at the stern with some additional railing work and I will be able to start the final leg of major construction. More life boats and small sections of railing and stairs need to be fit throughout along with remaining deck bits.

As always, I appreciate you stopping by to have a look see!!! See you soon with another update!! ;)


[attachment deleted by admin]
 
Thanks gents!!! LOL...I have not tried that yet Adam!!! ::) Let me get the clear coat on here and I will give it a shot!!! :eek:
 

Latest posts

Back
Top