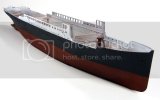
Hasegawa 1/350 N.Y.K. Line Hikawa Maru

Not yet you haven't Luigi!!! ;D But there is a thought you know....abandoned ship rusty and all...oh yeah, with a tree growing on it!! LOL!!!
 
TRM said:
Not yet you haven't Luigi!!! ;D But there is a thought you know....abandoned ship rusty and all...oh yeah, with a tree growing on it!! LOL!!!

;D ;D ;D

Lol, I think it's more likely that Chris will build a spaceship than me building a floaty thing ;)
 
adampolo13 said:
T, you really would rust anything huh? Hahaha
Pretty much Adam!!! ;D


Time for a little update on this!!

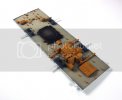
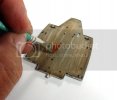
I was able to finish painting all the deck fitting on the upper most mechanical deck section. I needed to mask a little more to prepare or adding the orange color to the molded mechanical parts.

SMAUpdate5005.jpg

After removing all the tape...

SMAUpdate5047.jpg

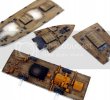
Now that the preliminary paint work is complete on all the decks, I attacked the remaining decks that nneded weathering.

SMAUpdate6014.jpg

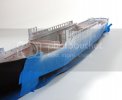
The color and wethering are beginning to give a nice clean look to these decks. I needed to now turn my attention to the hull itself. After masking (yes more... ::) ) of the lower Hull Red section I laid down a nice flat black coat, allowed to dry a bit and masked yet again to spay some white to the upper section above the forst deck, or weather deck if you will.

SMAUpdate6027.jpg

Now she begins to come alive a bit more.

SMAUpdate6033.jpg

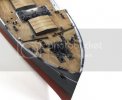
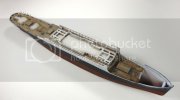
Finally, I could not resist any longer. I needed to dry fit the deck sections to see how this will look. I think there is a nice contrat happening between the exterior hul piece and the weathered decks.

013.jpg

Moving forward, I will assemble a few more of the ladder PE pieces and begin assembly of the individual cabin was fro each deck.

As always, thank you fro stopping in and taking a peek!!
 
Wow, that decking looks great all dry fit in there!!! :eek: You make it look so easy. Just out of curriousity, what type of white did you use for the weather deck, what color was under it, and how many coats did you have to lay down before it came out like that?


P.S. I hope your secret santa sends you some masking tape along with a kit! By the looks of it you certainly will need some!!! Hahaha
 
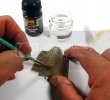
Thanks Adam!! The decking color was achieved with pre-shading under a base coat of Tamiya Deck Tan. After this dried, I laid down a heavy , well mixed wash coat of AK's Streking grime. I let this sit for about 10 minutes. Then using a clean flat brush I toned the dark color down by wiping the brush barely damp with spirits...the term would be humid with spirits. This leaves the darker color of the wash in the corners and lightens the open areas all the while, cleaning the brush off on a clean paper towel. I then waited about 10 or 15 minutes more, letting the AK set up again and with the same humid brush, turn the brush in the thethin side direction and applied lighten streaks. Wait another 10 minutes and with the brush almost dry, blend everything.

This might help....

SMAUpdate6004.jpg

SMAUpdate6008.jpg

Thank you very much Luigi!! I am hoping so!! LOL...still to early to tell!! ;D ;D
 
Thank you very much ER!!

A small update.

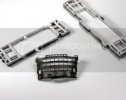
I was able to take some of the superstructure parts and begin a little painting. First I wanted to darkrn the lower edge with some pre-shading.

SMAUpdate5013.jpg

After some white went down I began a slightly laborious job of picking out the Mahogany door.

SMAUpdate7010.jpg

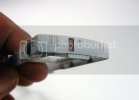
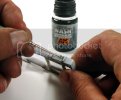
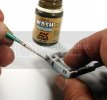
I already drilled out all the round portholes on the ship and the walls of the superstructure, however, the square pain windows need a different approach. Rather than trying to thin these down until I could cut the individual pains our or cutting these out and losing the muntin details...I chose to try the coloring method. I slightly mixed up some AK Brow Blue Wash which is used on Panzer vehicles, a dab with a fine point brush in each pain and the capillary action takes over and instant window.

SMAUpdate7012.jpg

A quick wash with AK OIF & OEF Wash and I can progress with all the little wall sections.

SMAUpdate7013.jpg

With the first section of walls painted and ready to go, I could not resist giving this another dry fit.

SMAUpdate7035.jpg

OK, many decks to go here and then stairs and railing can begin to be installed.

As always, thank you for tuning in!!


[attachment deleted by admin]
 
Sir, you do magic with your ship building skills. I never would've thought that the building of a non-military (as in no guns) ship would be something I would follow. But, nope, you've got me hook. I am truly fascinated with your results and I am eagerly waiting for the next installment in your log. Keep up the great job and thank you for sharing your techniques!
 
Almost ready for her maiden voyage!!! Whatever you do, don't let Rob smash a bottle of champagne against the bow! Excellent job by the way!
 
bravotwozero said:
Sir, you do magic with your ship building skills. I never would've thought that the building of a non-military (as in no guns) ship would be something I would follow. But, nope, you've got me hook. I am truly fascinated with your results and I am eagerly waiting for the next installment in your log. Keep up the great job and thank you for sharing your techniques!

Thank you Bravo!! You are too kind! I think it is great to share ideas sometimes...if someone takes something, let say what I have done, and use it or even better...improve on it...sweet! Myself or someone else might be able to improve on that one too...and so on!! All in having a good time!! Thanks for following along!!

Thank you very much Q, appreciate it!!! ;)

Thanks Adam!! LOL...might have to be one of those small bottles you get on a plane when traveling!! ;D

More to come soon!!! ;)
 
Looking absolutely Splendifferous my good man ;D ...The Hull looks awesome ,as does the decks .

Dont yer just love Streaking Grime ;D ;D one of my favourite colours ;D ;D ...Oh ...and Winter Streaking Grime ,so many uses for that too ;D

Keep it up ;)

Chris.
 
Thank you kndly Mr. S!! Streaking and the Winter Grimes are staples!! Like you say, so many uses!! ;)
 
LOL...I am surprised you had time to stop by in the first place John!! LOL!!! Thank you btw!!! Just having some fun!! Not get back and take care of the family!!! ;D ;D ;D ;D ;D ;D
 

Latest posts

Back
Top