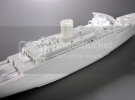
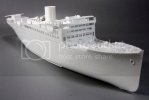
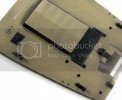
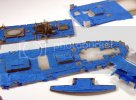
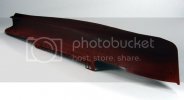
Hasegawa 1/350 N.Y.K. Line Hikawa Maru

LOL..Not yet Ken!! :eek: I know how you love Photo etching, I was going to drop the PE off at you house and let you lend me a hand!!! ;D ;D ;D
 
Moving forward here, I have assembled the hull and have started assembly of the various deck and components. But first a little PE process.
SMABuild2012.jpg

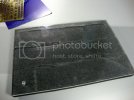
I like to use a piece of Plexiglass with some 1/2 inch foam gasket on the bottom to work with Photo etching. The foam keeps the Plexi from sliding on the bench surface and the smooth hard surface of the Plexi is ideal for cutting out PE sections.

With a sharp #11 or flat razor,taking your time, I cut the small sections out. The black base of the foam showing through the Plexi make it real easy to see the pieces you are cutting off the tree.
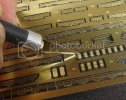
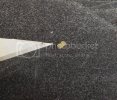
SMABuild2002.jpg

SMABuild2005.jpg

To aid in setting the tiny piece of PE, I use a tooth pick to set a tiny drop of CA where I want to install the piece, then turning the tooth pick around I dampen the end of the toothpick and place it on the piece of photo etching.
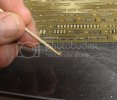
SMABuild2006.jpg

The dampness on the toothpick clings the little pice to the end and you can then place the piece where you want.
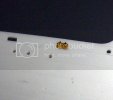
SMABuild2010.jpg

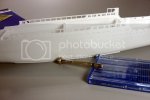
Taking breaks from working with all the tiny PE, I jump over to drilling out the portholes in the side of the hull.
SMABuild2013.jpg

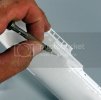
With pin-vise in hand and a selection of drill bit sizes to accommodate the numerous differences in the sizer of the portholes, I started drilling away!
SMABuild2019.jpg

Here I am showing the fruits of my labor. This extra detail will go a long way in bringing out that depth to the model when complete.

SMABuild2016.jpg

So in between preparing PE for installation and drilling the many portholes out, I began what I was to have been a daunting task, construction of the walls for the deck sections. I was wrong though.
SMAUpdate3015.jpg

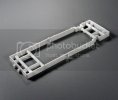
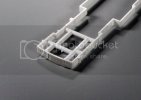
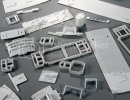
As you can see in the pictures, the sections have a really nice cross section bar system that install inside all the deck sections. This not only make the section a lot stronger with an impeccable fit to the corresponding deck sections, this also make construction a snap!!
SMAUpdate3016.jpg

So after a couple of hours, there it was, the walls and deck section....
SMAUpdate3012.jpg

...just fall together!!

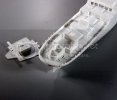
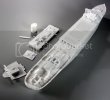
Here I have a dry fitting session to check things out. This shows you how great the fit (and Kit) are.
SMAUpdate3009.jpg

SMAUpdate3010.jpg

SMAUpdate3008.jpg

SMAUpdate3002.jpg

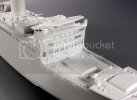
This is a prime example of why I have not glued anything but the hull and only the wall section together. In this shot you can see several of the floors on all the decks. These will be painted soon and this would be impossible after they are glued.
SMAUpdate3005.jpg

A few more deck pieces and I will be ready to begin to start the deck painting.

More to come soon! Thanks for tuning in!! ;)

[attachment deleted by admin]
 
This looks neat so far T. Should be nice all wethered up. I assume there will be some wethering?

I can see patience is a virtue here. Specially thinking of all the PE. I would be constantly needing to remind myself there is no rush. Let us know if you have any more grey hairs when your finished. ;D I'm kidding, I don't think it's that bad.
 
Very cool!
I'm a SciFi guy but I'll be following this closely. This kit seems like a lot a fun to build.

Cheers
 
Thank you very much gentlemen, for the kind words and for following along on this!!! ;)

A little bit of an update here.

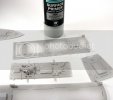
I was able to get the deck sections cleaned and ready for some paint. It's going to be a lot easier to paint them now than after the construction. First a little primer.....

SMAUpdate4012.jpg

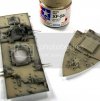
After a little pre-shading I shot some Tamiya Deck Tan for starters.

SMAUpdate4021.jpg

And finally, after some careful masking, I shot some Tamiya Dark Gray on some deck fixtures.


SMAUpdate4028.jpg

I will be working on some deck weathering next and then I will be close to installing the first couple of decks into the hull section.


Thanks for stopping by and more to come soon!!!

[attachment deleted by admin]
 
Thanks Q &MJ!!

MJ, careful....LOL!!

SMAUpdate4023.jpg

:eek:.......................... :-X........................ ;D
 
Thank you Adam!! LOL...think you are right!! ::) The same process is being done to each of the decks, the top mechanical deck where the funnel is located will be the worst as there are tons of little details pre-molded into it :eek:....might have to invest in the Blue Tape Company soon!! ;D
 
T, does the blue tapes works better than the tamiya tape when it comes to masking? I tried masking with tamiya tape and sprayed it with clear, but the color still bleed.


cheers!!!
 
Hi ER!!

Typically with darker colors, especially Reds, these will bleed through often even if you add light coats and try spraying angled into the area to avoid spraying straight in to the edge of the tape. With that said, the blue tape is cheap and available everywhere......cut what sizes I need and go! I love the Tamiya stock, just costly for a 4mm strip. I will however buy this sometimes when there is a ships boot stripe to be done as the uniform 4mm, 5mm or whatever size works excellent to keep that line perfect!!! ;)
 
Hey guys,
What I like to do is mask the "important" lines with tamiya tape 5-6 mm and complete the rest with 2" blue tape.

Cheers!
 
Noted T and Frank, yeah the tamiya tape is costly than the ordinary painter tape.

Thanks!!
ER
 
Pretty much the same thinking there Frank...a must for some jobs but blue for the big stuff!!!

Enjoy!!

Prepping and prepping and.....

SMAUpdate5002.jpg

I did manage to start painting the hull a bit....base went down after priming and then some hull red for starters.

SMAUpdate5056.jpg

Off to show today...having some fun hanging with friends and looking at painted plastic!! Back at it later!!

Thanks for stopping in!! ;)

[attachment deleted by admin]
 
Yer defo on some kinda drugs ……… that masking is insane
 

Latest posts

Back
Top