1988 Earnhardt Monte Carlo

letsgobrowns82

Active Member
Joined
Feb 27, 2011
Messages
1,368
Well I'm in the waiting process on my other kit. Paint is going to be drying for days now and its time for a new build. It took me a while to settle on something but I finally decided on this. I bought this kit on ebay. When I saw it I just had to have it. I love old Monte Carlo's and I love the #3 black paint scheme so naturally I thought this was pretty awesome. As far as the kit itself, well its going to take some work. They didnt mold kits back then the way they do now so this build is going to take a while. Thats alright though I wanted to put some scratch detail into it anyway.

[attachment deleted by admin]
 
As you can see they molded the kit in black, which I hate but hey what can you do.

[attachment deleted by admin]
 
Well I managed to get the tires done tonight. Wow were these difficult. They used raised lettering on the tires instead of decals. It took forever to get the paint on there without making a mess. I found that a toothpick works well for when the white would spill over onto the tire a little bit. I was able to just scrape it away with the toothpick. They arent perfect but I think they are as good as they are going to get for me.

[attachment deleted by admin]
 
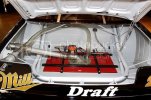
I'm removing the trunk lid to expose some detail. I plan on scratching the gas tube and adding fuel lines with some brass rod that I have. I know that this is probably not accurate because I dont think trunks on these cars are hinged but I'm not doing it to be accurate I just want it to be more visually appealing.

[attachment deleted by admin]
 
trunks are hinged. normally they use only one hinge on the right hand side.

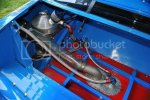
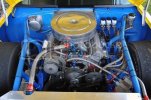
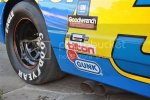
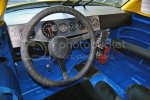
here are photos of his 1987 car which is identical other then the paint job.

7-chevrolet-monte_carlo-nascar-9423-8152526-17-640.jpg

7-chevrolet-monte_carlo-nascar-9423-8152526-15-640.jpg

7-chevrolet-monte_carlo-nascar-9423-8152526-31-640.jpg

7-chevrolet-monte_carlo-nascar-9423-8152526-20-640.jpg

7-chevrolet-monte_carlo-nascar-9423-8152526-19-640.jpg
 
Wow great reference photos. I hadnt started doing any research yet I just knew I wanted to model it with the trunk open. These pics are great and are going to help out a ton. Thanks StyreneStylist!
 
Front and rear bumpers are glued on now. I was suprised how well they lined up. I used Tenax 7r so minimal sanding will be required when its cured.

[attachment deleted by admin]
 
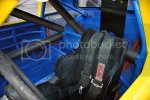
I had to assemble the roll cage and fire wall off the body. The fit was terrible. It took a lot of sanding and Tenax to melt everything together. I still had to use some Squadron Green Putty to fill in a gap or two. This is only the primer stage I'm going to be airbrushing this MM Italian Red then I'll put a satin coat over that.

[attachment deleted by admin]
 
So for the lanyard that connects to the steering wheel I used a piece of #12 Stranded copper that you can get anywhere. I uncoiled one strand and then wrapped it around a small piece of tubing. For some reason in this picture it looks out of scale like its too big but its not.

[attachment deleted by admin]
 
Just got the first coat of Italian red down. I'm thinking its going to take 2 more coats.

[attachment deleted by admin]
 
I made some progress over the past two days. I hacked apart the fuel tank where they molded the hose that should connect to the body and made my own out of a piece of sprue thinned out, heated and bent to shape. I wasnt too bad to do and it looks better than what the kit provided.

[attachment deleted by admin]
 
Some detailing still needs done but now the roll cage is on the chassis and things are moving along.

[attachment deleted by admin]
 
Some more work on the chassis here. Most of its done, theres some small detail I'd like to add but for the most part Im working on the body now.

[attachment deleted by admin]
 

Latest posts

Back
Top