1988 Mclaren Honda MP4/4 Top Studio Build *95% Done*

foenetik

Member
Joined
Feb 16, 2014
Messages
102
So I decided to go in way over my head and attempt a top studio build (actually two, bought the YZR-M1 Kit, that's next).

For those that don't know, Top Studio makes a Super Detail Up kit for the base model. Basically it makes it very realistic and its quite the build. The base model only has 3 Sprues worth of parts so the detail kit replaces most of it, and adds a ton more. I couldn't find any builds on youtube or the web so I thought id document it here. I'm taking pictures along the way to point out most of the major steps. Expect lots of pics. Ill do my best to explain how I did the more difficult parts.

I'm using Tamiya #89719 and Top Studio #MD29011

Here is my last order of stuff for these next two builds. I think I have enough colors?
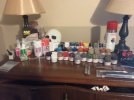
supplies_zps21d110d5.jpg

Here is the model in box stock form:
model_zpsc77f4e19.jpg


This first set of pics is lacking on before pictures because I wasn't sure if I was going to document it or not so I apologize. I will be more thorough going forward.

First step is to modify the stock parts. These parts are all parts that needed something cut off of them. Either replaced by resin parts or photo etch. Some wont be used till later, but I want to mod everything before I get into the top studio parts.

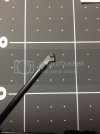
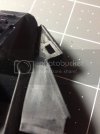
Clear Light cut down. It had a post on the back that has to be cut off and sanded flat
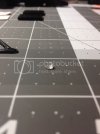
clear_cut_zpsbf9641ef.jpg

In order to sand it flat I put it in my pin vise. Next I need to drill a hole in the back when I get my bits tomorrow.
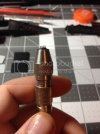
clear_pinvise_zps902d44d7.jpg

Intercoolers. Here I cut the end tanks off one side. Top studio includes new ones. I used an exacto and then sanded them flat.
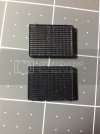
end_iccut_zpse18a5b28.jpg

Exterior panels need to be cut on panel line. The part with detail is replaced by PE parts
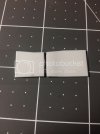
ext_cut_zps247a1ae4.jpg

Suspension piece needs to be cut into 3 pieces, It was a full triangle to begin with.
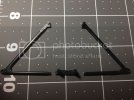
sus_cutwhole_zps710e066d.jpg

Where to cut the top
sus_cuttop_zpsc4ed6861.jpg

Where to cut bottom, I cut right in the center of the circle so there is enough material to drill later
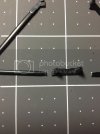
sus_cutbot_zpsd8be4f2b.jpg

This is where the ecu was molded into the cockpit. it had to be cut out and sanded flat
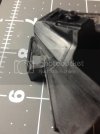
ecu_del_zpsbb4814d2.jpg

ecu_del2_zpsce2a9865.jpg

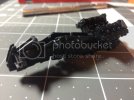
Engine
eng_bare_zpsde945bfd.jpg

There was a tall hood on each side on the front. it had to be removed (sorry no pics of before)
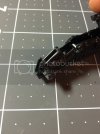
eng_cut_zps11b7e20b.jpg

On the valve cover there was a bracket that protruded out. Had to be removed. Basically I turned it over and cut it with exacto from the back and then sanded it level.
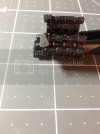
eng_heads_zps9bbba312.jpg

That's it for now. When I get my drill bits tomorrow ill drill all the holes. I have to modify the cockpit still by filling some spots with styrene and putty. Im waiting on some more supplies to get here but I will update soon.

Thanks for looking
 
Re: 1988 Mclaren Honda MP4/4 Top Studio Build

Very cool, looking forward to seeing this one..
 
Re: 1988 Mclaren Honda MP4/4 Top Studio Build

Thanks. Me too. Unfortunately my top studio kits are delayed so it might be a week before I get to the good stuff. It'll happen though.
 
Re: 1988 Mclaren Honda MP4/4 Top Studio Build

while waiting for my parts to come in, did some more of the stock part prep.

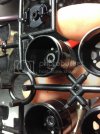
Drilling out the wheels to 3mm (1mm deep)

ext_whldrl_zpsb9f9ec5f.jpg

Drilling out this box for an AN fitting

end_sdehl_zps86f635c7.jpg

And the fun one, so I had to use a .4mm drill bit, to drill these 4 wire holes on center. ill let the pictures do the talking....

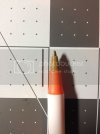
This is the size of the drill bit, that's a normal size bic pen...

drl_sm_zps44802b26.jpg

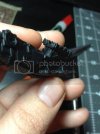
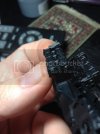
These are the 3 holes on each side I had to get on center for spark plug wires.. imagine how fun that was, the bit bends with the slightest pressure.

Close-up of 1st hole ( "easier" cause I can come from side)
eng_spkhl_zpsc9e53bad.jpg

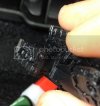
Rest of holes (had to come down at an angle over previous coil)
eng_spkhl2_zps8b347807.jpg

That's it for now, im doing some body work but till I get my styrene sheets and top studio kit, im kinda at a standstill. its killing me. want to model so bad.
 
Re: 1988 Mclaren Honda MP4/4 Top Studio Build

Small Update:

Removing the exhaust air dams to use PE parts

Stock:
ext_exhaust_zps3af67825.jpg

Removed:
ext_exhaustcut_zpscccdc8aa.jpg

ext_exhaustcut2_zpsa9d56a1d.jpg

top studio kit is finally on its way. the Yamaha kit will be here tomorrow but unfortunately im not working on that one. oh well. one more week and I can get cracking.
 
Re: 1988 Mclaren Honda MP4/4 Top Studio Build

Hello Anthony! Found it my friend!! ;D Count me in for the ride!! Looks like you have all the wares to get things moving in high gear soon!! Let the plastic fly!! ;)
 
Re: 1988 Mclaren Honda MP4/4 Top Studio Build

Thanks T! glad you could make it.

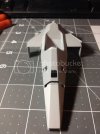
Got my styrene sheet in and decided to do some of the body work. Keep in mind ive never used putty nor done anything other than paint or weather a car. this was all new.

So had to take the stock body and add some styrene to make smaller holes, like the real car. Cutting the pieces was easy enough, but I couldn't really get them to line up so I figured out to add bracing cause I calipered the cockpit before I ordered styrene and got the exact size. so now the bracing makes it flush! woo

Before pics of holes to be filled...
cp_before_zps0b5f0af7.jpg

This one I had to add a whole piece

cp_fill3_zps9dd05cf2.jpg

Here Is the bracing to make the pieces flush

cp_reinforce_zpsc7b386d0.jpg

Here is my terrible putty job. like I said first time, and it said to spread it with a spatula tool but the putty literally started setting up 5 seconds out of the tube. I don't understand how anyone can work with this stuff, unless im missing a step between squeeze and spread.

cp_fill_zps531e9318.jpg

cp_putty_zps35ed5b9a.jpg

After a ton of sanding due to the sloppy putty. I know theres a lot of scratch marks but its wet sanded so its really smooth and im gonna use Alclad Gray with microfiller so it should fill anything in I missed.

cp_sanded2_zps29295b56.jpg

cp_sanded_zpsaa3ae691.jpg

so that's it for now. came out acceptable. still waiting on my kit to get here.
 
Re: 1988 Mclaren Honda MP4/4 Top Studio Build

Definitely looking like you're getting some good results so far
 
Re: 1988 Mclaren Honda MP4/4 Top Studio Build

Thank you. I think so to. I cant wait for the detail kit to finally get here so i can make some real progress. i should have started on the bike cause i have all the parts for that. not sure why the mclaren stuff is taking so long...
 
Re: 1988 Mclaren Honda MP4/4 Top Studio Build

Because shipping is horrible Anthony!! ;) You still made some fine progress there just the same! Should be some smooth sailing once the kit arrives!! ;D
 
Re: 1988 Mclaren Honda MP4/4 Top Studio Build

small update.

STILL waiting for my kit. :'(

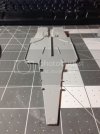
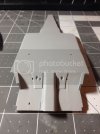
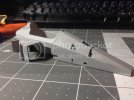
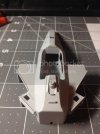
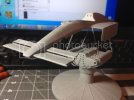
after fighting with learning to airbrush and alclad II primer, I switched to what i know and primed some stuff with a spray can. I have to revisit airbrushing alclad. had the toughest time with it. wouldnt go on smooth at all. i think im used to spray paint so i was putting too much on. It worked great on small parts, but bigger stuff it just looked terrible. had to sand the body 3 times.

cant really do much else till i get more parts. Im just showing them because they all were modded for the kit. Nothing too exciting... nothing is wet sanded yet. waiting for primer to dry.

Motor
eng_prmr_zps2a928cfb.jpgeng_prmr2_zps07a95fc0.jpg

Floor
flr_prmr_zpsb839d7d5.jpgundrflr_prmr_zpsc1ff9e4e.jpg

Cockpit
ckpt_prmr_zpsd654ae5a.jpgckpt_prmr2_zpsb2040e0b.jpgckpt_prmr3_zps86a6b297.jpg

Body
bod_prmr_zps3889beb8.jpg

Body: Shaved the panel lines, i like it smoother looking.
bod_shave_zps30145f92.jpg
 
Re: 1988 Mclaren Honda MP4/4 Top Studio Build

Looking pretty nice with the primer on!! Love how there is that slight texture to the interior part! Keep pushing on!! ;)
 
Re: 1988 Mclaren Honda MP4/4 Top Studio Build

bah!

i may have to abandon this project for a while. unfortunately im getting a bit of the runaround on my top studio kit. i ordered this and the bike the same day. bike kit is here. car one got "stopped" at post office so he resent. i ordered the photo etch chain kit 2 weeks later and thats now in NY and still no car kit. :( i have everything for the bike so i may have to start that instead. shame. i really was looking forward to this.
 
Re: 1988 Mclaren Honda MP4/4 Top Studio Build

Ha! The styrene gods have shined their light on me. Just got an email that my kit is in ny!!!
 
Re: 1988 Mclaren Honda MP4/4 Top Studio Build

woo the kit made it. pics to follow


note:

glad i bought CA debonder. many stuck fingers would have happened. this stuff is unruly.
 
Re: 1988 Mclaren Honda MP4/4 Top Studio Build

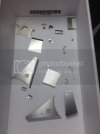
Bent some PE parts. Only broke 1. Nothing a lil ca can't fix.


1453B4F9-B848-451C-B118-242A8A109598_zpsg5fkplm7.jpg
 
Re: 1988 Mclaren Honda MP4/4 Top Studio Build

Nice looking parts there!! Time to get things all together now!! :)
 
Re: 1988 Mclaren Honda MP4/4 Top Studio Build

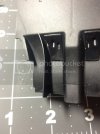
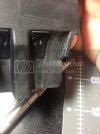
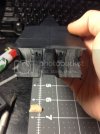
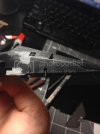
small update, Added some PE Parts:

Brake Components
IMG_5486_zps7c059a65.jpg

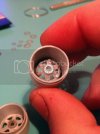
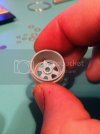
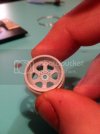
Wheel Components
IMG_5481_zpsa389ee4c.jpg
IMG_5482_zps65d29e28.jpg
IMG_5484_zps88bf705c.jpg

Wind Deflector
IMG_5480_zpsc18af1d2.jpg

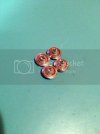
so far only one part has got me stumped. its really really difficult but im working through it. have to glue 8 small solder pieces vertically to a PE disc to which i add a plate so i can sand them down so they basically end up looking like bolt bodies. such a pain to glue solder as it wont sit straight so the disc doesnt want to go on.
 
Re: 1988 Mclaren Honda MP4/4 Top Studio Build

Great stuff there Anthony! How did you make out in the end on them brakes?? ;)
 

Latest posts

Back
Top