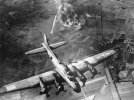
1/48 Revell B-17G

Baron, I didn't even think of the white, just like the thining when brush painting.

Wyoroy, thank you for the complement. I feel like I have learned so much during this build and am enjoying every minute! I'll be on ADDICT level pretty soon.

In terms of my progress today:

I finished up the other engines:
IMG_0255.jpg


Then I masked off the wing tips in preperation for the red. Because I learned my lesson with overspray on the top of the wings I went ahead and masked almost all the way up the wing:
IMG_0250.jpg


Here is a pic of the red about to go through my AB, I went ahead and thined out the paint more than usual 50-50 ration pigment to paint. I wanted to make sure I could lay down a bunch of mist coats. I did this so I wouldn't have problesm with taking up the masking tape:
IMG_0251.jpg


In an attempt to make sure I didn't get any pealing edges when I removed the masking, I did a bunch of very thin mist coats, 6-7 I think:
IMG_0252.jpg


Here she is with the masking removed. Good thing I did what I did because I almost had issues taking up the tape. I could tell if i left it on longer I would have had the same issues as I did with the wings:
IMG_0254.jpg


I am going to let all the paint dry for the next day or so. Then I am going to paint the de-icer boots black. AFter that I get to lay down some future and decals! My Favorite part!

Thanks again to everyone for following my build and giving me all the advice!
 
Man your moving on this thing. looking great!

As for masking. Other than canopies i remove my masking immediately after I'm done spraying to avoid pulling up the paint. Nothing to worry about, it's not going to run or anything.
 
Looking very good !

the sheer size of the 17 is very impressive


great stuff


shane.
 
SoarinSukhoi you wont have to wait too much longer. I can hardly wait myself. This has been the longest build of my life. Cars and Motorcycles never took this long.

Here is today's progress.

After finishing up on the engines, which I forgot to mention worked out to about 4 hours after all the drilling, paint, wash, and wires, I painted the inside of the cowlings (I think thats right) green zinch chromate. Then I tacked them into place with some CA. Then I created a mask, I traced and cut out circles out of an index card and painted them the same grey as the bottom of the aircraft.

IMG_0257.jpg


Here they are drying:
IMG_0258.jpg


Also in there are the landing gear and the forward gun as well as the rear gun. (I should have attached that before painting the fuesalage but I'll get to fixing that.

Next, since it has been a minimum of 80 (F) the last few days I figured the paint was nice and dry. I masked off all the de-icer boots and got to painting them.

IMG_0262.jpg

IMG_0263.jpg


Next on my agenda is to weather the landing gear, get the engines painted with OD, future the plane. I'm getting closer.

Thanks again for all the help!
 
Looks great, Adam! The OD has a great color in that light--have you done any weathering to it yet, like any fading or lightening?

I really like how you detailed the engines, and I'm going to steal that idea, if you don't mind :D when I do my Midway B-17E.

Great progress! Making me nostalgic, too!
 
Hey Baron, no such thing as stealing. (At least when it comes to building models!) I keep using techniques I've seen other people do. Thanks again for the complements. I haven't done any weathering just yet, other than the engine and interior. I'm going to get the future, decals, future down, then weather. The good news I got her up on her wheels today!!!! :)

Check it out, I'm so excited!!!

IMG_0264.jpg

IMG_0265.jpg


Have a great day everyone!!!
 
Myke, thank you! Just an update, I got a coat of Future on the top of the aircraft. I am going out of town tomorrow, which is good cause it will force me to let the future dry. Assuming it stays 90 (F) here I will lay down some future on the bottom of the bird. Then I get to decal! I'll get you guys another update as soon as I can.

Thanks all!
 
Adam, would you please (or anyone else that feels like chiming in...) explain why you would put down the red first and other markings prior to the olive drab? That seems counterintuitive to me. I'm sure it's right, I just am wondering why it works that way.
 
Hi Glennonrp. What happened to me on this build was I put down the darker color first (olive drab) then the lighter color (Red), the olive drab that I painted over makes the red darker. Its the same thing with pre-shading I think, the idea being you paint your panel lines black and then paint the main color second, which highlights the lines. In this case, this being my first aircraft build I can live with the darker red.
 
That makes sense. I thought it had something to do with the bleed problems you had. Do you know what caused that? Maybe I should go back and read again, so forgive me if you already said this.
 
Hey glennornp, the reason I had trouble taking up the masking is (I think, as I'm still learning) because I did not thin the paint enough before spraying with my AB, it went down too thick. I also got side tracked by my wife and left the tape on for almost an hour after painting. When I took up the tape it pealed away some of the paint along the edges. I had to let the red paint dry, sand it back, paint the area red. Then I masked of the wing area and re-sprayed the OD. The thing I found that works for me is thining the paint a little more than I was. It may not work for everyone by it has been helping me a ton.
 
adampolo13 said:
I couldn't resist, I had to dry fit a prop...

Hehe, did you give it a spin, too? ;D One of my favorite stages in building an airplane--wings are on, and the prop is on, it's time to do a little bank and roll while making engine noises ;)
 
Alright, so in the words of BomberBoy "I got her stickered up" I took the late plane in last night, got in a lil after midnight. Which worked out well cause I could get the future on this morning. With the 80 (F) weather we had today, it dried up quick. I don't have all the decals on right now, but here's how she is starting to look.

IMG_0270.jpg

IMG_0271.jpg

IMG_0269.jpg
 
Hey Adam, before you get to the weathering stage I want to make you aware of one major fact that most people get WRONG!!!! The four vents behind the engines ARE NOT EXHAUST VENTS, they are in fact fresh air vents for the Oil and Air coolers in the nacelles that have the intakes on the front of the wings, yes those things you wonder about that they leave as holes. Pay close attention in the photos, like the one I've posted here.

b17_8thaf_germany.jpg,
see how the soiling goes around them as it passes by.

Hope it helps,
James
 

Latest posts

Back
Top