Trumpeter Cougar AVGP
- Thread starter NecronautDrummer
- Start date
NecronautDrummer
Member
- Joined
- Sep 25, 2011
- Messages
- 804
Gahhh!!!  Got back from Las Vegas last night and spent the day recuperating, if ya know what I mean
Looks like the post office has some Mr. Surfacer waiting for me, so I should be able to finalize my scratchbuilt pieces and start texturing the skid points on the hull this week. As well, I hope to be receiving my PE bender and circle punch from Micro Mark this week, so I can button up the hull details. And if all goes well, my airbrush should be arriving soon too. And that means that I can look forward to finishing this beast by Christmas. I'm still holding out hope that i can get a well-detailed 1/72 Fine Molds Millennium Falcon into the group build too!
Looks like the post office has some Mr. Surfacer waiting for me, so I should be able to finalize my scratchbuilt pieces and start texturing the skid points on the hull this week. As well, I hope to be receiving my PE bender and circle punch from Micro Mark this week, so I can button up the hull details. And if all goes well, my airbrush should be arriving soon too. And that means that I can look forward to finishing this beast by Christmas. I'm still holding out hope that i can get a well-detailed 1/72 Fine Molds Millennium Falcon into the group build too!
NecronautDrummer
Member
- Joined
- Sep 25, 2011
- Messages
- 804
Oh look, Christmas came early for ND!
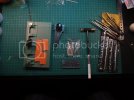
Lets see... a PE bender, a grab iron bender, a circular punch and die set, a hobby hammer, various tweezers, and a set of putty applicators!
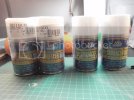
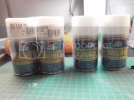
Not what I wanted. I will seriously trade this, straight up, for the equivalent in brushable versions. PM me if you're interested.
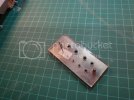
First go at using the circular punch to make a power socket for the windscreen.
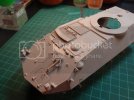
I think it went okay. You can see it to the left of the periscopes. I also used the grab iron bender to make some hand-holds around the shock mount and on the engine cover. You can see a glue spot in front of the periscopes where I tried to fit a scratch-made air nozzle to blow on the driver's front periscope. FAIL!
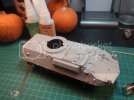
And a parting shot of the other side of the hull. I'll need to finish the seam filling along the side and the top of the hull before I apply the photo etch for the pioneer tool clips.
This week's goal is to finish the back door area and put the hull together. Happy sanding, modelers! ;D

Lets see... a PE bender, a grab iron bender, a circular punch and die set, a hobby hammer, various tweezers, and a set of putty applicators!

Not what I wanted. I will seriously trade this, straight up, for the equivalent in brushable versions. PM me if you're interested.

First go at using the circular punch to make a power socket for the windscreen.

I think it went okay. You can see it to the left of the periscopes. I also used the grab iron bender to make some hand-holds around the shock mount and on the engine cover. You can see a glue spot in front of the periscopes where I tried to fit a scratch-made air nozzle to blow on the driver's front periscope. FAIL!

And a parting shot of the other side of the hull. I'll need to finish the seam filling along the side and the top of the hull before I apply the photo etch for the pioneer tool clips.
This week's goal is to finish the back door area and put the hull together. Happy sanding, modelers! ;D
Beobachtungsbereich
Prep for STAB....STAB ON!
- Joined
- Oct 7, 2011
- Messages
- 254
Nice job on the mounting points! Exactly the right size.
My Christmas wish list is growing....grab iron bender. Wife is going to kill me. ;D
Regards
My Christmas wish list is growing....grab iron bender. Wife is going to kill me. ;D
Regards
fumblethumbs
New Member
- Joined
- May 22, 2011
- Messages
- 963
Coming along very well ND! Great attention to detail on this build.
NecronautDrummer
Member
- Joined
- Sep 25, 2011
- Messages
- 804
Haha!! Just put in my pre-order for the fine Molds 1/72 Millennium Falcon re-release through SSM!
Anyways, time for another round of advice from all of you...
It's prime time! My airbrush should be here within the next week, and I'll be shooting Vallejo primer through it for a nice, fine finish. I'm thinking of shooting colour, a coat of Future, decals, some more Future to seal the decals in, then washes and pigments. It's been a while since I modeled, and I want to be sure I've got everything right.
For primer, I'm thinking either neutral gray or a dark green. If I can get both, I'd pre-shade with the green over the gray. For the main colour, I'm looking for Canadian medium green with that slight hint of mint colour, used in the 80's and early 90's. This'll be accented with a lighter green applied very lightly to raised and highlighted spots on the hull. Ditto with the black camo stripes on the hull. Question: what colour and brand of paint? Tamiya, Model Master, Vallejo, Humbrol, PollyScale, Mr. Hobby? Who has the closest match to the basic colours I need? If I choose enamel, can I still use Future over it or should I use a lacquer gloss? ???
NecronautDrummer
Member
- Joined
- Sep 25, 2011
- Messages
- 804
Quick build update...
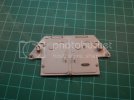
Whipped this off tonight after sanding off my second putty application to the hull. Just a light coat of Mr. Surfacer ought to finish that off. I tried to file out the hooks on the hatch opening locks, but you'd never see them anyways. There might be a couple reflectors on the hull just outside the tail lights, and my PE set has them. Have to check some reference photos to see if they were part of the '95 refit or not.
How would you paint round reflectors? The PE reflectors are textured on the inside part already. I was thinking of a basecoat of silver, then draw in the pie-shaped divisions with a micron pen, then top-coating it with clear red, and maybe even a drop of clear epoxy for the clear plastic cover. What do you think?
Happy modelling!!
Beobachtungsbereich
Prep for STAB....STAB ON!
- Joined
- Oct 7, 2011
- Messages
- 254
The reflectors were always there even after the refit in 95.
Are you going to put on a length of welded chain between the door handles?
Regards
Are you going to put on a length of welded chain between the door handles?
Regards
NecronautDrummer
Member
- Joined
- Sep 25, 2011
- Messages
- 804
Yup, it's already on order. I even found a padlock in my PE kit last night for them!
Beobachtungsbereich
Prep for STAB....STAB ON!
- Joined
- Oct 7, 2011
- Messages
- 254
NecronautDrummer said:Yup, it's already on order. I even found a padlock in my PE kit last night for them!
NICE!
NecronautDrummer
Member
- Joined
- Sep 25, 2011
- Messages
- 804
Back in action! Just returned from a dentist appt, and found that one of my LHS finally got some Mr Surfacer ;D Slathered some on some fills, cracks, and joints. I'll let it cure until later tonight, when I get back from a meeting. I'll be firing up the iron to put some weld details back into the turret, too.
Happy modelling!
Happy modelling!
Captain Caveman III
"Captain Caveman"!
- Joined
- Oct 28, 2011
- Messages
- 150
I'm a big fan of the mid year LAVs. Grate work so far, I like your use of scratchbuild details. 
NecronautDrummer
Member
- Joined
- Sep 25, 2011
- Messages
- 804
Ugh. Not too sure how my weld lines turned out. I used a temperature controlled hot iron with an exact-blade wired onto it. It heated up fine, but the weld lines might be too subtle. The blade was plenty hot enough. I danced it along the seam, allowing the weight of the iron to make the impression in the plastic.
Wielding the soldering iron is a little tricky, with the handle at the other end (which is why I erred on the side of caution). I am thinking about using a wood-burning tool instead. Since the handle is at the tip, you'd get a lot more fine control.
Anyone serious about this method should leave a little extra sprue on the part (i did, then cut it off, thinking it might be too much).
Maybe some dissolved putty and a file? We'll see!
Work is progressing on the turret. I'll be putting the hull halves together tonight, and doing some putty work along a couple of the seams around the rear hull doors. By the end of the week, I should have a primered hull!
Happy modelling!
NecronautDrummer
Member
- Joined
- Sep 25, 2011
- Messages
- 804
I'm sure all of you have run into this problem: micro-voids where two pieces meet at a sharp angle. Mitered edges were pre-molded into the plastic. While test fitting the pieces, I thought to myself wow, what a nice little touch! I put together the hull halves and the rear door plate, and I now have these hair-thin gaps where the pieces meet at a sharp obtuse angle. What to do? I have a couple thoughts...
Just jam some putty in there and sand away? But the gaps are so thin! Could I even get putty into the gap?
Use CA glue to fill the void via capillary action? But the applicator nozzles on the bottles are so big! It'll make a huge insta-drying mess on the plastic that'll have to be sanded away.
Paint in some Mr Surfacer/Dissolved Putty? I just got this stuff, and I'm still trying to figure it out. It doesn't flow well at all (even the 1200, I found tonight), so I don't foresee using it for any capillary action filling. I could paint it on, but what a mess to clean up! A recent issue of FSM says that acetone will clean it up, once it's sat for a few minutes. I, on the other hand, made the beginner/impatient mistake of using lacquer thinner (hey, i had it right there in front of me in my brush cleaner, taunting me to use it) on a brush to wipe away excess Mr Surfacer i had just applied, and now I've got a spot of slightly melted plastic.
What to do? Any and all advice would be appreciated, fellow modellers. ???
PS. How long does it take for Mr surfacer or Mr Dissolved Putty take to cure? I don't read Japanese.
Dennis McQuillen
New Member
- Joined
- Mar 4, 2011
- Messages
- 17
NecronautDrummer said:
NecronautDrummer said:It's prime time! My airbrush should be here within the next week, and I'll be shooting Vallejo primer through it for a nice, fine finish. I'm thinking of shooting colour, a coat of Future, decals, some more Future to seal the decals in, then washes and pigments. It's been a while since I modeled, and I want to be sure I've got everything right.
For primer, I'm thinking either neutral gray or a dark green. If I can get both, I'd pre-shade with the green over the gray. For the main colour, I'm looking for Canadian medium green with that slight hint of mint colour, used in the 80's and early 90's. This'll be accented with a lighter green applied very lightly to raised and highlighted spots on the hull. Ditto with the black camo stripes on the hull. Question: what colour and brand of paint? Tamiya, Model Master, Vallejo, Humbrol, PollyScale, Mr. Hobby? Who has the closest match to the basic colours I need? If I choose enamel, can I still use Future over it or should I use a lacquer gloss? ???
Why not use the Mr. Surfacer 1000 for primer? It is a personal taste for me but I find that Enamel and laquer based primers have some bite into the plastic and metal and are much more durable. I am very abusive to my kits during the weathering process and have been known to rub right through to the plastic. I use Floquil railroad enamel primer through an airbrush and it has the smoothest, toughest finish I have ever seen. Stinks to high heaven though and it is a pain to clean up. The Mr. Surfacer spray can should give similar results and have less cleanup. If you spray it now it should be cured by the time your airbrush arrives for the rest of the paint. I usually wait a week while the primer cures. Just a thought as you have it sitting there.
Looking good.
Dennis
Similar threads
- Replies
- 15
- Views
- 2K

