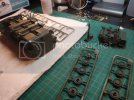
Trumpeter Cougar AVGP

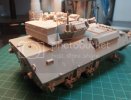
I looked long and hard at some cheesecloth in a local grocery store as a stand-in for a camo net... maybe. I may just end up cutting it out of tissue paper with a round chisel. Since it'll be rolled up, I think I might be able to get away with doing just the sides and a few layers of the visible top. Anyways, here's my latest progress:
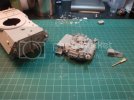
PC120728.jpg
My Barrel Store order came in, with a 1919 Browning machinegun for my coax, and some chain for the rear hatches. I am almost finished the turret (just the PE parts from the kit and one antenna on the gunner's side), and the hull just needs the side tie-downs that fell off while handling it.
It'll be primered and pre-shaded by the end of the week (haven't I promised myself that before? :-X ). I'll be doing the painting at school over the holidays, which will give me the necessary space to work on my Air Group build.
 
And funnily enough, the turret is straight OOB, with only a little modding of two or three pieces and the scratchbuilt jerry can rack. Yeah, they tried to cram all the bells & whistles that 1960's technology had to offer onto the tiny surface area of that turret.
Well, the school spray booth is out of commission for the time being, and it is winter so no painting outside... what to do? No-one will be in the building over the holidays, so I'm tempted to just go at it in the shop area and build a temporary spray booth around one of the exhaust ducts for the planer or sander. Maybe if I time it right, I can do the painting of both the Harrier and the Cougar over the holidays?
Tonight, I'll be reviewing Madman's vids on scratching your own tarps and stowage from tissue paper. I need to build a rolled up engine grille rain cover and a canvas sleeve for the gun.

Quick question: Should I mount the antenna and tie-down before or after painting? Please post your thoughts! Seeya later tonight!
 
I always put the antennas on last. It's the finishing touch and that way they don't get damaged.

Good job on the build!
 
Almost ready for paint...
PC140731.jpg
Hull tie-downs are back on, the PE is all mounted to the turret.
PC140729.jpg
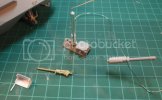
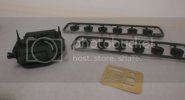
This is what's left to go on the turret. I'll be mounting the turret mantle with its coax MG after paint. As well, I've got the thermal shroud for the main gun molding on the kit's alternate plastic main gun (thanks for the vids, Madman!!). I'll be on the prowl at the local Michael's or Lee Valley Tools this weekend for a small half-round chisel to punch out some camo net for the top of the turret too.
I should be finished the last jerry can basket (and the build portion) tomorrow night. Next step, paint!!
 
Looking sharp ND!!!! Looking forward to seeing you slap the paint around on this!! ;)
 
Keep up the good work !!! almost there !!! Love that OLD 7.62 GPMG

I don't recall the Cougar sporting such a big box at the back.... I was mostly Tossed around in a Grizzly!
most of my Early days.... 1982... man thats a long time ago... I like the overall look of the beast ! Brings back a lots of memories....

We were Skimmed by a "Logging Truck" in a steep hill ! The Truck took out our Left Propeller …
We were very lucky ! He never stopped !!! Well HOW could he ??? and maybe never cared or he didn’t even felt it !!! LOL SChweing !!! (oopsy)…. Oh well ? I'm just glad it wasn't a Full on Impact ! LOL

Can't wait for you to Hit the paint booth !

Later !
 
The boxes on the back were pretty big. Mind you, almost half the storage was taken up by the rear of the turret protruding into it.

Good looking build. Loom forward to seeing the paint and 80W90 stains on the hubs!

Regards
 
Nope, no missing the oil seep from the hubs!

I realized yesterday that even if I could get my main gun thermal wrap off of the alternate main gun, I wouldn't be able to get it onto the aluminum barrel, with the muzzle in the way. Guess I'll do it right on the barrel later in the build once it's got a coat of color. I must say that making the wrap itself was a great learning experience, though. Primer & preshade on Tuesday!

I've got myself some nice Archer black dry-transfers for decals instead of the kit-supplied NATO color mission markings. How do you apply them? When do you apply them? I plan on doing a color modulation effect and some light oil-based dirt/mud weathering over some Future floor shine.
 
I'm just about to go out the door to spray on some primer on the Cougar at work, and suddenly got very nervous about using Vallejo Surface Primer. From what I've heard, it works pretty good on plastic, but it adheres very poorly to metal (of which I have a few bits here and there on the model). Anyone use this stuff over metal to any degree of success?
 
I've used it on the Sherman Firefly VC I just did and it adhered very well to the PE parts. I didn't even scuff them up before shooting the primer.

Hope that helps!
 
Will be no problem on PE or aluminum metal parts. If in doubt give them a little scuff with a 320 or 400 grit sanding stick to help it bite.
 
Some great attention to detail on this ND! Can't wait to see it painted. Are you going with the Nato Green?
 
This ought to answer your question, Myke...
PC270730.jpg
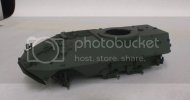
I'm using Vallejo's Acrylic Surface Primer. Two coats were applied with the new Paasche Talon, 24 hours apart. This is after the first coat.
PC270731.jpg
I shot some primer on the remaining PE signal light guards the day after.

PC290734.jpg
And back on the workbench. The remaining parts are waiting to be installed. I used a dark green primer on everything before final assembly to make sure that all sides of every part were at least primered. I knew I would have trouble getting into the nooks and crannies of the propeller drives if I put the cage guards on the model too soon. Before they go on, I need to mount a forgotten ::) towing point on the back of the vehicle (you can see where I sanded and have started on the Mr Surfacer to do away with the gaping hole there).
The primer is already rubbing off of some of the metal parts, so they'll need to be touched up before I start with the colour coats. I'm going to try a color modulation (much like Scott G's T-34/76) using the dark green primer as the shadow colour, Tamiya NATO Green for the mid-tone, and the NATO Green with a little Desert Sand mixed in for the highlights. I'm doing a Black & Green camo job, with NATO Black as the basetone and a really dark gray for the mid-tones. We'll see how it all pans out. After I'm done final assembly tonight or tomorrow morning (hopefully), I'll start shooting the NATO Green midtones.

Happy modeling! ;D
 
Very nice ND!!! Clean primer cost...Saaamooth! This does call out modulation a bit!!! Keep it coming!! ;)
 
Thanks guys. I thought I posted a reply already, but I guess it didn't go through. My first time shooting airbrush primer, so I hope it went on smoothly (Thanks for the support, TRM!).
 

Latest posts

Back
Top