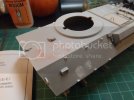
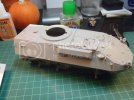
Just a quick update on my progress over the past night...
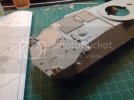
I added the driver's hatch lock-down using styrene rod and a former piece of hatch handle.
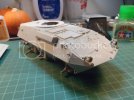
I sanded off the extra tie-downs molded at the front of the hull. Methinks I'll be sanding off the rest of them and replacing then with some cut-up channel instead. The spacing of them is all off on the driver side. More to follow on that little experiment.
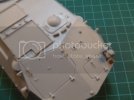
I can't seem to get the kit-supplied handles to look good (I can't sand them properly, they're too small!! :'( ) So instead, I've replaced all the latches and added the ones the kit forgot with brass rod, and built some loops to sit on top of the engine grille (the kit neglected that detail too). However, they seem too big. I might try bending up a piece of unwound guitar string instead, and see if I can tighten up the loops a bit.
The lower hull's as finished as I want it to be before I paint some of the nooks and crannies. However, it'll be a couple weeks before i have my Mr. Surfacer, airbrush, and paints, so no colour for a while. And the old Holbein airbrush I found in a back room at work is currently soaking in a restorer bath overnight.
Since it's on my mind right now, I'll ask everyone: I know I'll need a true primer (unlike GW Basecoat) to get the paint to bite onto the metal and PE parts. Will the Vallejo primers (the kind you can pretty much airbrush straight from the bottle) work, or should I just go with a rattle can of Krylon primer?
Later this week, I'll be adding the bits of channel to sub in as tie-down loops. I think the size I have will scale nicely, and add some more authenticity. If it doesn't work, I already have a few sets of the resin loops (both styles) on order from Tiger Models, along with some chain for the rear hatch handles (Thanks, MadMan!).
I feel like I'm falling behind, compared to a lot of the armour builds here... ??? Meh, I have until February. Plenty of time. ;D

