Trumpeter Cougar AVGP

Yeah, I forgot that I had the Mr Dissolved Putty in my paint stash actually. Just broke it out to fix a couple things on my Harrier ejector seat a couple days ago.

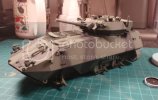
Anyways, I just threw on the first coat of Tamiya NATO Green onto the boat using a panel fade (they finally turned on the fume hood/spray booth at work!!). I think I may not have been liberal enough with the paint actually. The panels look pretty smooth and even but I think my primer colour (which I allowed to show through along edges, features, etc.) may have been just too dark. I planned on highlighting it with the A/B with a mix of NATO Green and some sand colour... you know, I think I might still do that. I know that weathering and CM will darken the model so I should still be OK if I go a little lighter at this stage.

I'm using the Paasche Talon with the giant colour cup and the narrow nozzle/needle set. I filled it half-way with paint, thinking I'd have to add some more close to the end (as per my experience with priming using the medium needle/nozzle set). After finishing my panel fade colour coat, it looked like I had barely made a dent in the amount of paint left in the cup!

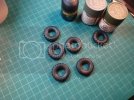
Now, how do you deal with vinyl/rubber wheels? The wheels look factory fresh with that new tire shine. I want tires that are flat, a little gray, and kind of beat-up with the odd gouge in them. How do I achieve that with these tires? Can I use model paints on vinyl and still get good paint adhesion? Do they need to be washed to get mold release off of them?

Pics next week once I finish the camo. Until then...

Happy modelling! ;D
 
Here we go...

P1100724.jpg
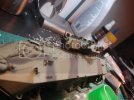
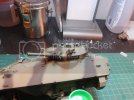
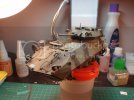
Side View

P1100725.jpg
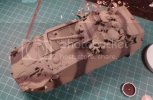
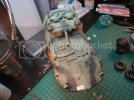
Top View. This picture came out a lot yellower. The side view is a much better colour representation. However, both pics seem to have washed out the panel fading I did around parts of the hull and turret. I attempted to create some panel fading with a really dark gray over the black camo stripes, but i think I was too heavy-handed with it.

Thoughts and suggestions on technique or how to photograph it to better show the panel fading? As well, any advice on weathering my shiny vinyl tires would be welcome!

Happy Modelling! :D
 
ND ,

Cool lookin camo scheme ! To tell ya th truth , I can't see any of th panel fading in th pix. & those stripes look brown to me ... at least on My monitor & in th Pix ??? Still I like th look of it & it would really pop with a pin wash or something along those lines !! I'm not knockin' th paint ! I like it .. it's just hard to pick out th colors in th picture ??

Good lookin' stuff ! I'd think about shootin th stripes again & maybe adding some washes /pin washes to this to make it PoP !! just My $.02 ( USD) ;D
 
Looking great ND!!

"I attempted to create some panel fading with a really dark gray over the black camo stripes, but i think I was too heavy-handed with it." ??? Thinking your monitor is Black and white?? ;D Kidding!!! ;)

I can see your fading in the first couple shots best. Think a nice Filter will bring this all together!! Keep it going!! ;D
 
Looking good...I can almost smell the burning 80W90 and the sweet smell of hull splooge! (mix of coolant, oil, hydraulic fluid and rain/ swamp water)
 
Camo looks great.
I'd pay good money to drive one of those around for a day. Got some business to take care of.
 
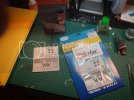
So way back in October I ordered a set of Archer dry-transfer decals from their 1/35 Canadian KFOR deployment set in Somalia (I think). It had everything I needed: customizable licence plates, customizable bridge rating, the tiny Cdn flag in black for the rear hull, and front registry decals. Today was the day that I'd get this little piece of heaven out of the way. Boy, was I wrong...

So here it goes...
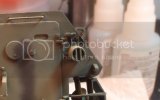
P1150724.jpg
This was the first transfer I applied, the old flat black Cdn flag above the brake/turn signal lights (you owe me a beer!). As you can see, it's too big, and there was nowhere for me to tape it down smooth before rubbing it on. For a first decal to apply by dry transfer, this was a real challenge. Aaaand this was when I first noticed that dry transfers get silvering around the edges too. Now, whether MicroSol solutions would correct this or not, the only decal setting solution I have is the Testors one in the rectangular glass pot (for now), and it didn't seem to do squat on my Harrier dash. So instead I applied a few coats of Future to try and get the edges to settle down. Reading on Archer's website, they say that enamel or mineral spirit-based washes or paints will have adverse effects on their decals, while acrylic clear coats will not affect it at all. Well, there's enough Future on it now to choke an army of maids. Moving on...

Licence Plates!
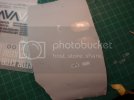
P1150725.jpg
I remember Scott G using a sliced up pop can to make a 'No Trespassing' sign for his Ma.K. build. For that beat-up, creased look for the license plates I wanted (they got thoroughly thrashed in the field), I decided to co-opt his technique. This is a piece of 7-Up can that's been snipped up, primered with Mr Surfacer 1000 in a spray bomb (SA-MOOTH!!!), sanded with 800 grit sandpaper (what was the point, really?!), re-primered with Vallejo Surface Primer, sanded again (because it needed it after that... I think Mr Surfacer will be my new and beloved priming agent from now on <3 ,<3 <3 ), and with my Archer Dry transfer license plates applied.
And this is where I started to experiment.
Nowhere had I seen anybody's advice on what sort of surface is best to apply a dry transfer. I had 4 plate decals, so I thought I'd try a little experimentation. On the top two decals, one has a coat of Future painted on underneath, while the other has just the sanded and rinsed primer surface. Now, without any obstructions in the way of a clean and good rub-down of the decal, I didn't really notice any difference. Then I proceeded to ruin both decals. I found that trying to rub a transfer onto another transfer wouldn't work so well. With my next two attempts, I coated Future between the plate transfer and the number transfers on top. BETTER!
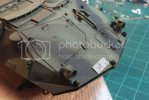
P1150726.jpg
Here's the front. Like I said, I applied Future between each individual number on the plate. And it's pretty glossy. So much so that my work lamps washed out the last 3 numbers in the pic! The acrylic surface seemed to grab the decal fine. As well, it provided a protective barrier between the carrier film, the transfer itself, and any previous transfers I had laid down in the same area. I'm still working on the painted-on registry numbers in the hull corners. Not great, huh? BUT, since there's so much Future on it, I could just sand them off right now and go to a Testors printable decal sheet and make my own! Yup... thinking about it right now...
P1150727.jpg
This is the rear plate. I did not do nearly as good a job of lining up the numbers on this as the front plate. However, in real life, they were never perfect anyways.

Yup... water-slide decals would have been a lot easier... now I know. And I could whip off all of my decals in MS Publisher in an hour 'imperfections' and all... hmmm...

Once more for the gifted: I thought that dry transfers would be a superior product in terms of ease of use and no edge silvering. I was wrong. With the decal setting solutions out there for making decals settle, and the fact that you can reposition and line up your decal as you see fit, I think that I will stick with wet-transfers myself.
 
Thinking it looks pretty good ND!! I would try and weather up the plate 1st and see what you get!! ;)
 
Dry transfers are a little harder to apply and do take some getting used to but really are superior to decals for a number of reasons. Most of Archer's sets are of specific vehicles that aren't available in mainstream kits that people have researched from photos and books etc. and worked with Woody to produce one of a kind sets. I myself have researched five half tracks for Woody and they are available as sets if someone wanted to build any of those specific vehicles.

What you see on the black transfer is not silvering, it's just some of the adhesive residue from the sheet, it can be burnished down to the surface or carefully picked off. There is no carrier film on dry transfers other than the large plastic sheet they are printed on, so air pockets under the clear carrier film (silvering) is impossible. It's basically just the ink printed on the sheet.

After applying the transfer, you should take the wax paper sheet that comes with them and place it over the transfer and finish burnishing it to the surface, this would have gotten rid of that extra residue you see.

You can see this technique mentioned on the Archer site: http://www.archertransfers.com/PAGE_DrySmall.html

To make things like individual numbers on license plates easier to apply, they sell a wet medium paper which allows you to position the transfer precisely before blotting out the water and burnishing it with the wax paper: http://www.archertransfers.com/PAGE_WetLarge.html

HTH

Don't give up on dry transfers just yet, with a little practice they can yield incredibly real looking 'painted on' markings.
 
Doh! Thanks so much for the tips, Ken! Unfortunately, I've used/ruined all the numbering & license plate transfers that came with the sheet. She's siting aside for the rest of the week until I can get some printable decal paper this weekend. I'll be redoing the decals myself with MS Publisher and a colour toner copier/printer at school sometime next week.
Some time away from them, along with your helpful post, has given me time to reconsider them overall. In the meantime, I'm attacking the fuselage fit issues on my Harrier. May post on that later tonight. And Thanks again, Ken!
 
How's it goin, eh?

So I'm back at this after spending some quality sanding time with my Harrier.
P2070726.jpg
I picked up another batch of dry transfers, after mostly ruining the old ones. I'll burn off some more of the old batch practicing the dry transfer-to-waterslide technique before doing it for realsies on my model this weekend. By then, the detail painting should be done too. That should coincide nicely with the imminent arrival of my AK weathering products and training DVD...

So, how do you do vision blocks pre-laser-reflective era? Here's my take:
P2070724.jpg
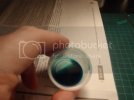
Step 1: Realize that you don't have any clear blue or green paint. Make your own with some artist ink and Future.

P2070725.jpg
Step 2: Mix the ingredients. Here's where the recipe gets really technical: precisely 1 squirt of Future and exactly 1 dash of ink. Mix well.

P2070728.jpg
Step 3: Apply a thinned down coat of flat black, letting capillary action flow the paint into the corners. Over top, apply a VERY thinned coat of metallic silver, so it's not too reflective. I used Vallejo Black and Citadel Chainmail. Finally, apply several coats of your brand new clear paint.

P2070727.jpg
Step 4: Realize that while the vision blocks look right, the periscopes & turret sights aren't exactly scaling right. Plead for help and advice from fellow forum members.

All kidding aside, should I have left the silver paint off the glass? What do you all do for periscopes? Should I have used the kit-supplied clear periscopes instead?

Thanks for the help and happy modelling! ;D
 
Hey Dude,

I Dig th Homemade transparent Paint !! I think it looks Great !!

Here's what I do ..... I do this for Dragon's Clear periscopes.

1) I'll shoot th whole glass in AlClad's Transparent Green

2) Avoiding the Viewing area, I'll paint th body of th vision block in Model Master Chrome

3) Over paint th Chrome with Vallejo Games Black( Negro)- as it has th right amount of semi-gloss that th German Periscopes had. Those periscopes were also made out of Bak-Lite ( WWII version of Plastic) They were sorta Red-Brown too. So either way Finish up with a Black or Red-Brownish.

DSC08100-1.jpg

DSC08091-1.jpg
It might be hard to tell from th pix, but to My eye ,doing it this way adds a lot of Depth to th periscopes.

Also ... If I'm doin th solid plastic ones ... I'll just add th MM Chrome, paint th lens *Transparent Green over th chrome* & then over coat th Chrome with Black. Leaving th Lens green

DSC07701.jpg
Here's th Driver's periscope on Tamiya's 1/25th scale Jagd-Panther. I had to scratch build th periscopes for this one. I used th above method

What you are doin' is Cool too. I bet you can shoot that Future + Ink mix through th AB ?? Just make sure you clean th Heck out of it when you are finished. ;D

Good Stuff !!
 
Couple of clever ideas there for painting those. Awesome work.
Love the mixing ratios too, those are much more in tune with they way I measure.
 
NecronautDrummer said:
I'll burn off some more of the old batch practicing the dry transfer-to-waterslide technique before doing it for realsies on my model this weekend.

Can't argue with that logic.

Keep us posted on your results.
 
As promised, I'm back with the results...

P2130724.jpg
I slathered on more and more of my custom clear green paint until the glass had enough 'depth'. And running with panzerace007's method, I had to add my twist: Citadel Badab Black. I 'eyelined' each periscope with Citadel's black wash, rather than using Vallejo Black (just so you could still see a full green surface, sort of...?). The deeper-set vision blocks and periscope glass look awesome! The more shallow-set crew commander's sight and the driver periscopes could use another coat, though. Easy to remedy that.

What else? Decals 2.0, of course! As you can see, the front corner registry markings are in place. Archer's new YouTube channel arrived just in the nick of time for this. I made my own waterslide decals for these with Testors clear decal film and got the numbers to line up pretty well for my third crack, IMHO. However, I found that the decal film is pretty fragile. Some of the rub-ons started to lift off a little. And with the slightest whiff of MicroSol, they almost evaporated. We'll see how they look in the morning.

P2130725.jpg
Here's another shot of the hull. You should be able to see the superior job I did with the dry transfers on the license plate this time around. What else? I touched up some spots where my clear paint and wash ran a bit, re-attached a couple pieces that had fallen off, painted and highlighted the grenade launcher condoms, and washed the coax mount with some Badab Black in prep for its Dark Steel pigment application. Did I mention my AK order arrived? Joy!

Now...
P2130726.jpg
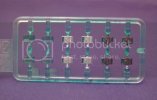
How do I deal with these guys? They're vinyl. They need to be aged some. Do they need to be washed to get rid of mold release? Can I paint them with Vallejo Panzer Aces acrylic? What prep work needs to be done on them before I start weathering them? Would sanding them give them that aged appearance? Please help!

Thanks in advance and happy modelling!
 
i would wash them, and if you plan to paint them make sure u use a primer coat over them, But on my build im going to use very nice sand paper and get that worn look followed by dust pigment and that should do the job
 

Latest posts

Back
Top