TNG Romulan Warbird

Update #... I don't know... I lost count.

So after we last met, I went ahead and filled the gaps between the wings and the warp nacells, along with the gaps between the main body and the forward hull piece. It started off quite messy, but there was so much to do that by the time I was done I was feeling like a seasoned professional at filling gaps.

Filed and sanded with heavy grit sandpaper... I was probably too vigorous about it and ended up with alot of divets in the filler. Went back and filled those in, sanded with lighter grit paper gently, then with a really fine paper to get a smooth finish. Still noticed some little dents... went back and filled those... It was starting to feel like fixing the imperfections was taking over the project. I had to beat down the perfectionist in myself to just let it go and get on with it. At this point the filler still looked like a complete mess, but it felt smooth to the touch.
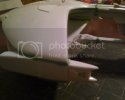
Photo04300045.jpg

I knew there were still some problem areas, especially the areas inside the wings, but at this point I was ready to move on and see what happened. I also took a little break from the ship itself and started working on the stand, which I have some definite plans for... but my plans usually end up like those on a battlefield... not surviving the first encounter with the enemy, so we'll have to see...
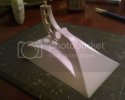
Photo04300051.jpg

I decided to give the ship a good healthy does of spray primer. I know everyone is always saying something about doing several very thin coats, but in my experience with priming miniatures, it tends to shrink down alot when it dries to conform with the detail. I was hoping that an extra bit of spray on the warp engines would help to smooth out the filler. Here's a shot in some good light outside.
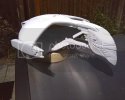
Photo04301425.jpg

The filler came out alot smoother than I expected on the warp engines, though there are some areas where it has some pretty evident divets. I don't know yet if I'm going to give in and try filling them, or just let them go and let the base coat sort it out.
 
Those are some nasty seams....... you have my sympathy, I just went though one of those with a 747 model I built.

If you haven't tired it yet, get yourself something like Aves Apoxie sculpt. I had people giving me advice on it for a least a year, and wouldn't try it. I am now a convert. You can smooth it with your fingers using a little bit of water, it dries hard and will not shrink. You can control how much you apply way better than you can with any other type of putty. I will do a video on this soon!
 
Definitely get the Aves. The issue you've described is EXACTLY why I used to hate conventional putties.
I could never get them smooth enough.
You're coming along fairly well, though, despite the issues
 
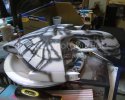
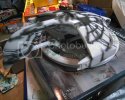
Pressing on.... pre-shading. Used a brush to get paint the cut out recessed areas, then broke out the airbrushed and attacked it with extreme prejudice.

Photo05041804.jpg

Photo05041805.jpg

The airbrush tip is probably at the point where it needs to be replaced. Quite inconsistant. Kept going from a barely visible thin line that I had to go over several times, to a thick dark line that was pleasing to work with, but didn't mesh with the other lines. I think I'm going to invest in a new tip before doing the final weathering.

Anyway, evened it out best I could. I've never done pre-shading on a vehicle before. In every video tutorial I've seen it looks really messy, but in the end looks really nice. I've got the messy part down :) I don't know if it will even make a difference when I overspray it with the base coat. Really looking forward to seeing how it turns out.

Not shown: I've primed the stand grey. My plan is to spray it a bright shiny silver, then do a rub down with wood stain to dull it down a bit and "age" it. I did this with a sculpture I repaired for my father and it turned out REALLY nice. Then planning on printing the Romulan emblem, fitting a piece of plasticard to lift it a bit for a 3D effect, and placing it on the front. Actually don't know if I want to do the stain before or after putting the emblem on... will have to test the stain on the photo paper to see if it's feasible.
 
That looks great. Whoa, whoa, whoa, hold on a second; do i see a ROCK'EM SOCK'EM ROBOTS game? Cool.
 
Thanks! I really appreciate the encouragement!

Yep, thats the box to Rock'em Sock'em Robots. I'm going to cut out the front and frame it as artwork for my boys' room.
 
It Looks like a Fair Size Model ??? Lots of potential there !

Once you start Using AVES putty ! you will find you'll like it !!! The smoothness alone is Awesome !!!
and the Non Shrink is a Plus !!! other putties over time might, pull out and ruin your models overtime...

depending on storage and all !

Good luck with your Build !!! it should like mighty impressive once all Dolled up !


Norm

OUT !
 
Yeah, I looked for the Aves around town, but no one had it, and StarshipModeller was sold out of it. I'm gonna keep looking for it for future projects.
 
Nice build !...looks interesting ,looking forward to seeing how the paint works out . Oh ....I like the rocke em sock em in the background ;D

Chris.
 
It's been quite awhile since I updated... about 3 weeks. I got discouraged after the spray painting the base coat went horribly wrong. I sprayed the internal areas and the bottom, but I applied the spray much too thick. Some areas are not fully covered where the paint ran from, and others are nicely covered where the paint pooled. I had some drippage down to the top half, so there were some big drops of dried paint. Also got some bubbling where the filler was.

I finally regrouped myself after taking a break and took another look at it. The paint is actually not that bad, it's shrunk down to hug the detail. I was able to sand down the paint drops without sanding off the primer, and have sanded down most of the pock marks where the paint had bubbles. A little more touch up sanding and I think I'll be back in the game and ready for another -light- coat on the bottom and then on to cover the top.

Never give up, never surrender!
 
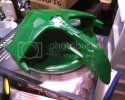
Finished up with the basecoat, which turned out much darker than I was expecting and pretty much completely obscured the preshading except in the most deepest recesses. It's also gloss, which actually turned out to be a plus later...


Photo06072126.jpg


The defects that had come up after the first paint run are barely noticeable, so that turned out good. I was still a bit gun shy taking the airbrush to it. I had picked up two different colors of Testor's Acrylic in green, but when I got home I found that one color was darker than the base coat... not what I wanted. The other looked to be just right. I finally worked up the gumption to boldly go, and went at it.

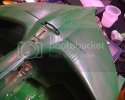
The Testors paint has a much different formulation than what I usually use, and I ended up thinning it down way too much. The first run ended up with the paint running and dripping down the model. This was where the gloss came in handy. I just wiped it down with a paper towel and started with a clean slate. Added a little more paint to the pot and this time it worked perfectly. I got some very smooth graduations of color. I used a new technique to me, using a piece of card as a mask to get one edge of the spray a harder edge and the other softer.

I was expecting to having to go with another round of airbrushing, but after the airbrush clogged (of course) and I stepped back, I think I really like how it turned out. The airbrushed color really lightened it up to what I wanted it to be and has a nice subtlety. I think it might be done!

I don't think the photo taken in bad light with my crappy cellphone camera does it justice...


Photo06072223.jpg


All that remains is the decal on the nose, which I am thinking I might just freehand paint... the decals are 20 years old! Then a dullcote seal. And of course finish up the base, which I am not expecting any problems with... famous last words...
 

Latest posts

Back
Top