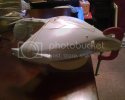
TNG Romulan Warbird

fcschmidt

New Member
Joined
Apr 4, 2011
Messages
57
Hello, all. My name is Fred. I'm a big Warhammer 40k fan and have several fully assembled and painted armies. I haven't put together a strictly display model since I was a kid, though... maybe 25 years ago! Thought I'd throw my hat into the contest ring with some of the techniques I've learned since way back then. The only kit I could find in my garage that wasn't partially assembled was a Star Trek TNG Romulan warbird. I can't believe I never even opened up the sprue bags.

My plan is to put together the sub-assemblies and do a dry fit to make sure they fit right. In researching the kit I've found that some have said that it may require some filling between the top and bottom halves where they meet the warp drives. This may pose a problem, as I want to airbrush the inside areas. Anyway, I'm hoping to airbrush it an emerald green, more like what is seen on the screen rather than the gray of the original model, then airbrush the panel lines. I'd like to try my hand at some weathering, but I'm not sure how to go about weathering at this scale.

I'm looking forward to this build. It will be a learning process for me, so any tips you want to throw at me are appreciated :) Thanks!
 
Hi Fred

Welcome to the contest, cannot offer any assistance as I am in a very similar situation to yourself. What i will say is though, everyone here will chip in and help you out.

Have fun

Tom
 
Hey, Splashcoat. Thanks for the link. I actually read your write up while I was doing my research. I really like how you did the lighting on it... that might be a little too ambitious for me at this point. :p Good information, though. Thanks again!
 
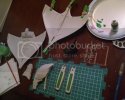
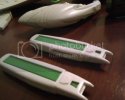
Update #1: Off to a bit of a slow start... I needed some supplies from the hobby store before I could get very far, and was delayed on getting there. Got out there yesterday, though, and was able to dive in. I have the major assemblies put together, including the painting of the inside of the warp engine's clear parts. I think they're looking good so far. Filed down the seams on the front section of the ship. It just needs some fine sanding now to really smooth it out. That's it so far...


Photo04130004.jpg
Photo04130008.jpg
 
Based on how I am progressing, you have made a great start. It's all looking good thus far.
 
Thanks, everybody. I appreciate the comments!

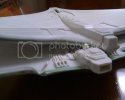
I'm only getting sporadic time to work on the project, but I got a couple sessions in. Filled in the leading edge of the wings with Squadron Green (my first time using the green). I was really not looking forward to doing so much filling, but got it done and it wasn't too bad. Scraped, filed, and sanded to a smooth finish. There are still some very small imperfections, and I'm not sure if they will show or not after priming, so I guess I'll just wait and see. Sorry, not the best photo here, but a WIP photo none-the-less.

Photo04191237.jpg

Next up is masking, priming, and undercoat shading.
 
Thanks for keeping us posted! I have this kit near the top of my build list and seeing it built up helps!!
 
I've been in analysis paralysis mode for about the last week, thinking about how I'm going to proceed. I was already iffy in my plans, but after watching ScaleModelMedic's video on getting a better finish, I was really perturbed. It was either paint the interior surfaces first and then fill the areas around the warp drive, then paint those again, or completely assemble, fill, then paint. I went with the latter plan... though it will require me to paint the interior surfaces at an extreme angle and won't be able to do any fancy airbrushing. The surface should look alot better, though. This project is turning into an exercise in compromise.

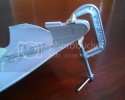
I connected the tail section to the lower wing. Not shown: I had to trim away alot of rear section of the plug, as it was too tall to fit snugly to the wing. The back flap of the wing stuck out at an angle, so I had to clamp it down.

Photo04201810.jpg

From there I filled in the seams for the tail and the inside areas where the wing peices met with white glue. I figured this would be easier than trying to use filler with the right angles and surrounding detail. Plus it's in an area that will not be the focus of the model, so will most likely not be seen anyway.

Went ahead and assembled the rest of the kit minus the clear parts on the leading edges of the warp engines.

Photo04252200.jpg

Again, had to clamp the tail section. It's very difficult to get a clamp to stay on two angles surfaces! Had to tape it down.

Next: More filler, filing, sanding, ad naseum....
 
Thanks, all! I'm planning on airbrushing it very similar to the studio model, though mine is going to be a brighter green to better match it on-screen. The airbrushing is what I'm looking forward to the most, as I'm going to be trying out some new techniques. I only have a crappy Testors airbrush, but I think it will work well.
 

Latest posts

Back
Top