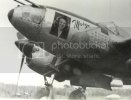
Revell 1/48 P-38J Lightning

Ferris928

New Member
Joined
May 7, 2009
Messages
623
Hey!
Well, since I've been waiting for decals to arrive on my B-26, I've been working on Revell's 1/48 P-38J Lightning.


I pretty much plan on doing it Out Of Box and the primary version. After looking at the surgery required and or stunning typical old Revell details...that's about all I feel comfortable doing with this kit.

Yup! 1964!
Though, surprisingly, the flash and such (so far) isn't that bad. The clear parts are not too great. The moulds are showing their age there.
The decals are looking pretty good. Marge is in register, and the decals themselves don't look that thick this time. Though we'll see when that time comes.

Progress so far:


Thanks for checking it out.
Cheers!
 
Good start Ferris. I like the initial painting in a kit - I always feel that I'm making lots of head way when I lay down big areas of colour.
:)
Are you planning to build "Marge" or "Bomber Dear"?
 
Ferris,

real nice subject mate, really looking forward to seeing how this bad boy builds up 8)


great start mate


shane.
 
JMac said:
Good start Ferris. I like the initial painting in a kit - I always feel that I'm making lots of head way when I lay down big areas of colour.
:)
Are you planning to build "Marge" or "Bomber Dear"?
Thanks! it turned out pretty good this time. the black really made the chromate green look sweet! and when the wash goes down, it should make it look awesome (IMO). :)
I'm going for Marge.
Bomber Dear is the 'Droop Snoot" and the detail for it is...well... nothing. You sit the guy on the floor of the gun bay and cut some windows in the 2 top gun covers and throw on a clear nose. I know in the really real world, the bombardier was crammed in pretty tight, but this is just dumb. I'd love to build one someday, I think it looks cool. Also, it's one of those planes that go into combat without a gun and gets away with it! If I do do one, I'd like a dedicated kit.
longlance67 said:
Ferris,

real nice subject mate, really looking forward to seeing how this bad boy builds up 8)


great start mate


shane.
Thanks! This is my first P-38, my first comment upon opening the box was, 'It's so little!." :) I've seen the plane in so many documentaries and such and I always thought it was so much bigger. Though, now that I think about it, I thought that of the ME109 as well. The F4U Corsair is a city bus compared to this thing! :)
More to come!
Thanks for checking it out!
Comments are encouraged and welcomed!
Cheers!
 
Update:
My pix for the cockpit didn't turn out too good.
But I got the wing-fuselage glued. Went 'clamp-happy' again! :)


Working on the seams.


I know there is going to be a small slaughtering of panel lines on this one, I hope it's not too traumatic.
Here's a pic of some loose fitting.


Thanks for checking it out.
 
One of the Coolest Allied plane of the War. Nice work on this beauty.
Just below the pic of Plain Marge , on the decals, the number 993 looks wiped out....
is that the way it should be??? Keep up the good work. Bill
 
PANZERMAN said:
One of the Coolest Allied plane of the War. Nice work on this beauty.
Just below the pic of Plain Marge , on the decals, the number 993 looks wiped out....
is that the way it should be??? Keep up the good work. Bill

Thanks!
Decals: Apparently, I've seen pix where it's gone and some where they're replaced, but I found this pic....
MajDickBongsP-38J49thFG.jpg
I guess it's 'accurate.' Not too sure why they're like that, perhaps switching units ( ? ) Or maybe the paint came off from cleaning the gun stains too often ( ? ) the guy did have 30+ kills.........:) Or it could just have been bad paint and airflow took it off.....
I wasn't sure about putting them on, i figure it out sometime soon i suppose. :)
The anti-glare panels...in the instructions...are called out as black, though I've seen OD as well, I'm thinking of going OD.

Thanks for checking it out.
Cheers!
 
Update:
I think I'm just gonna plow ahead with the P-38 and finish it before getting back to the B-26. I'm really not that far from being done with this one, I might as well as follow through with it.
But anyhoo, here's some pix.
The carpet monster defeated my attempts to retrieve the clear part for the wing light, it teamed up the the rollers from under the chair and killed it before successful retrieval. :(
So I filled the area in with CA. It's a little cloudy, but it works I guess.


I'm enjoying the build, but I don't have too high of hopes for it. The fit is terrible, and the raised rivets can't handle anything harsh. The plastic is reacting to everything; Lacquer thinner, CA accelerator, and somewhat with alcohol.
The fit problem I pretty much figured would happen, it's an old Revell kit (....1964), it's expected. But wow!


Do you see the glue finger print? :)
The reaction to the thinner and accelerator and alcohol are surprising though, never had that happen before.
The nacelles are pretty much done except for props, gear, and gear doors which will come later.


It may sound like I'm griping and crying, I'm not. I just wasn't ready for the amount of 'fixes' require for this kit. I do like building the Revell kits and for my model budget they fit (about the only good fit...).
Anyhoo, thanks for checking it out.
Cheers!
 
Wow, that is a huge gap to deal with. Sounds like this is an Epic Battle to get this one done.
The ones you fight the most are the victories you will savor the most later on. You can do it....
Keep plugging away. Good Luck. Bill
 
Ferris,
Those old kits were kinda, made to have the panels
open and close to display the eye candy inside.
You are doing a bang up job on this though. Looks
Great.
 
Thanks guys!
Peppylepugh said:
Ferris,
Those old kits were kinda, made to have the panels
open and close to display the eye candy inside.

Doh!
i typically don't have panels open, so i guess i didn't think about that.
Good call.
 
im building the exact same kit, with the same problem in the joints.....
amazing work so far.. ill keep an eye in this build !!
have fun !!
 
I really enjoy seeing people work on these old Monogram/Revell kits and some of the Linberg ones to. Takes me back to the good old days of my youth. I think when I built the P-38 kit in 1976 it was in one weekend but back then we didn't worry about seams or the decals silvering.
 
Holden said:
I really enjoy seeing people work on these old Monogram/Revell kits and some of the Linberg ones to. Takes me back to the good old days of my youth. I think when I built the P-38 kit in 1976 it was in one weekend but back then we didn't worry about seams or the decals silvering.
The Archie Bunker theme is now screaming through my mind! Thanks! :)
 
Update:
Attached the booms and horizontal tail.


The tail didn't line up too well, so I used the band to move and hold it in line.


Superchargers.....


Well one anyway. So Since I couldn't fin any round plastic stock, I used the ends of a small pipette.


They're a little too big, but they work.


I sprayed them with Testors Burnt metal (buff) and rubbed on some powers. I think they came out well. Final word will be when I dull coat them.


Under the wings on the booms, and where the horizontal tail slides through the booms, there was a large gap. I filled them with white glue and with a wet cotton bud I wiped away the access.


That's where it sits for now. Thanks for checking it out.
Cheers!
 
Update:
Been doing some of the annoying stuff. Getting gear seams lines removed and gluing that together.


Redoing the wheels (after rubbing off the excess wash, went to far and removed paint, too thin I guess). Using only Simple green on the wheels this time...


Adjusted some sanding on the nose gaps. scribing in panel lines on the bigger hatches and panels.
Put nose weight in. Mixed glue with the weight and gooped it in the booms / engines.


Fixed up some of the weathering inside the cockpit and wheel wells.
Masked the clear parts...pain. if I do another P-38 I'm gonna look for masks. on the positive, it was a learning experience.


Hopefully, tomorrow, I'll be able to get to paint. I'm itching to try out the paint I decanted.
-------------
A helpful tip for assembling and painting without have the landing gear struts attached. Cut the round part on the boom (well interior) in half and shorten the strut piece that fits in there by a millimeter or two. There's a bit of test fitting to be done. This way, you can do all the gear struts and such separately from the rest of the plane.


Hope it helps.
-------------
Thanks for checking it out!
Cheers!
 
Big update Ferris. You're cruising through this one and the P-38 is looking nice.
 

Latest posts

Back
Top