Mr. Spock

MrNatural

my head is falling off my head
Joined
May 27, 2009
Messages
983
Hey friends! Would just like to start off by wishing everyone the best of luck with their entries. The talent here on SMA is unprecedented! Amazing to see how much this site and contest has grown over the years. Well im keeping it pretty simple this year, I'm extremely busy lately and just don't have the time like I used to in previous years, but I still want to participate in the contest.

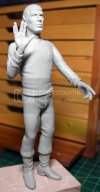
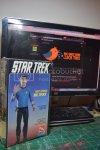
So, in honor of the late great Leonard Nimoy, I'll be building this kit for the figure category this year.

DSC_0031_zps6ruykypw.jpg

Thanks for checking out my thread! Later dudes!
 
Bizzare-Thanks for checking it out! I know its an old kit and a bit cartoony, I dont care, I like it. Thanks for the kind words my friend!

Scott!-So glad you're overcoming your modeling slump! Thanks for checking it out! Much appreciation my friend!
 
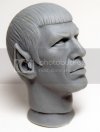
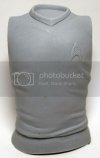
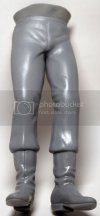
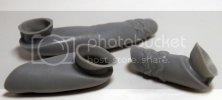
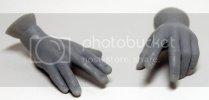
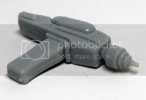
Alright, just a little update here nothing too crazy yet. Let Spock soak over night in some dish soap and cold water and gave him a good scrub down with a tooth brush. Here are all the washed parts as they come out of the box, I haven't done any trimming or sanding yet. This is a really old kit so its a bit cartoony looking but I dont mind reminds more of the animated series.

Mr.%20Spock%204_zpsubzynm8e.jpg
Mr.%20Spock%201_zpsomemoeij.jpg
Mr.%20Spock%202_zpsi8nyd33j.jpg
Mr.%20Spock%203_zpsx0iymvw7.jpg
Mr.%20Spock%205_zpsi56cindt.jpg
Mr.%20Spock%206_zpsi0g4xmke.jpg
Mr.%20Spock%207_zpsrx2egede.jpg

Thanks for checking it out!
 
Scott Girvan said:
Great looking kit.

Thanks for checking it out Scott, yeah, for as old as this kit is, it's really not that bad, definitely has some character to it.

UncleDredd said:
I really like the look of this model! Excited to see your progress. :)

Thanks man, I'm excited to start painting, this will be my first Star Trek related kit 8)

Cash said:
Looks like head part is going to be fun while painting. :)

Thanks for checking it out man, yeah, I was thinking the same thing, the head sculpt on this thing is pretty good, even though it looks like a much younger and muscular version of good ol Leonard.

Cool, well moving right along on this guy, having a ton of fun with it, been going back and watching the old TOS episodes on Netflix for some inspiration. I'm pretty surprised at how well the parts fit together, only had some slight issues with the torso, had to do the old hot water trick to bend it back into the correct shape.

As with a lot of vinyl kits the issue of warped parts and rigidity definitely comes up with this model. The parts are really soft and "squishy" and vinyl has a tendency to warp over time with different climate changes and what not. So your best bet is to fill the hollow parts of the kit with some sort of solid material to ensure rigidity over time. I prefer to use plaster, but you could use all different sorts of materials including; air dry clay, sand, newspaper, spray foam, etc...

Hollow bad...pre plaster infiltration
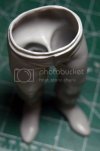
DSC_0008_zpsrl5exbws.jpg

Went down to Hobby Lobby, (we just got a hobby lobby in my town BTW and what a great store, love it) picked up a fast setting plaster product called PermaStone. Really easy to work with, just eyeball how much you think you need, mix with water until you have a pancake batter consistency, then either fill your model, mold, or whatever you're working on. In this case, I just had to dump the stuff into the hollow parts of the model. It's solid in 30 minutes, you can carve, sand, drill, tool this stuff into anything your heart desires.
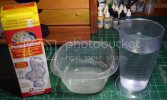
DSC_0006_zpskj1eruxe.jpg

Success, I like plaster because it gives the model a nice hefty weight and it conforms to all the nooks and crannies.
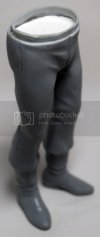
DSC_0013_zpswwgyyvnt.jpg

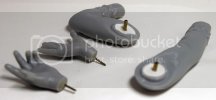
After filling the major parts with plaster I added reinforcement brass rods to all the major connection points for added strength. I dont want Spock to be droooooping 10 years from now. Check it out!
You can see where I reinforced the join with Aves.
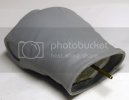
DSC_0014_zpsjzzktqdf.jpg

Was a little difficult to get the plaster into the tiny openings for the hands, so I stuffed them with aves and stuck my brass tube in while the aves hardened, Aves is my friend ;D
DSC_0015_zpslqowtj5r.jpg

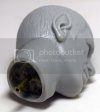
Jammed some brass into the head, same plaster technique reinforced with aves.
DSC_0016_zpsg8x6l25e.jpg

Basic stuff, thanks for looking, I hope everyone wins. God bless.
 
I like that idea of filling the empty space... very cool... Looking forward to more..
 
Grendels said:
Off to a nice start! This is turning into a nice tutorial on vinyl models!

Thanks bud!

Quaralane said:
Excellent idea on filling the model

Thanks Q! Yeah it had to be done, this particular kit is really soft and squishy, filling the parts with plaster really helped while sanding certain areas.

adampolo13 said:
Very nice work so far!

Thanks so much man, really appreciate it!

amateurmodeler said:
That head sculpt is pretty cool looking.


cargoman5126 said:
I like that idea of filling the empty space... very cool... Looking forward to more..


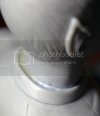
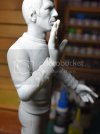
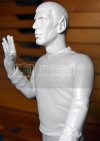
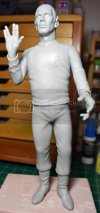
Hey dudes! Im still here hahaha, I got Spock all put together. I've just been doing a lot of filling and sanding. This kit goes together pretty well but it definitely has its fair share of gaps and seams. Getting close to putting the first coat of primer on, I'm sure im ganna have to go back and work on the seams. I've used just about every type of putty on this thing including Aves, Tamiya basic putty, Bondo, and Mr. Surfacer 1000. Check it..
DSC_0023_zps05rkjnzm.jpg
DSC_0022_zpsace6ymye.jpg
DSC_0020_zpshprw2iut.jpg
DSC_0019_zpsqvmtsfbc.jpg
DSC_0017_zpskrchk9wx.jpg

Thanks for checking it out my friends! Comments and critiques are more than welcome. Later on dudes!
 
Finally caught up to this one...very cool subject!! ;) Looks like you've got Spock pretty close to adding some color soon!! Well done! ;D
 

Latest posts

Back
Top