You are using an out of date browser. It may not display this or other websites correctly.
You should upgrade or use an alternative browser.
You should upgrade or use an alternative browser.
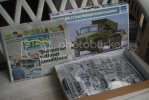
Trumpeter 1/35 BM-21 MRL Grad
- Thread starter okb1982
- Start date
Eastrock
It's All About The Fun!!!
- Joined
- Feb 20, 2011
- Messages
- 1,598
This would be a fun to watch 
I'm in the front seat lol
I'm in the front seat lol
Grendels
Active Member
- Joined
- Nov 24, 2009
- Messages
- 9,092
A rocket launcher. Will be watching...
The Model Dude
"Yeah, well. The Dude abides."
- Joined
- Jan 15, 2013
- Messages
- 160
I like the look of this kit Iking, I look forward to seeing your progress! 
Thank you Grendel, ER and Les for the appreciation.  cheers!
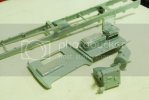
I started some items on this kit already.
First in the manual is the chassis and the engine block.
I mated the base chassis and the engine blocks already as you can see.
Fits are fine but the engine block needs some sanding and filling to cover the seams.
While it was drying, I opened the manual to the cab section.
I sometimes have a habit(bad habit) of jumping into another part of the manual for reasons that i want to assmeble the parts that are recognizable already, haha!
When I was assembling the cab part, I added detail on the seats by wrapping it on aluminum foil to give it a look of a seat cover. ill give this seat some worn out look in the coming weeks.
These seats will then be covered with primer to kill the sheen and for the base paint to stick.
Here is the WIP photo so far.
Cheers!
Iking
I started some items on this kit already.
First in the manual is the chassis and the engine block.
I mated the base chassis and the engine blocks already as you can see.
Fits are fine but the engine block needs some sanding and filling to cover the seams.
While it was drying, I opened the manual to the cab section.
I sometimes have a habit(bad habit) of jumping into another part of the manual for reasons that i want to assmeble the parts that are recognizable already, haha!
When I was assembling the cab part, I added detail on the seats by wrapping it on aluminum foil to give it a look of a seat cover. ill give this seat some worn out look in the coming weeks.
These seats will then be covered with primer to kill the sheen and for the base paint to stick.
Here is the WIP photo so far.

Cheers!
Iking
Biskup
New Member
- Joined
- Aug 27, 2010
- Messages
- 1,876
I didn't know that Trumpeter makes Ural and especially Grad.
It's a great truck and as I have one in my stash (made by Alanger) I will be watching closely.
Cheers
It's a great truck and as I have one in my stash (made by Alanger) I will be watching closely.
Cheers
Elm City Hobbies
Active Member
- Joined
- May 7, 2009
- Messages
- 3,239
Biskup said:I didn't know that Trumpeter makes Ural and especially Grad.
It's a great truck and as I have one in my stash (made by Alanger) I will be watching closely.
Cheers
It just came out. I have built the Alanger/Eastern Express, and whatever other name it was released under, kit. To say it was a chore to build would be an understatement.
Thanks guys!
For now, here are some updates:
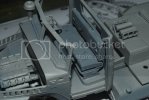
Shown on my previous thread, it was posted that I added some seat covers on the driver and passneger seats.
These were then slashed to make it look worn and damaged.
before painting:
After painting:
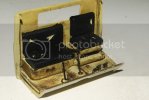
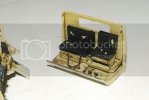
These were finished with tamiya paints and oil washes from AK Interactive.
The control panel are also assmebled and painted.
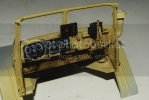
These will be mated together and sealed while i build the rest of the truck.
Before these painting happened, the parts were already dry-fitted:
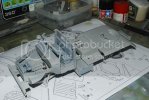
Cheers!
iking
For now, here are some updates:
Shown on my previous thread, it was posted that I added some seat covers on the driver and passneger seats.
These were then slashed to make it look worn and damaged.
before painting:

After painting:


These were finished with tamiya paints and oil washes from AK Interactive.
The control panel are also assmebled and painted.

These will be mated together and sealed while i build the rest of the truck.
Before these painting happened, the parts were already dry-fitted:

Cheers!
iking
Tailor
**ck 'em, if they can't take a joke!
- Joined
- Mar 23, 2012
- Messages
- 495
That is definitely on top of my have-to-have list. I will watch this closely.
Love the idea with the torn seat covers and will try to remeber it!
Keep it up, dude!
Love the idea with the torn seat covers and will try to remeber it!
Keep it up, dude!
Cave_Dweller
New Member
- Joined
- Mar 18, 2011
- Messages
- 812
Ace job on that interior! How did you make the torn up seats? That looks really authentic.
Grendels
Active Member
- Joined
- Nov 24, 2009
- Messages
- 9,092
That looks great!
Thanks guys for the support!
Tailor, this is a good kit and it's a must. I don't know how it fares with the older generation BM-21 kits but this sure is worth it. thanks and good luck on your build!
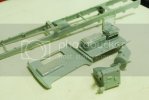
Cave Dweller, thanks a lot! The seats were first covered with aluminum foil. You can use household foil. glue it on the edges of the seat only using CA glue.
Once the glue is dry, get a sharp Xacto or hobby knife (pointed ones) and randomly slash the foil to create torn upholsters.
Paint the seats differently from the exposed cushion and you have it! enjoy!
Here are some photos:
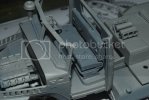
Thanks Grendels!
Here is my update so far.
Well the suspensions are a bit tricky but not because of bad detail but because i rarely built trucks hahaha! even though it's tricky and fragile this is a very much fun build.
The truck's stance is awesome; big wheels, the rocket launchers and the big bulk of its frame is just a beautiful kit made by Trumpeter. Oh and did I forget, all the roadwheels easily hugged the floor when I laid them without much difficulty
I have also done the subassemblies and managed to dry fit them.
The rocket launcher mechanism is already done and mated.
You can see that I added some electrical wirings that connect the launch tubes to the main fraim of the launcher.
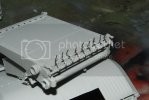
Bigger cables were also added as shown on realsteel photos.
In reality there are 2 main cables under the launcher platform.
I added it using earphone wires that can be seen on the photo as the white parts.
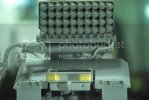
After these wirings were done, the launch tubes were mated on the main platform to complete the subassembly.
Right next from this, I tinkered on the engine compartment and added some details based on elusive www pics of URAL engines.
Some of these are just approximates.
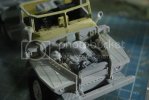
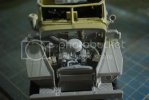
The details were made from my old scrap box parts and wires and vinyl tubes. I just hope to fill the engine cavity and (if not exactly) mimic the engine compartment of the URAL lorry.
Here she is now gents, standing and on its 70% completion.
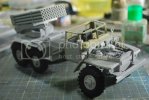
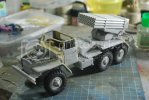
Enjoy and happy modeling!
Iking
Tailor, this is a good kit and it's a must. I don't know how it fares with the older generation BM-21 kits but this sure is worth it.
Cave Dweller, thanks a lot! The seats were first covered with aluminum foil. You can use household foil. glue it on the edges of the seat only using CA glue.
Once the glue is dry, get a sharp Xacto or hobby knife (pointed ones) and randomly slash the foil to create torn upholsters.
Paint the seats differently from the exposed cushion and you have it!
Here are some photos:


Thanks Grendels!
Here is my update so far.
Well the suspensions are a bit tricky but not because of bad detail but because i rarely built trucks hahaha!
The truck's stance is awesome; big wheels, the rocket launchers and the big bulk of its frame is just a beautiful kit made by Trumpeter. Oh and did I forget, all the roadwheels easily hugged the floor when I laid them without much difficulty
I have also done the subassemblies and managed to dry fit them.
The rocket launcher mechanism is already done and mated.
You can see that I added some electrical wirings that connect the launch tubes to the main fraim of the launcher.

Bigger cables were also added as shown on realsteel photos.
In reality there are 2 main cables under the launcher platform.
I added it using earphone wires that can be seen on the photo as the white parts.

After these wirings were done, the launch tubes were mated on the main platform to complete the subassembly.
Right next from this, I tinkered on the engine compartment and added some details based on elusive www pics of URAL engines.
Some of these are just approximates.


The details were made from my old scrap box parts and wires and vinyl tubes. I just hope to fill the engine cavity and (if not exactly) mimic the engine compartment of the URAL lorry.
Here she is now gents, standing and on its 70% completion.


Enjoy and happy modeling!
Iking
Grendels
Active Member
- Joined
- Nov 24, 2009
- Messages
- 9,092
Nice work on the details. The added wires help out a lot.
Eastrock
It's All About The Fun!!!
- Joined
- Feb 20, 2011
- Messages
- 1,598
Very fine work, Komrade looking forward with the paint 
Thanks ER!
I have some updates on the build.
I painted the kit in light sand mixture of Tamiya paints Dark Yellow and Flat White.
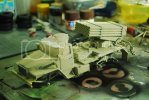
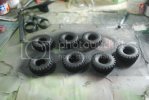
I then proceeded with painting the tire with black aerosol lacquer.
I then printed my own decals! I bought a local decal paper here and tried my hands in printing it using an inkjet printer.
Right now, it shows that i intend to build this into an Iranian vehicle.
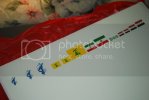
The other decals (Hezbollah, Iran and Iraq flag) will be used for other projects upcoming this year.
For added touch, and to add some livery, I attached a photo on the cabin roof.
The pic is of the Imam Ali mosque in Najaf Iraq holy to Iranian Shiites.
What will come next are the washes, filters and weathering.
Enjoy guys!
Iking
I have some updates on the build.
I painted the kit in light sand mixture of Tamiya paints Dark Yellow and Flat White.

I then proceeded with painting the tire with black aerosol lacquer.

I then printed my own decals! I bought a local decal paper here and tried my hands in printing it using an inkjet printer.
Right now, it shows that i intend to build this into an Iranian vehicle.

The other decals (Hezbollah, Iran and Iraq flag) will be used for other projects upcoming this year.
For added touch, and to add some livery, I attached a photo on the cabin roof.
The pic is of the Imam Ali mosque in Najaf Iraq holy to Iranian Shiites.
What will come next are the washes, filters and weathering.
Enjoy guys!
Iking
Grendels
Active Member
- Joined
- Nov 24, 2009
- Messages
- 9,092
Paint looks good!
Eastrock
It's All About The Fun!!!
- Joined
- Feb 20, 2011
- Messages
- 1,598
That's was fast decals looks great 
Thanks a lot guys for the support!
Im excited to see this done as well hahaha!
Hello Dupes wish granted and I did a more detailed step on how I progressed on this crawler. cheers bro!
PAulH thanks a lot man! hahahaha yeah still do sleep but when i sleep i still think of what scheme/modifications etc to be done on some of the models on my stash hahahaha!
cheers mate!
Here it goes!
After painting the sand color, I coated the kit with a gloss clear coat. Fortunately, I did not encounter any frosting of sort when I used this one.
What I used is a common hardware clear spray paint diluted with Gunze lacquer thinner.
The results are good and suits my taste
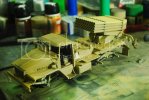
The undersides were painted this way.
I left some black portions as these will be dritied up with dust, grime and pigments plus this was the color that I noticed common on truck undersides.
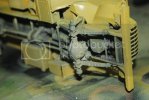
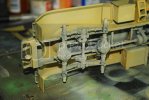
After the clear coat was cured, I applied a wash of AK Interactive washes. I used the Dark Brown Wash (Works best!) and the Rust Wash on some areas like some rivets, crevices and some nooks and crannies that most likely will accumulate rust.
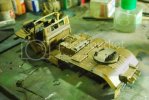
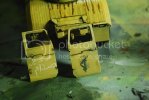
Here are the side doors; painted, coated and washed with AK mediums.
The Sepah decals were done and mated already.
The other door sports a Farsi script that says 'marg bar Saddam' (translated to 'Down with Saddam').
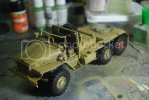
The wheel rims were painted and washed also.
Now, you will see that I painted the wheel rims in a random color.
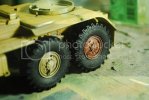
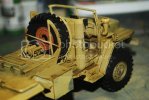
Some were painted in sand while some were painted in hull red.
This is to give an idea of battlefield modification and to give an impression of urgent battlefield repairs using whatever materials at hand.
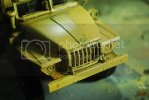
Now that the wash has cured and settled, I applied the AK streaks.
The streaks that I used were the AK Streaking Grime and the Rust Streaks. AK did provide a very easy medium for modulating your models. Kudos to the AK team.
These are samples of the streaks applications.
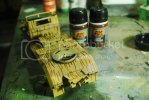
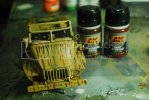
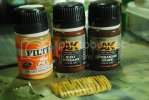
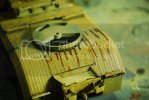
Note that you will see some of the rust washes that have accumulated on some of the rivets on random fashion.
For now, last to be applied is the AK Filter.
What I used is the DAK filter suitable for Dark Yellow vehicles.
Here is an example of the of the streaked and filtered finishes that I had.
This is the rear bed of the Ural truck and also the engine hood.
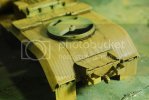
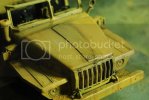
Also noticeable is the effect it made on the 2 side doors of the truck after the filter was applied.
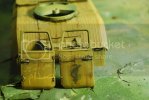
I love the AK filters as it makes the paint looks a bit sundamaged and a tad faded.
I researched and asked about what needs to be applied first if wash then filter or vice versa but there are mixed reviews so I just did what suits me and that is Wash then Filters. Thanks to ER for this tip btw.
Finally you can notice the old basic color of the paint and the weathered one.
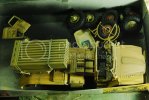
The initial paint color is still on the rocket launchers while the truck sports the AK'ed effect.
Next is to repeat this process on the rocket launcher cab then on to the chipping.
Enjoy guys!
Suggestions are most welcome!
Cheers
Iking
Im excited to see this done as well hahaha!
Hello Dupes wish granted and I did a more detailed step on how I progressed on this crawler. cheers bro!
PAulH thanks a lot man! hahahaha yeah still do sleep but when i sleep i still think of what scheme/modifications etc to be done on some of the models on my stash hahahaha!
cheers mate!
Here it goes!
After painting the sand color, I coated the kit with a gloss clear coat. Fortunately, I did not encounter any frosting of sort when I used this one.
What I used is a common hardware clear spray paint diluted with Gunze lacquer thinner.
The results are good and suits my taste

The undersides were painted this way.
I left some black portions as these will be dritied up with dust, grime and pigments plus this was the color that I noticed common on truck undersides.


After the clear coat was cured, I applied a wash of AK Interactive washes. I used the Dark Brown Wash (Works best!) and the Rust Wash on some areas like some rivets, crevices and some nooks and crannies that most likely will accumulate rust.


Here are the side doors; painted, coated and washed with AK mediums.
The Sepah decals were done and mated already.
The other door sports a Farsi script that says 'marg bar Saddam' (translated to 'Down with Saddam').

The wheel rims were painted and washed also.
Now, you will see that I painted the wheel rims in a random color.


Some were painted in sand while some were painted in hull red.
This is to give an idea of battlefield modification and to give an impression of urgent battlefield repairs using whatever materials at hand.
Now that the wash has cured and settled, I applied the AK streaks.
The streaks that I used were the AK Streaking Grime and the Rust Streaks. AK did provide a very easy medium for modulating your models. Kudos to the AK team.
These are samples of the streaks applications.


Note that you will see some of the rust washes that have accumulated on some of the rivets on random fashion.
For now, last to be applied is the AK Filter.
What I used is the DAK filter suitable for Dark Yellow vehicles.
Here is an example of the of the streaked and filtered finishes that I had.
This is the rear bed of the Ural truck and also the engine hood.


Also noticeable is the effect it made on the 2 side doors of the truck after the filter was applied.

I love the AK filters as it makes the paint looks a bit sundamaged and a tad faded.
I researched and asked about what needs to be applied first if wash then filter or vice versa but there are mixed reviews so I just did what suits me and that is Wash then Filters. Thanks to ER for this tip btw.
Finally you can notice the old basic color of the paint and the weathered one.

The initial paint color is still on the rocket launchers while the truck sports the AK'ed effect.
Next is to repeat this process on the rocket launcher cab then on to the chipping.
Enjoy guys!
Suggestions are most welcome!
Cheers
Iking
Eastrock
It's All About The Fun!!!
- Joined
- Feb 20, 2011
- Messages
- 1,598
As always the weathering is Spot on Komrade 
Similar threads
- Replies
- 38
- Views
- 6K
- Replies
- 15
- Views
- 2K

