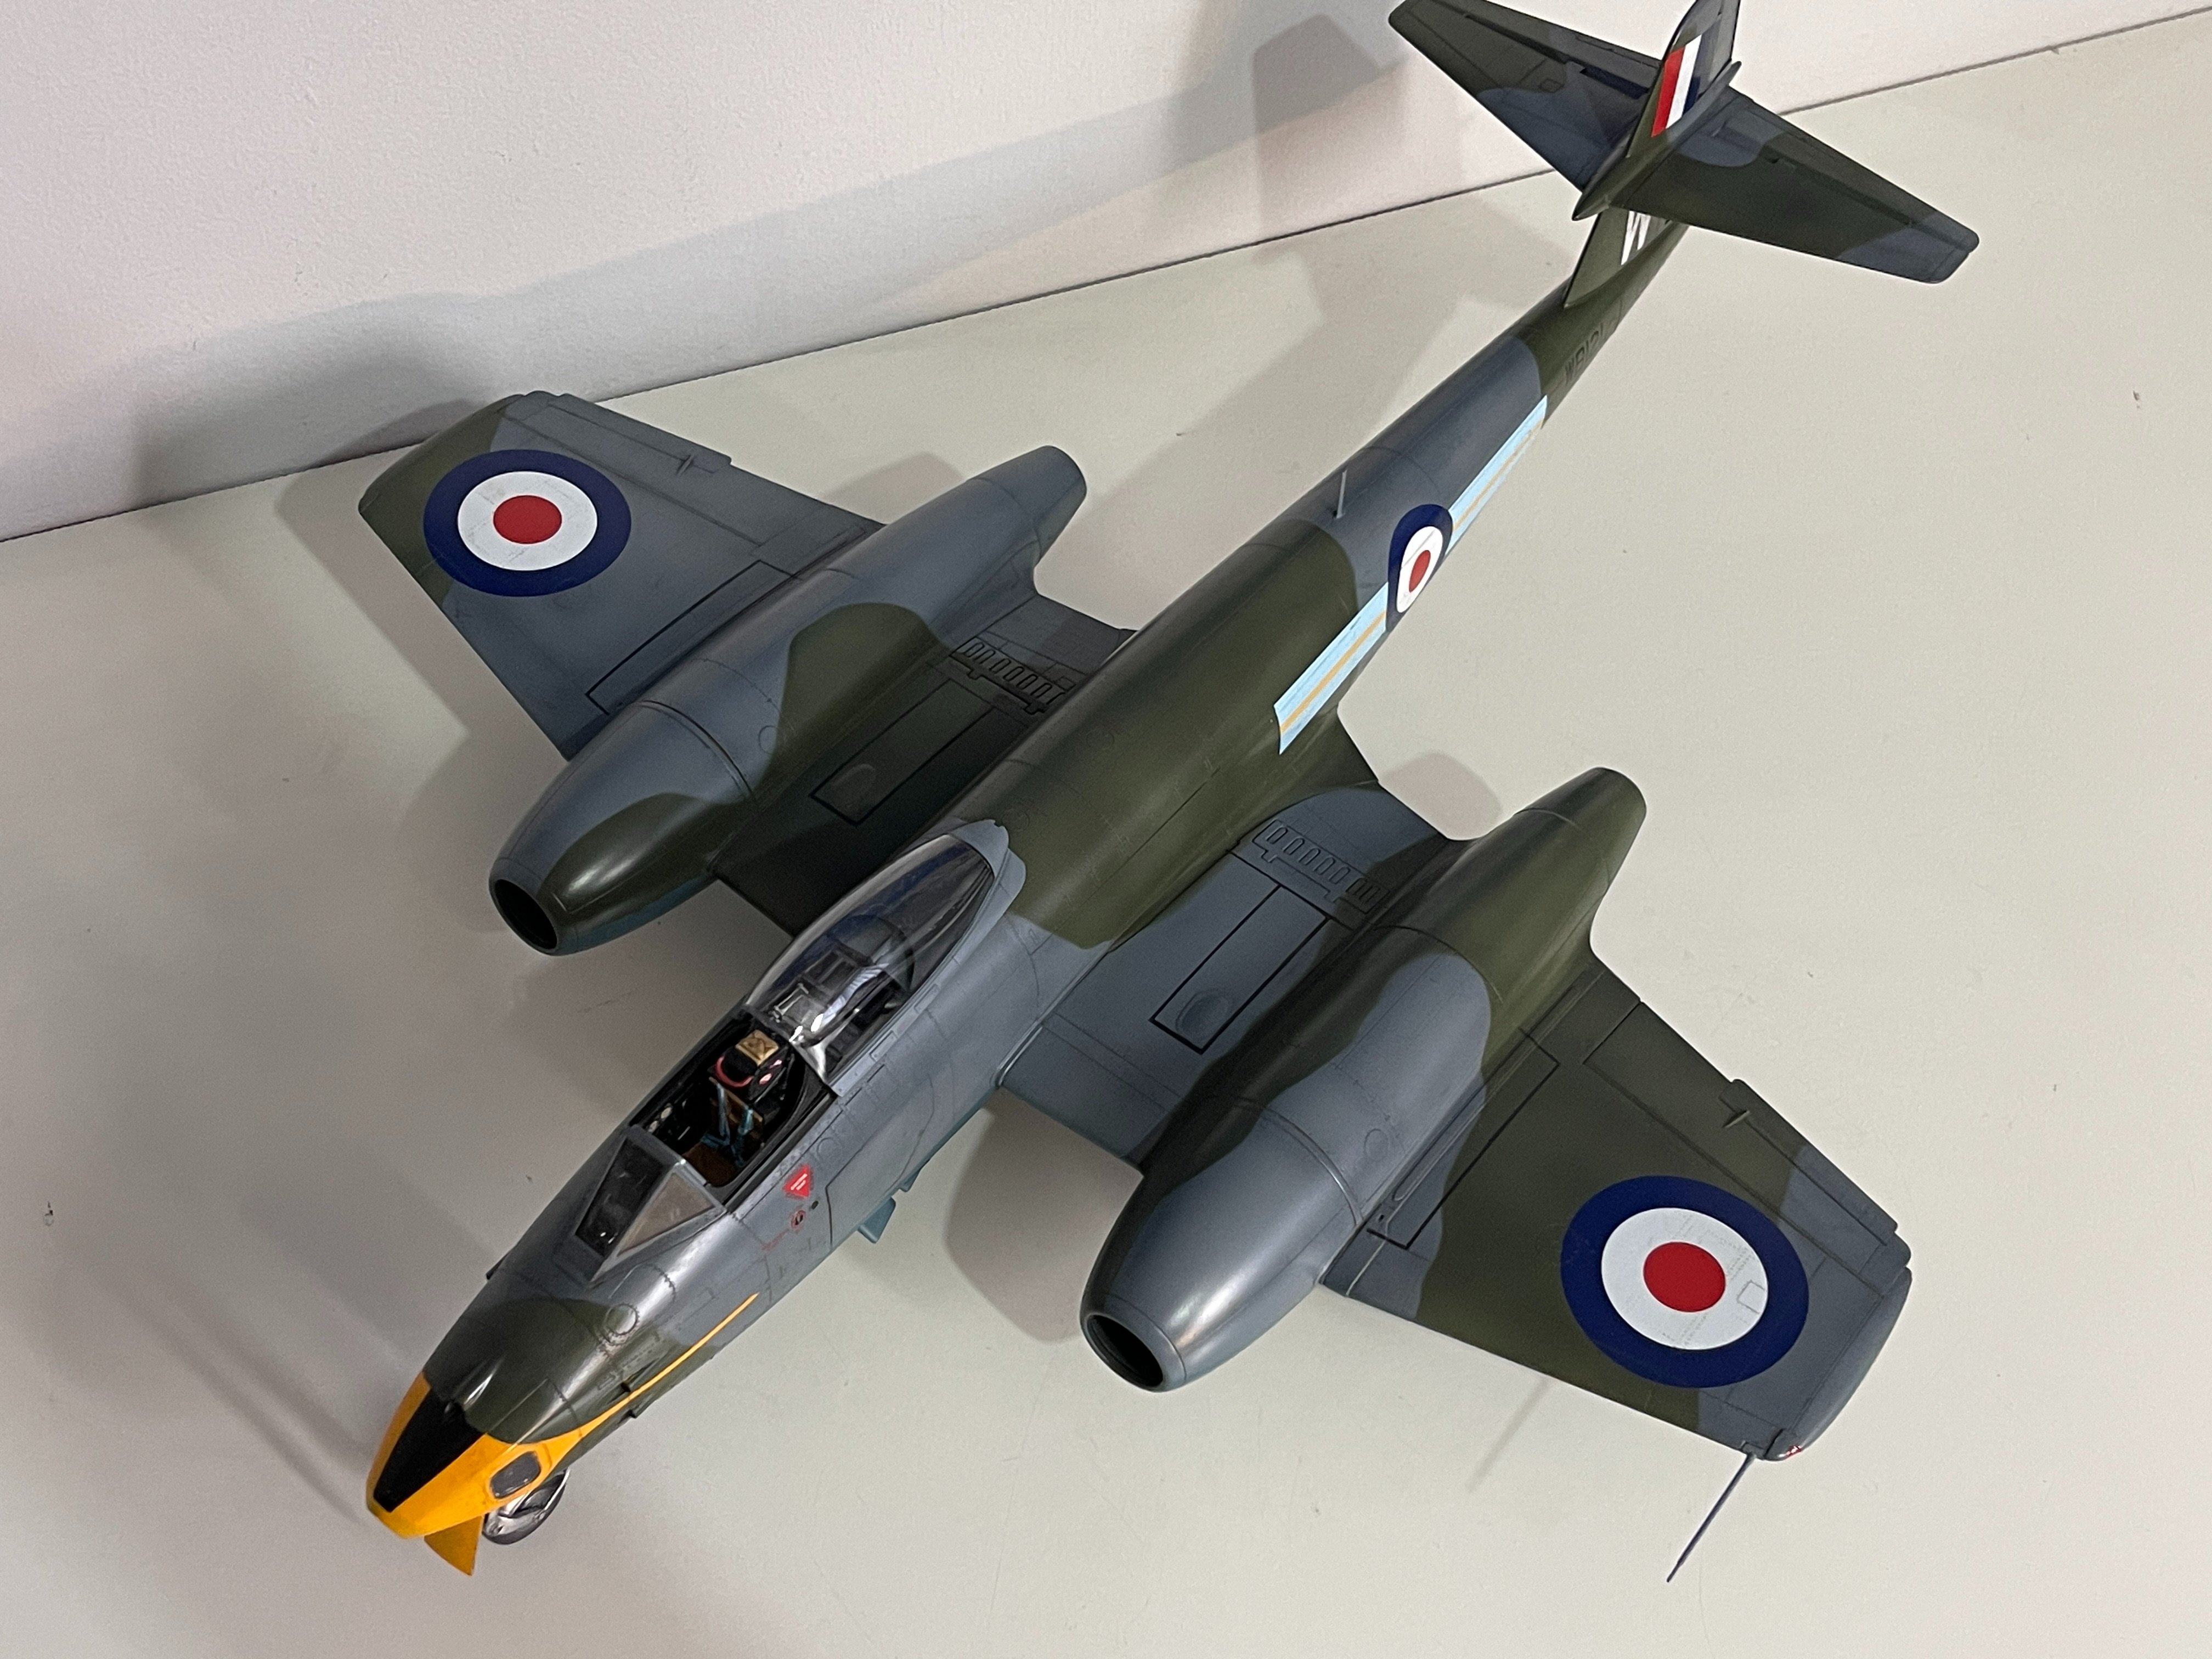
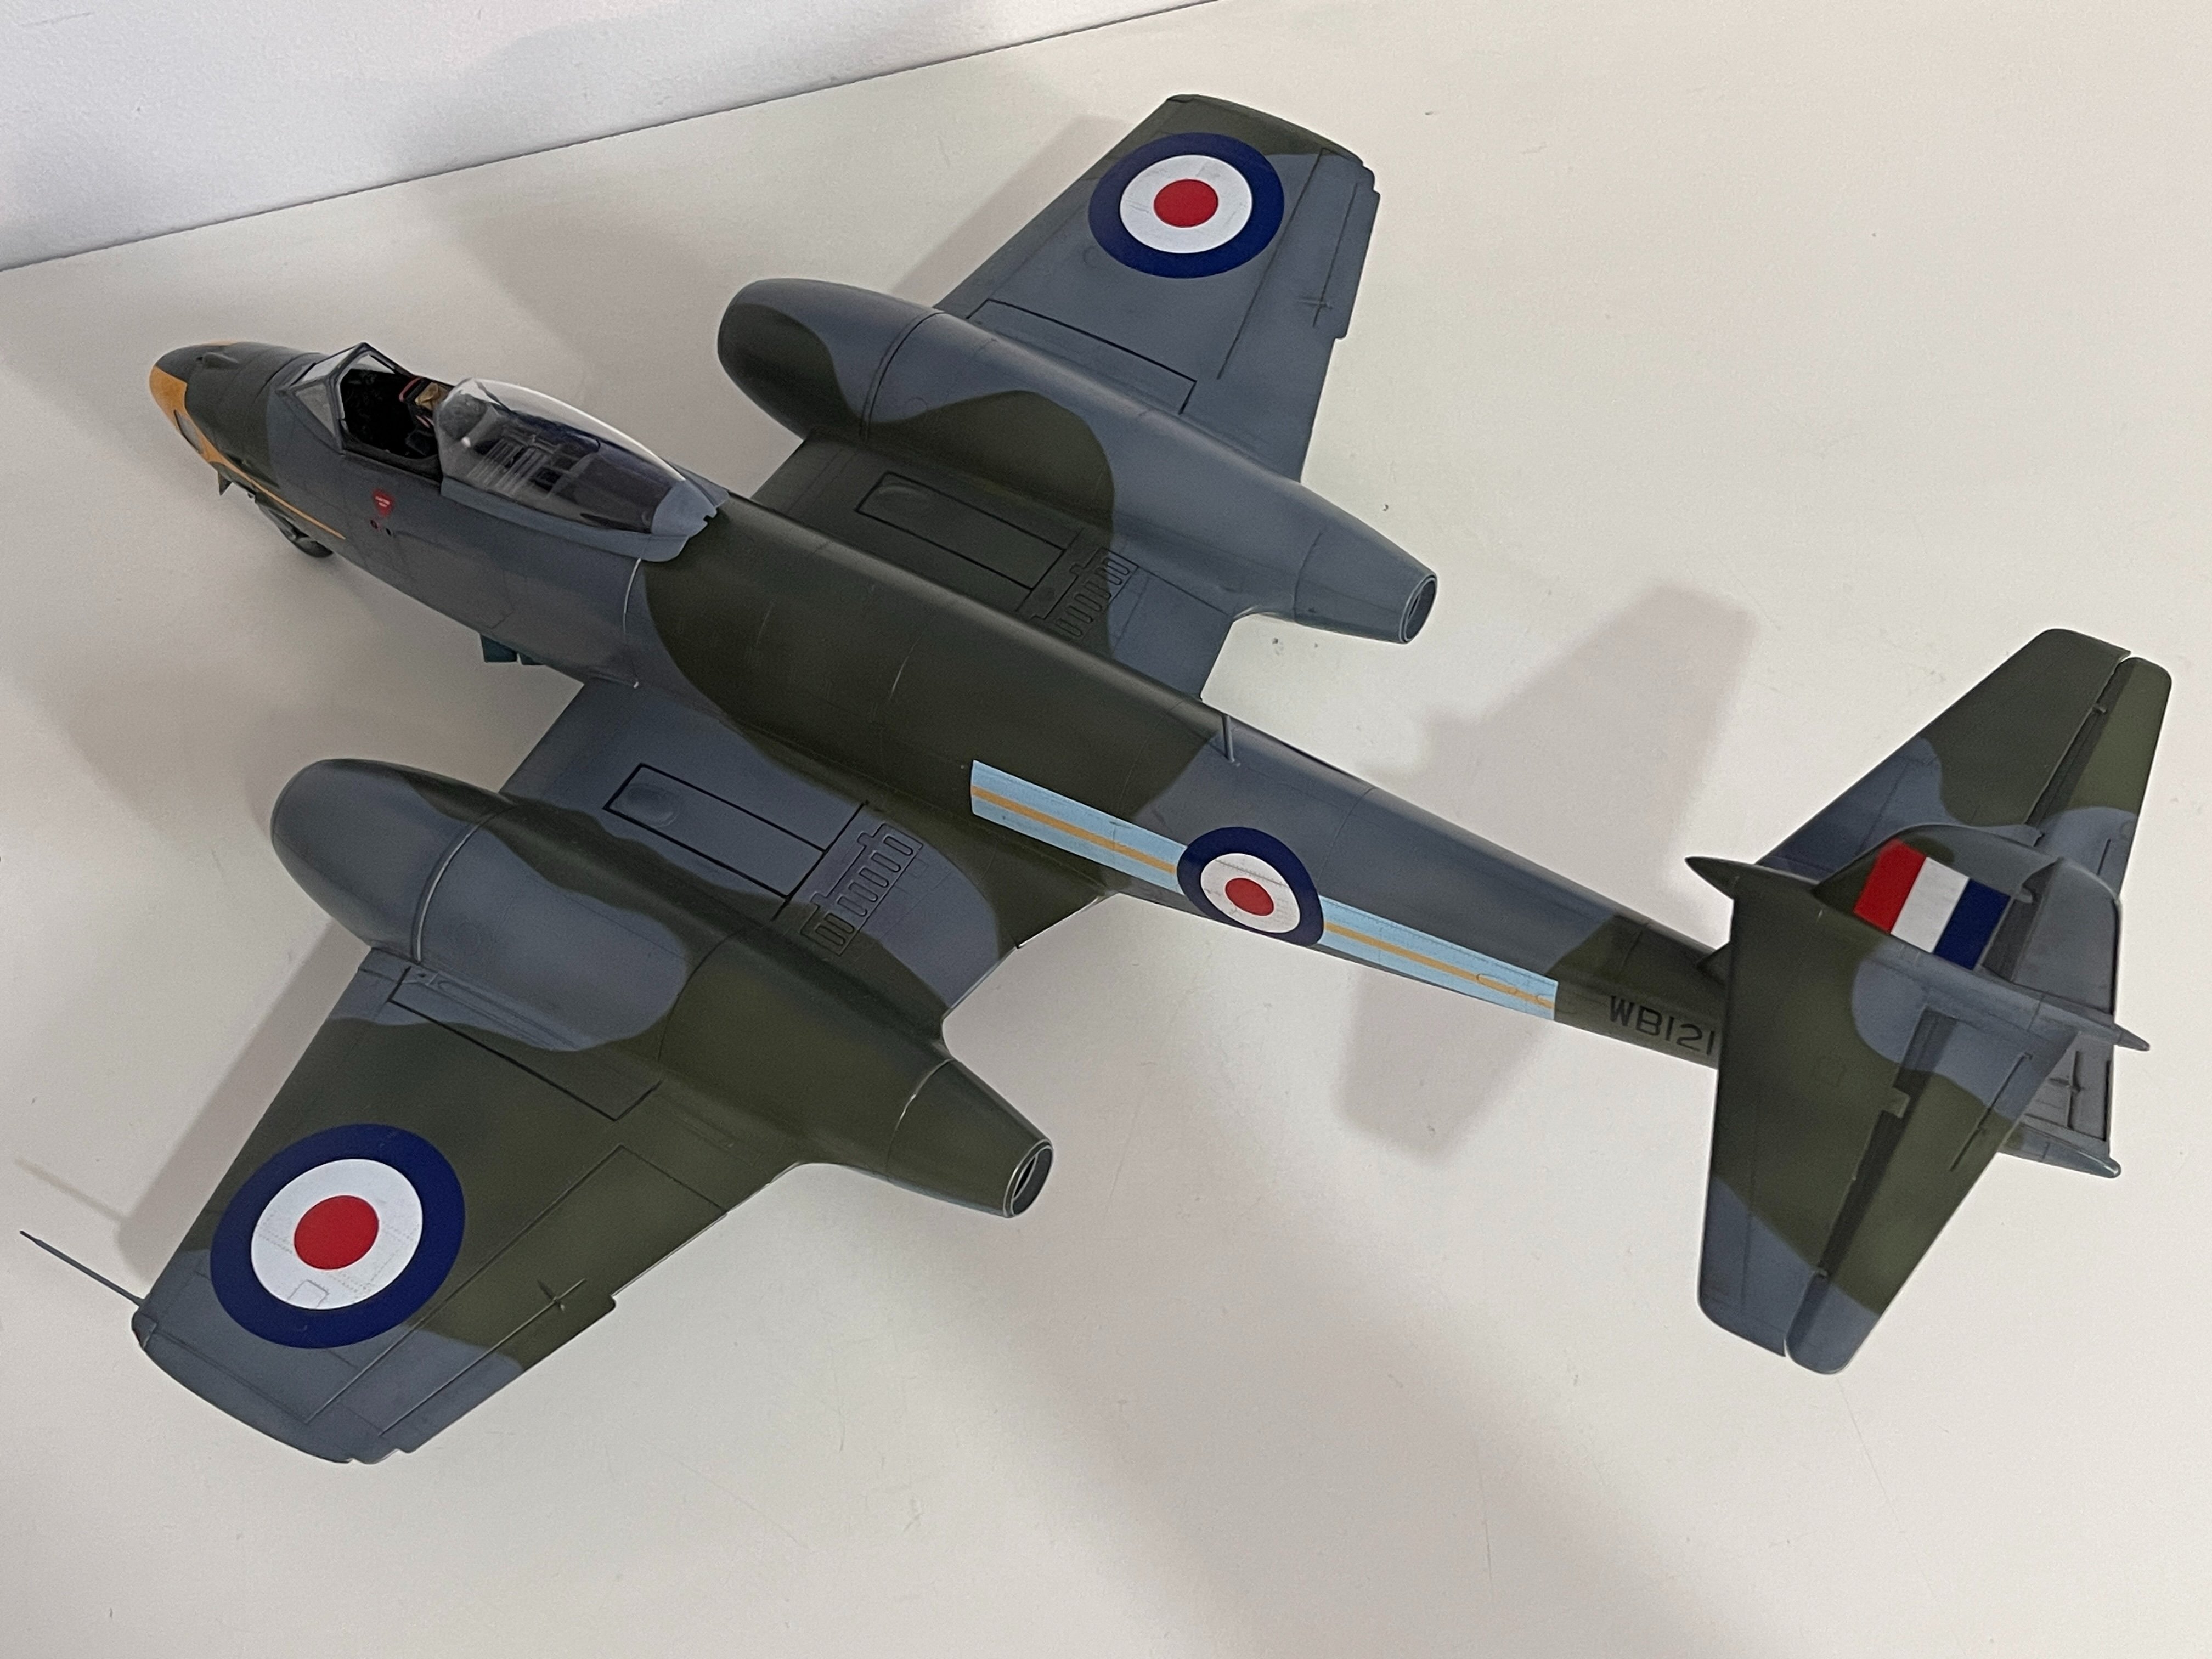
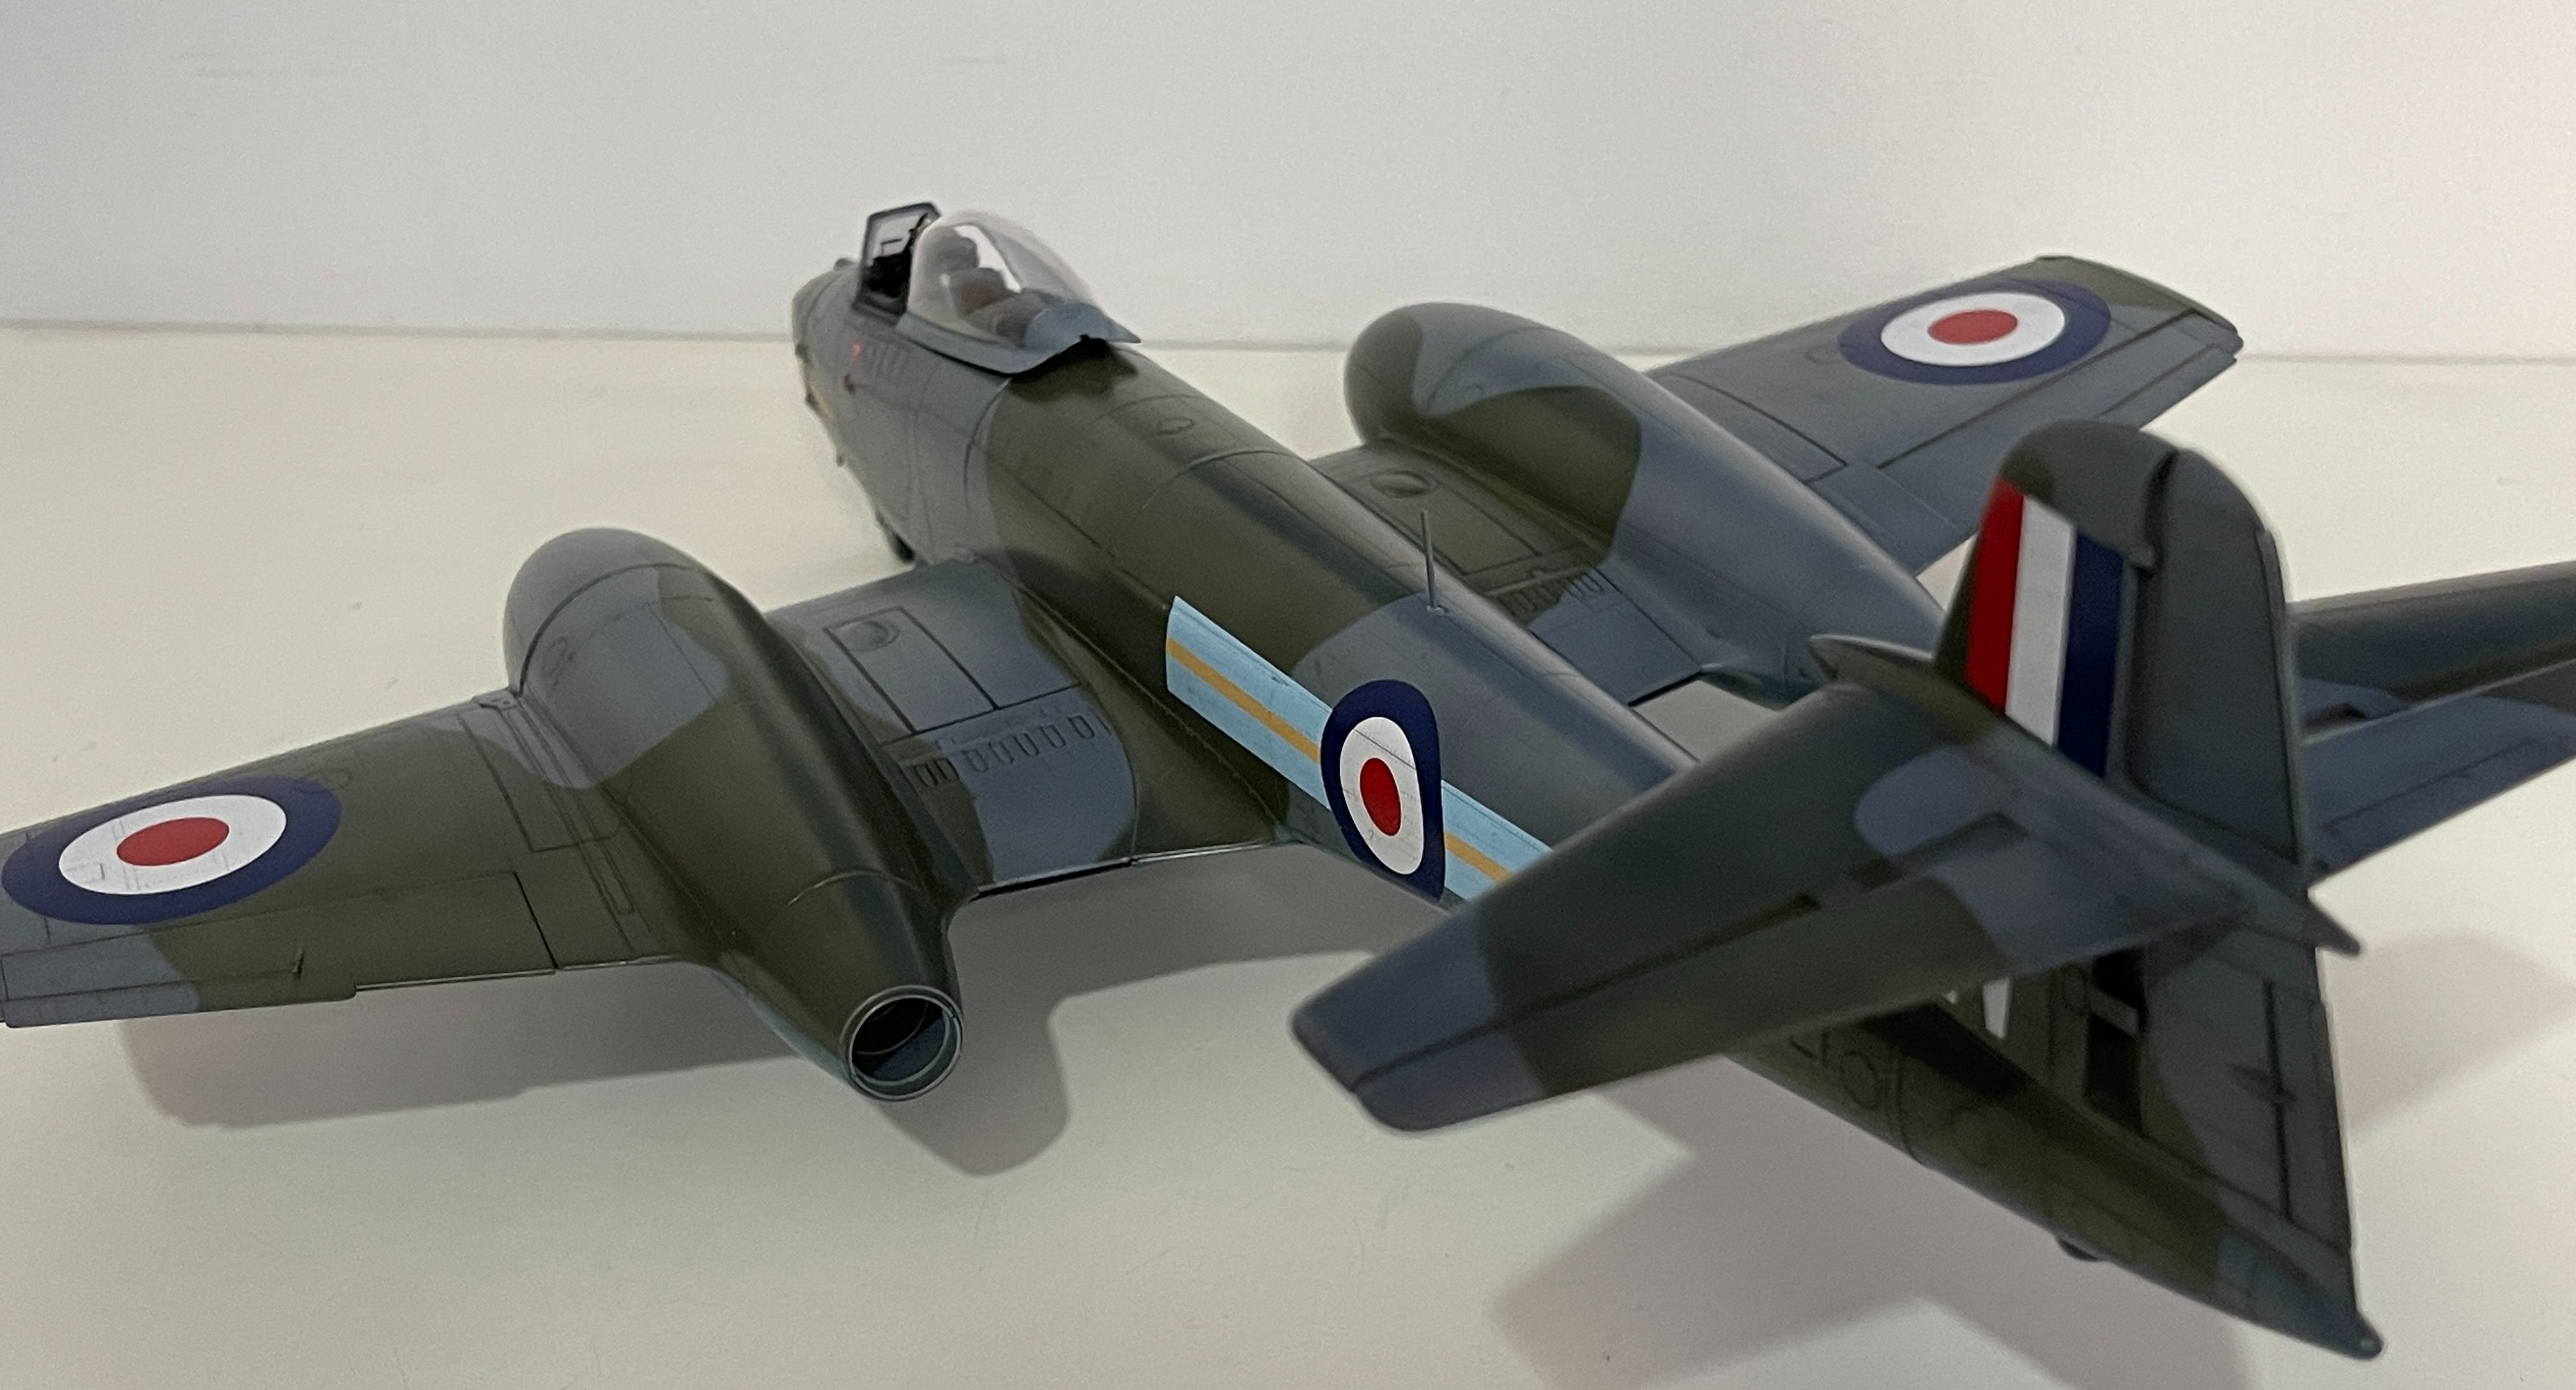
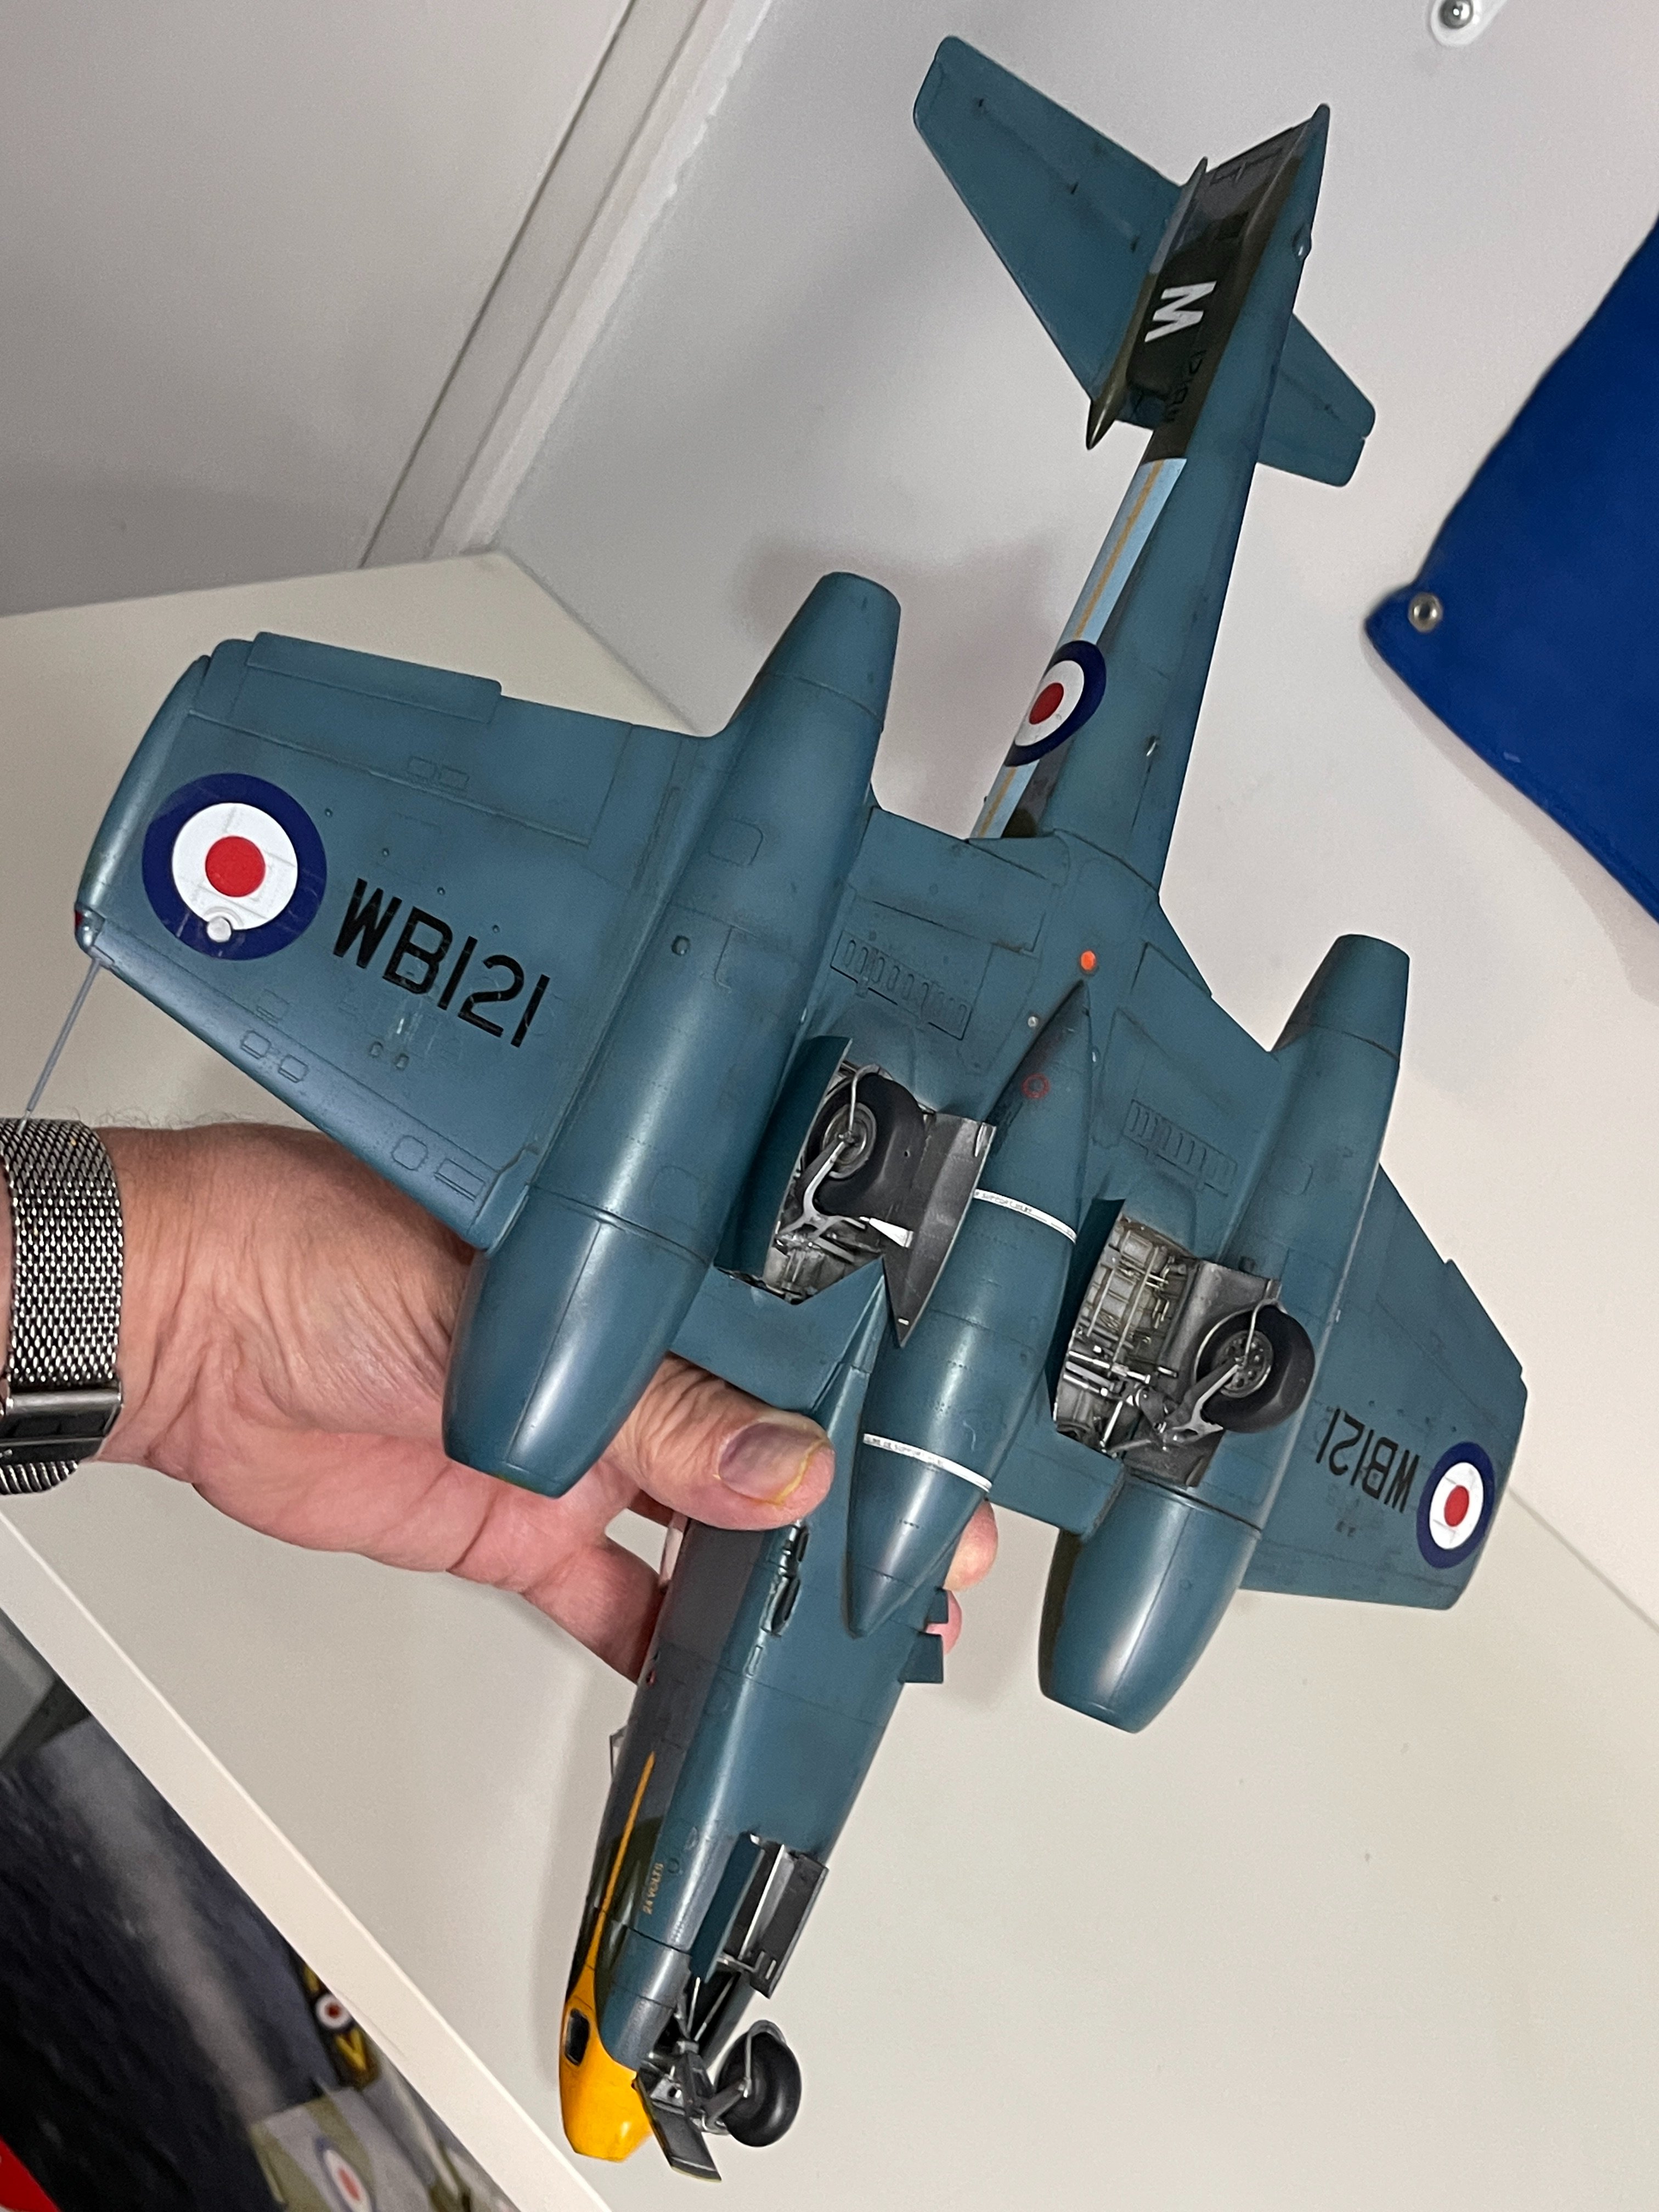
The 1/32 Revell Meteor

Scale Model Addict - Model Tips, Guides, Tools & Tech, Tutorials, and Community

Help Support Scale Model Addict:

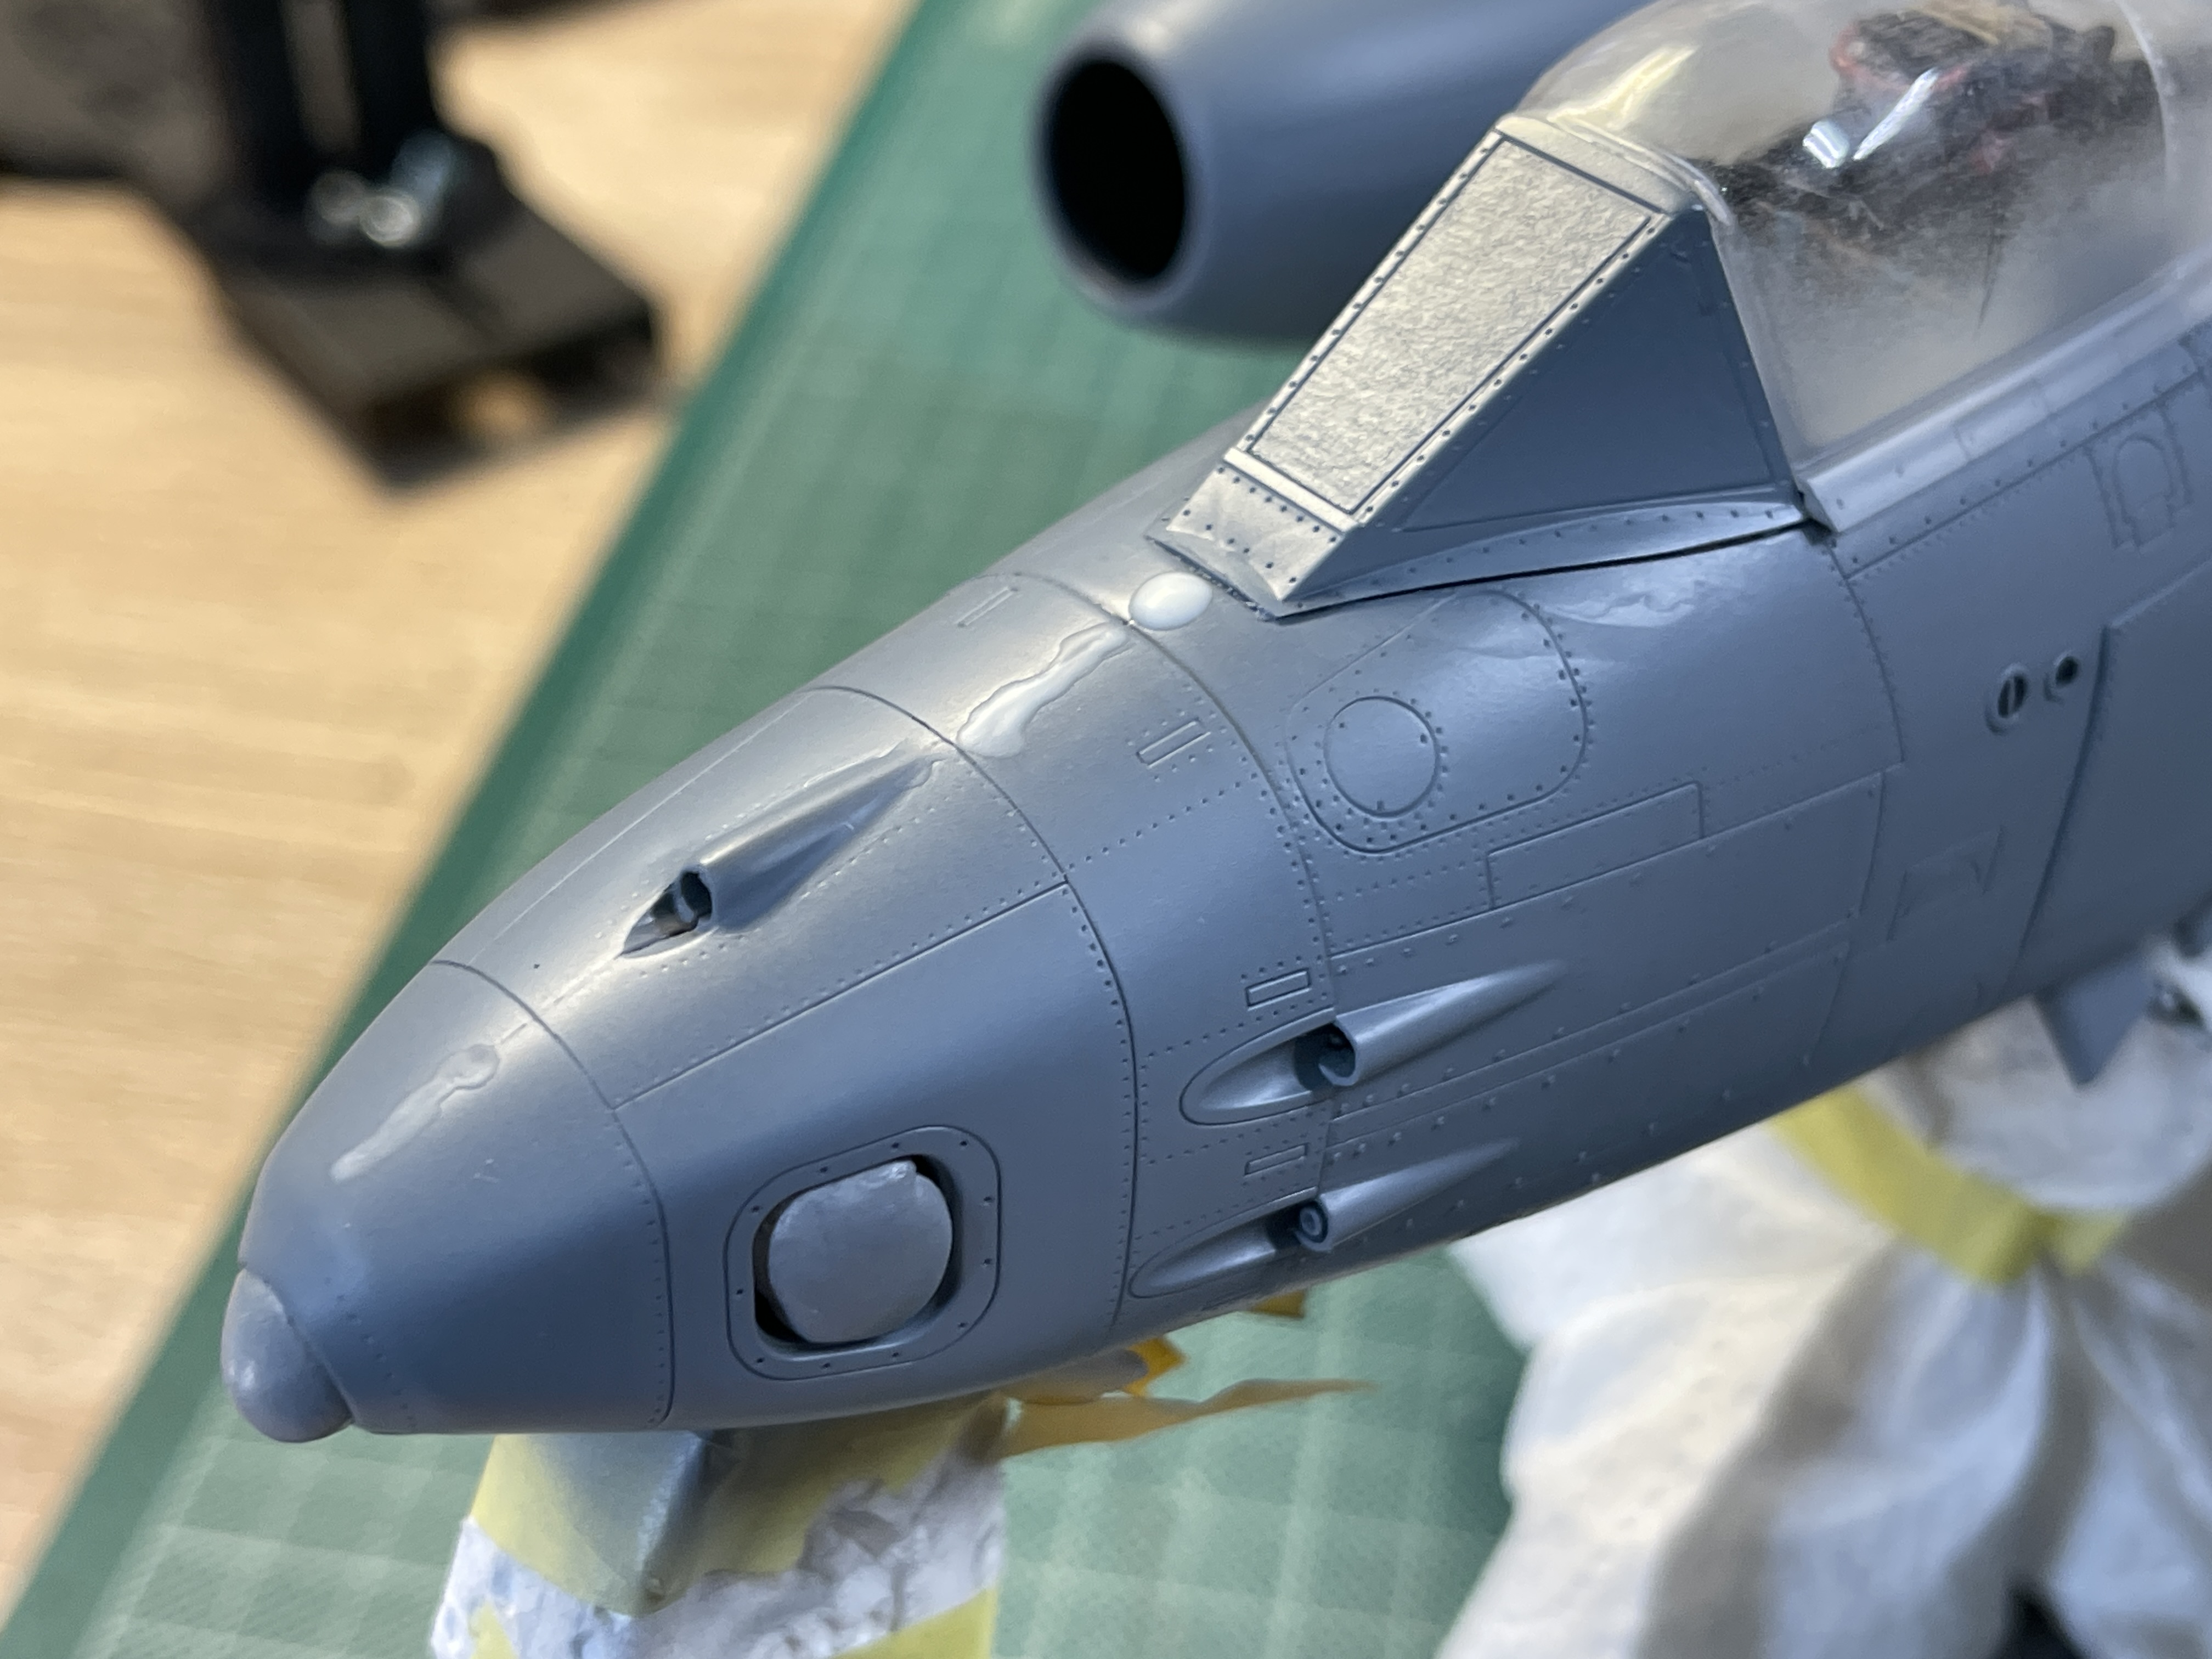
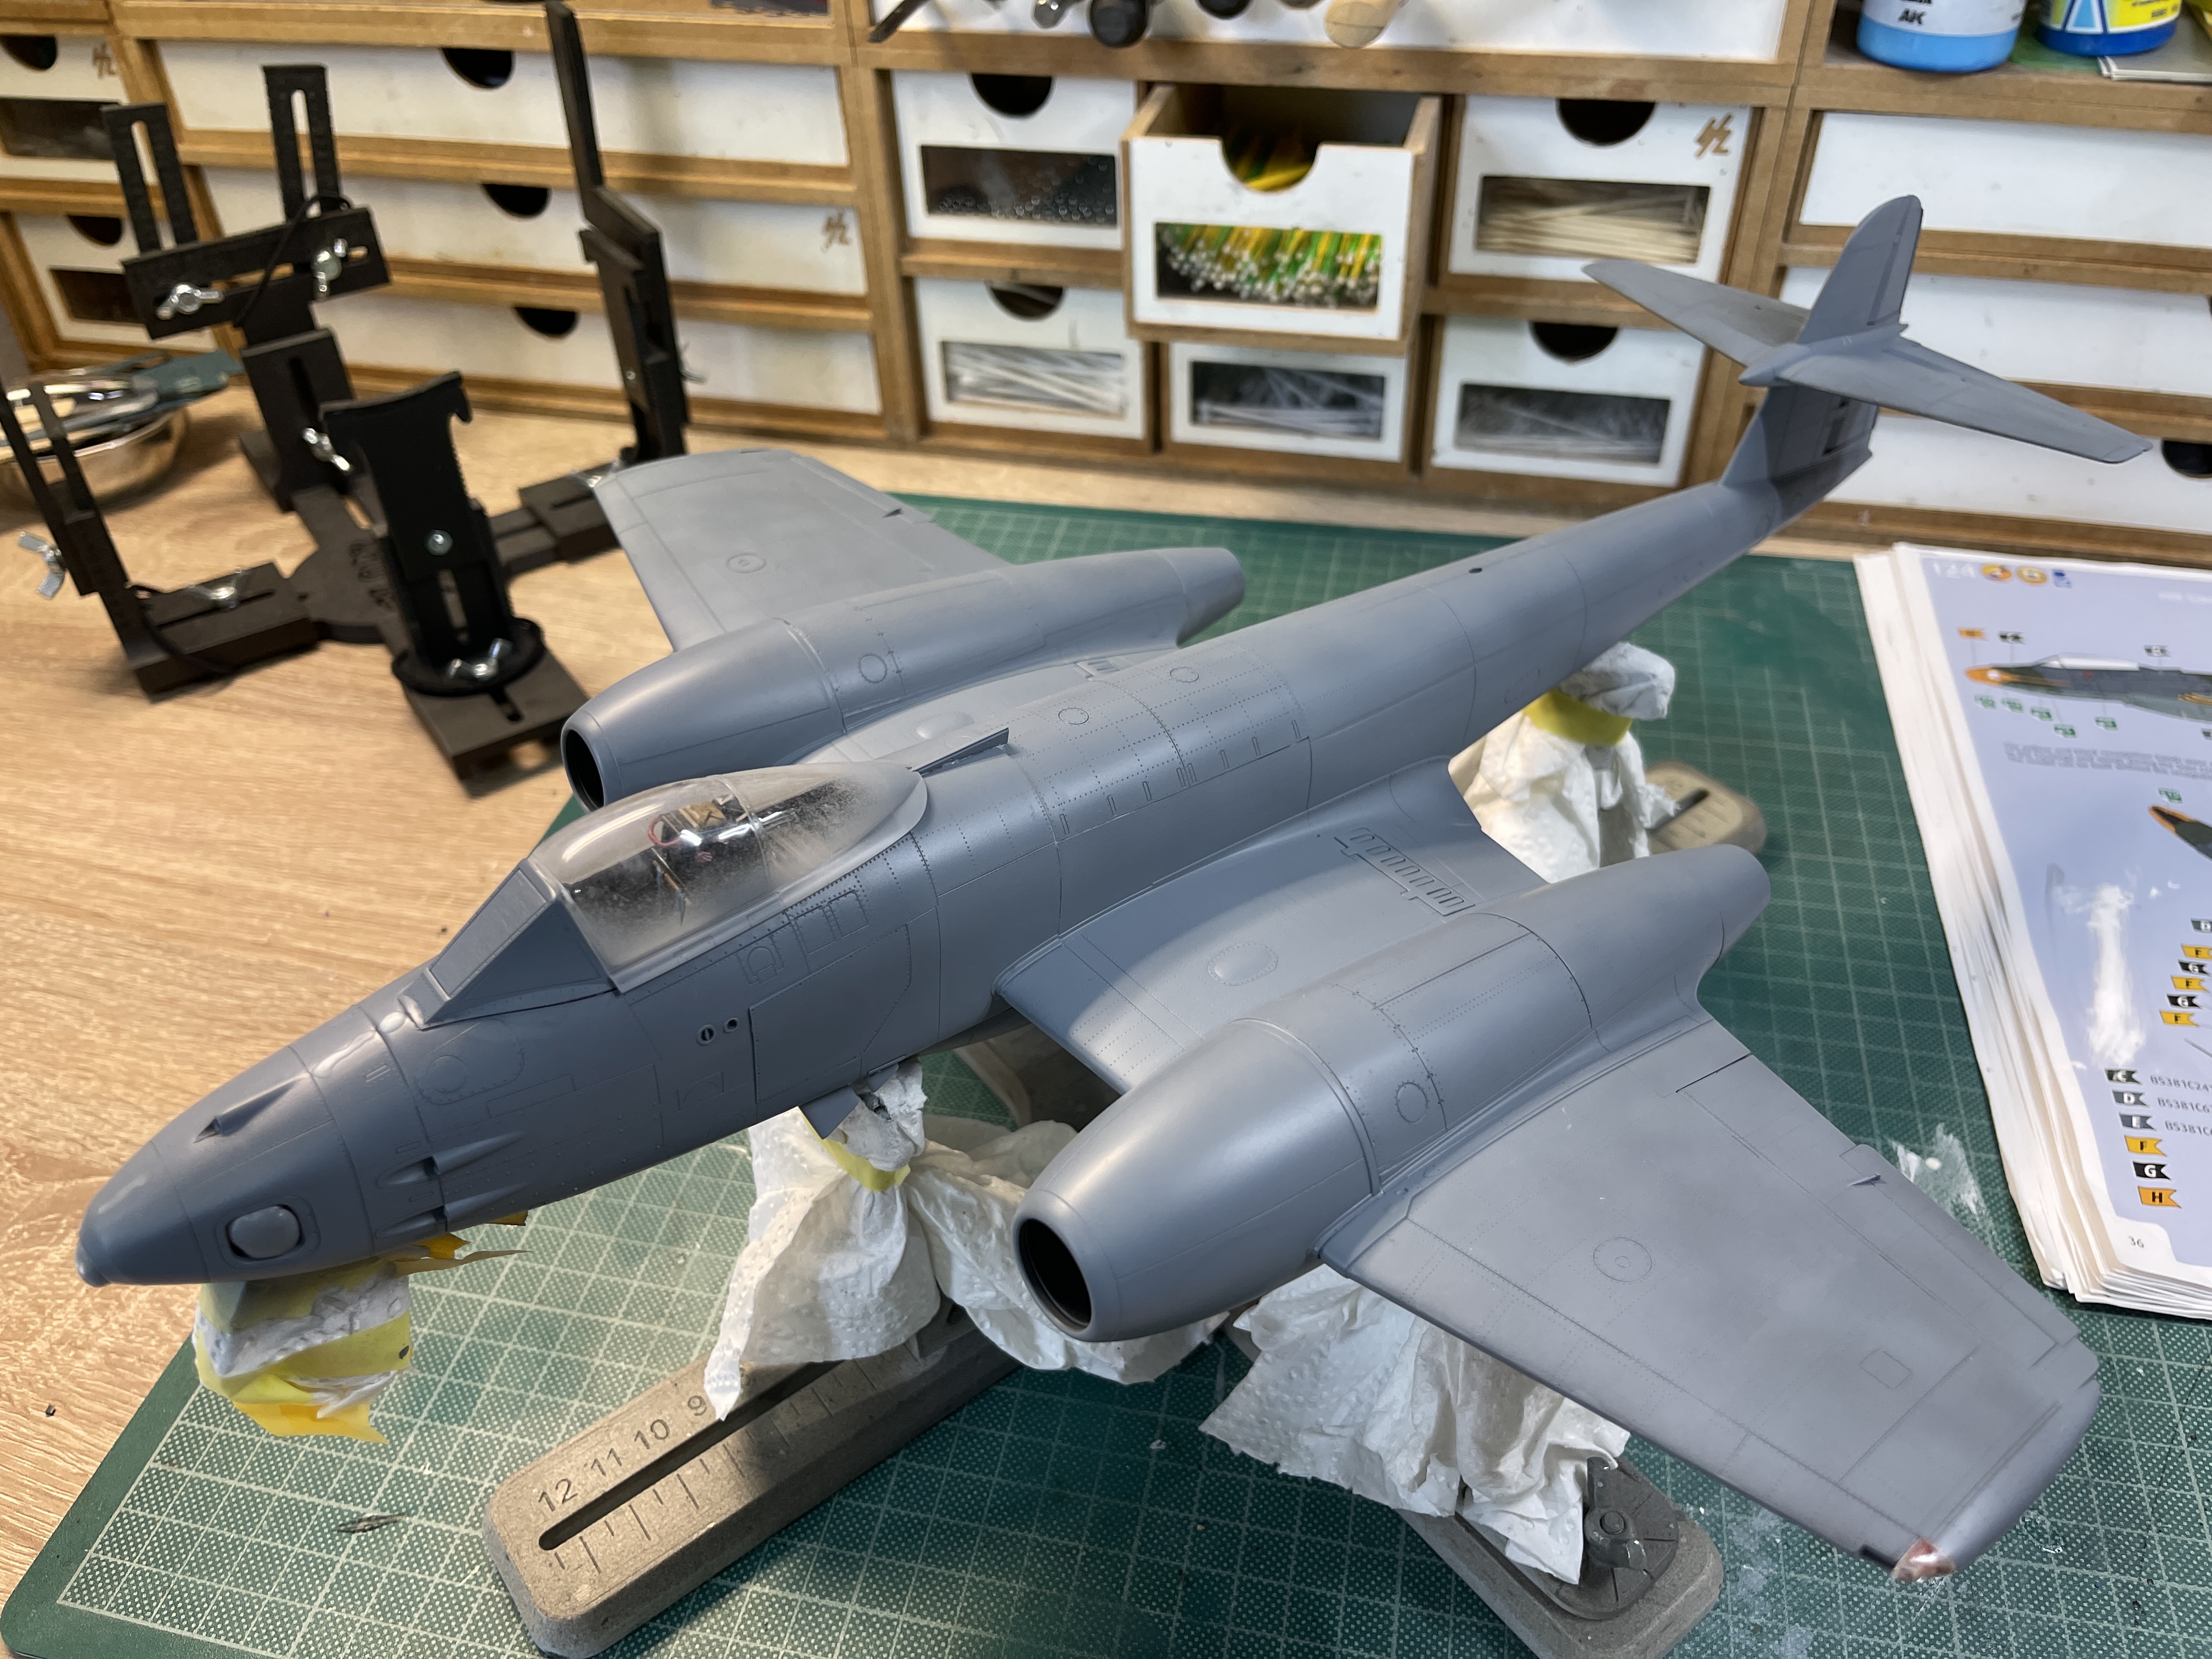
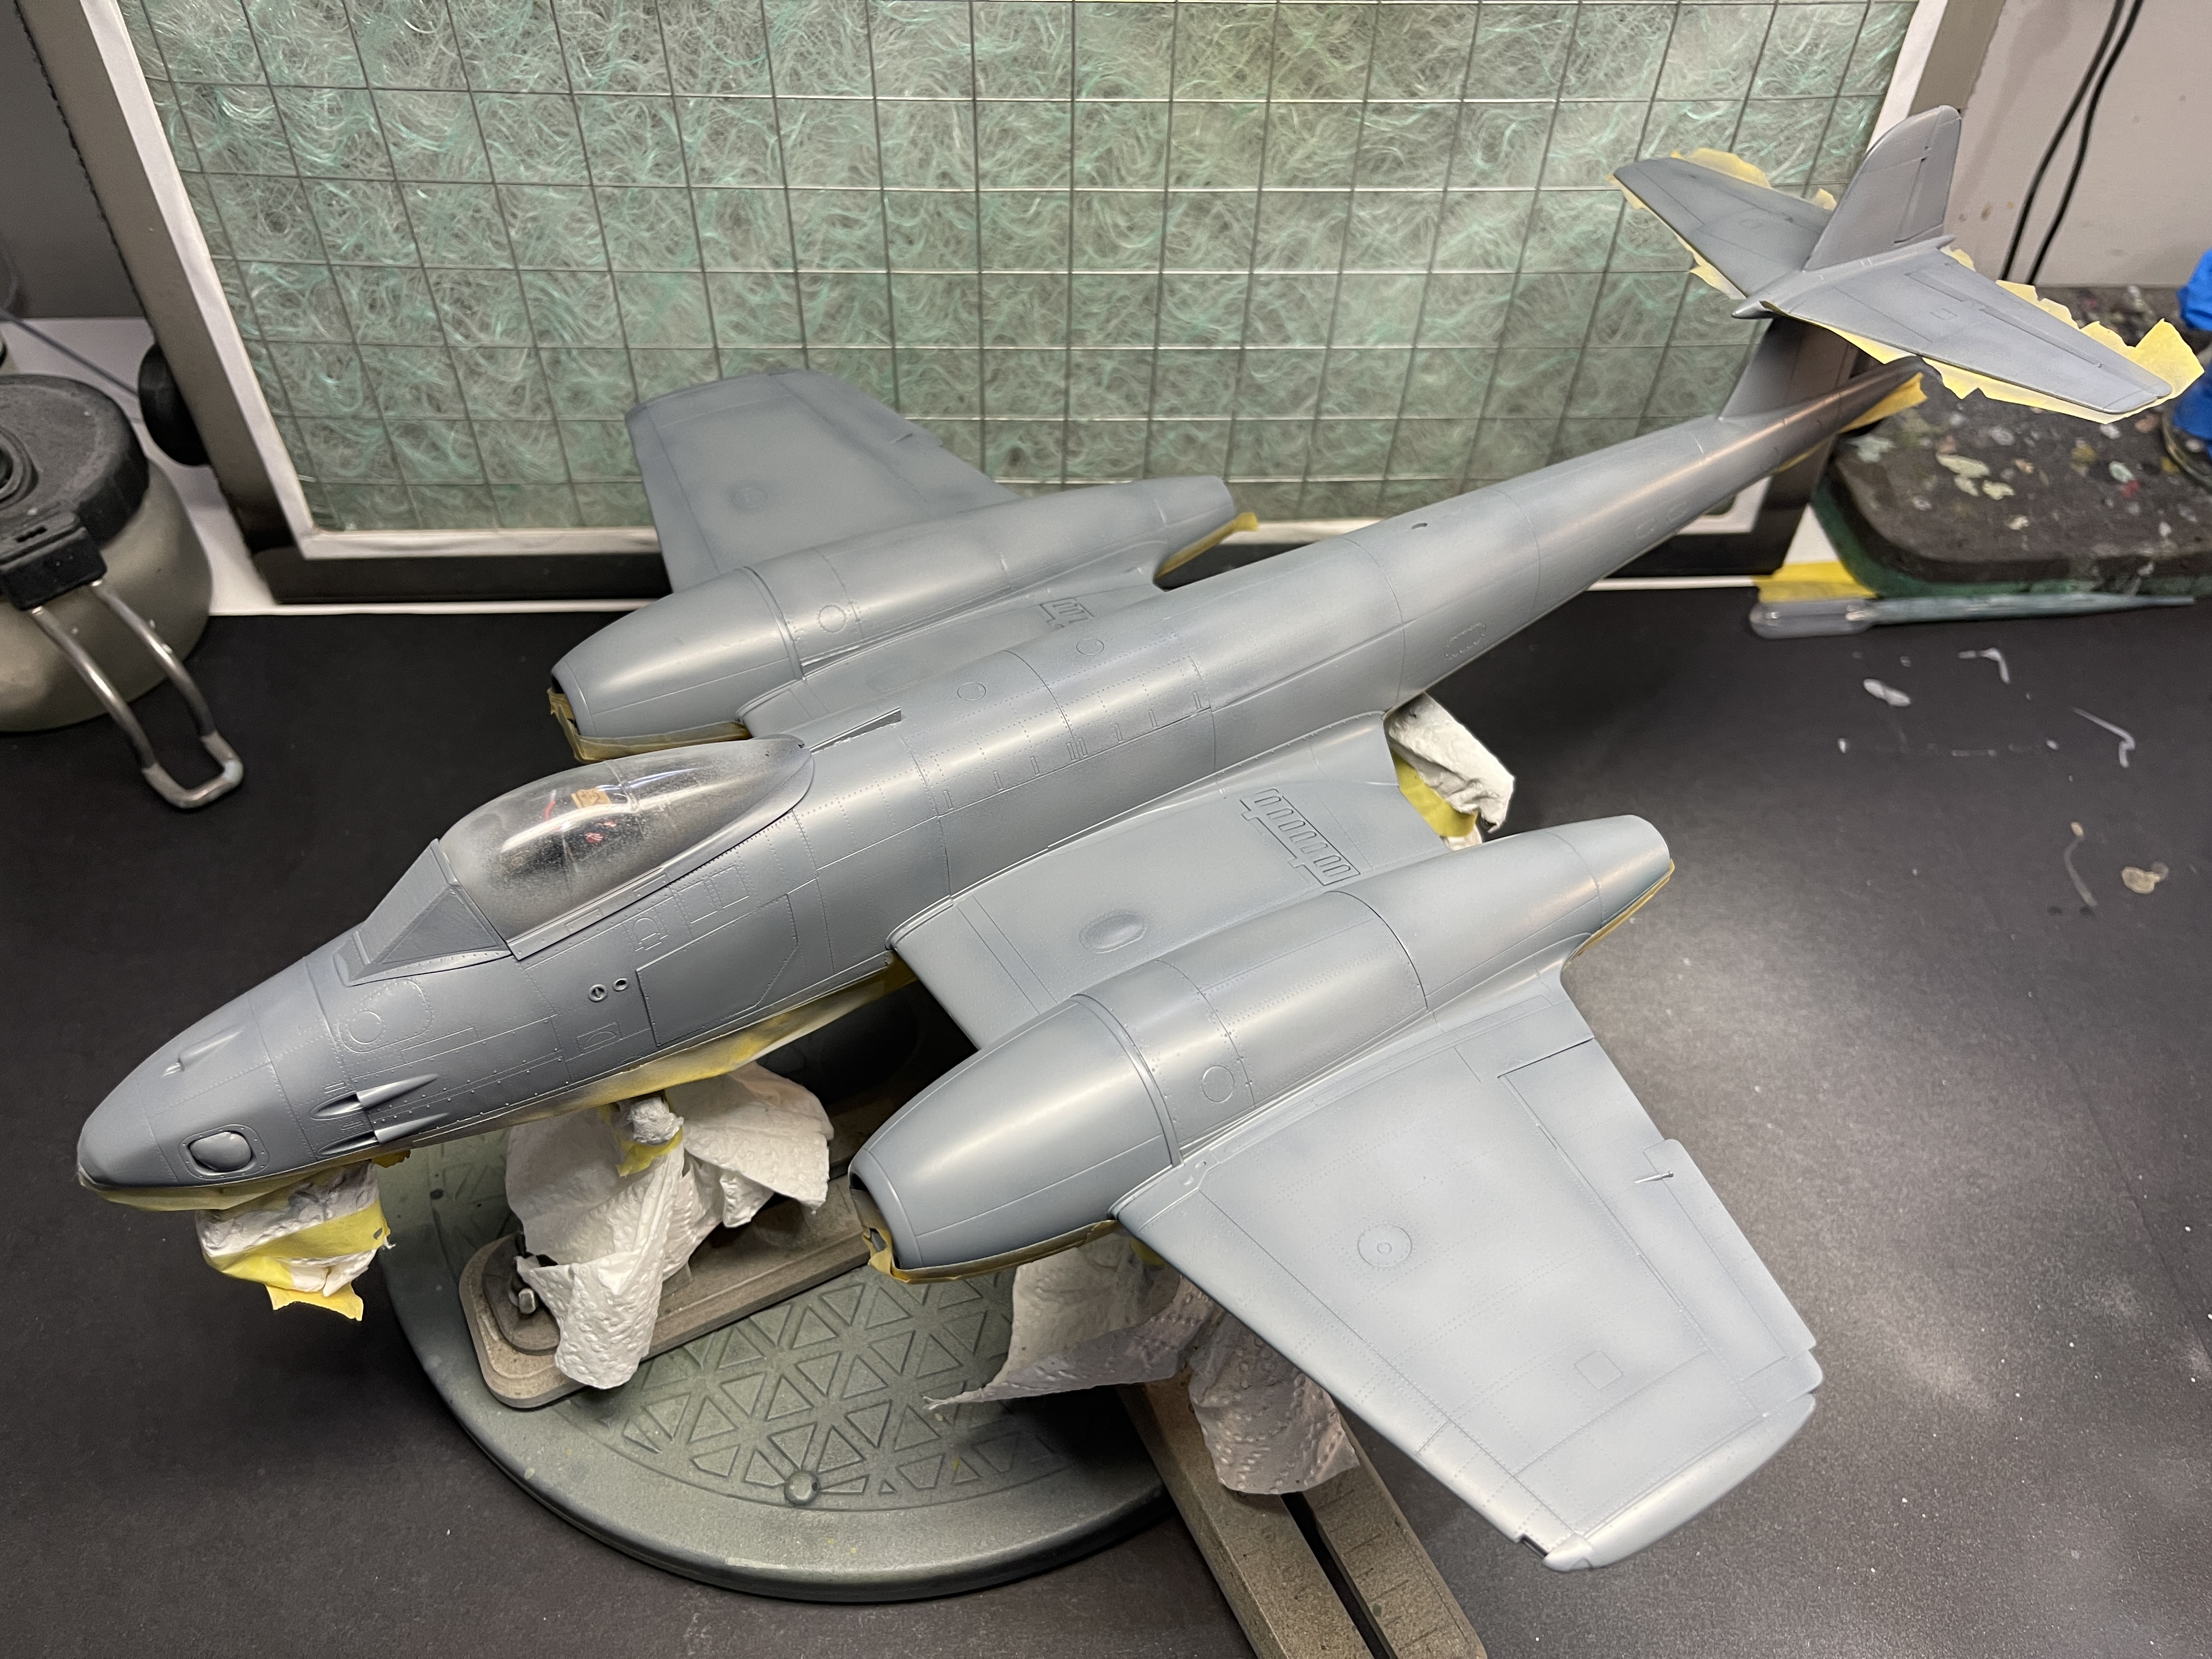
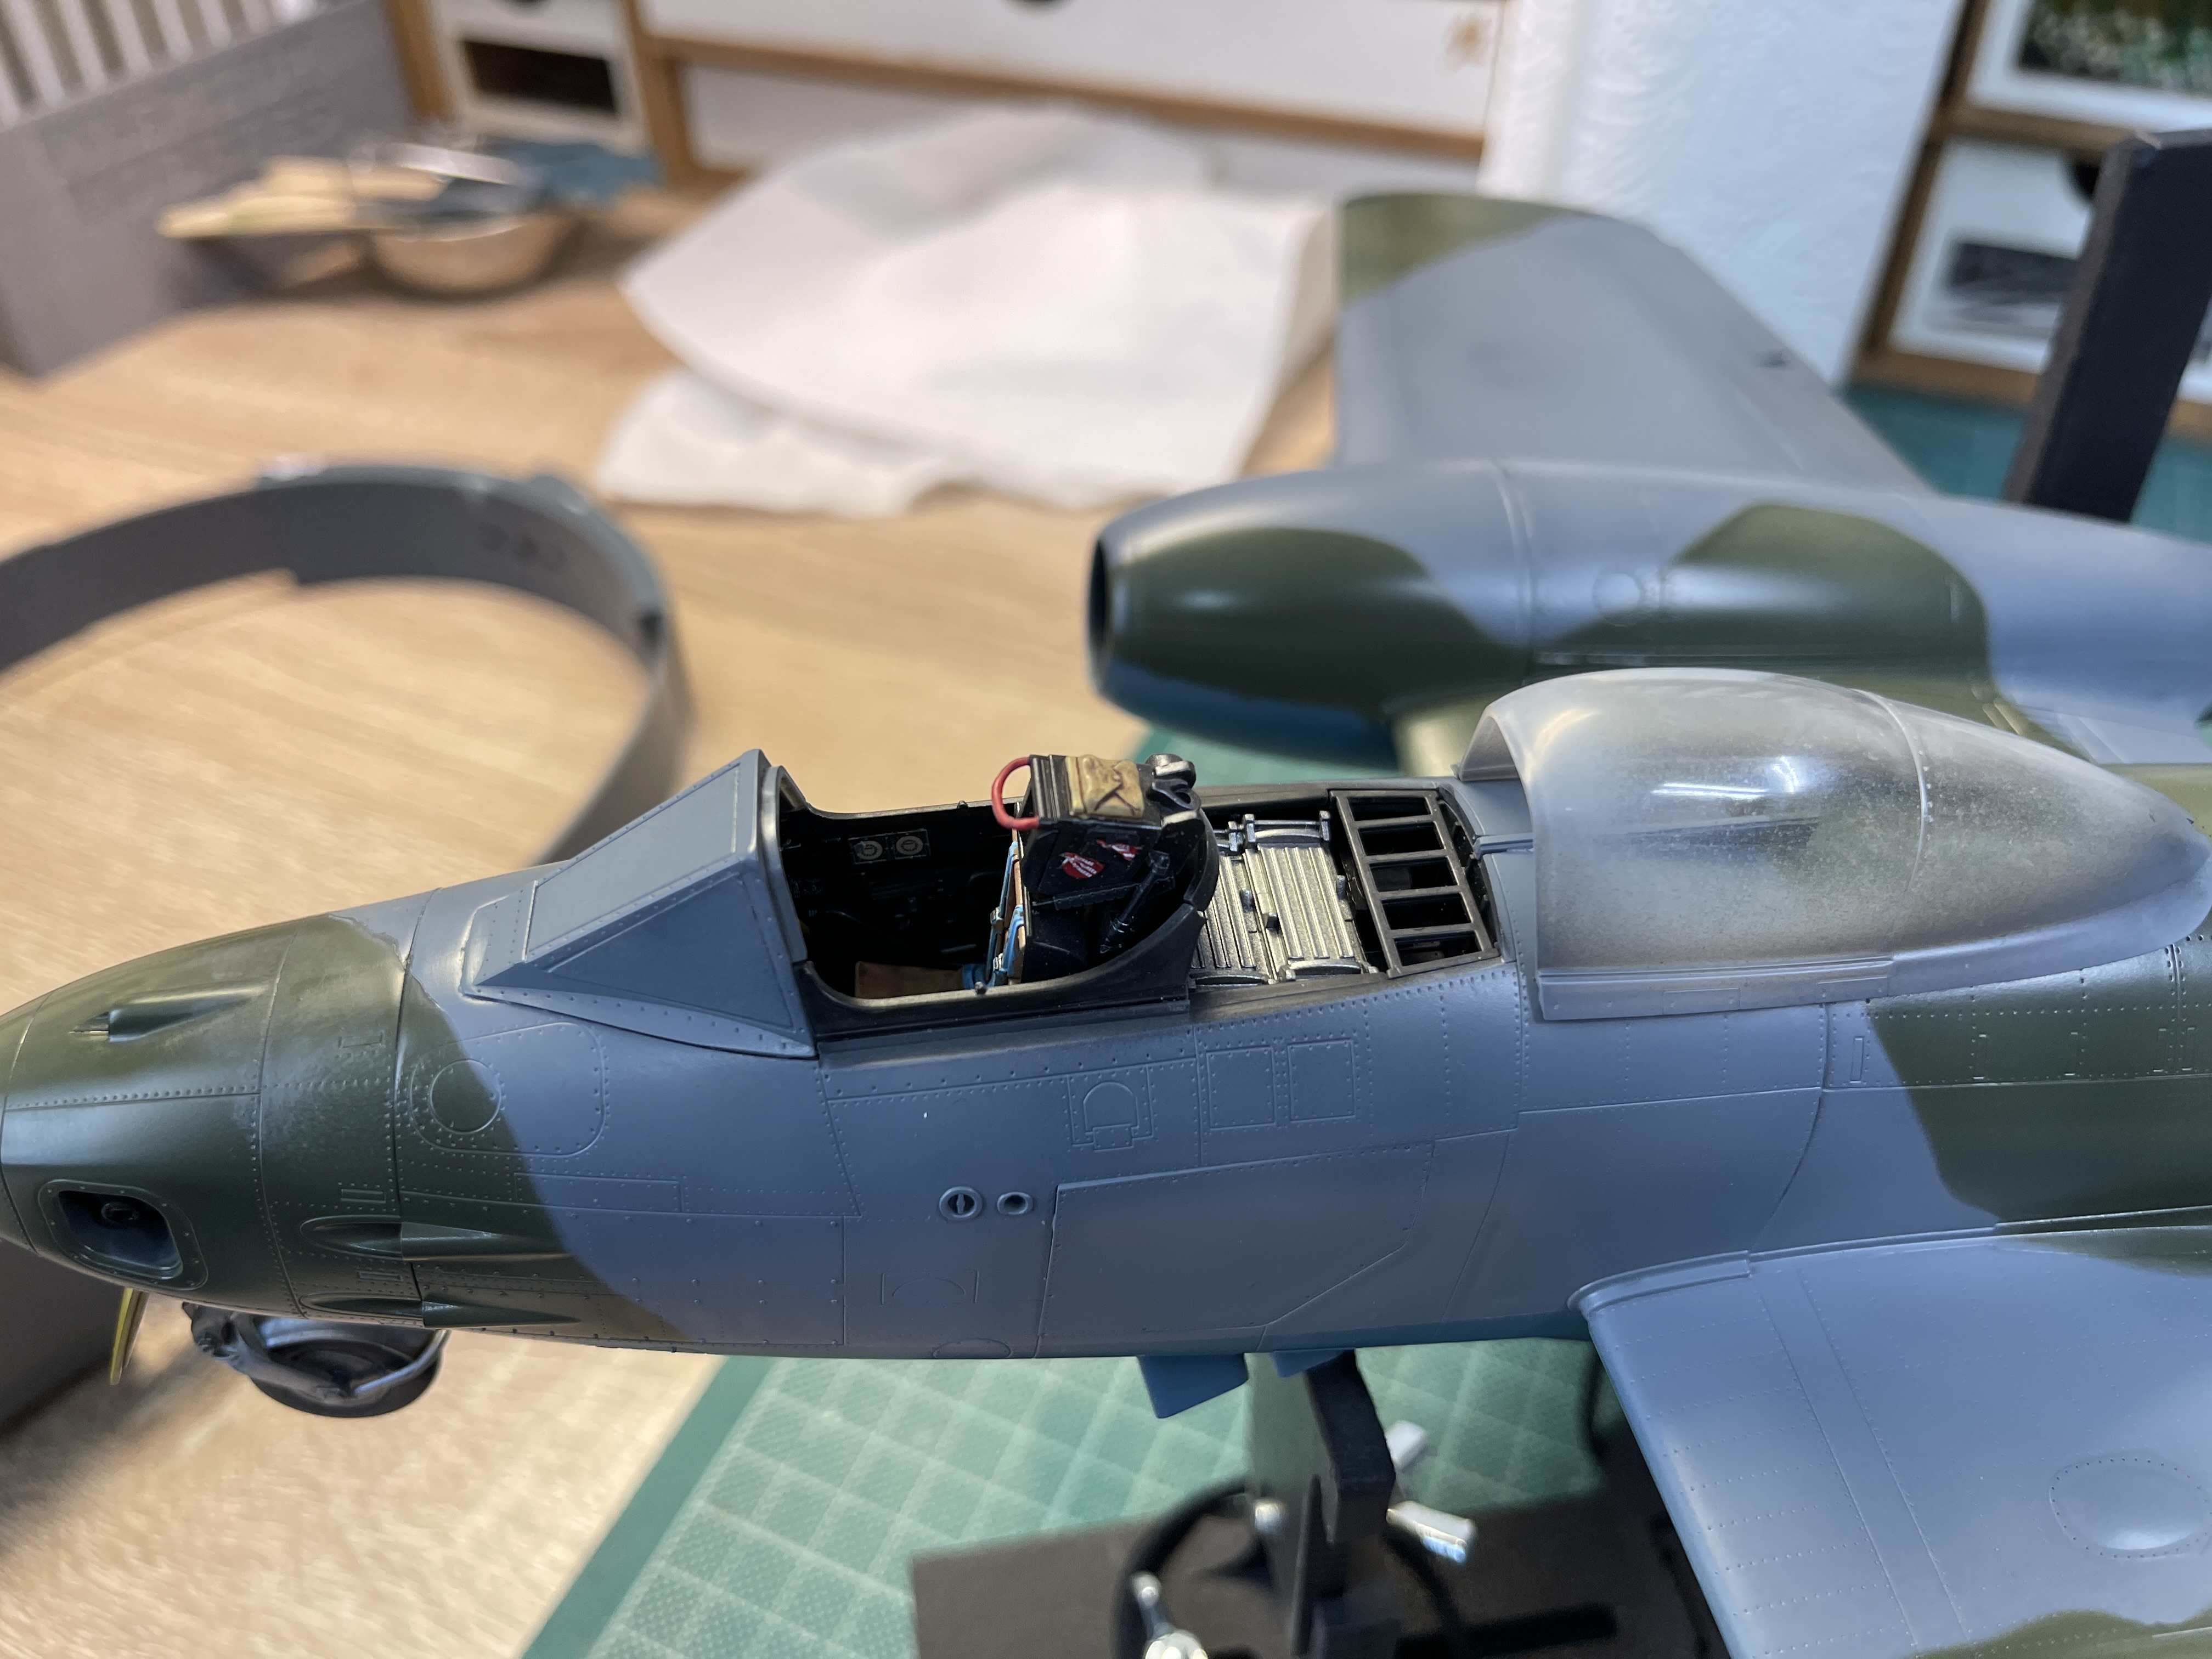
I have applied a grey primer and find that only need to treat the seam on the morning front of the canopy. The long seams to the rear look like panel lines and I only have them a light sanding.

I used Mr Dissolved Putty which is perfect for the seams. Once applied it I leave it overnight before sanding.

IMG_9252.jpeg


IMG_9251.jpeg


After sanding I will spray a little more grey primer where needed and then use a black primer to preshade. After a run over with a 2500 grit sanding sponge I will be ready to start the paint scheme.
 
It can be used many ways. I sometimes dry brush to bring out detail (best on matt paint) with no need to 'fix it' in place. It is brilliant for depicting worn painted metal this way.

Sometimes I burnish it to create a shiny metallic or blue steel finish (I use three types, chrome, steel and iron). Again no need for any kind of fix solution. Best done on a Matt paint using a cotton bud. I also use a cocktail stick, I pick up a small amount on the end and rub it onto matt painted area to depict paint chipping. It's my favourite way to do chipping.

The Zoukei Mura Raiden has its chipping done that way, a mix of dry brushing and cocktail stick. I tend to prefer a lighter weathering on the basis of less is more unless my subject really demands a heavier weathering.
Zoom in and take a look.
View attachment 190063
That's very nice.
 
I prefer pre-shading because I feel it gives you more control. I pre-shaded my MiG project but it looked awful so I just laid the base coat on thick enough to cover it up. That's a lot easier than having to redo a base coat because you don't like your post shading.
 
As an Amazon Associate we earn from qualifying purchases. Product prices and availability are accurate as of the date/time indicated and are subject to change.
I thought I would run through and illustrate my approach to painting including shading. I consider shading the basis for getting realism while also being where some 'artistry' comes in.

I had finished the underside before deciding to do this, so I will demonstrate my approach on the two top camo colours.

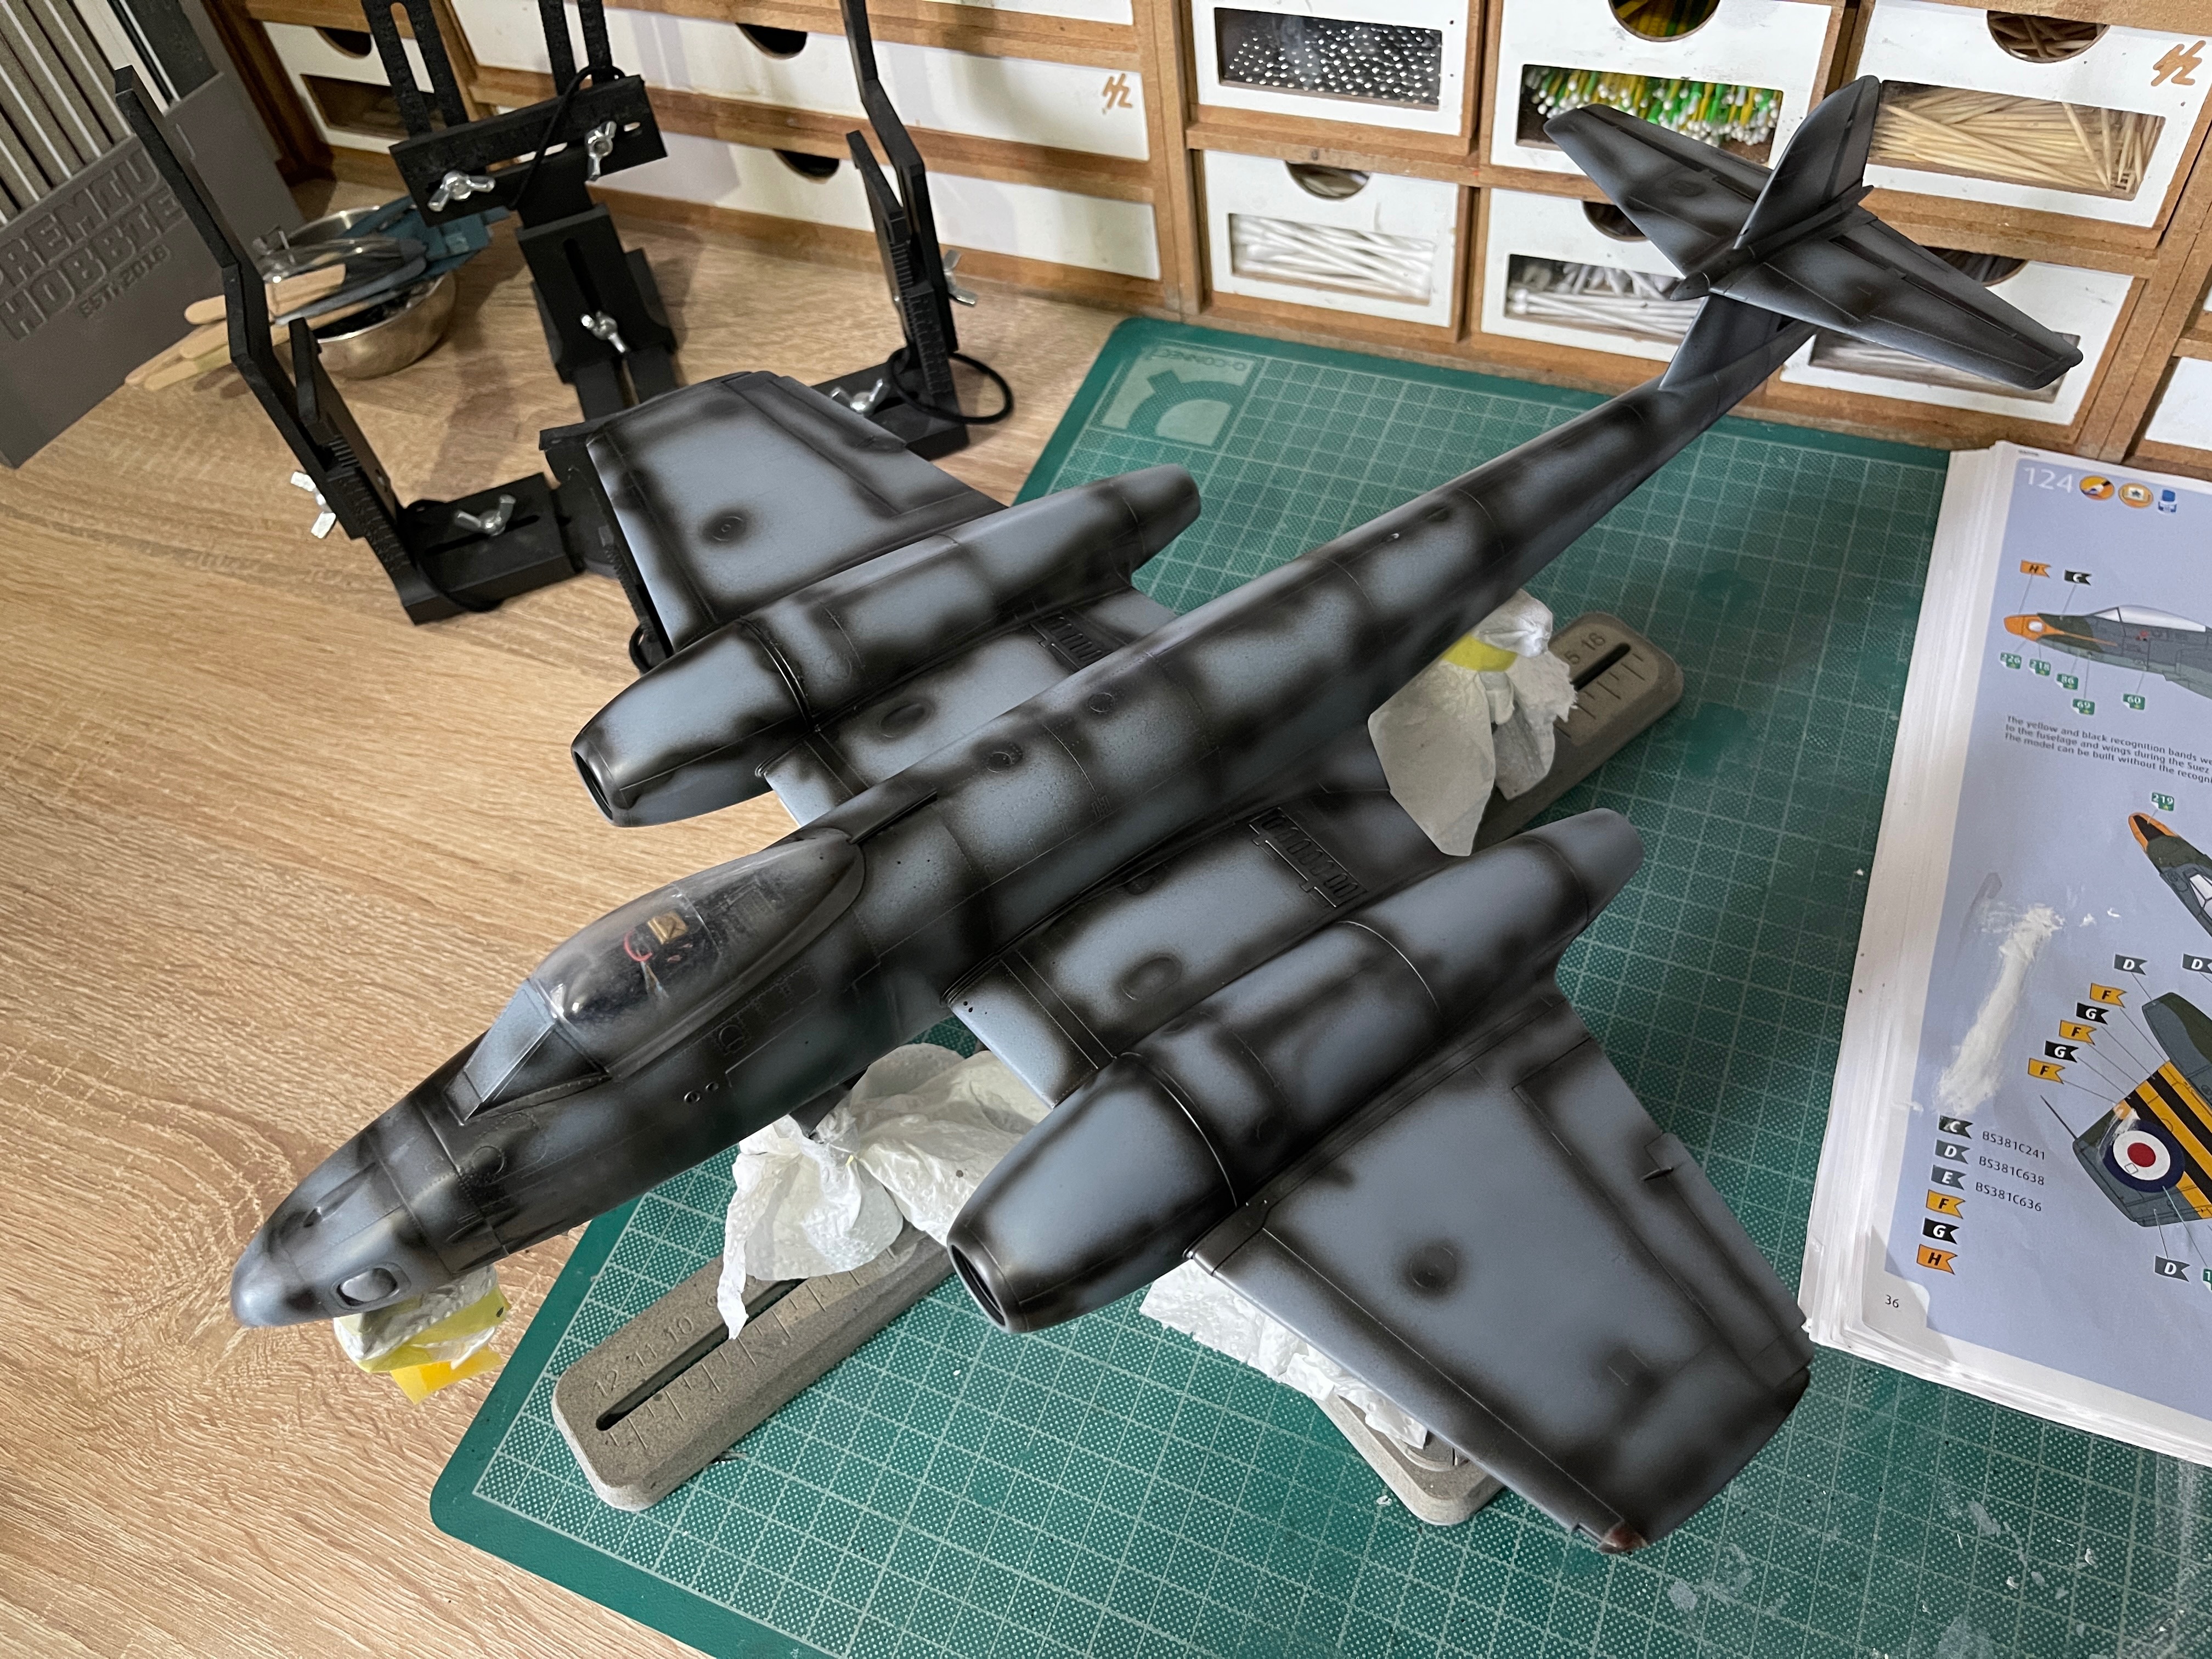
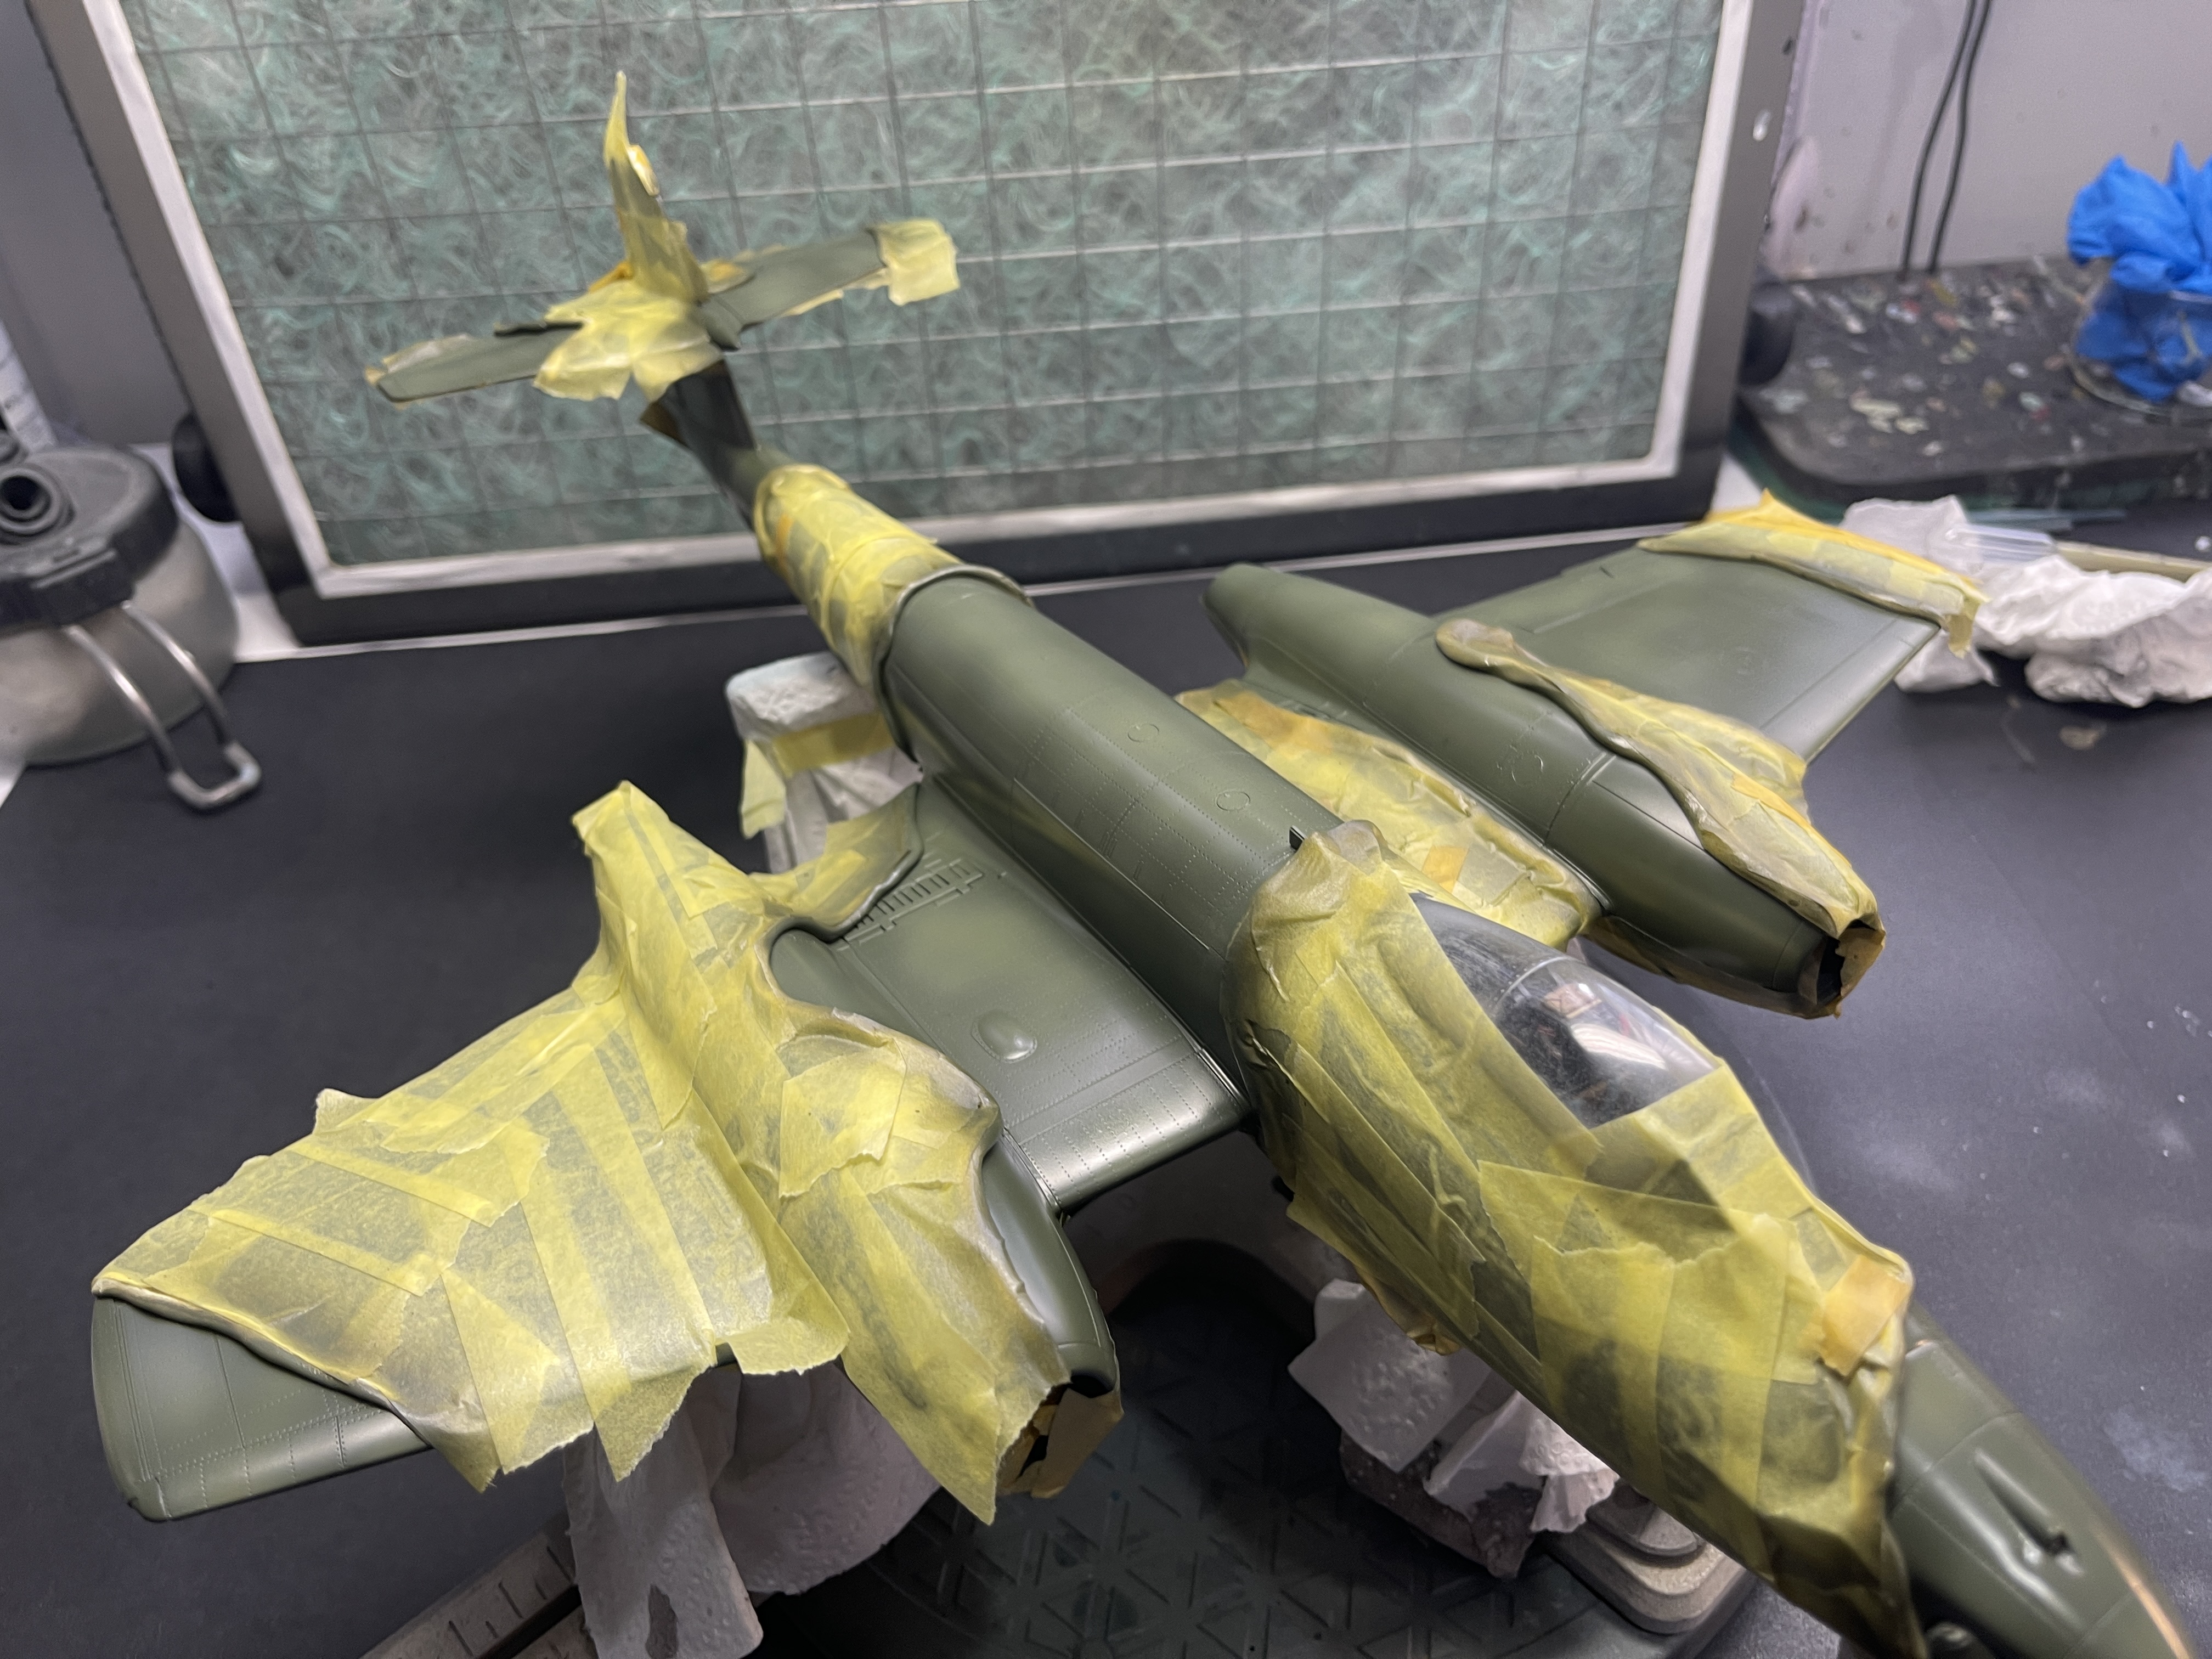
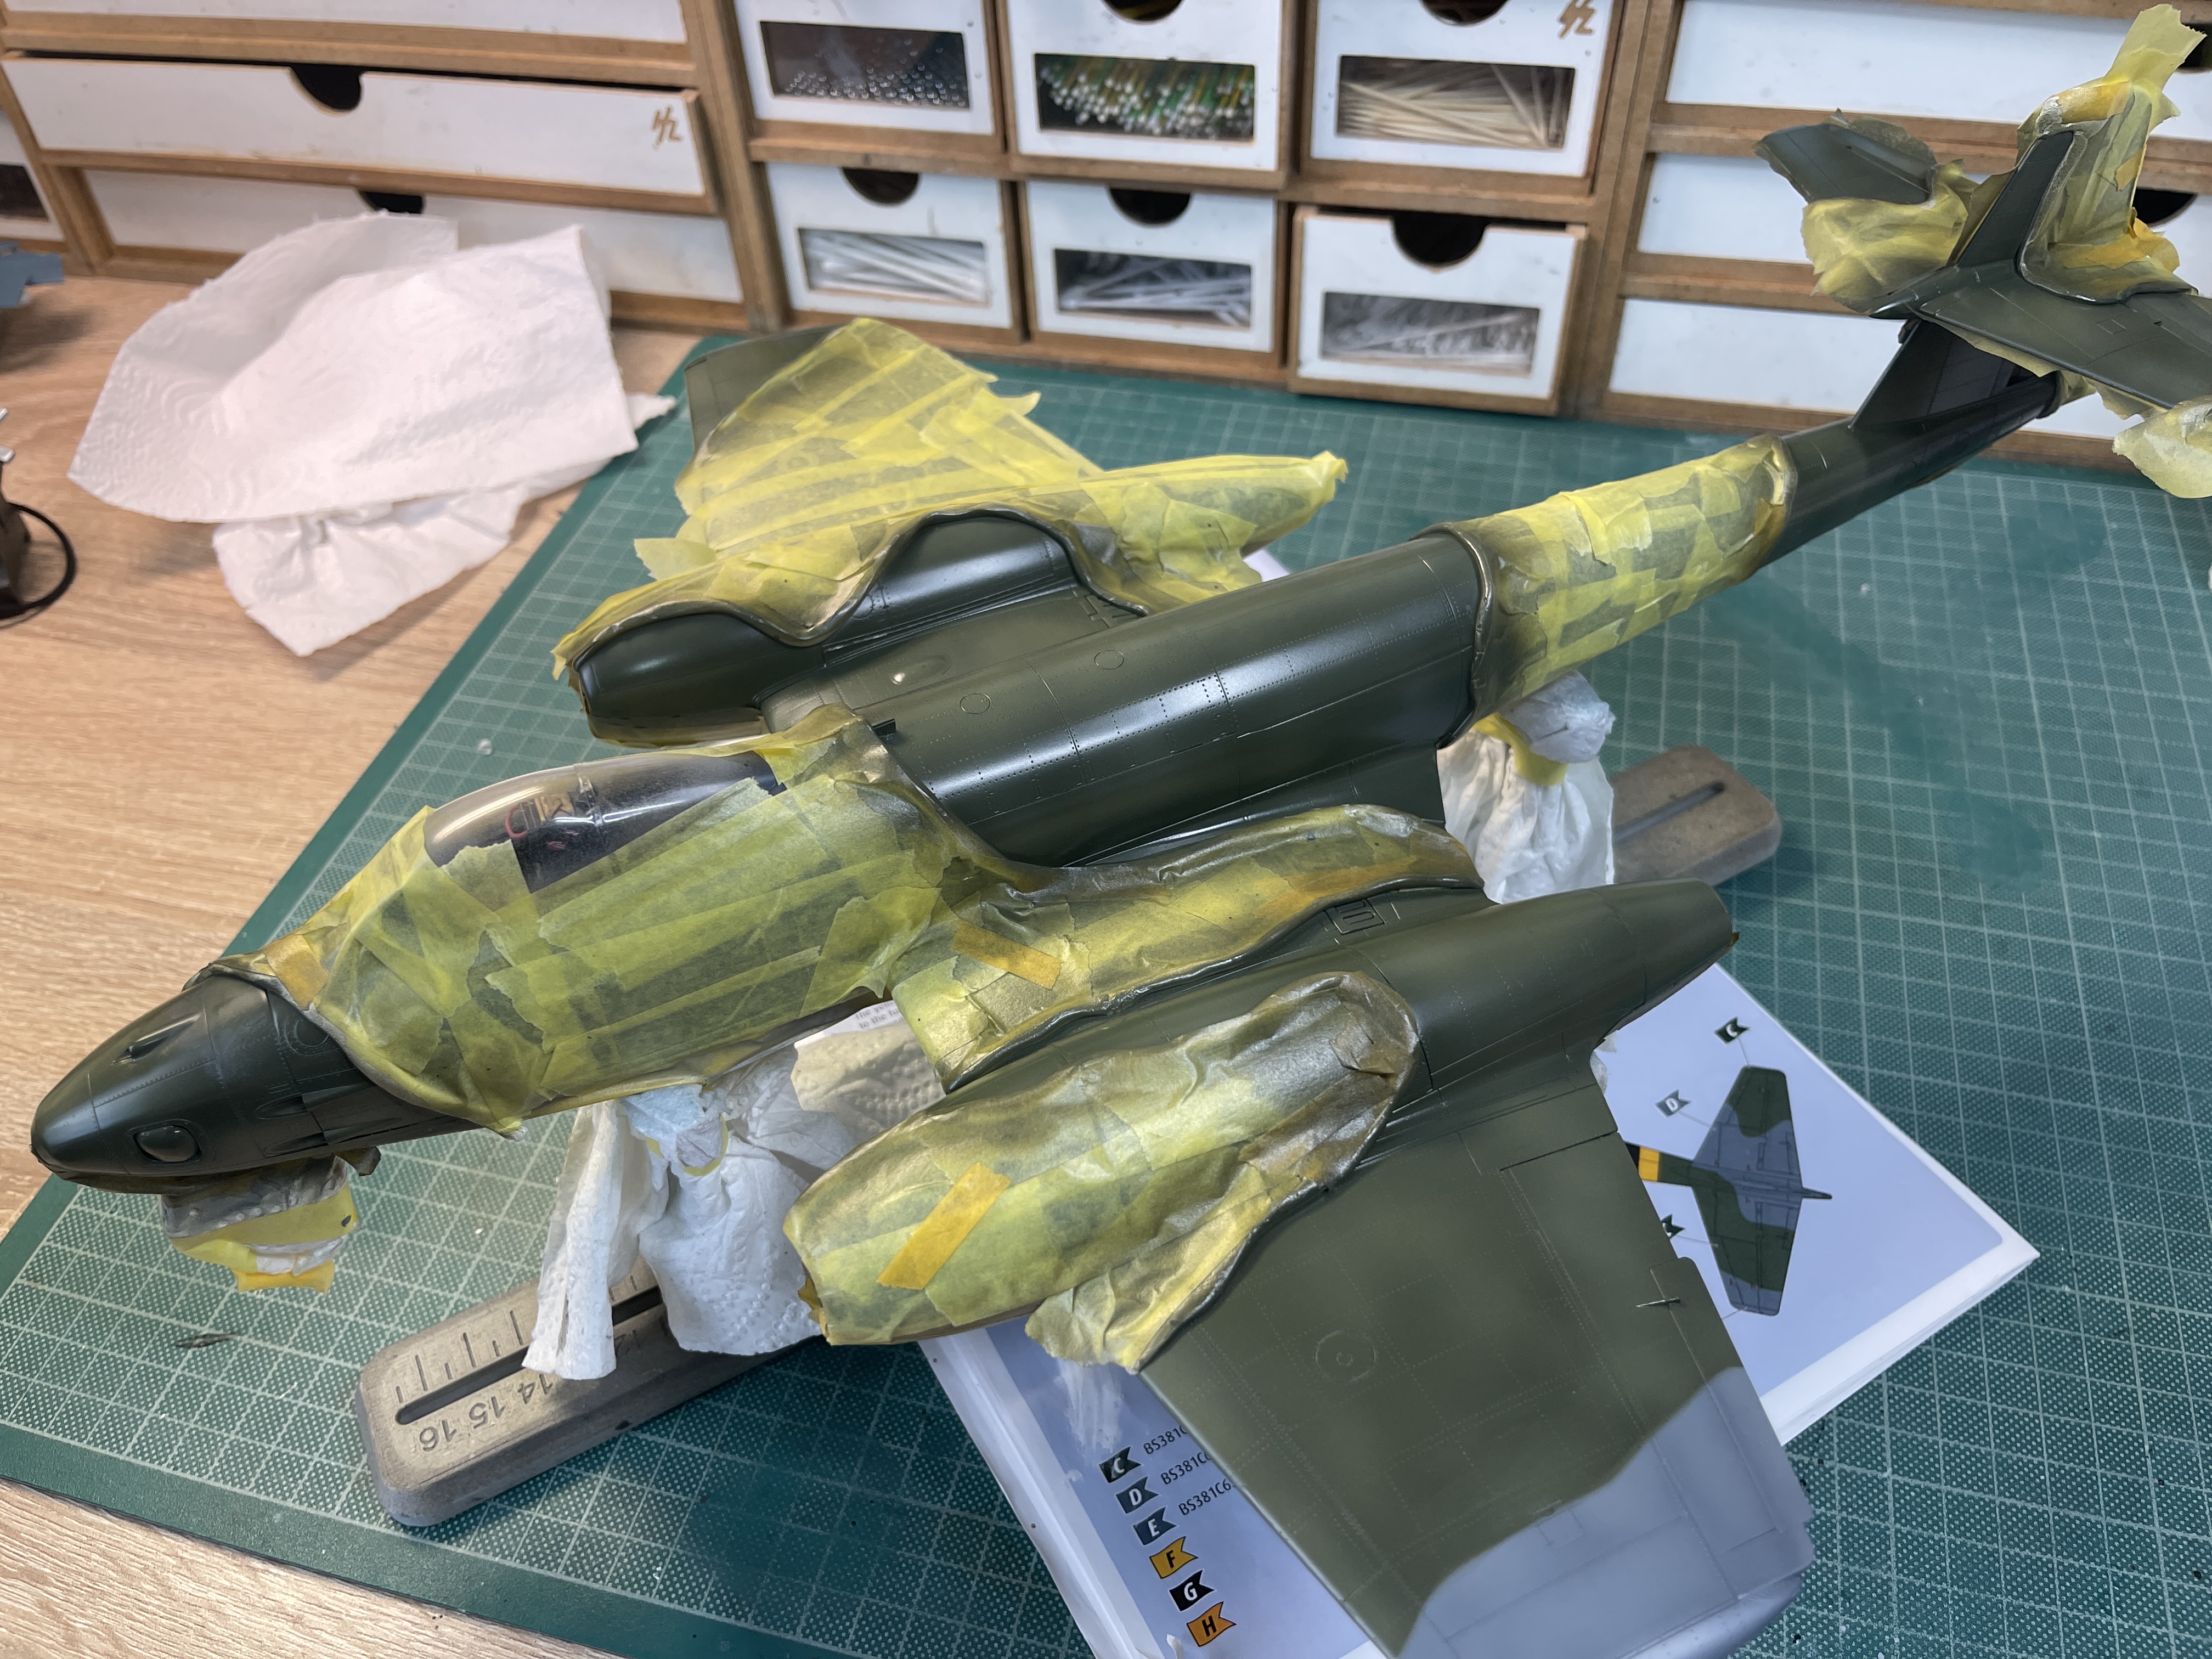
My first photo is with the underside masking done to give a solid demarcation. You can see the primed topside with black shading.
IMG_9255.jpeg

Now, about the preshading above. It's important to remember that this is about colour modulation and trying to emulate the play of light you get on a large surface onto the much smaller surface of the model. This is not panel line accentuation, that I will do as a wash later. What I want is added visual depth with highlights and lowlights. For this reason while panel lines can be used it's important not to be too neat and not to follow them too rigidly otherwise you are in danger of getting a chequerboard effect. For that reason you can see that my preshading looks a little haphazard and 'rough' this is deliberate.

Then it's the turn of the Dark Sea Grey.

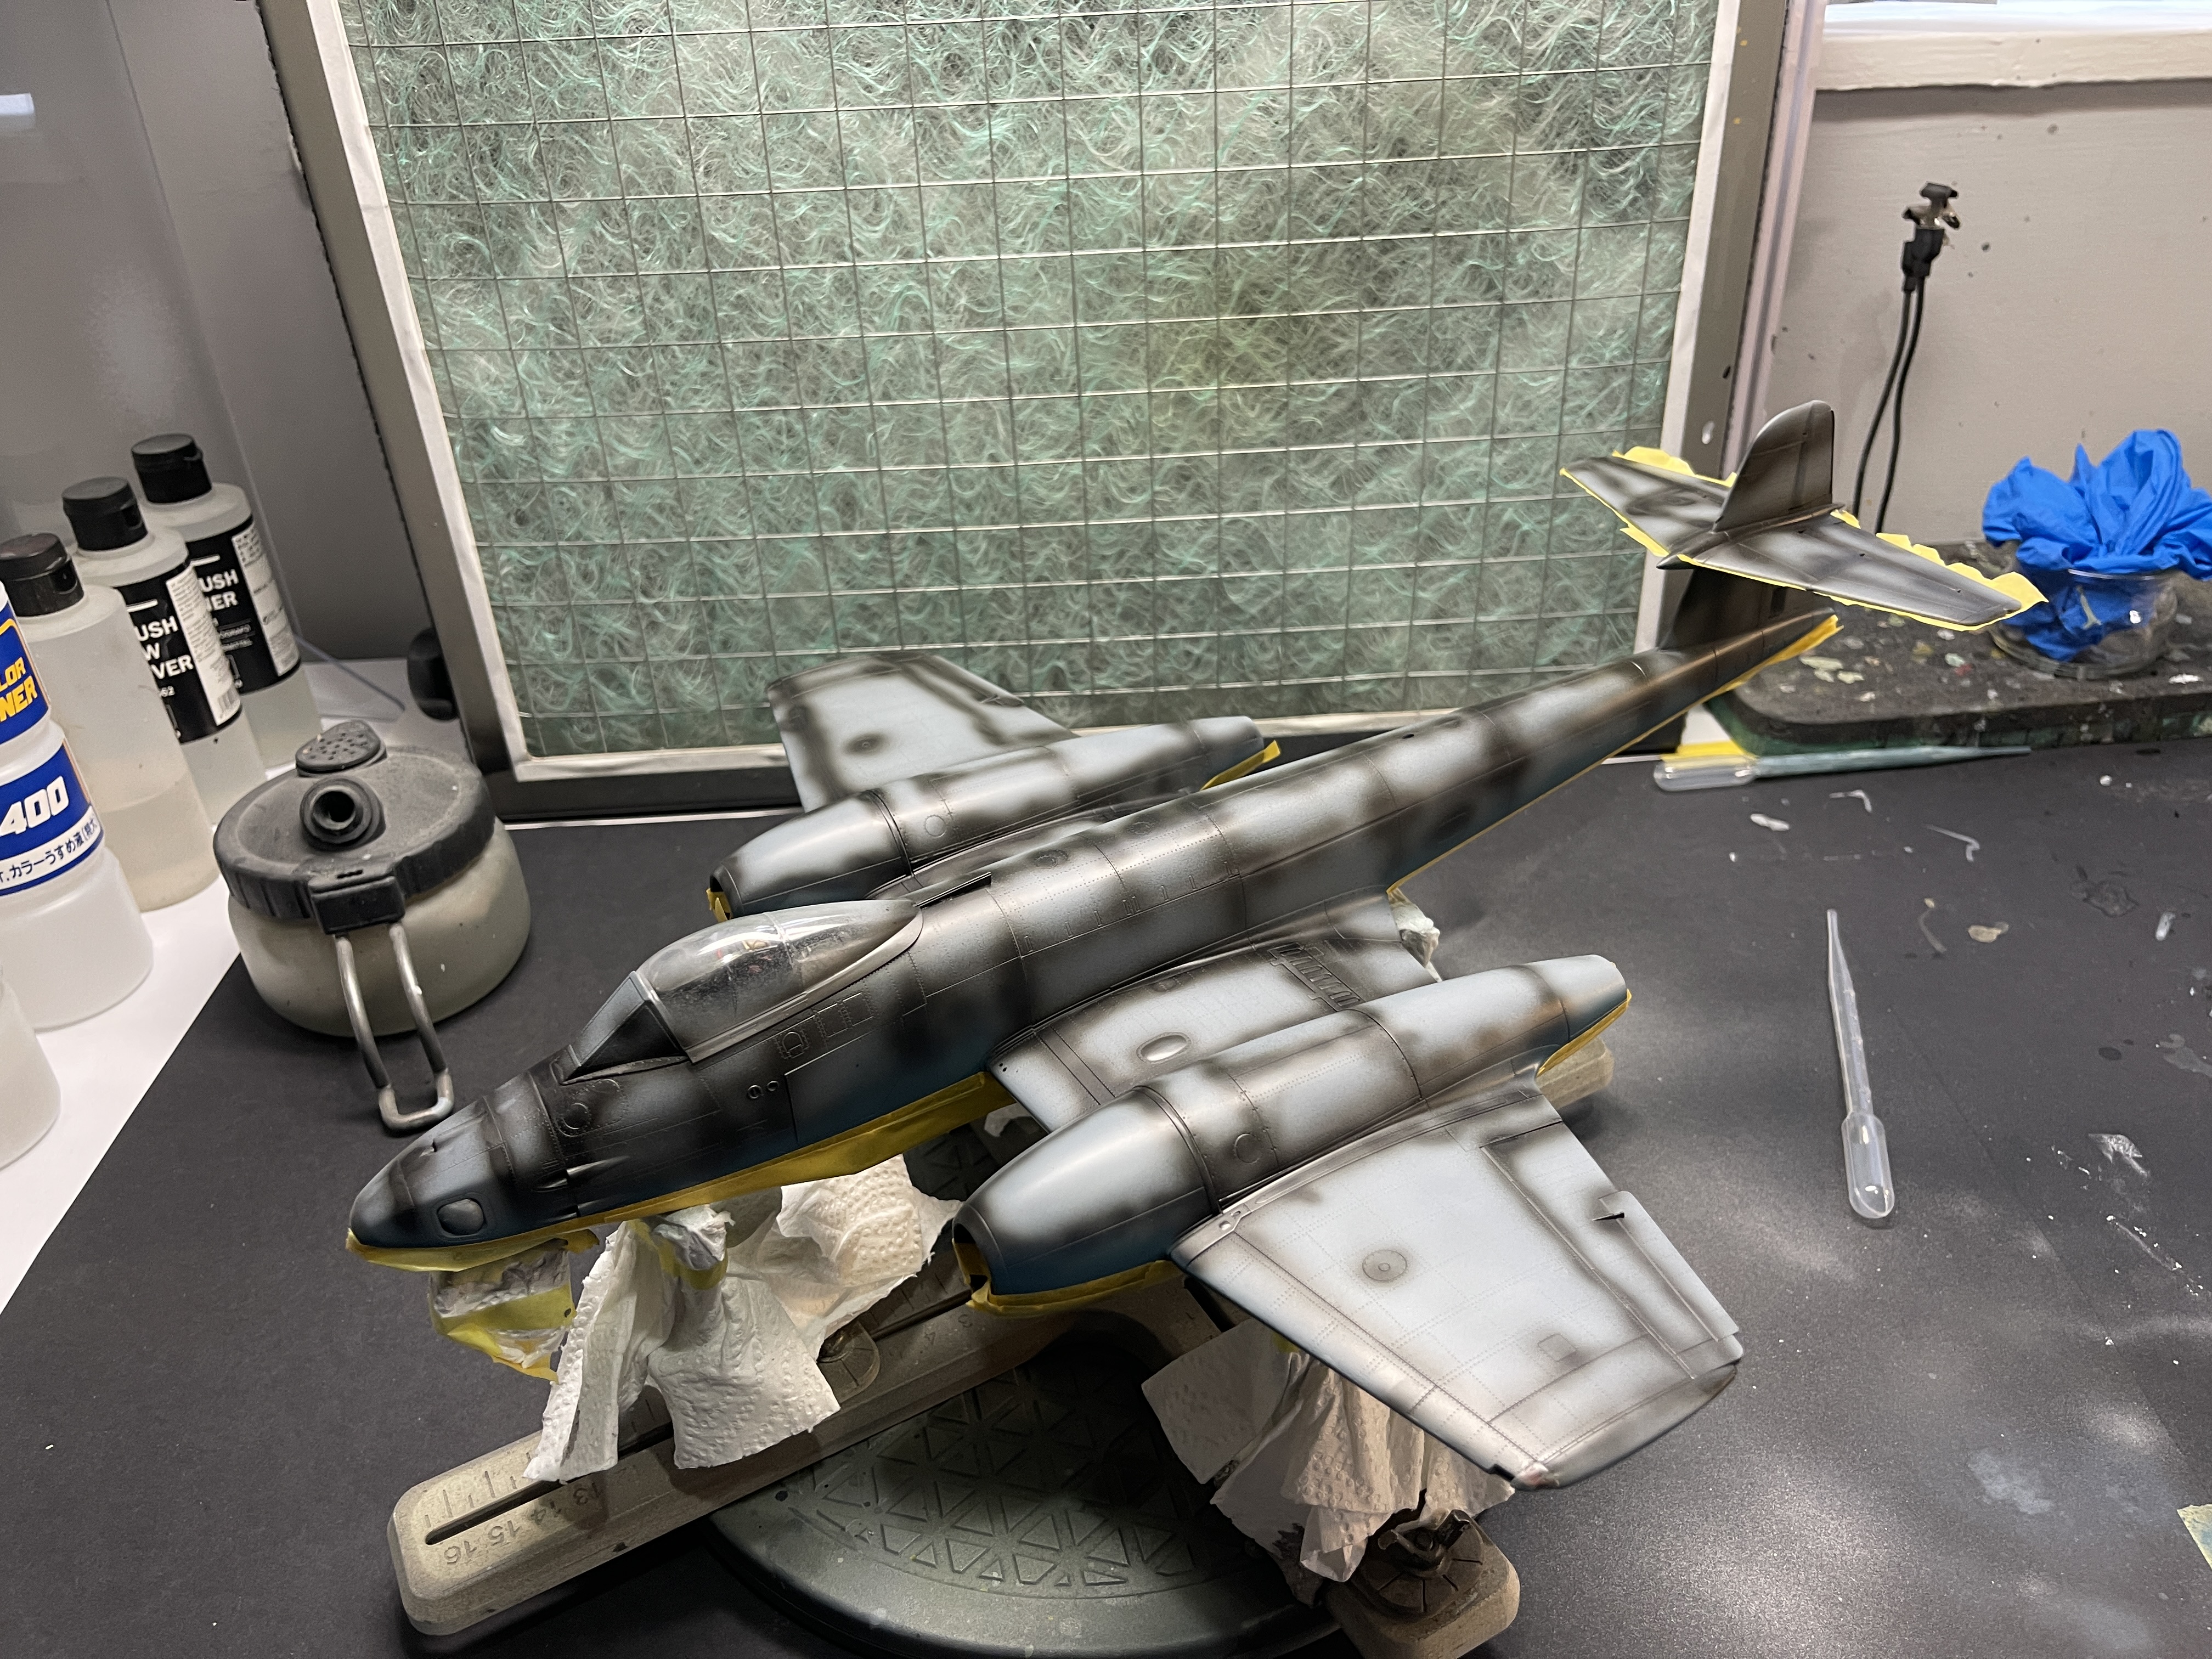
My advice is to spray in sections, specially if you are building in a larger scale. Keep pressure low and control the paint flow to build up cover slowly. Proceed slowly, stop regularly and look at progress from different angles and ideally under different light. A fairly subtle effect is best specially for a post WW2 subject like this. You can see below where I stopped. Not quite done yet, but close.

IMG_9256.jpeg

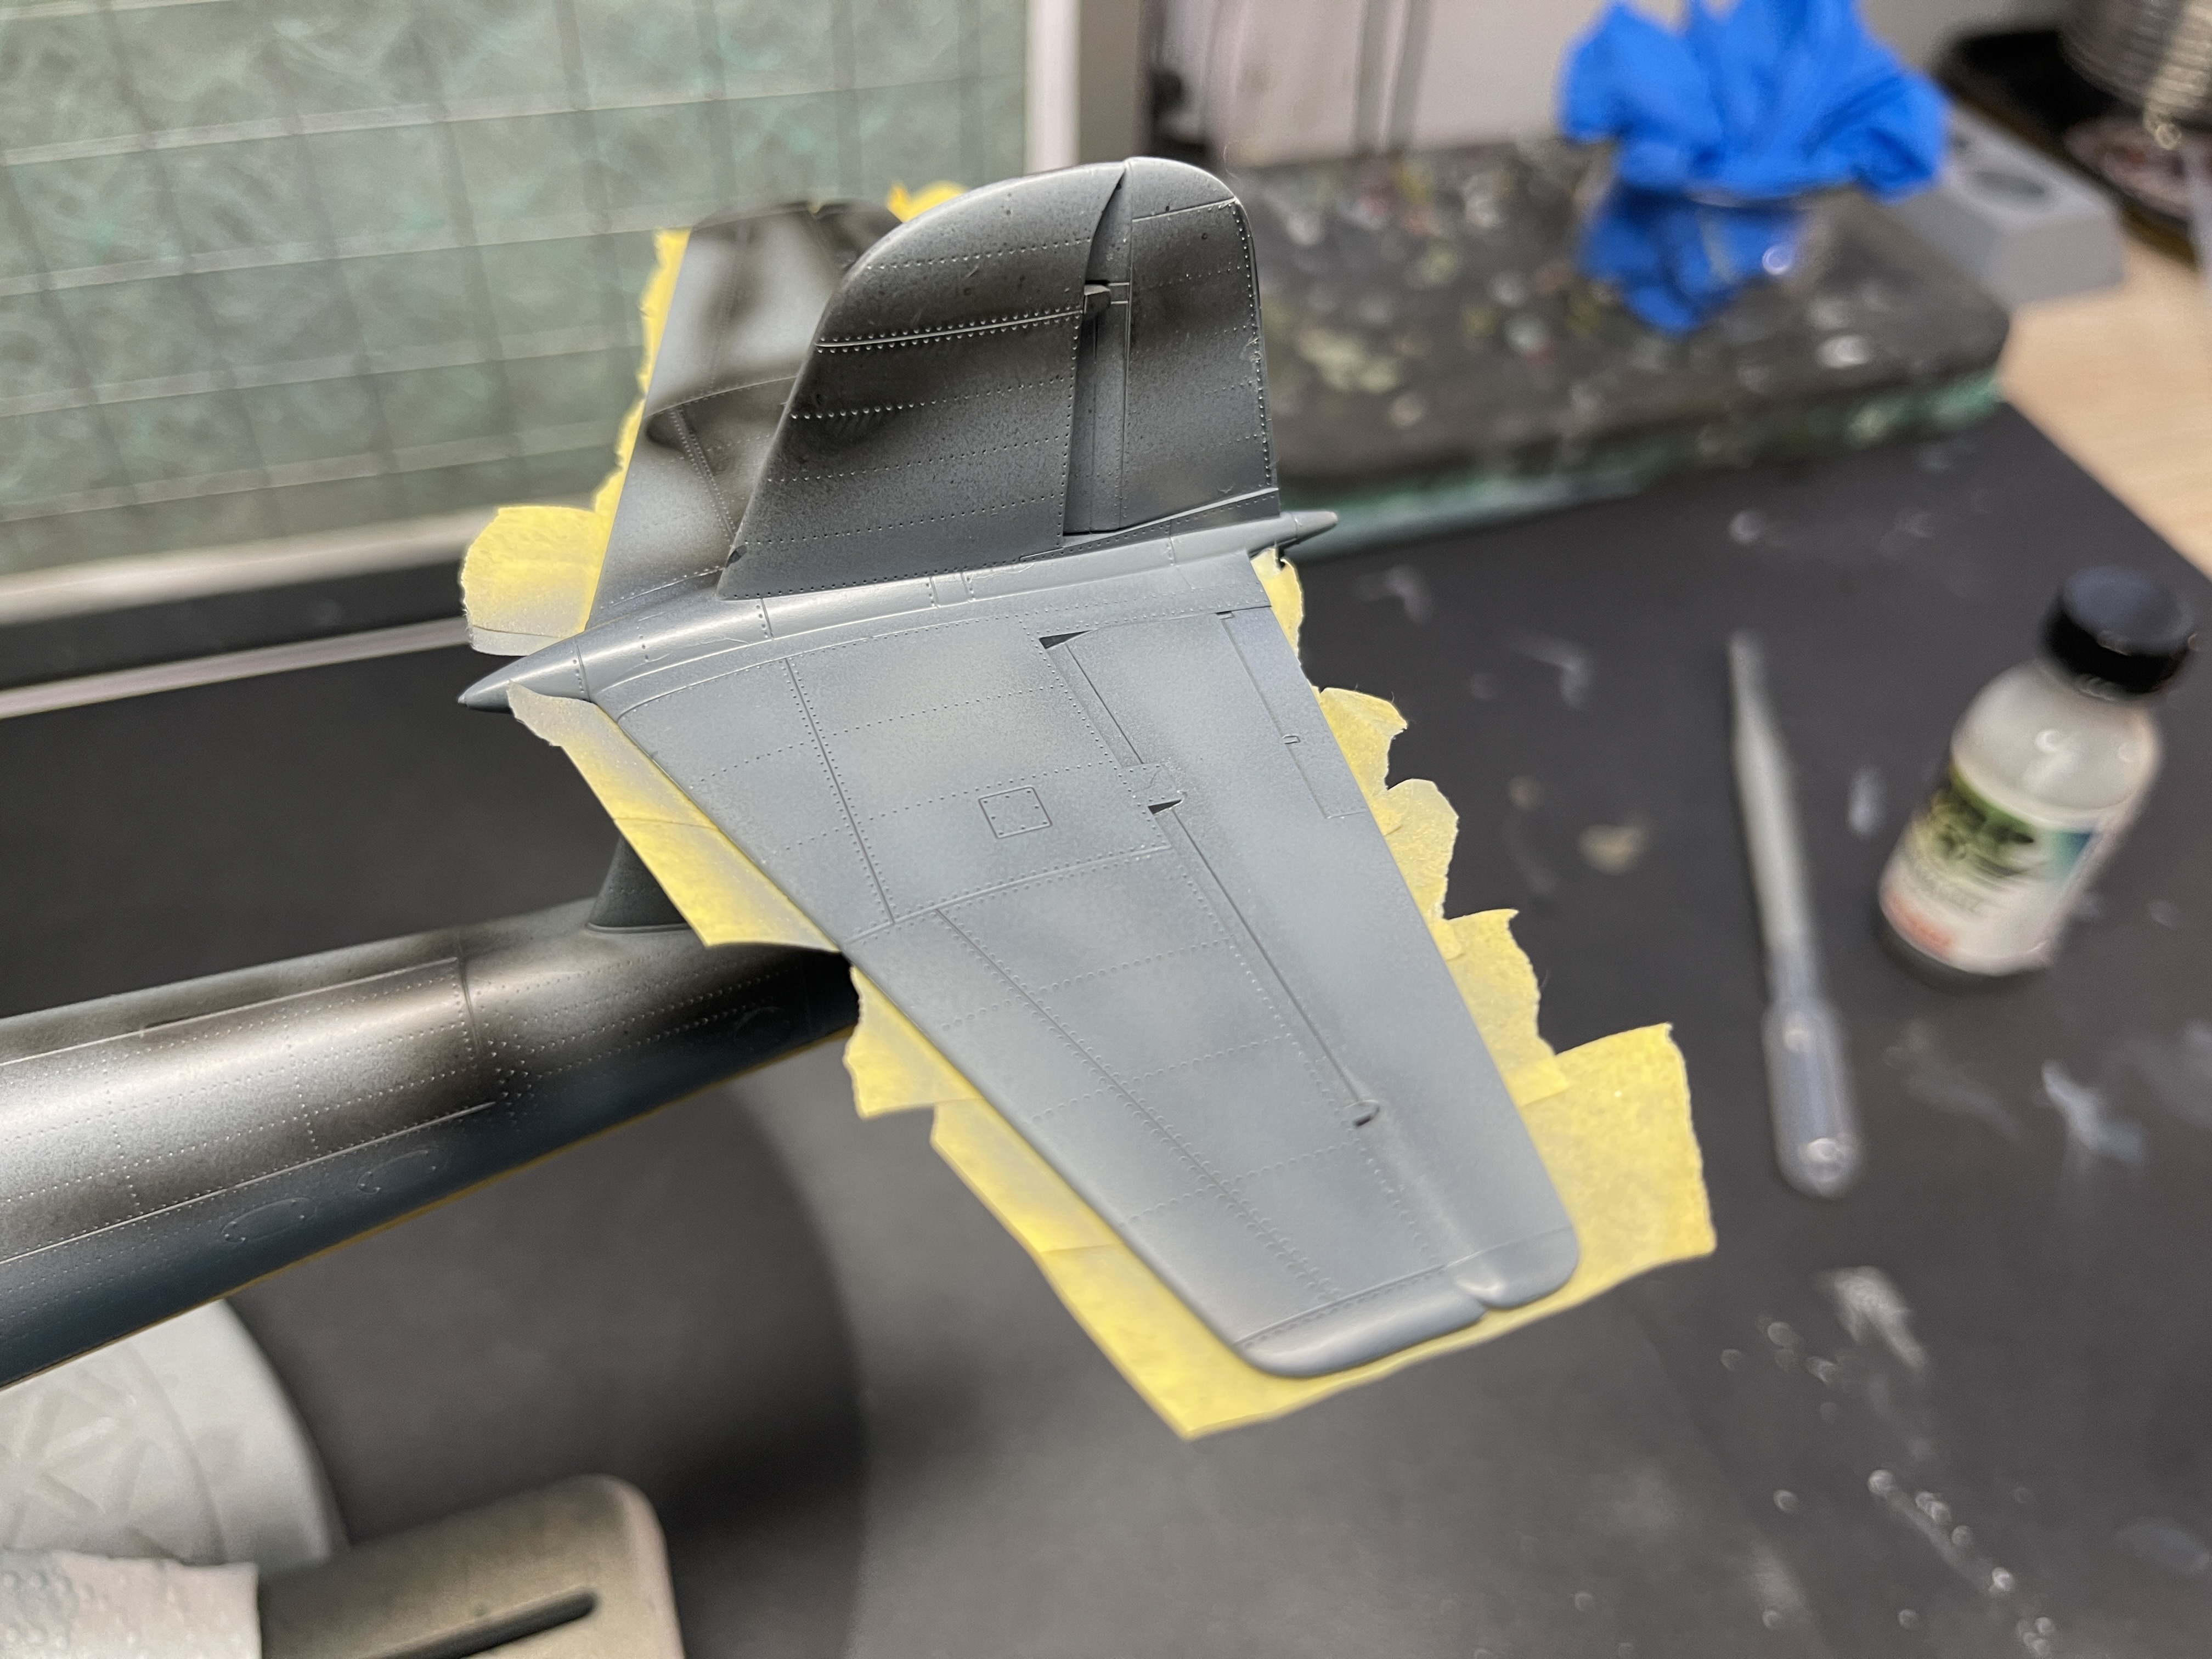
I then work on the rest of the model, section by section with an aim of getting the appearance very close to the first section painted. As you can see below, I finished the tail and worked forward to the wing and then onto the outer wing.
IMG_9257.jpeg


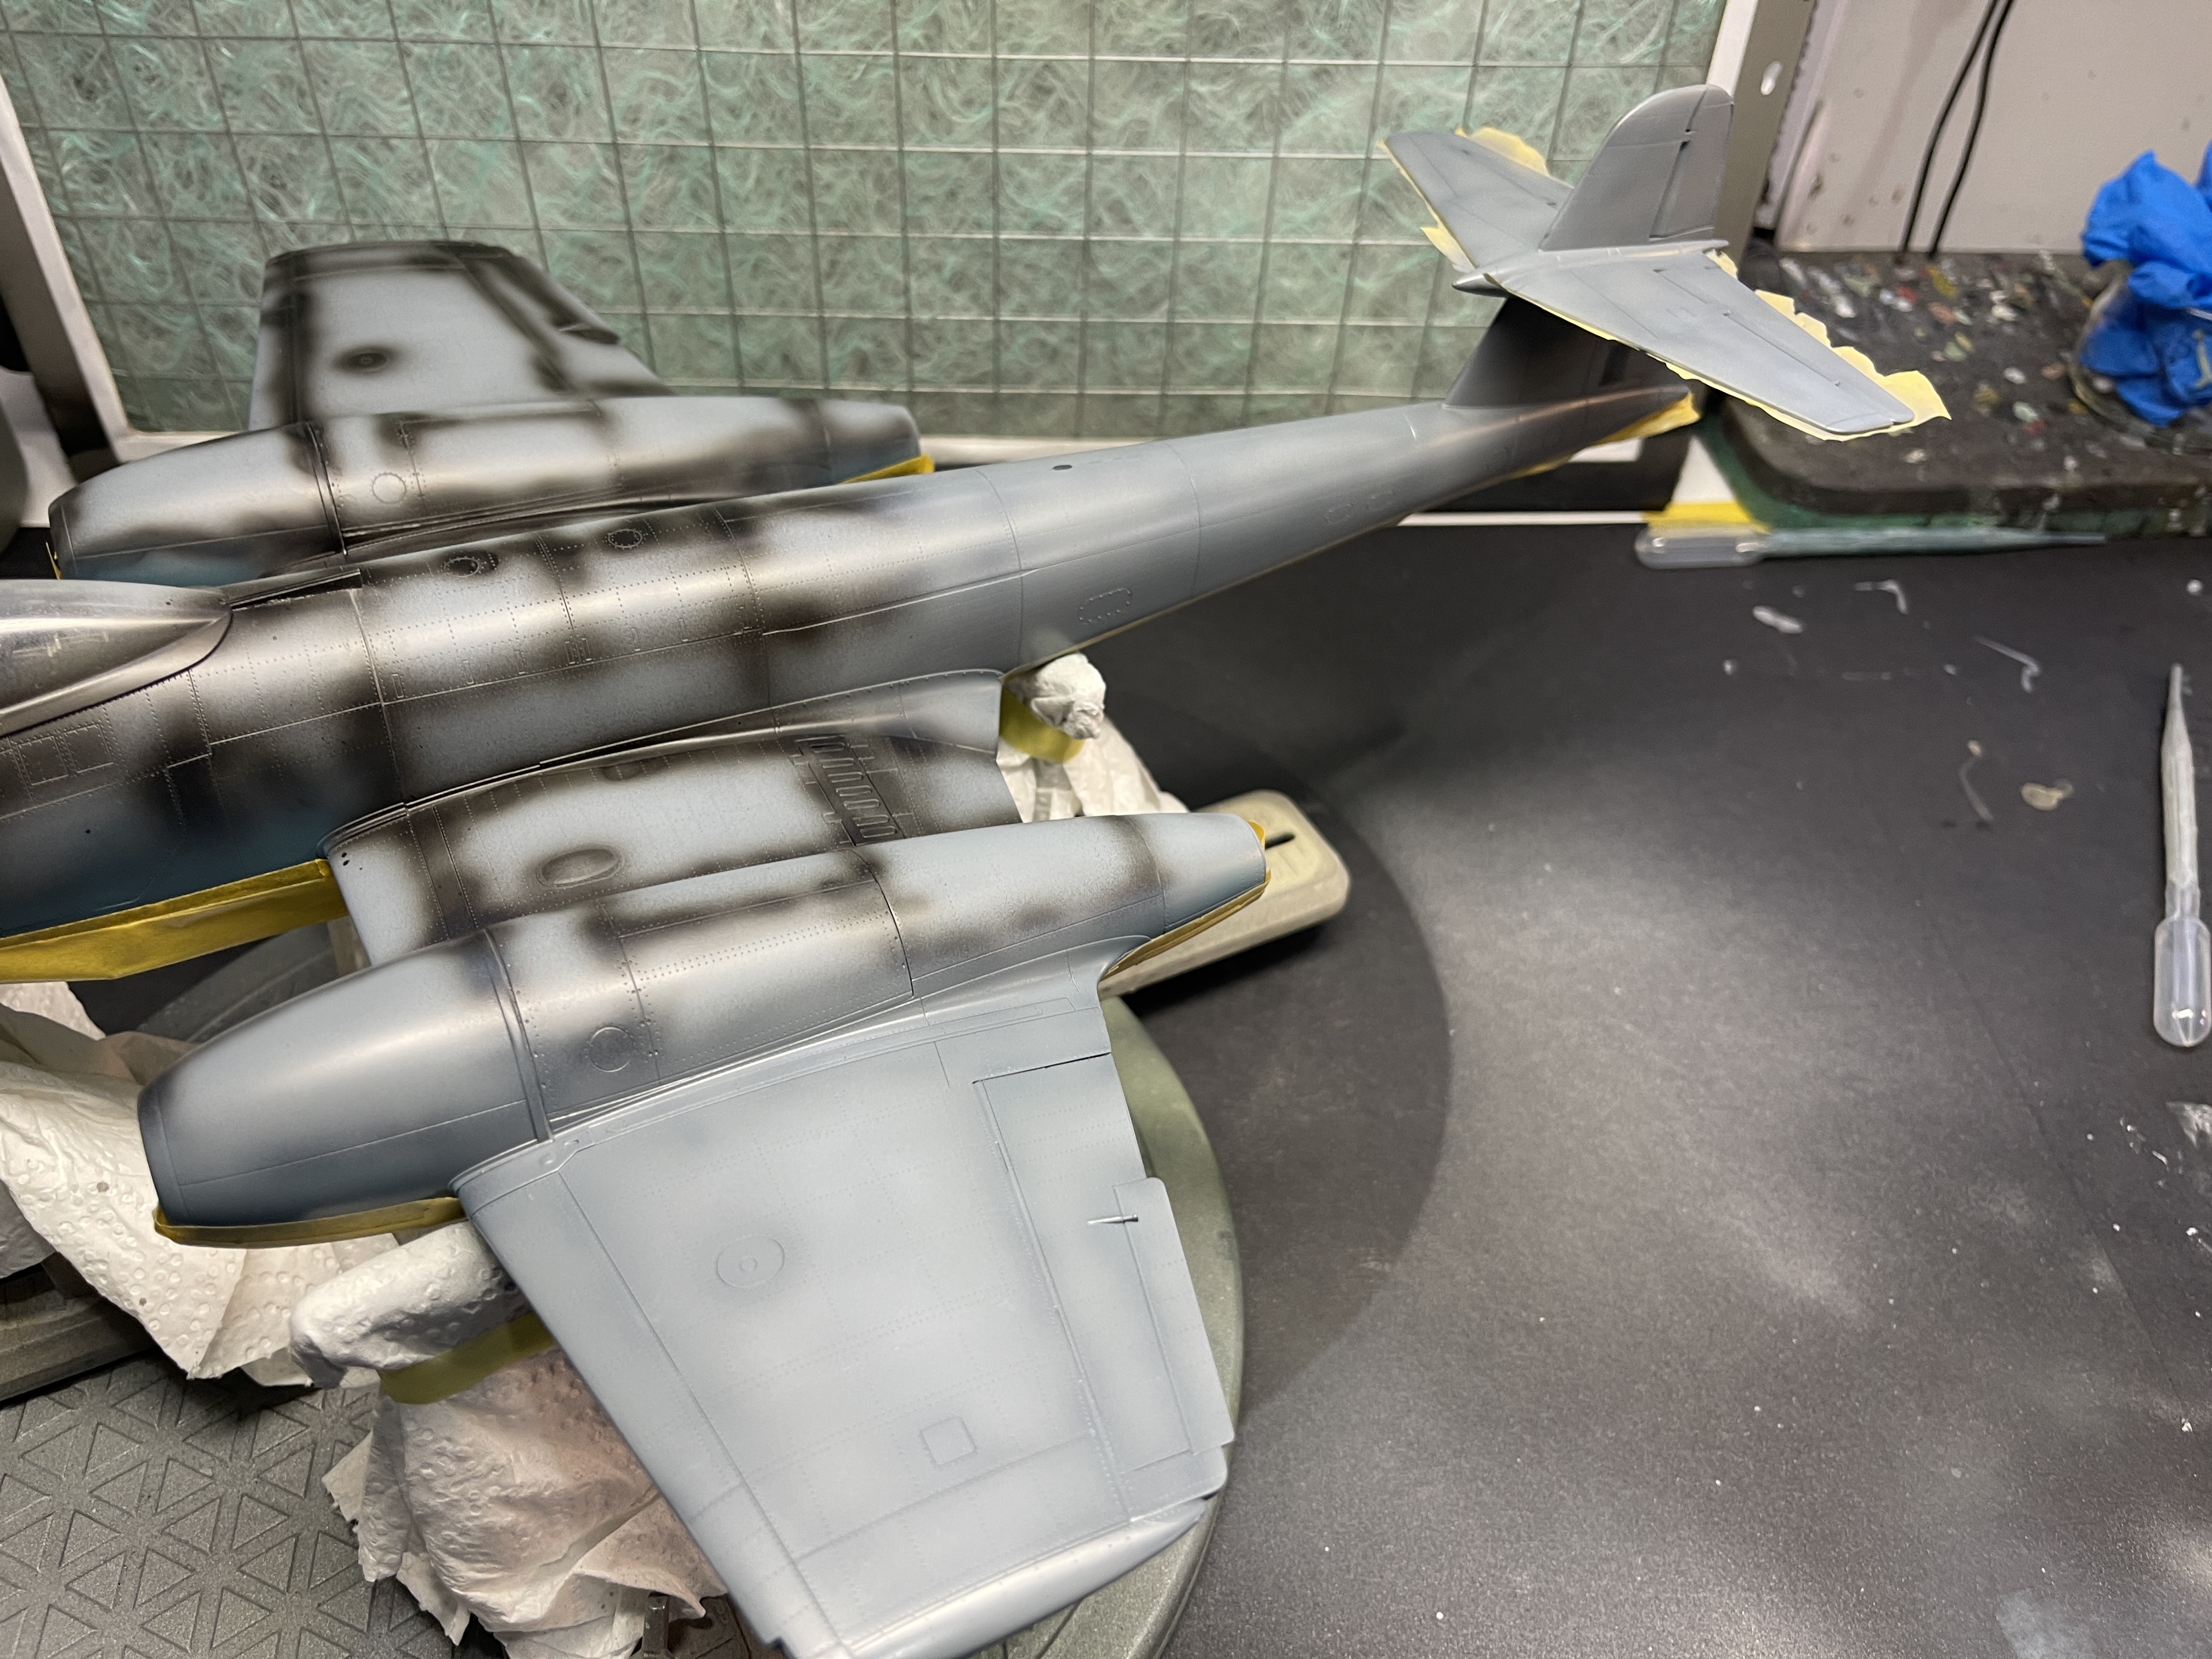
Here is the Dark Sea Grey done.
IMG_9258.jpeg

I then examined the whole aircraft and went back with a little more colour where needed being careful not to lose all the shading, just 'knocking it back' where I thought I needed to. I cannot repeat it often enough, take it slowly, thin coats building up colour where needed. Take lots of breaks is my best tip.

Once done I had to decide whether I also need to post shade this colour. I decided not to as I believe I have sufficient modulation for this subject.

Next I will mask up to do the dark green. My approach will differ, slightly, for this as some post shading will almost certainly be necessary and that's where it might get more interesting.
 
Last edited:
I thought I would run through and illustrate my approach to painting including shading. I consider shading the basis for getting realism while also being where some 'artistry' comes in.

I had finished the underside before deciding to do this, so I will demonstrate my approach on the two top camo colours.

My first photo is with the underside masking done to give a solid demarcation. You can see the primed topside with black shading.
View attachment 190528
Now, about the preshading above. It's important to remember that this is about colour modulation and trying to emulate the play of light you get on a large surface onto the much smaller surface of the model. This is not panel line accentuation, that I will do as a wash later. What I want is added visual depth with highlights and lowlights. For this reason while panel lines can be used it's important not to be too neat and not to follow them too rigidly otherwise you are in danger of getting a chequerboard effect. For that reason you can see that my preshading looks a little haphazard and 'rough' this is deliberate.

Then it's the turn of the Dark Sea Grey.

My advice is to spray in sections, specially if you are building in a larger scale. Keep pressure low and control the paint flow to build up cover slowly. Proceed slowly, stop regularly and look at progress from different angles and ideally under different light. A fairly subtle effect is best specially for a post WW2 subject like this. You can see below where I stopped. Not quite done yet, but close.

View attachment 190529
I then work on the rest of the model, section by section with an aim of getting the appearance very close to the first section painted. As you can see below, I finished the tail and worked forward to the wing and then onto the outer wing.
View attachment 190530

Here is the Dark Sea Grey done.
View attachment 190531
I then examined the whole aircraft and went back with a little more colour where needed being careful not to lose all the shading, just 'knocking it back' where I thought I needed to. I cannot repeat it often enough, take it slowly, thin coats building up colour where needed. Take lots of breaks is my best tip.

Once done I had to decide whether I also need to post shade this colour. I decided not to as I believe I have sufficient modulation for this subject.

Next I will mask up to do the dark green. My approach will differ, slightly, for this as some post shading will almost certainly be necessary and that's where it might get more interesting.
I like that you're including this. My biggest problem with pre-shading is I typically apply to much base coat over it and lose the effect.
 
I like that you're including this. My biggest problem with pre-shading is I typically apply to much base coat over it and lose the effect.
Hence how I do it. Take time, be restrained and do many light coats stopping before you get to the point you want.
 
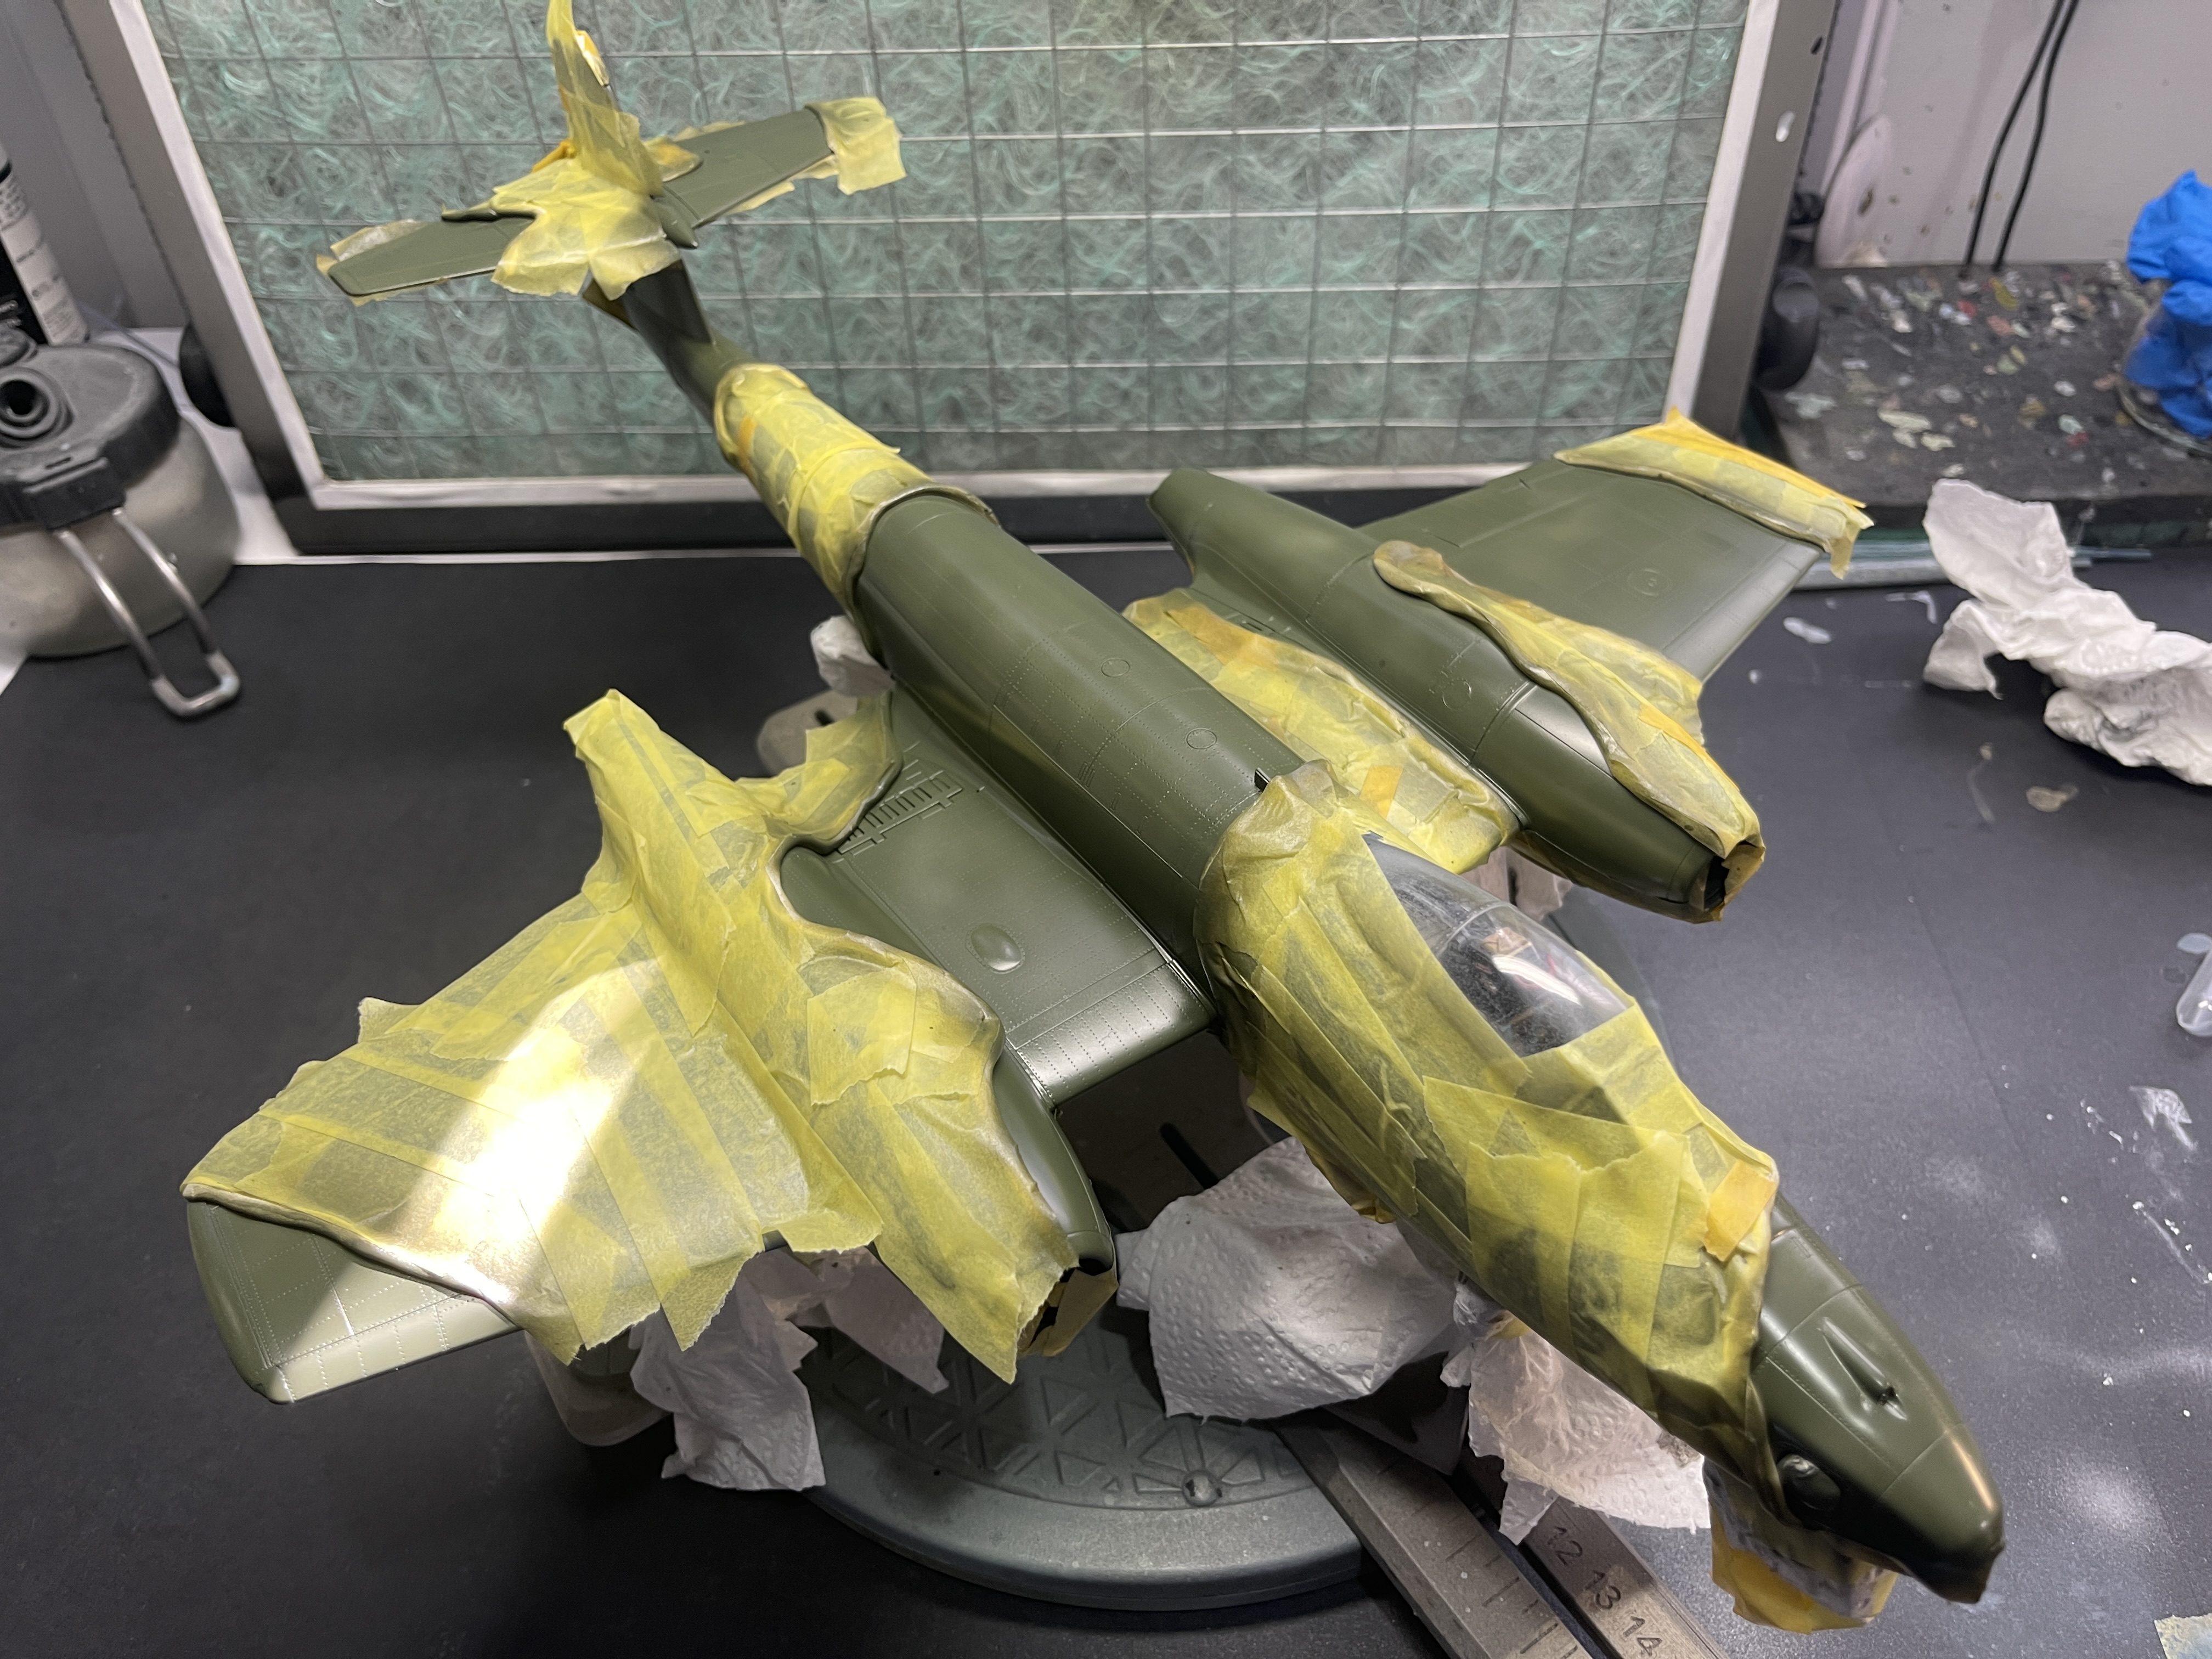
Now thanks to the wonder of MRP lacquers cured in under 30 mins, I was able to mask up after lunch and get on with the dark green.

Masked with the dark green done.
IMG_9259.jpeg

Naturally the preshading has no impact on this colour and this is where post shading comes in.

I used RAF Light Green as the post shade colour. It would also work well if you mixed a little white into the dark green. I sprayed lightly in areas that I wanted to lighten with particular attention to those places that catch the light.
IMG_9260.jpeg

Above is how it looks so far, not finished yet, I need to reduce the contrast and blend it together as it's too stark.

For that I did a 50:50 mix of the Dark Green with Mr Levelling Thinner. This is the only thing I need to thin MRP lacquers for. I then did a series of mist coats checking between every coat until I was satisfied with the result. Again, between coats check it from different angles and under different light. It dries very fast so you only need a few minutes between coats.

Below is the result. My poor photography doesn't do it justice but it will look better later when I have done my varnish coats and washes.
IMG_9262.jpeg
 
It's important to remember that this is about colour modulation and trying to emulate the play of light you get on a large surface onto the much smaller surface of the model. This is not panel line accentuation, that I will do as a wash later. What I want is added visual depth with highlights and lowlights. For this reason while panel lines can be used it's important not to be too neat and not to follow them too rigidly otherwise you are in danger of getting a chequerboard effect.

My advice is to spray in sections, specially if you are building in a larger scale. Keep pressure low and control the paint flow to build up cover slowly. Proceed slowly, stop regularly and look at progress from different angles and ideally under different light. A fairly subtle effect is best specially for a post WW2 subject like this. You can see below where I stopped. Not quite done yet, but close.
Thanks for sharing all the great tips. I'm in the early stages of trying to learn these techniques so I appreciate hearing your process. And I'm not a fan of the checkerboard look so it's great stuff. Your results speak for themselves. Beautiful work.
 
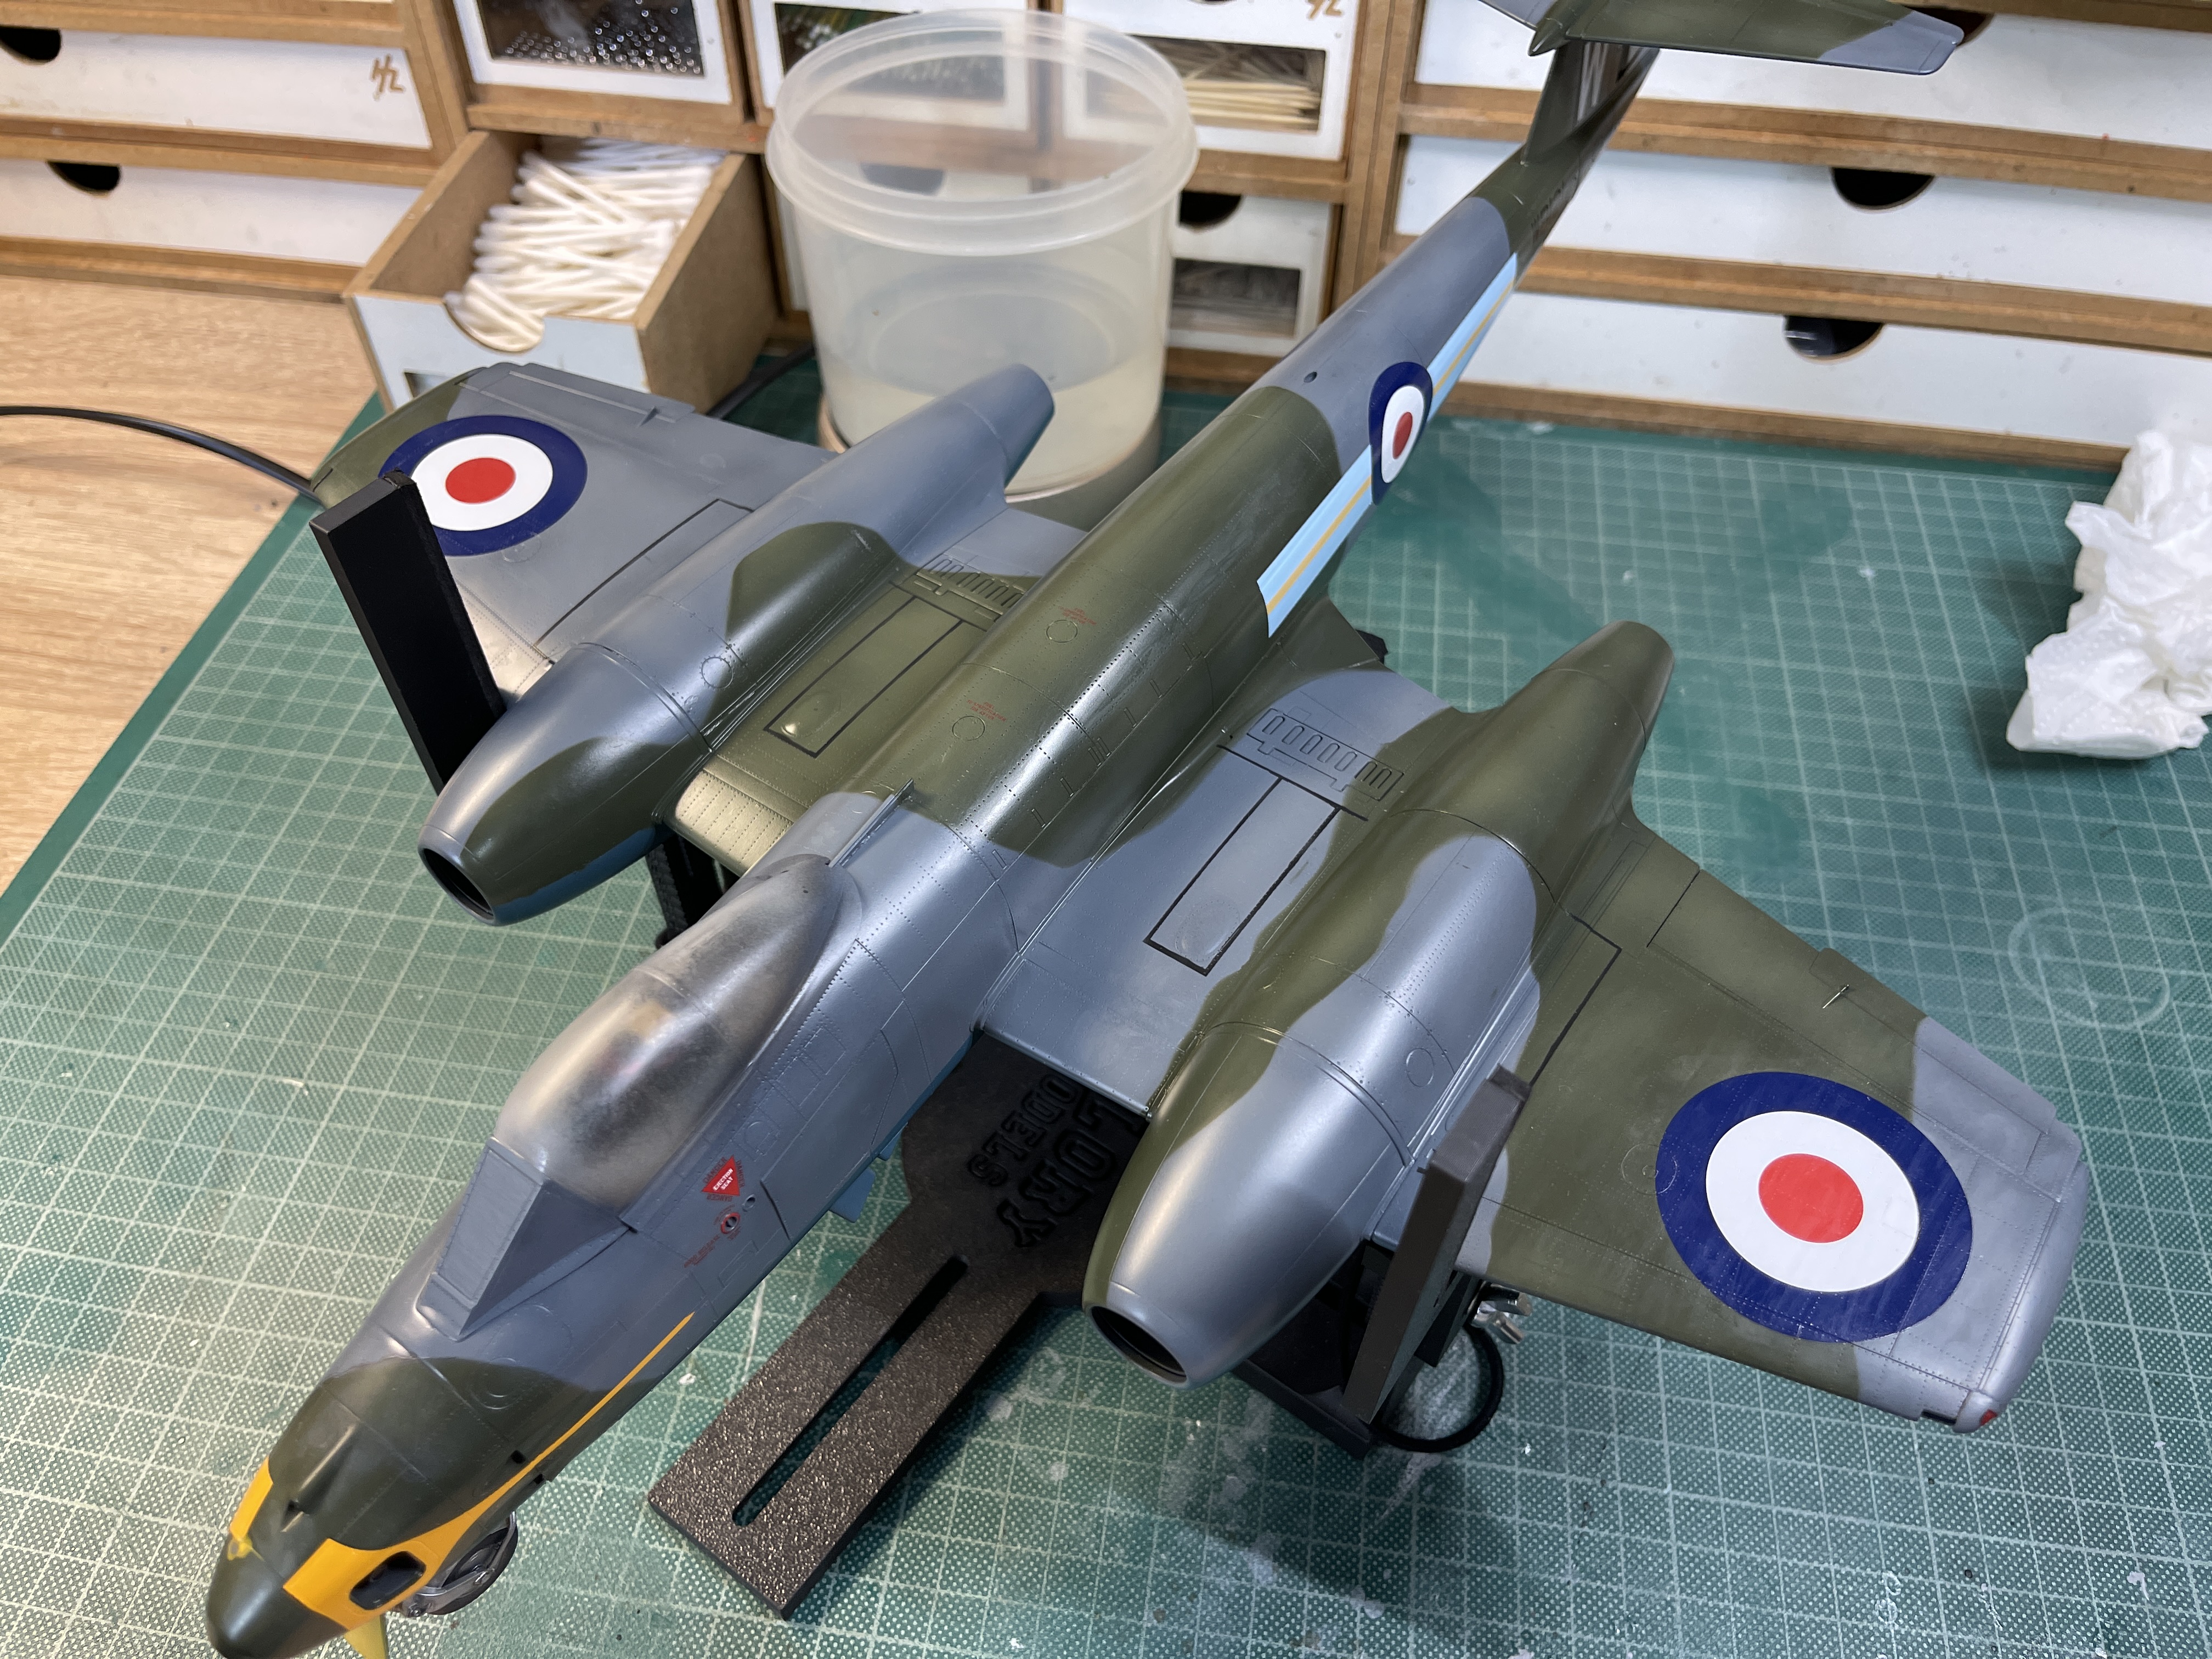
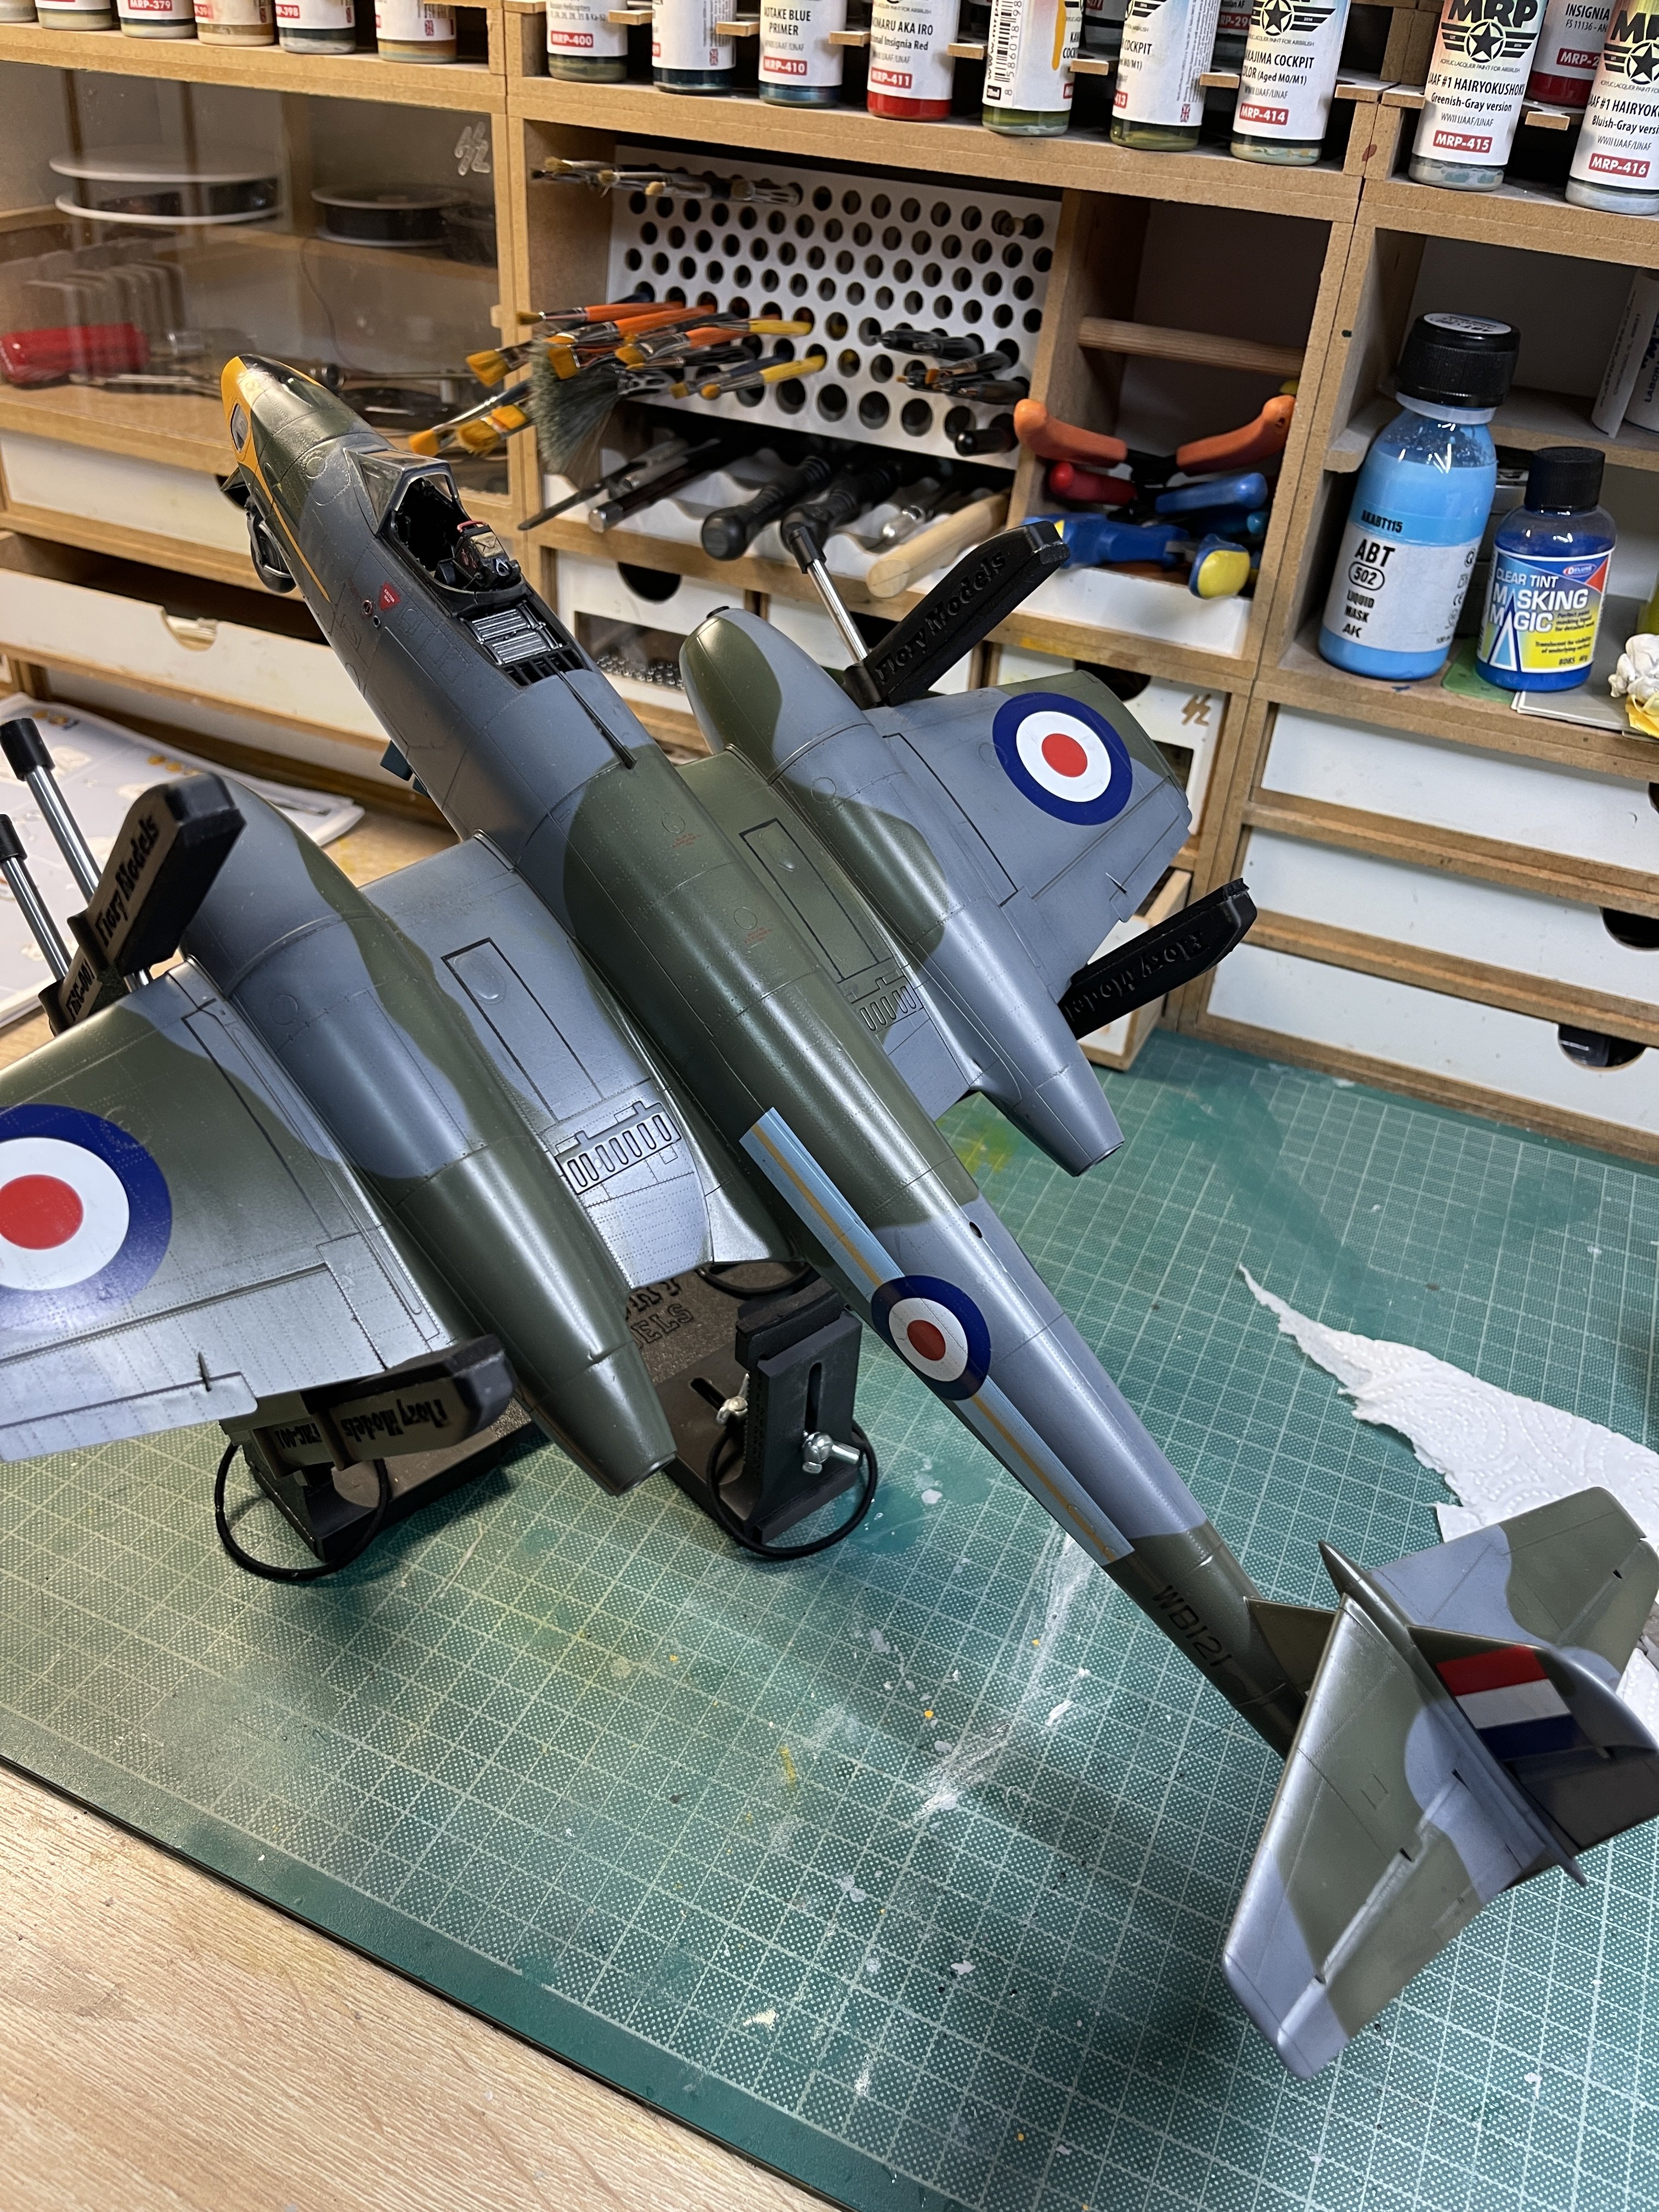
Some more pictures of the now completed paintwork

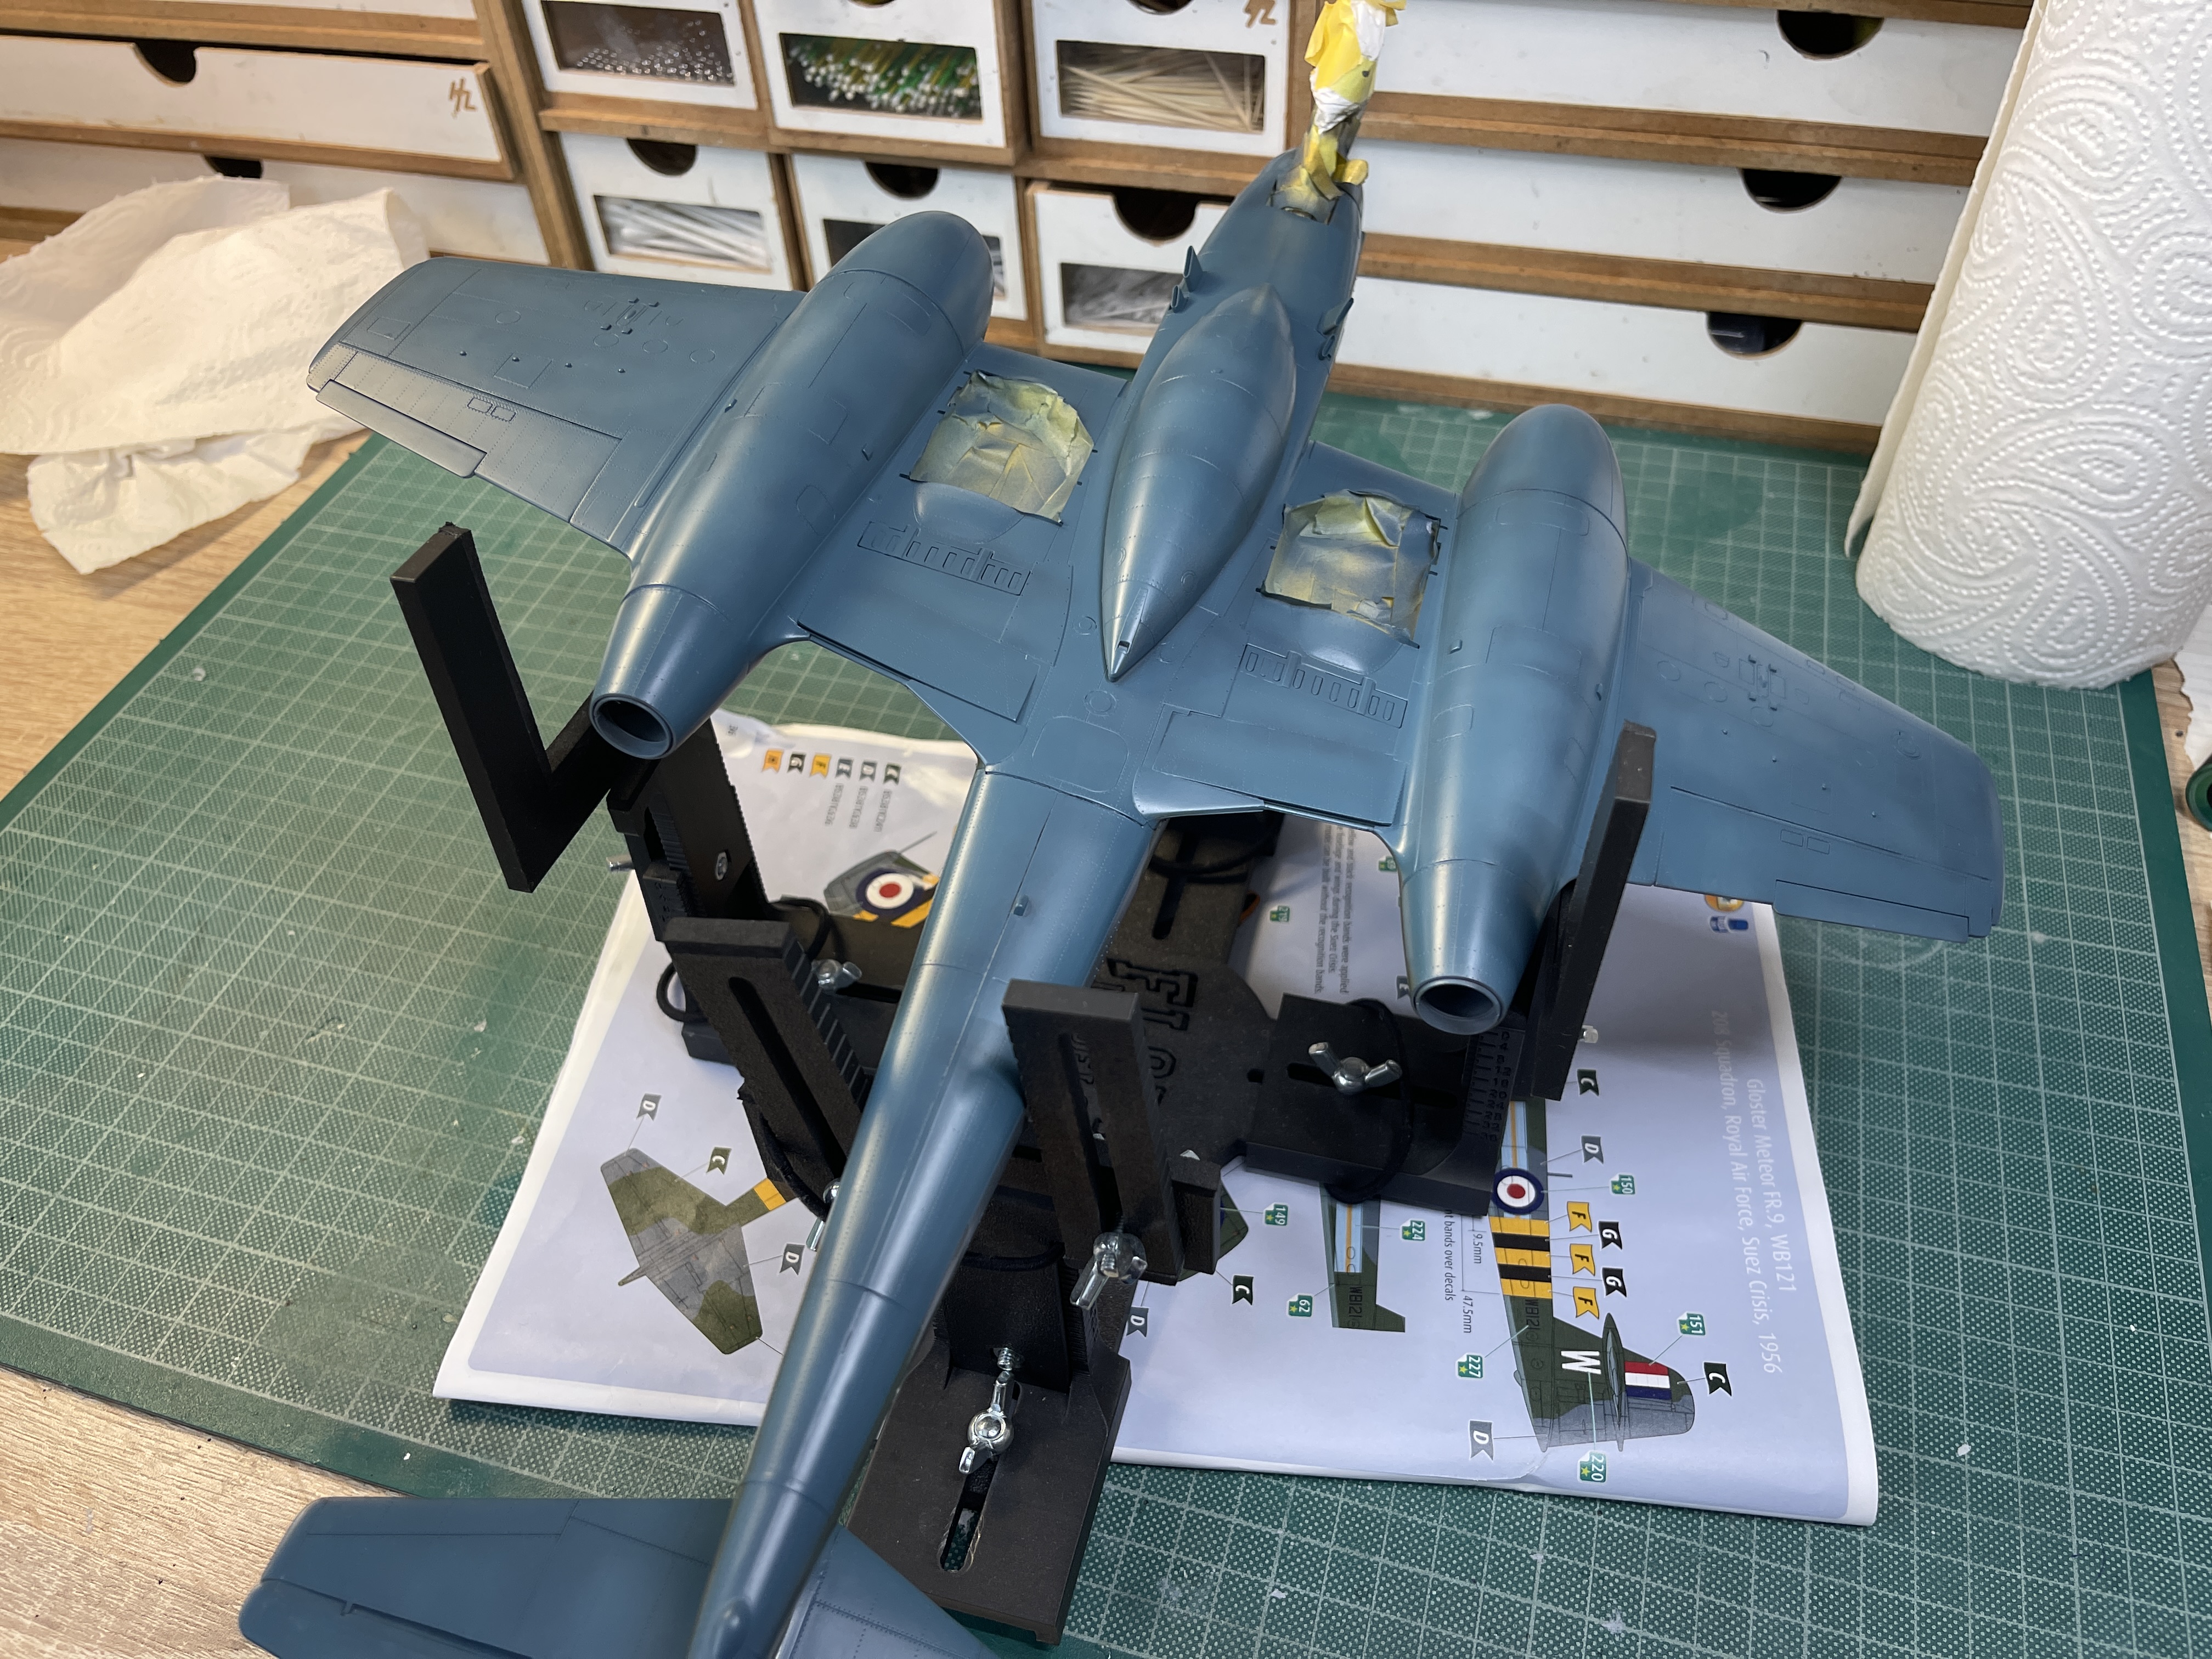
First a shot of the underside showing the colour modulation. For this I only needed to preshade.

IMG_9263.jpeg


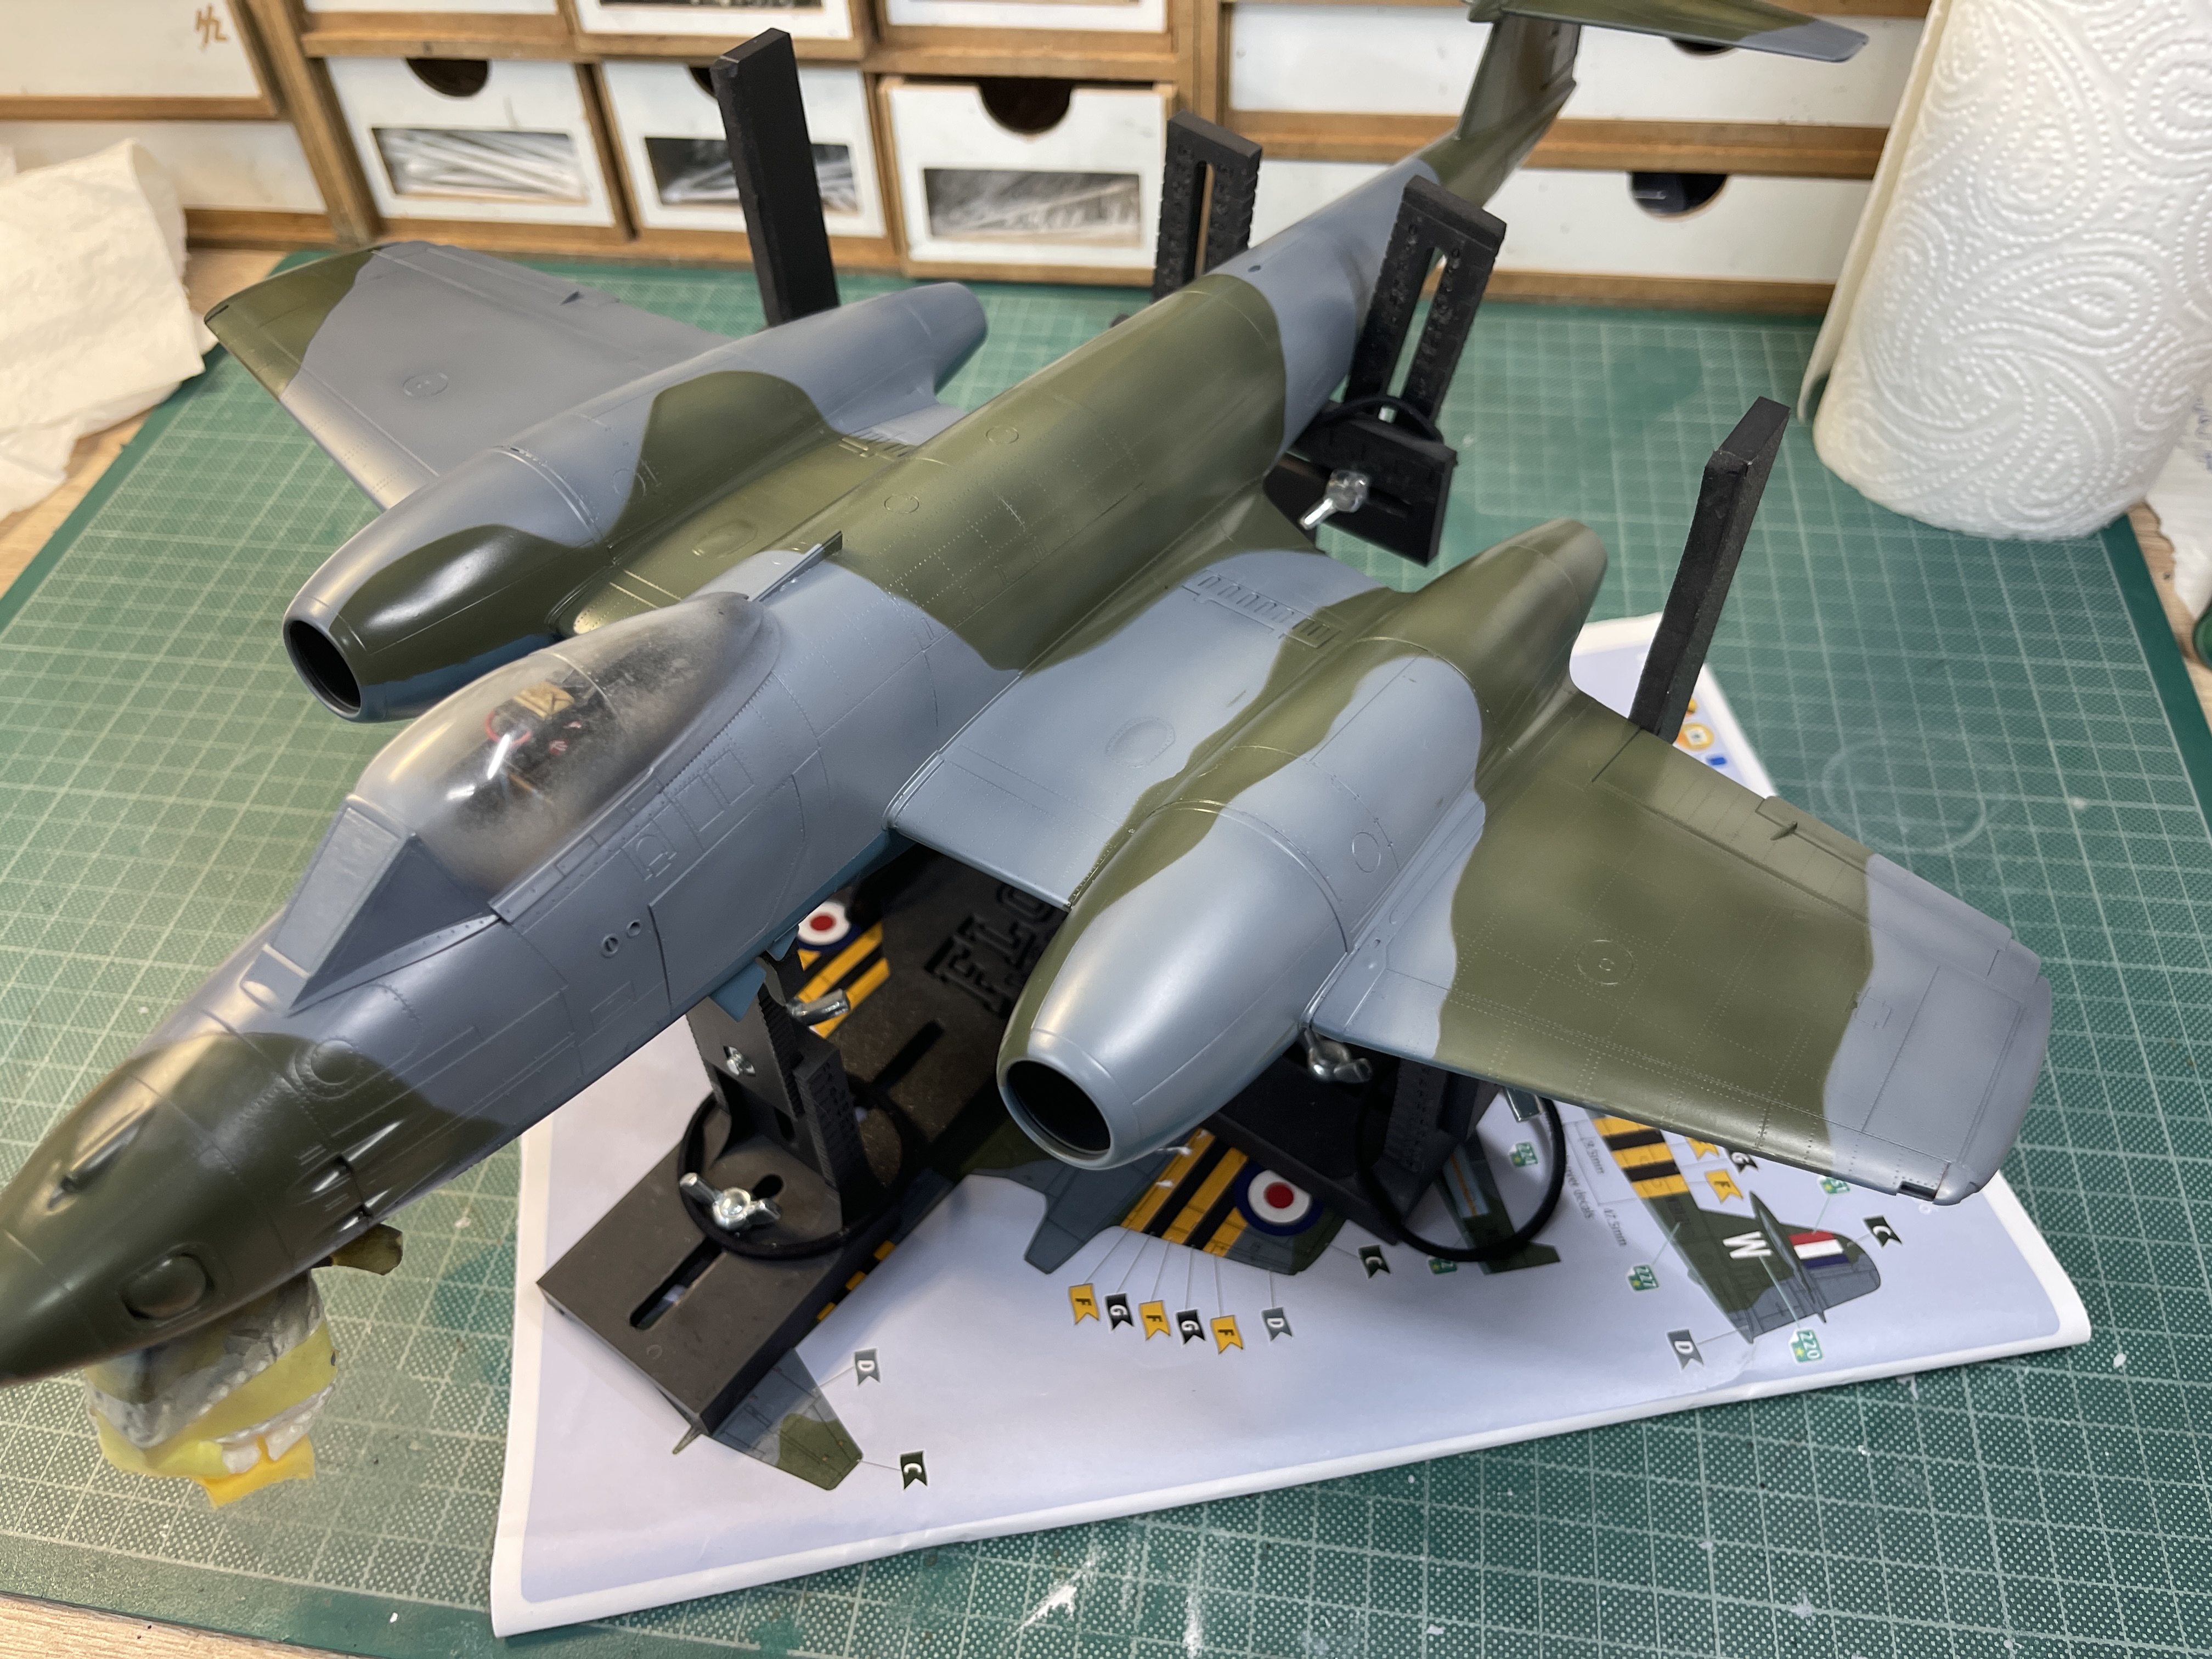
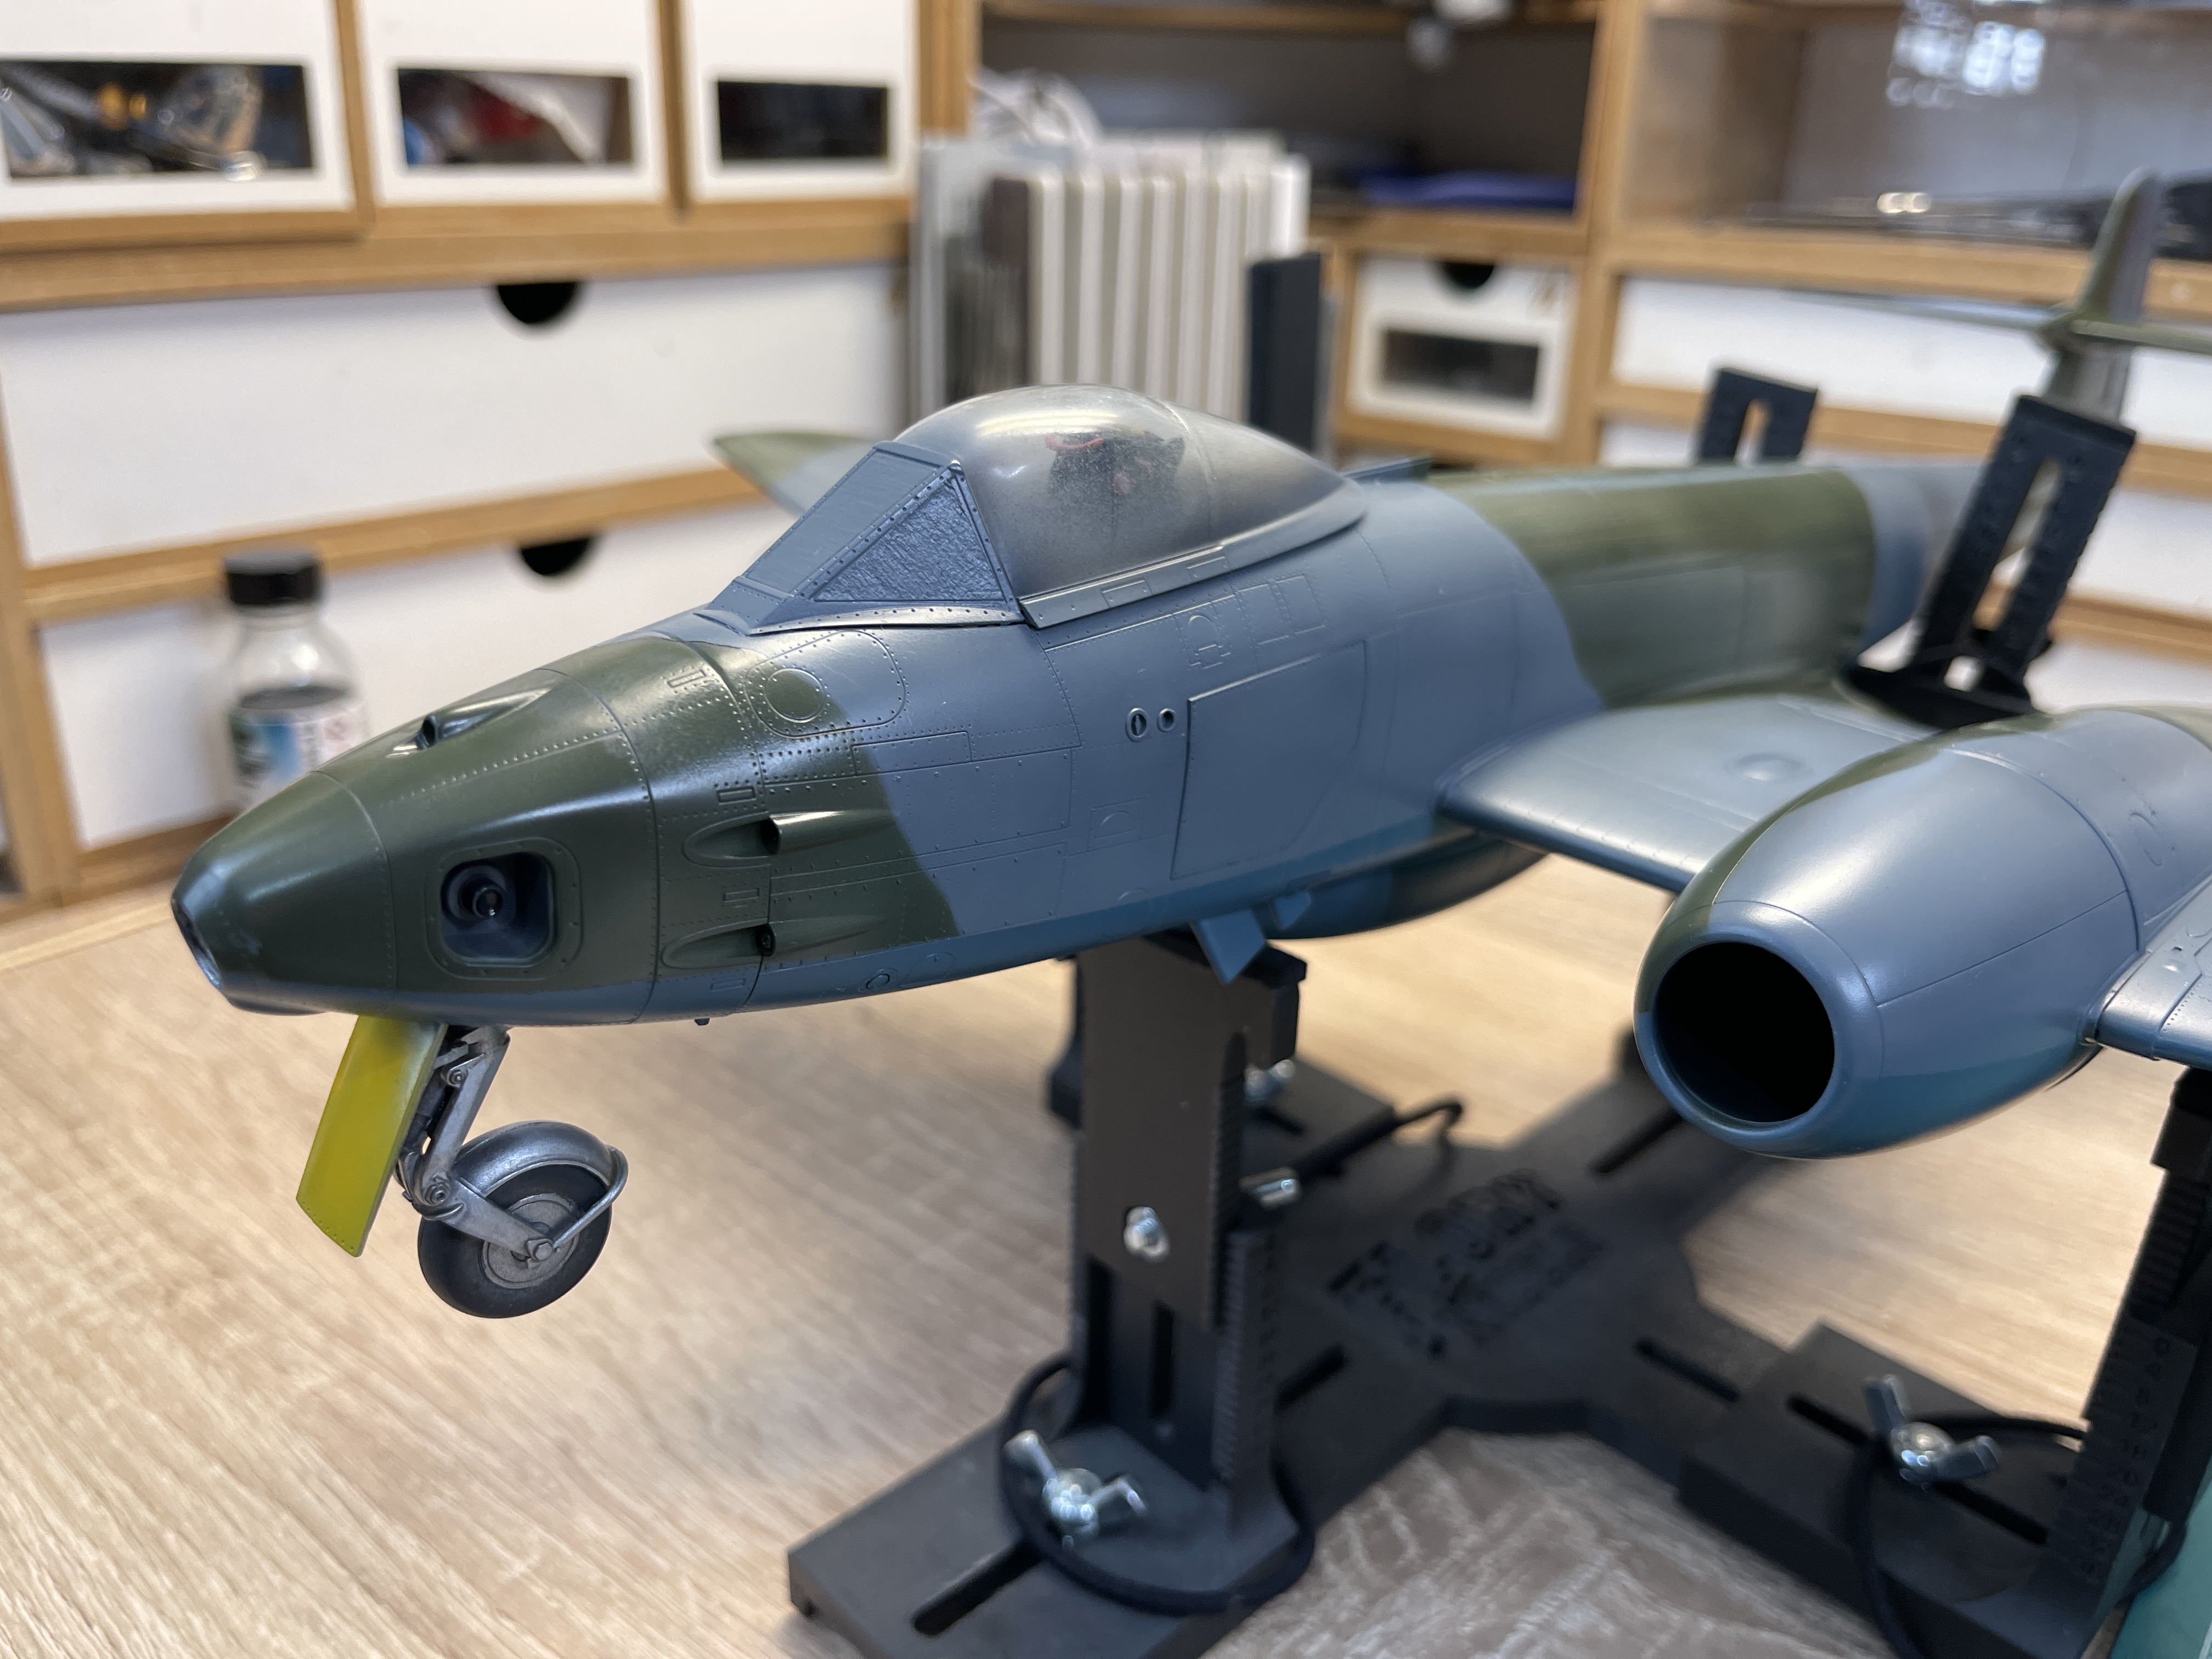
Here is the topside with masking removed.
IMG_9264.jpeg


I didn't mention that the canopy fit is so good that I could mask the cockpit without the use of glue, I just clicked the canopy into place. There are two canopies for different versions so I could mask a paint the one I will use off the model, masking with the other. Below I removed it and just placed the masking canopy behind the cockpit for the photo. When done I might just not glue the canopy into place at all.
IMG_9265.jpeg


IMG_9267.jpeg


I need to apply a semi-gloss and then the decals. I could apply decals direct onto the paint bit I want to protect it. The semi-gloss is more to protect the paint.
 
HI Barry nice job on the camo but it looks to me you have got paint spray on the canopy dint you mask it up proper ?
chrisb
 
HI Barry nice job on the camo but it looks to me you have got paint spray on the canopy dint you mask it up proper ?
chrisb
Hi Chris. No, I did say that I used the canopy for a different version to mask the cockpit. The actual one I am using is safe and sound to await fitting.
 
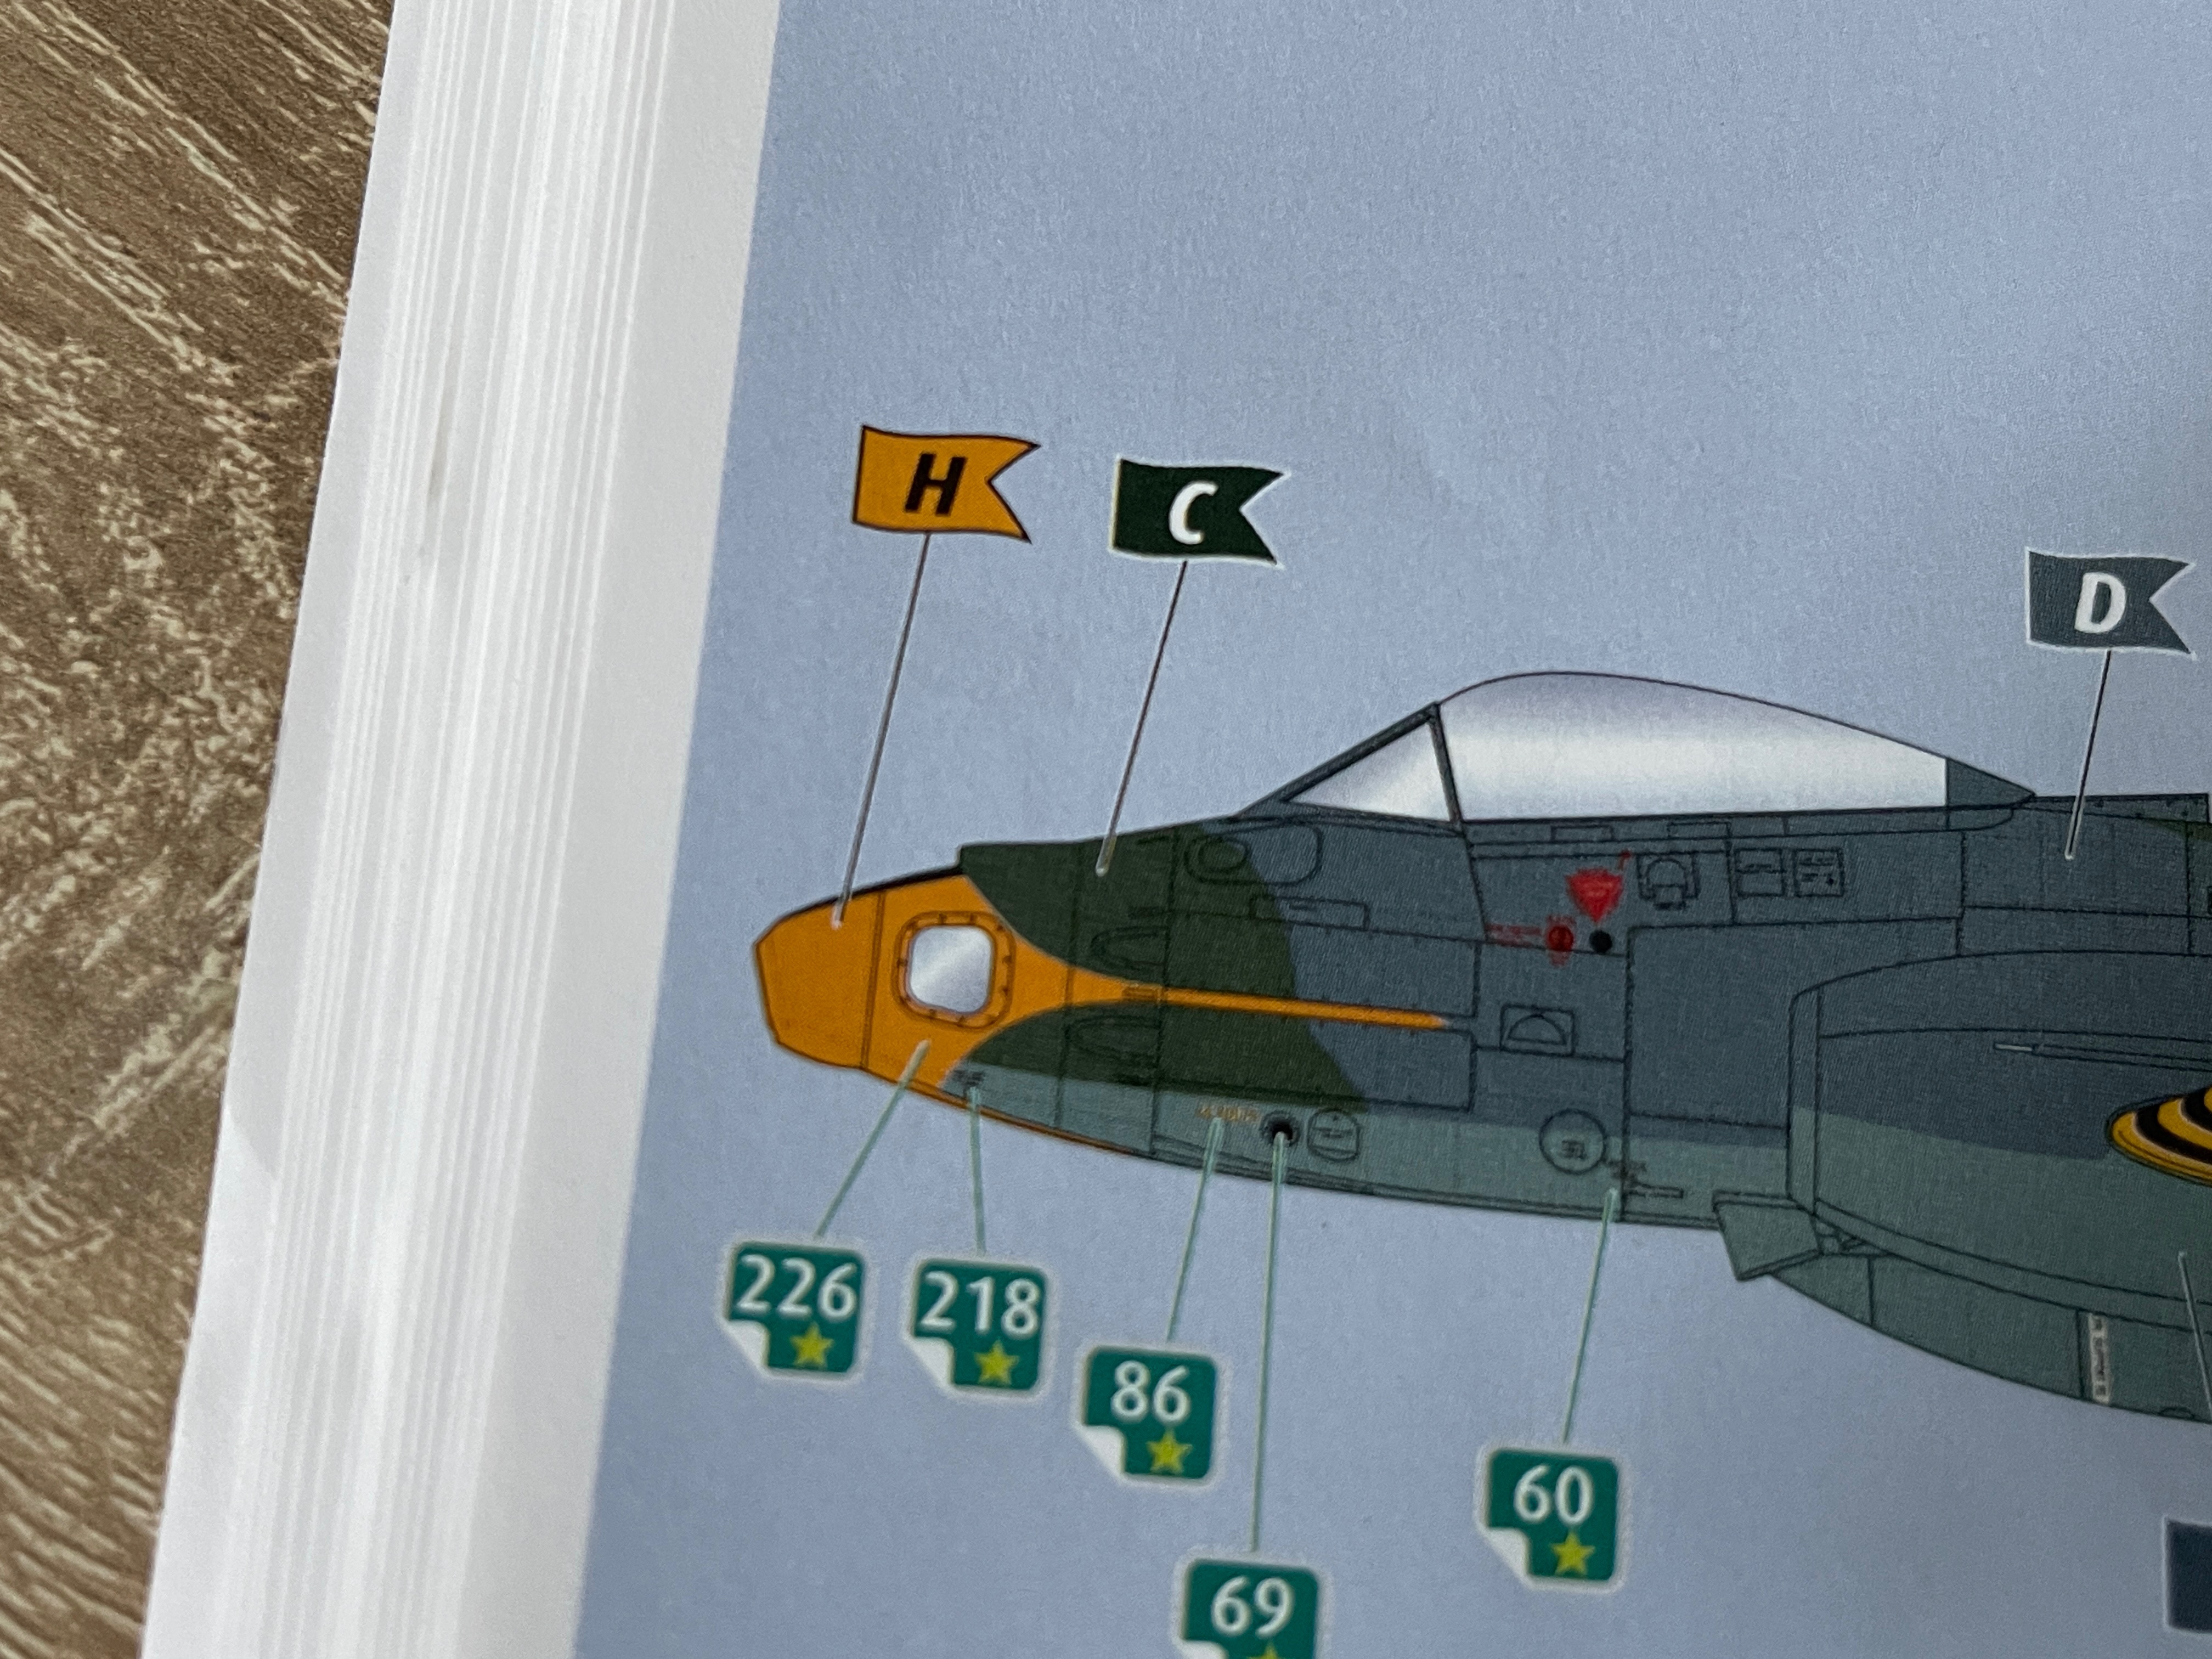
I have started decalling and an issue has emerged with this scheme.

This is the nose
IMG_9270.jpeg


This is with the decal

IMG_9269.jpeg


You need to paint the nose yellow and none of my six yellow shades is a good match.

Having looked around I decided to buy the Revell paint recommended for this and I will paint the rest of the area. Hopefully it will match the decal. I might just handbrush it for ease but it depends on how it looks.

In the meantime I will get on with the decals. The paint should be delivered Monday or Tuesday.
 
I have been getting on with the decals. They go down very well, indeed Revell decals have always been one of the good things about their kits.

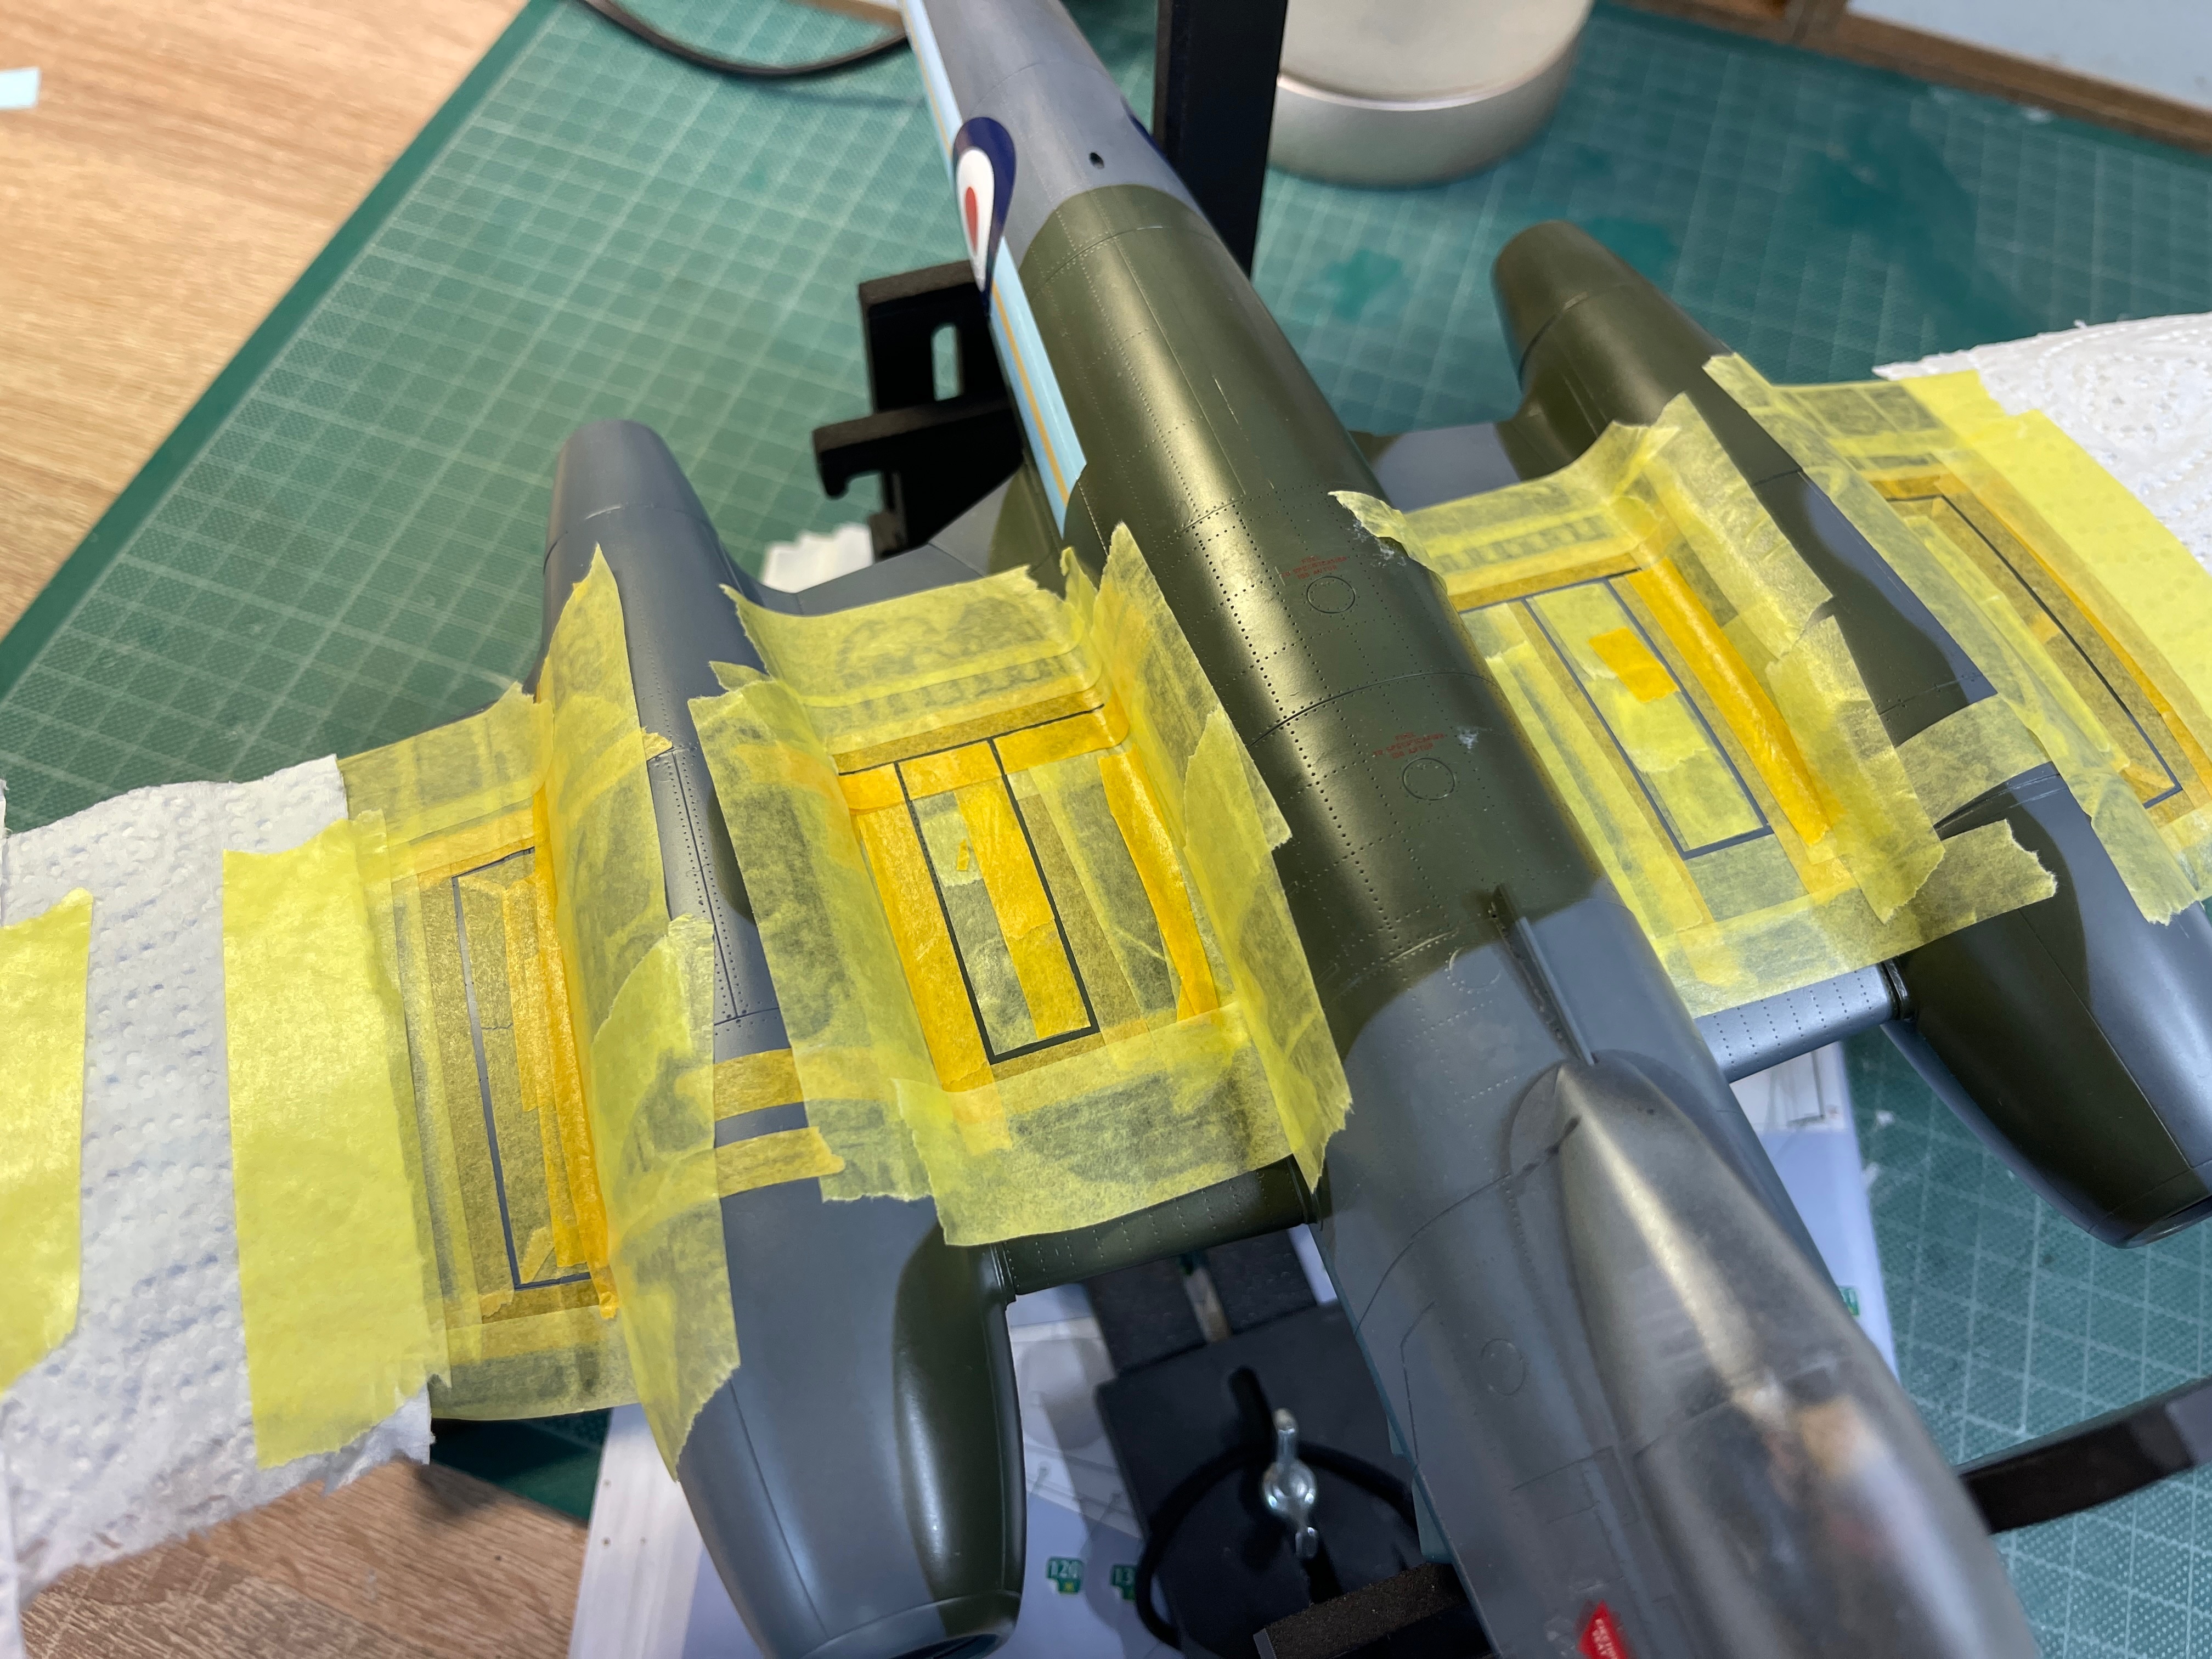
Walk line decals, however, rarely work well even if you cut them up to piece together. So it's a good idea to take the time to mask up and paint them. Not only is it easier to do but it also gives a better result.

Here is my model masked. You need to be careful though to protect any decals you have already laid down. Not just from overspray but applying mask over decals is not exactly advisable.

Below, ready to spray.
IMG_9275.jpeg


And sprayed
IMG_9276.jpeg


Please ignore the nose. The paint is expected to be delivered later today when I will be doing some experimenting before actually painting. I am hoping I will get it in time to finish the nose today. That way I can leave the model to fully cure off over night before spraying a semi gloss to seal and prepare for panel line washes.
 
I have literally spent days on the nose of the aircraft!

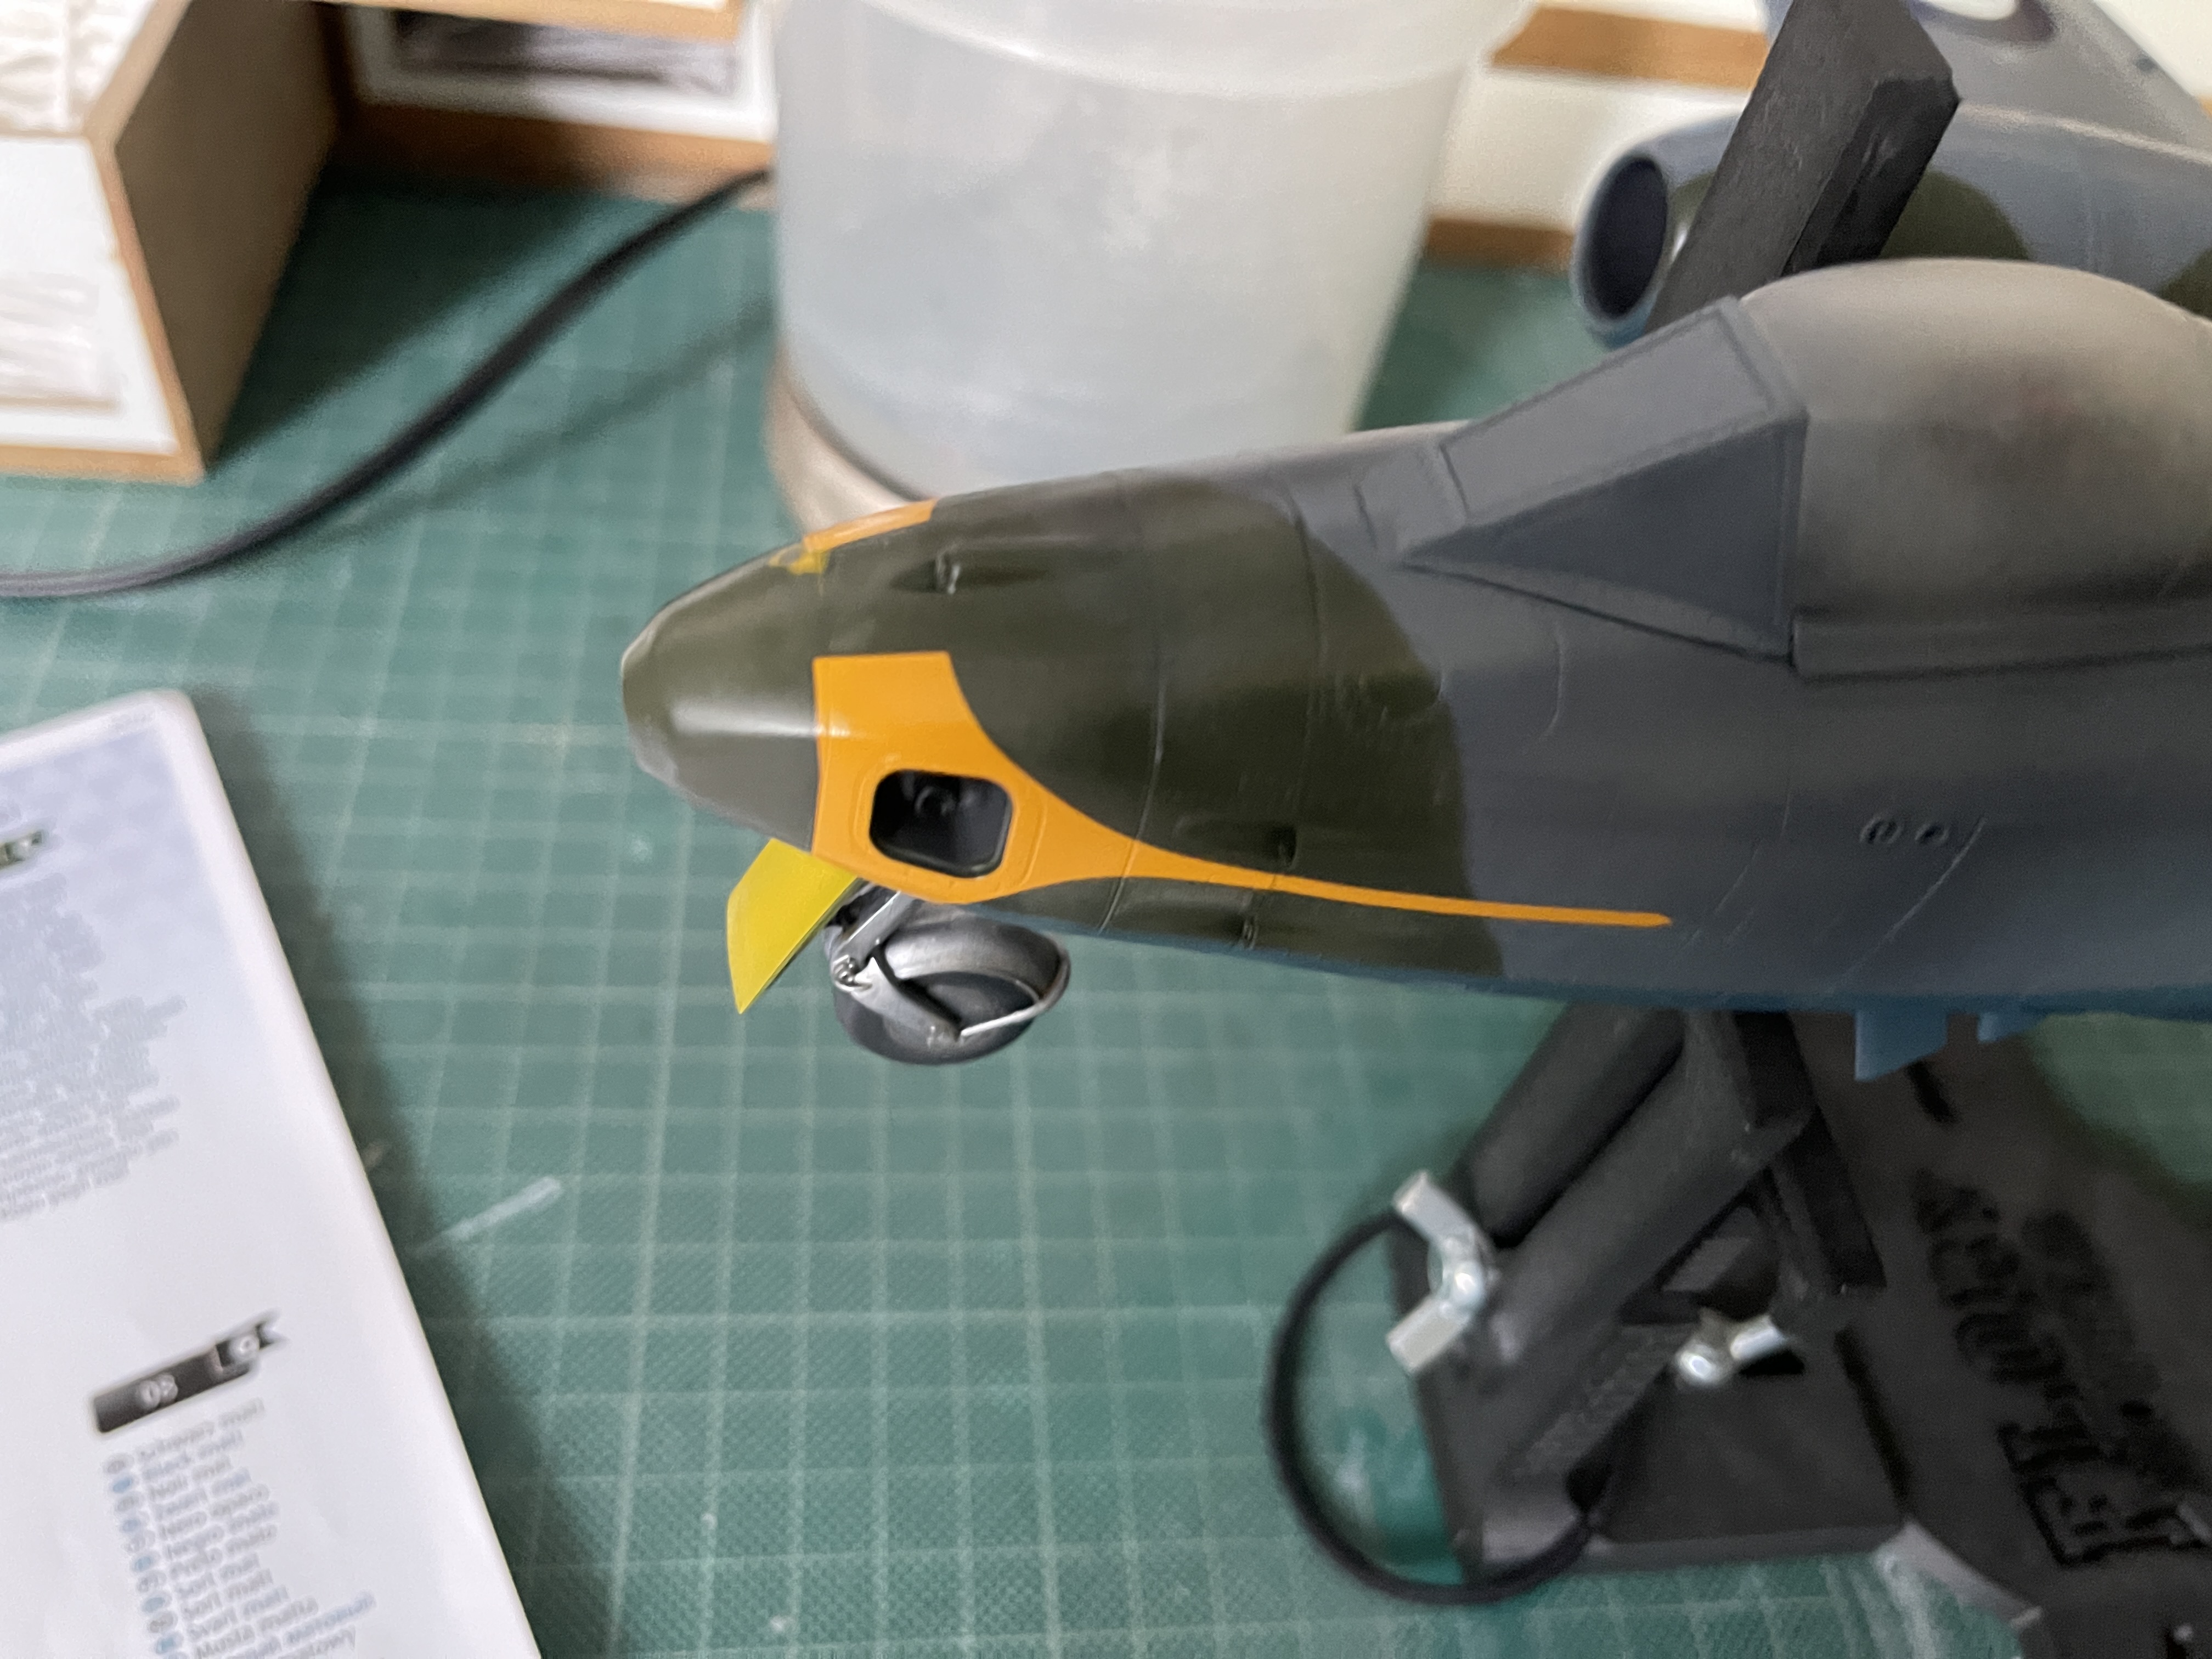
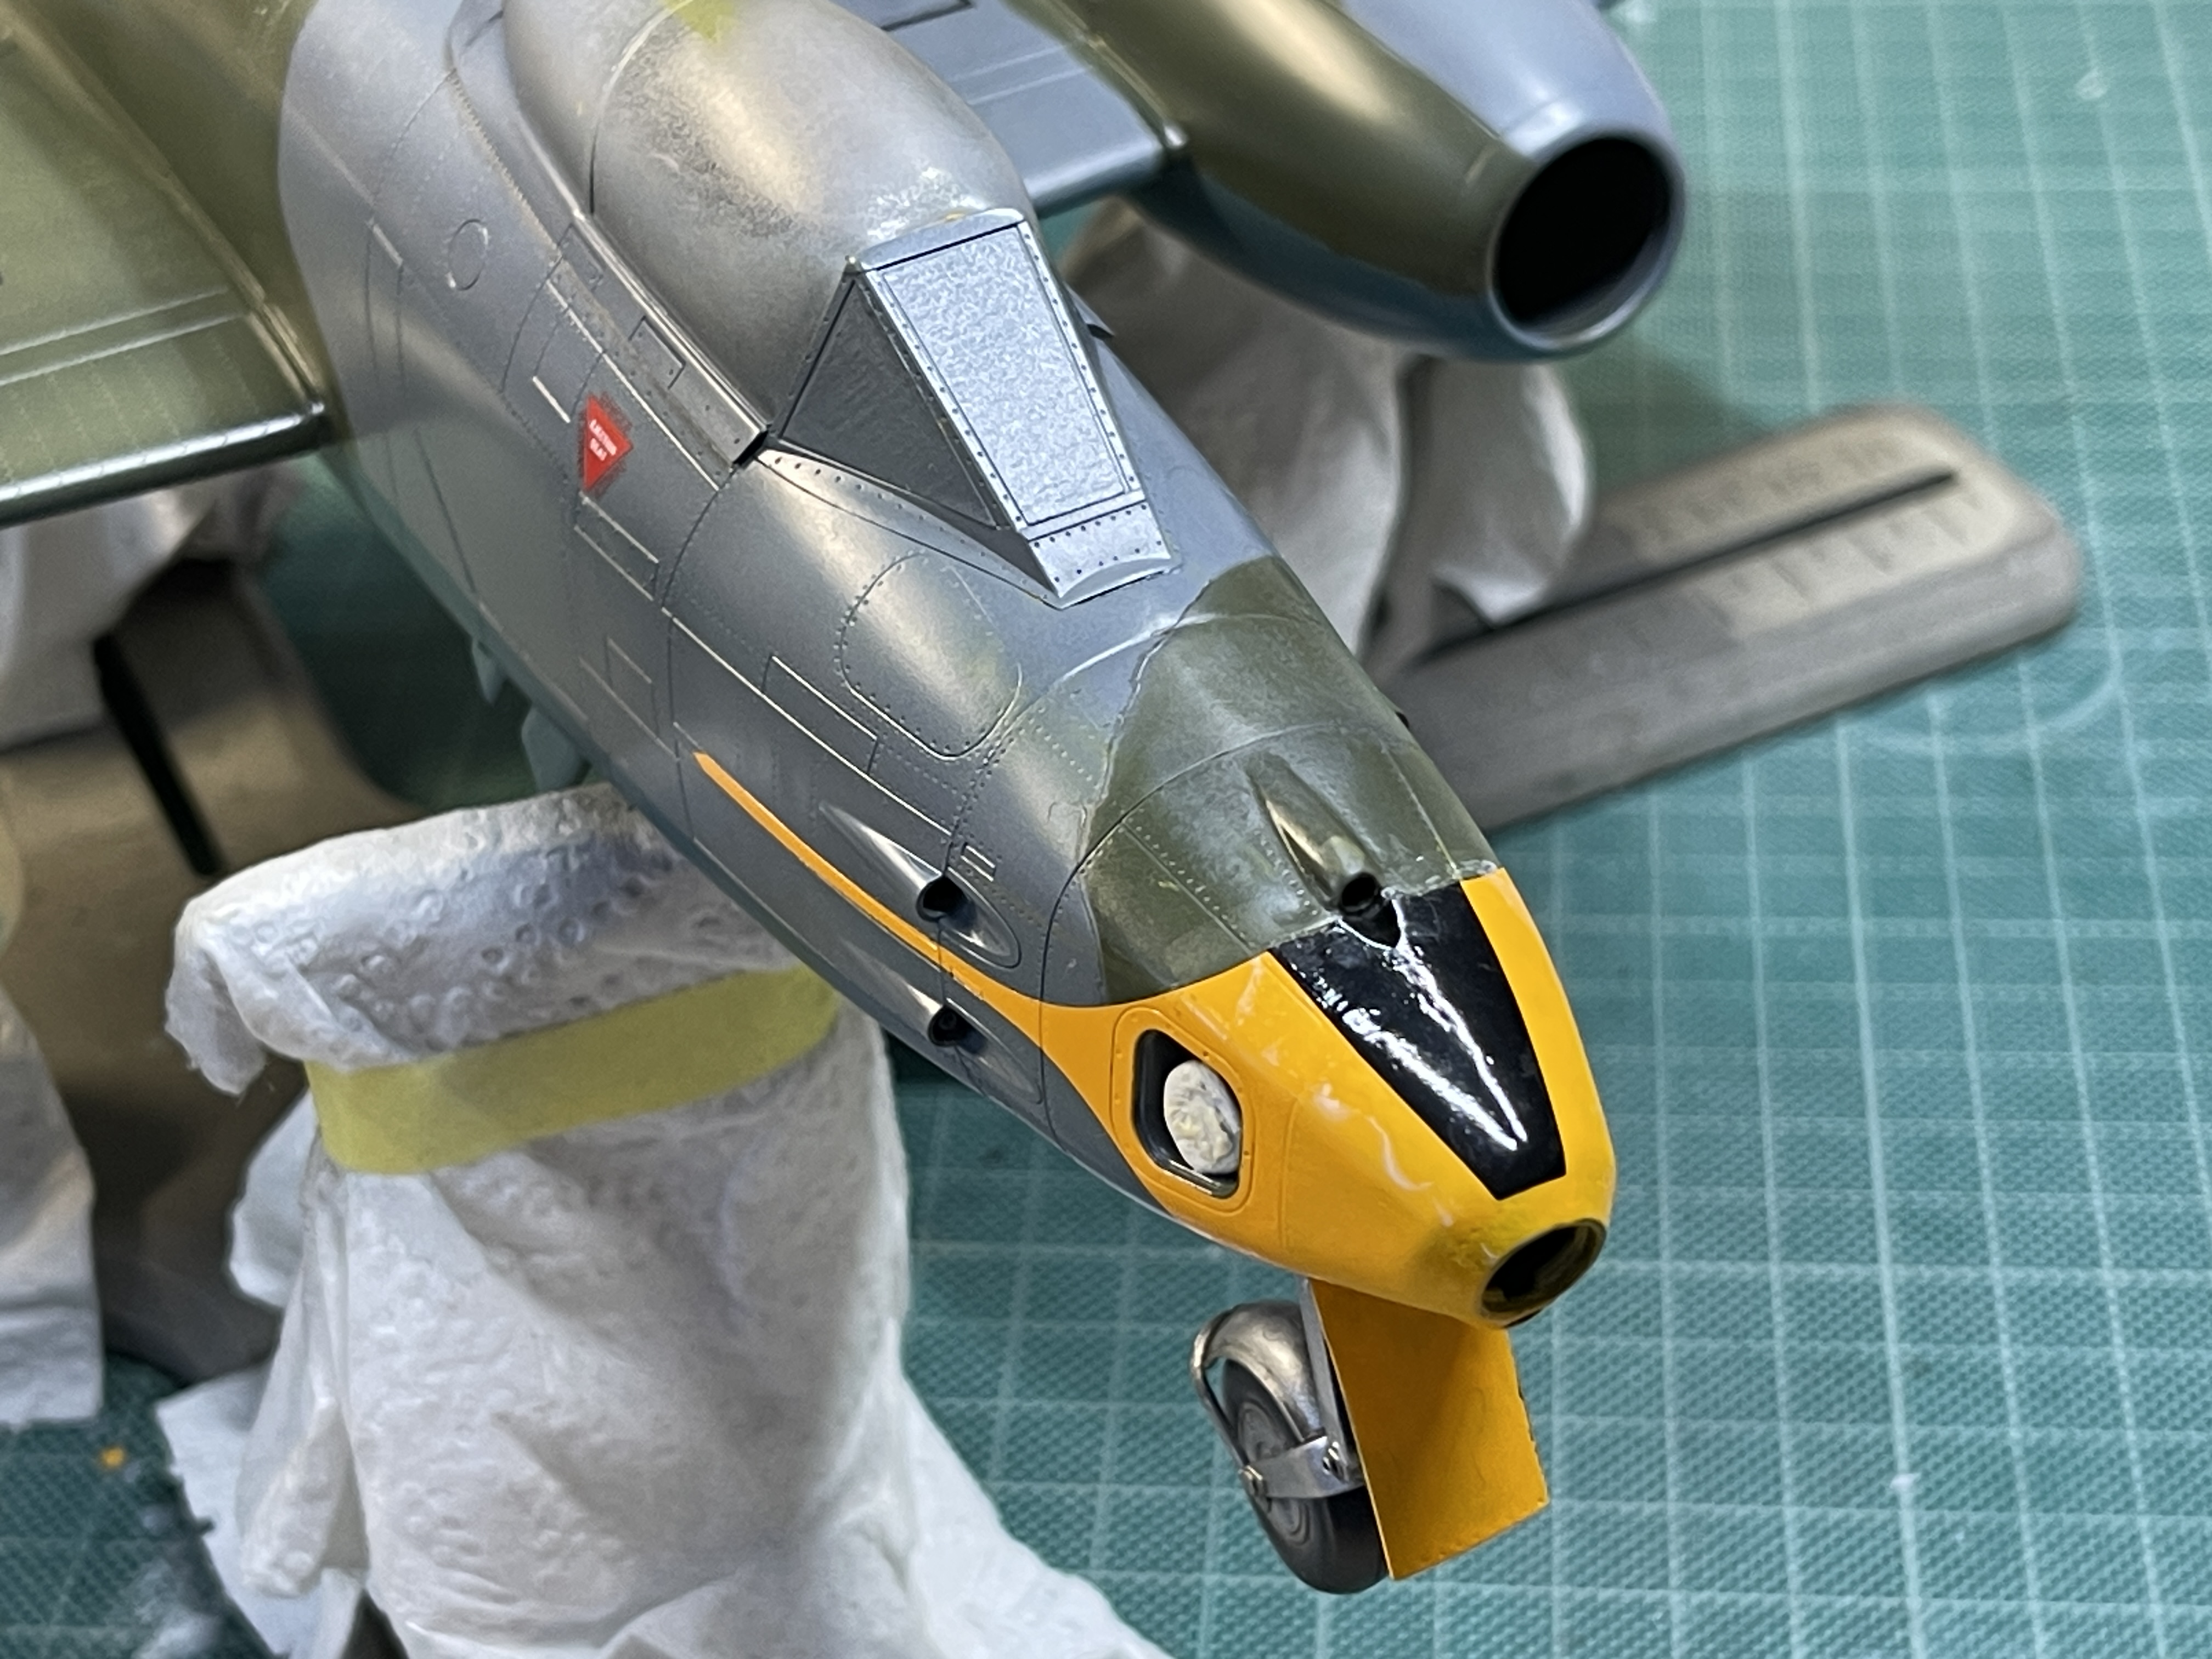
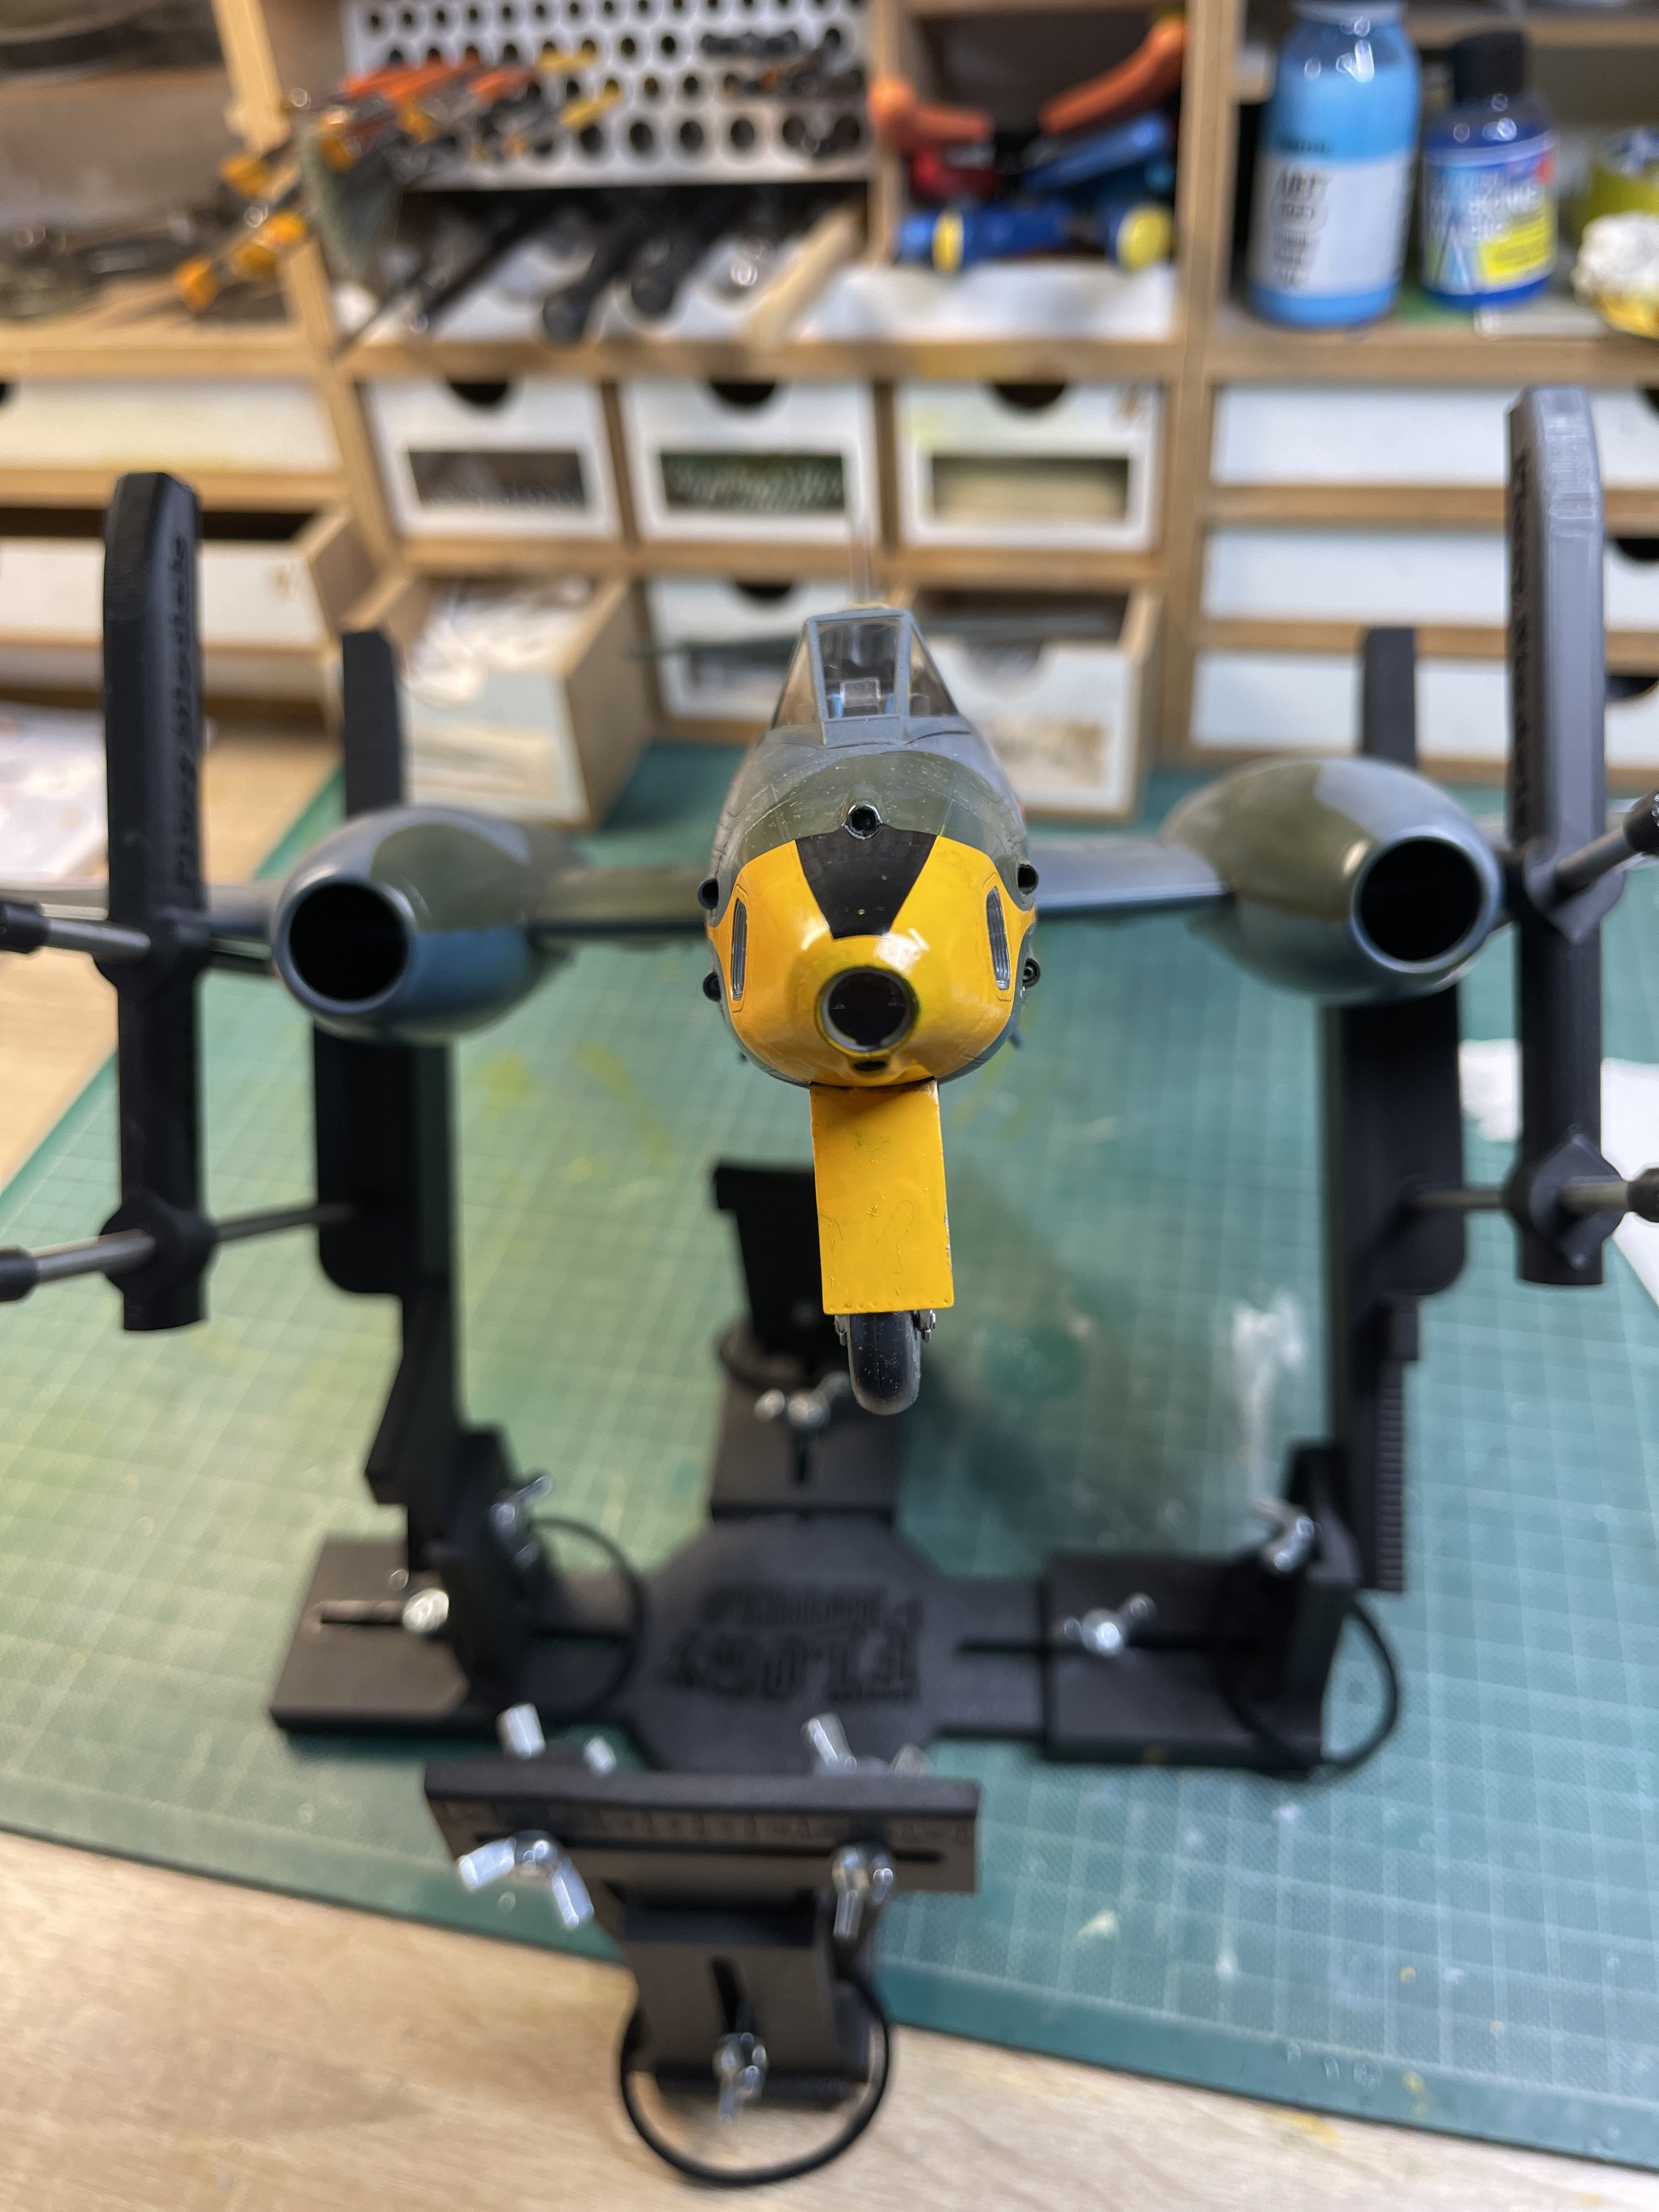
The Revell yellow arrived and is a perfect colour match to the decal.

This is the first time I have used enamel paint for over 50 years and I reminded how thankful I should be that we have modern lacquers and acrylics.

First of all, yellow always is problematical for coverage and I expected no different here. This is not the issue.

For ease I decided to paint this small area by brush, I used a flat brush and did a thin coat. Then I left it for 4/5 hours and went back and did another thin coat and the coverage seemed little better, largely because, I suspect, the first coat was not cured enough. So I decided to leave it overnight and tried a third coat. A definite improvement. I decided then to spray the last bit in the hope it would finish the job. I left it 24 hours this time and then used a 2500 grit sanding sponge to smooth it. Spraying helped move it forward (after using Parafilm
M to mask). But it still needed more. Another 24 hours later I did another run over with 2500 grit and this time hand painted it where needed to finally bring it up to what I want. This needed another 24 hours drying time for me to apply the black decal…. So much time on such a small area.

Now, if I was using lacquers I would have masked with the Parafilm M and sprayed. Within an hour and 3/4 light coats it would have been done!

Why on earth anyone would want to still use enamels these days I really don't know.

Anyway the good news is that it's done and looks good. The colour is a perfect match to the decal, something I could not have achieved with my usual paints.

Here is a pic. If you see some white on the yellow, ignore it, it's white decal solution bloom from applying the black decal on top. I have already dealt with it.
IMG_9278.jpeg


Next, tomorrow, I will check the model all over, remove any remaining decal solution bloom and then apply another semi gloss coat to sea the decals. I have decided to do a sludge wash rather than pin wash for this one as I think it will work better with the detail.
 
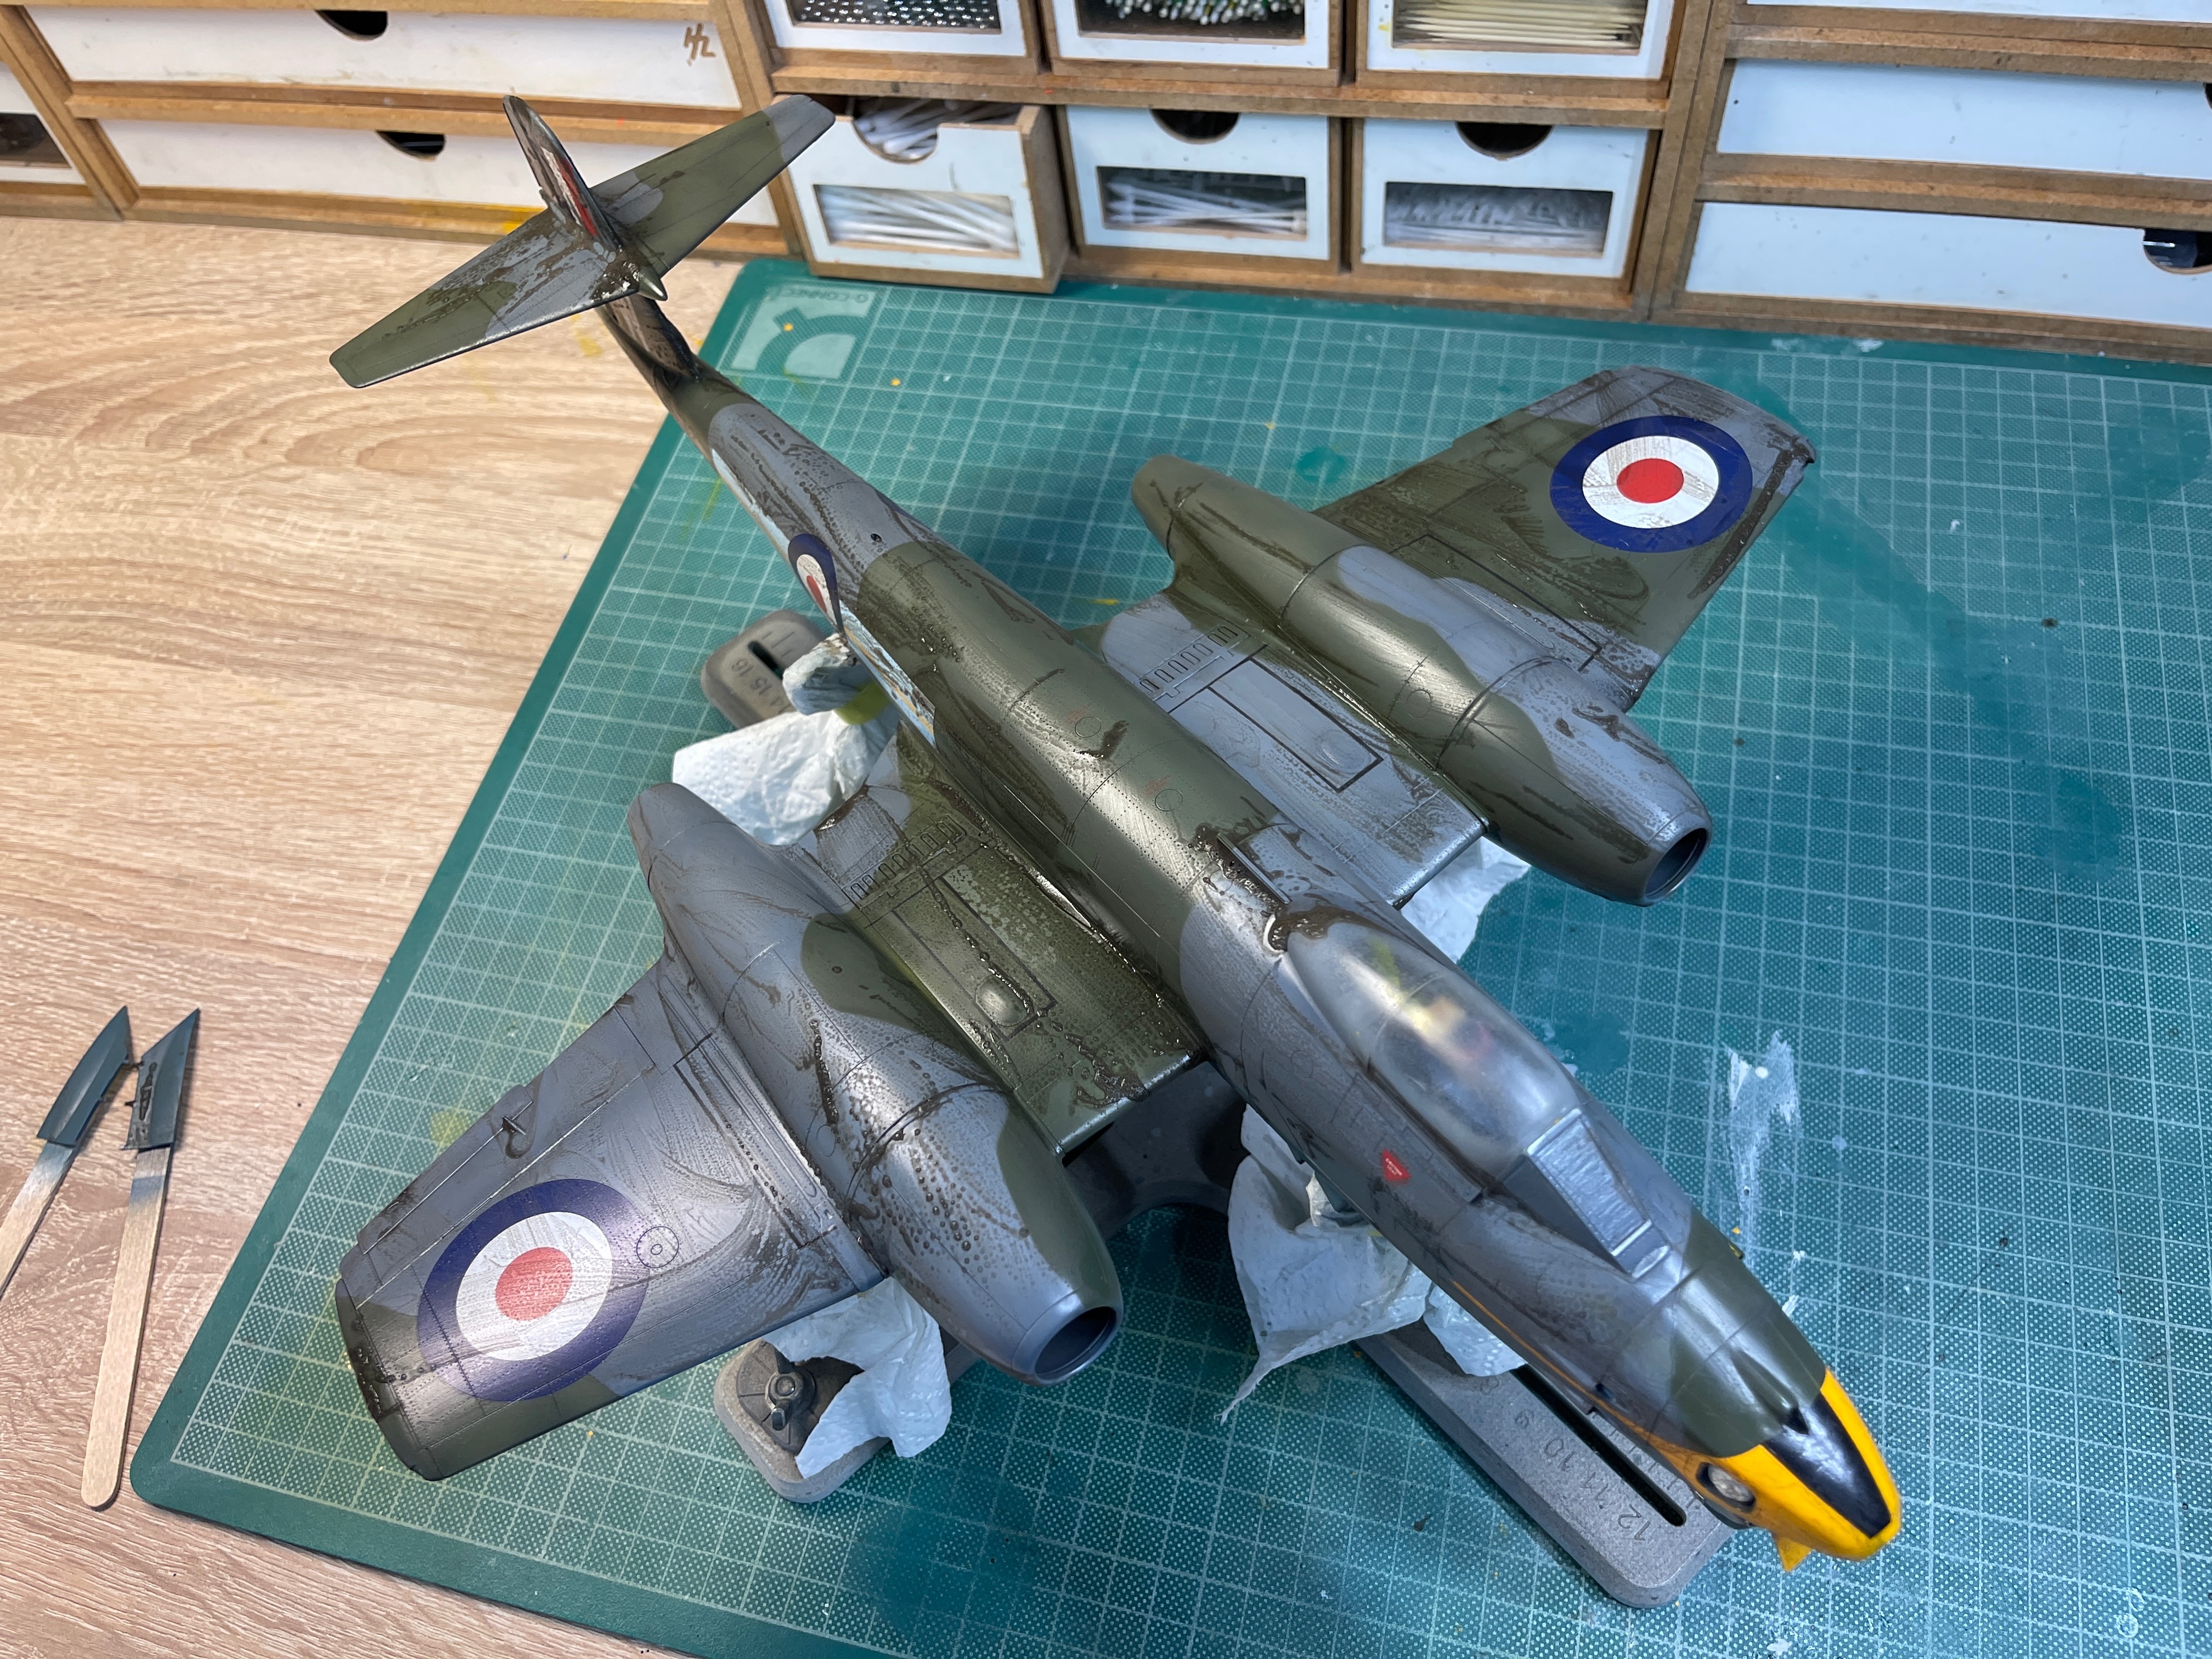
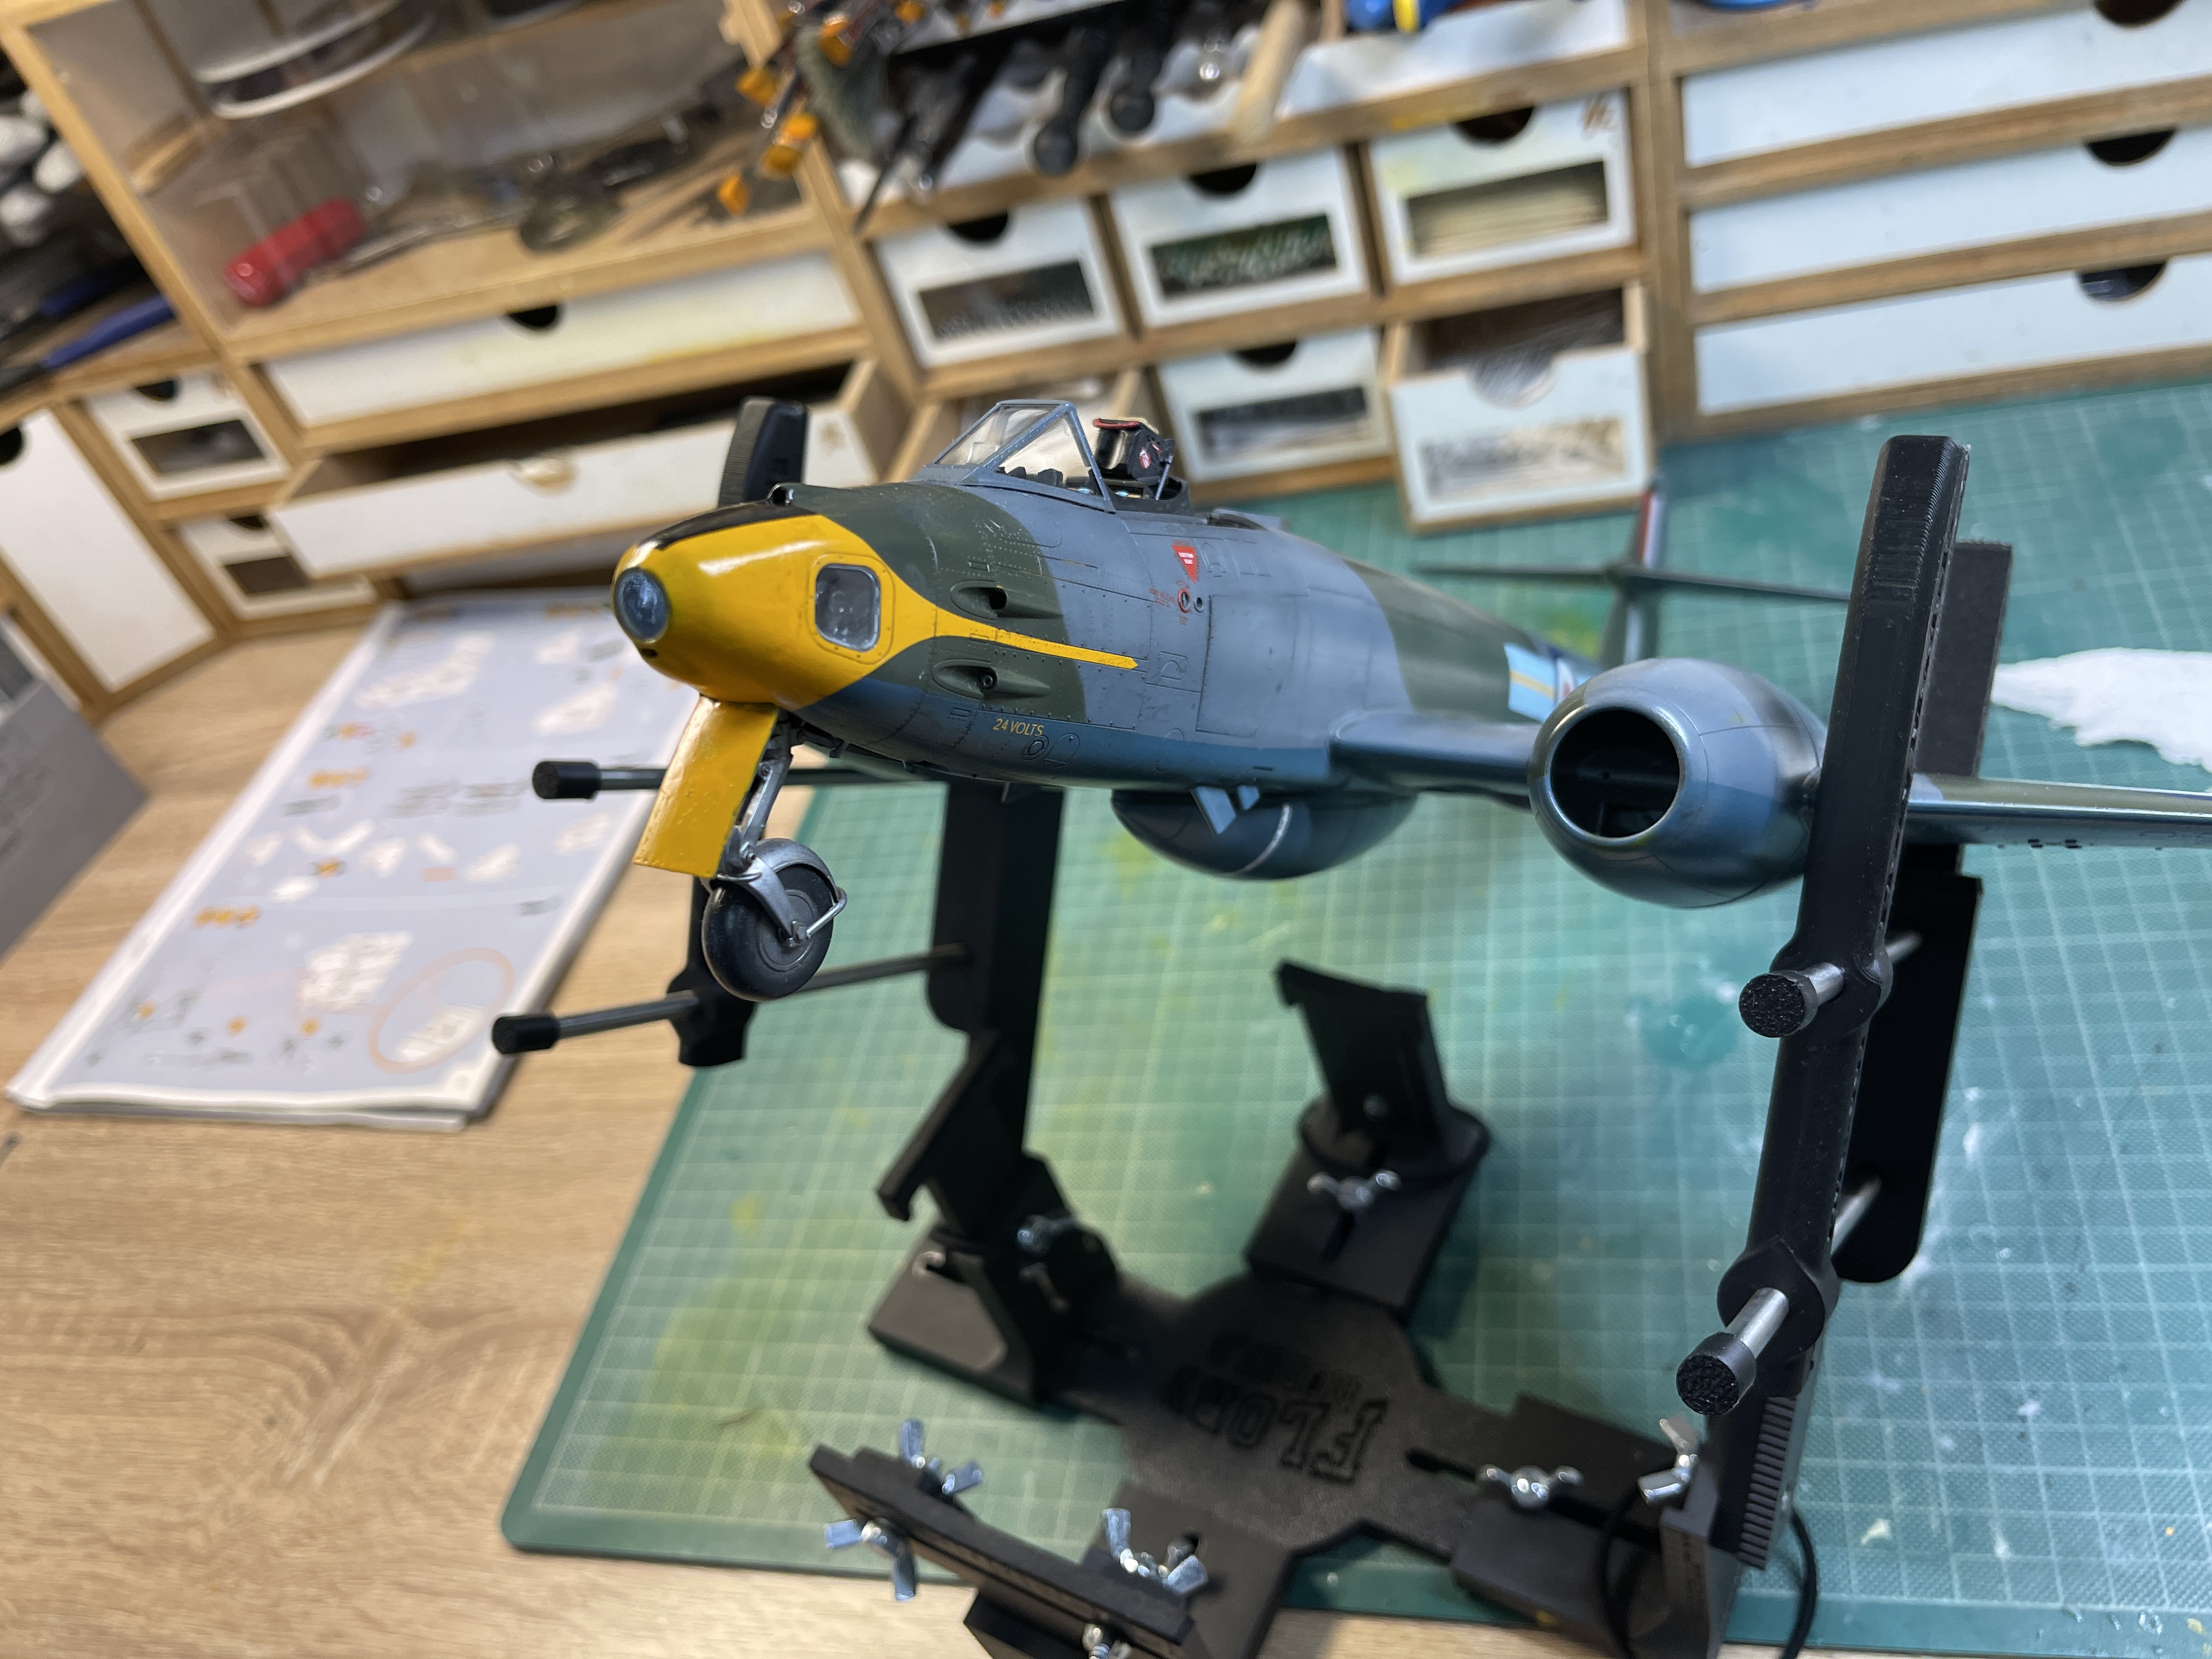
After a couple of sealing semi-gloss coats which, I have decided, will be the sheen on the completed build, I decided to do a sludge wash using the Flory Dark Dirt Wash. most of the time I tend to do pin washes, but in this case I believe that a sludge wash is better. This is not because of any particular reason just my own gut feeling from experience.

I applied the wash with a large wide brush.
IMG_9305.jpeg


When it has dried I will removed the surplus with a cloth and paper towels.

I intend this to be lightly weathered given that it's depicted before the Suez crisis and the high intensity operations at that time. As a recce aircraft it would be kept well maintained and clean because of the need for speed.
 
Onto the final fittings…..

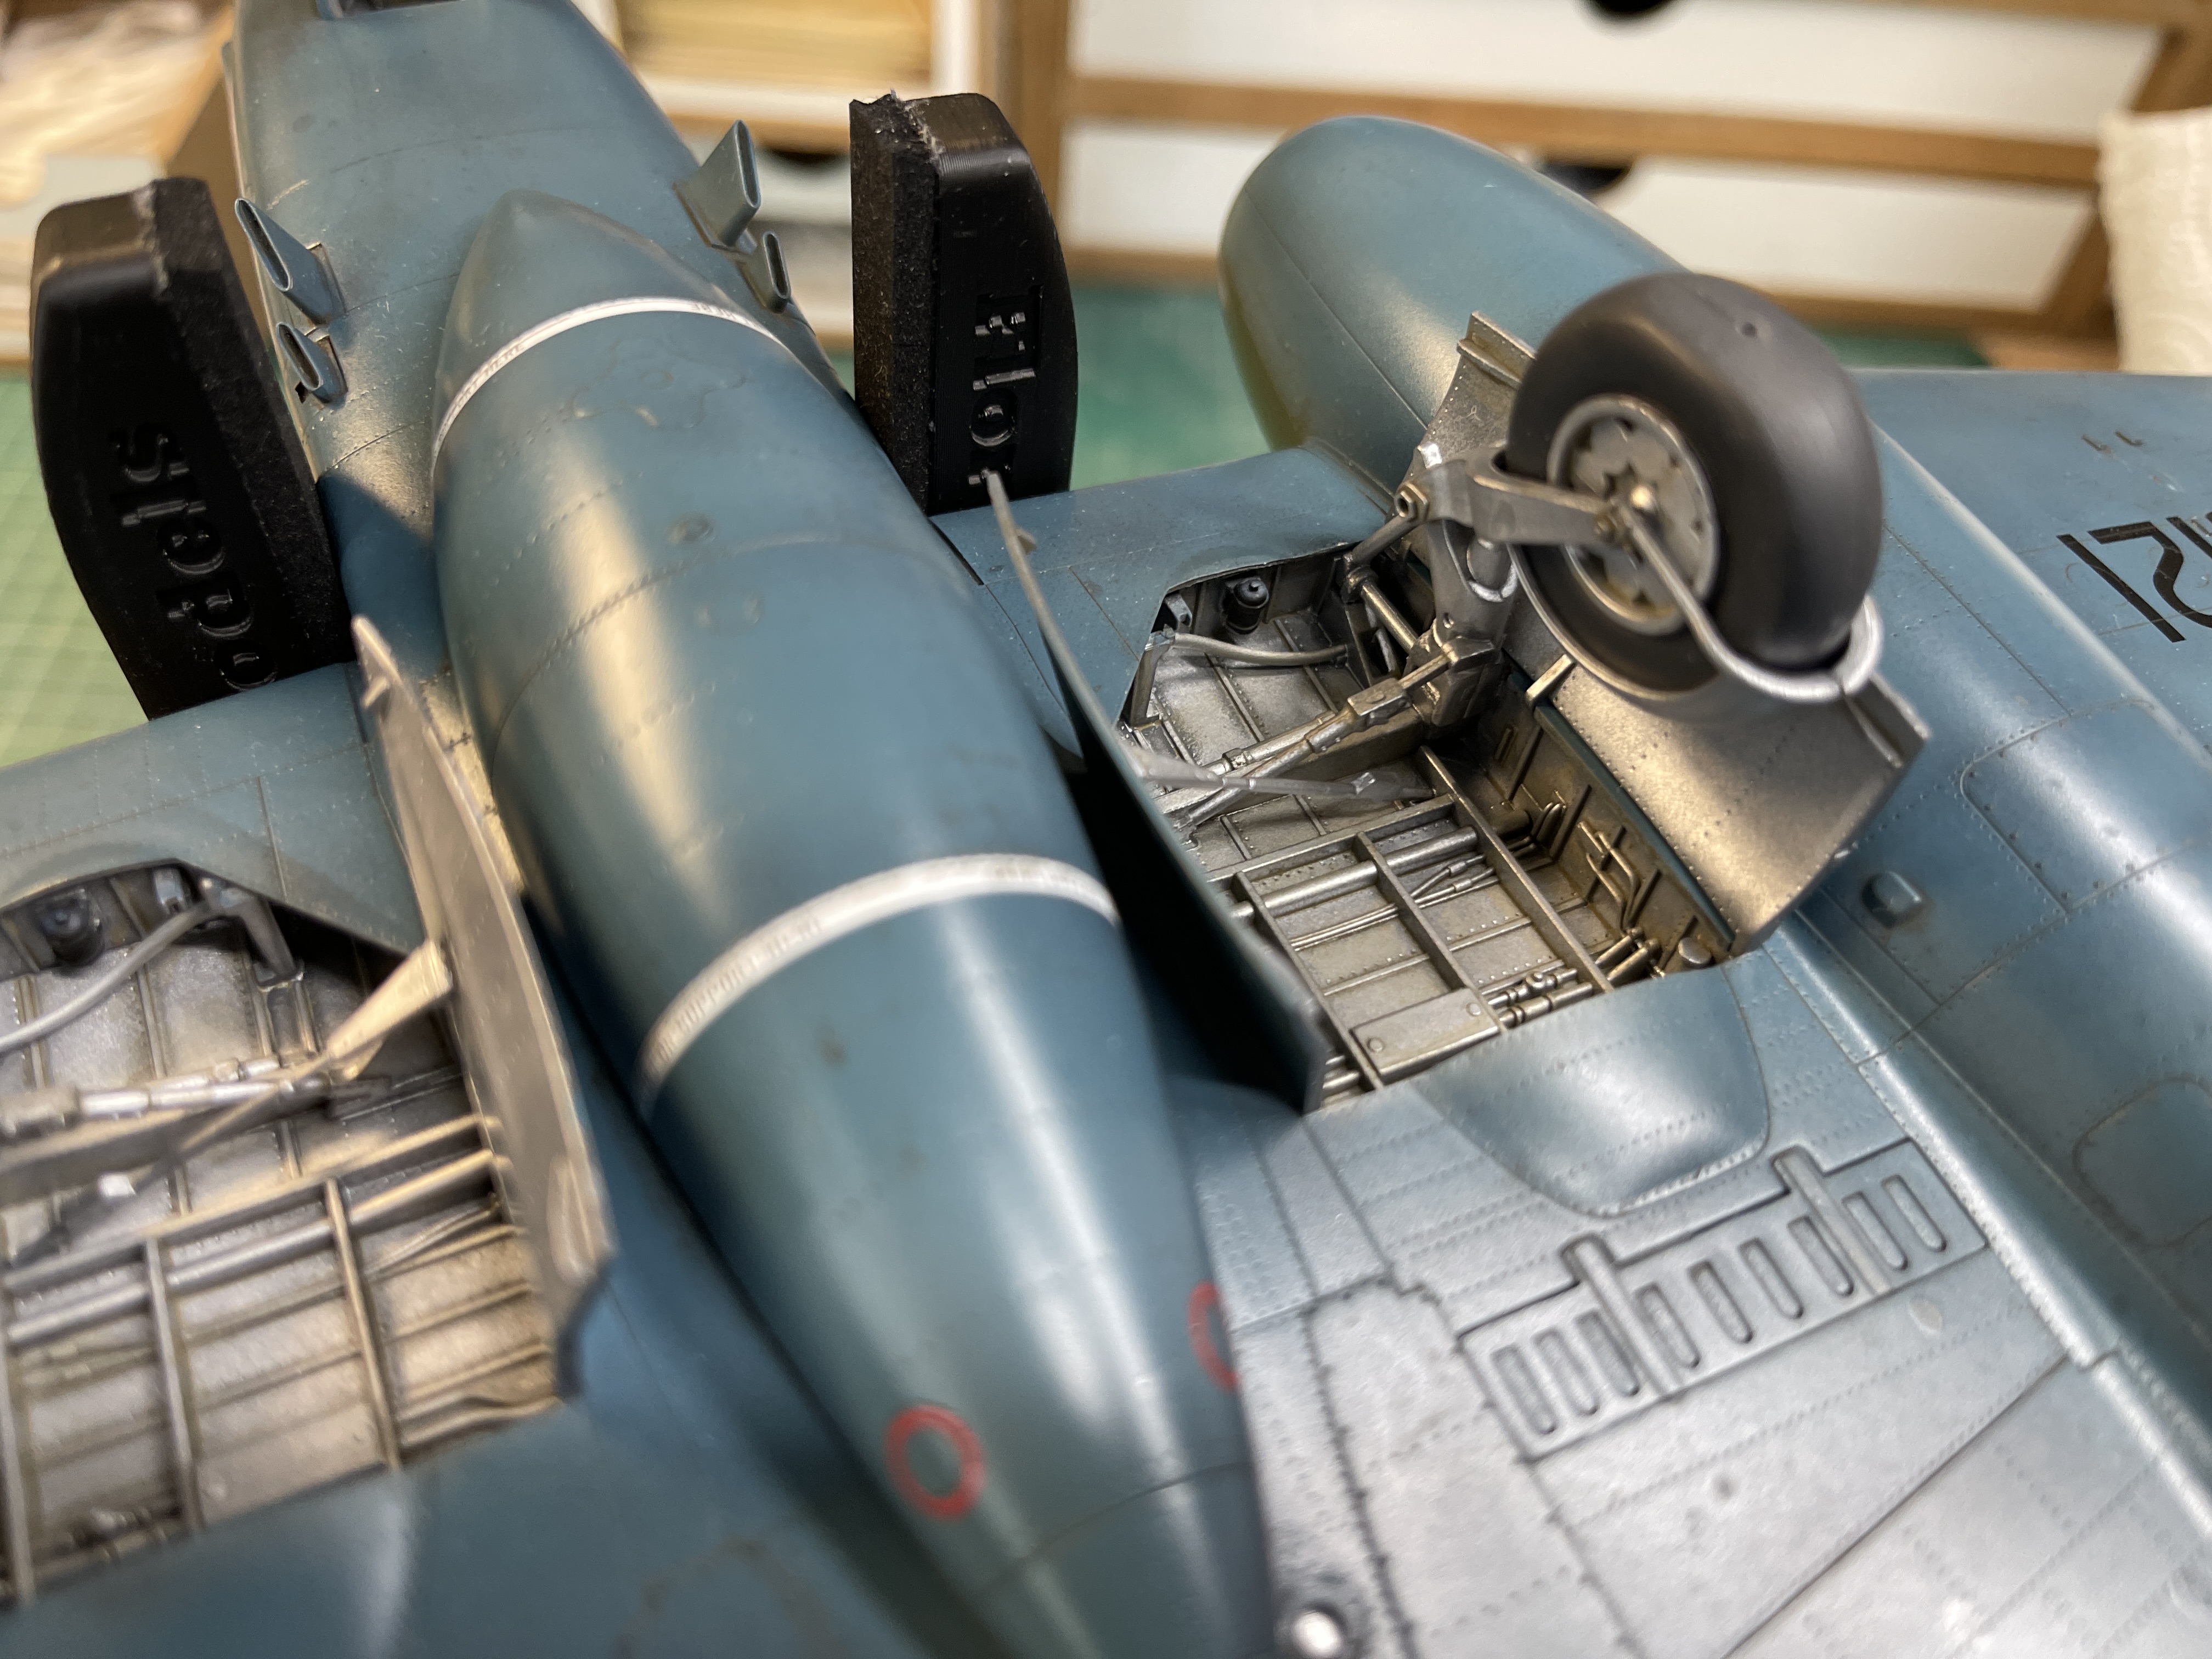
The undercarriage first. The instructions are vague about how it fits to the wheel well. Not really a problem though. Looking closely at the wheel well and cross referencing to the superb reference book that came with the first edition and all was sorted. The leg, the covers and actuators all fitted superbly

IMG_9312.jpeg


I will need to set the flattened wheels into place with a drop of cement once this has all cured and I am happy to set it down on its legs.

In the meantime I turned it over and completed the last of the fittings.
IMG_9313.jpeg


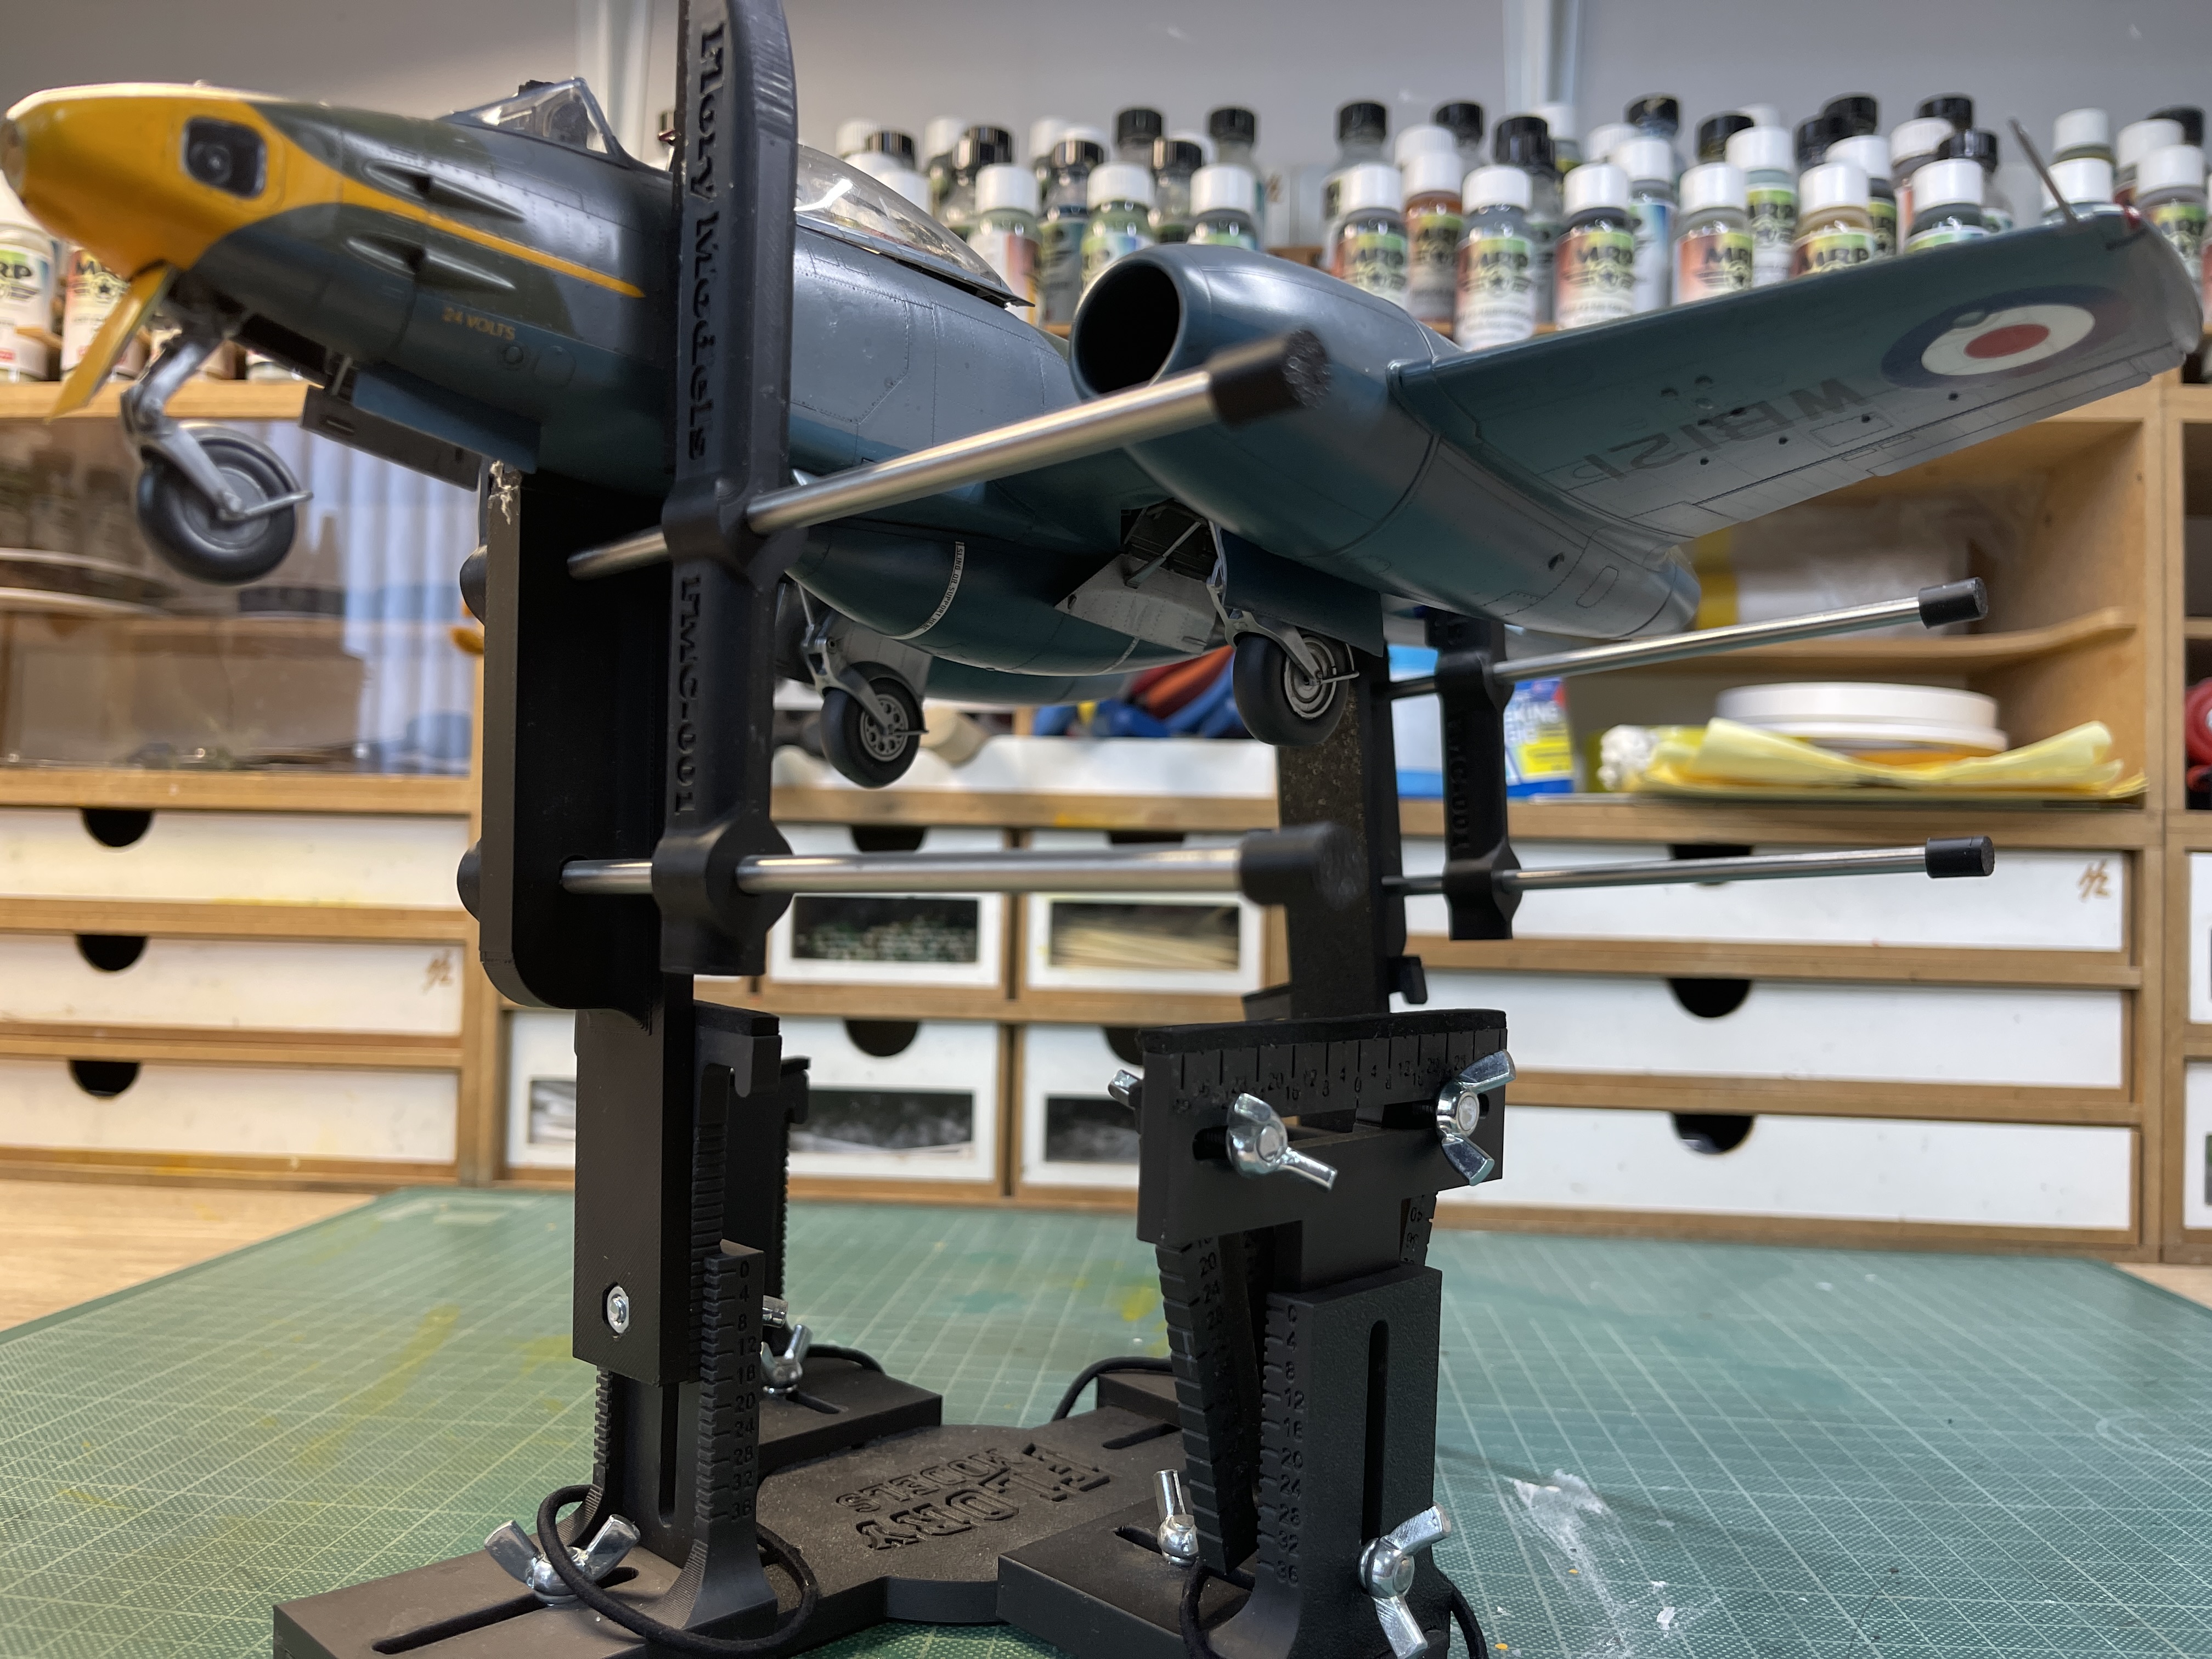
A view from under.
IMG_9314.jpeg


In a couple of hours I will set it on it legs then fix the wheels into place.

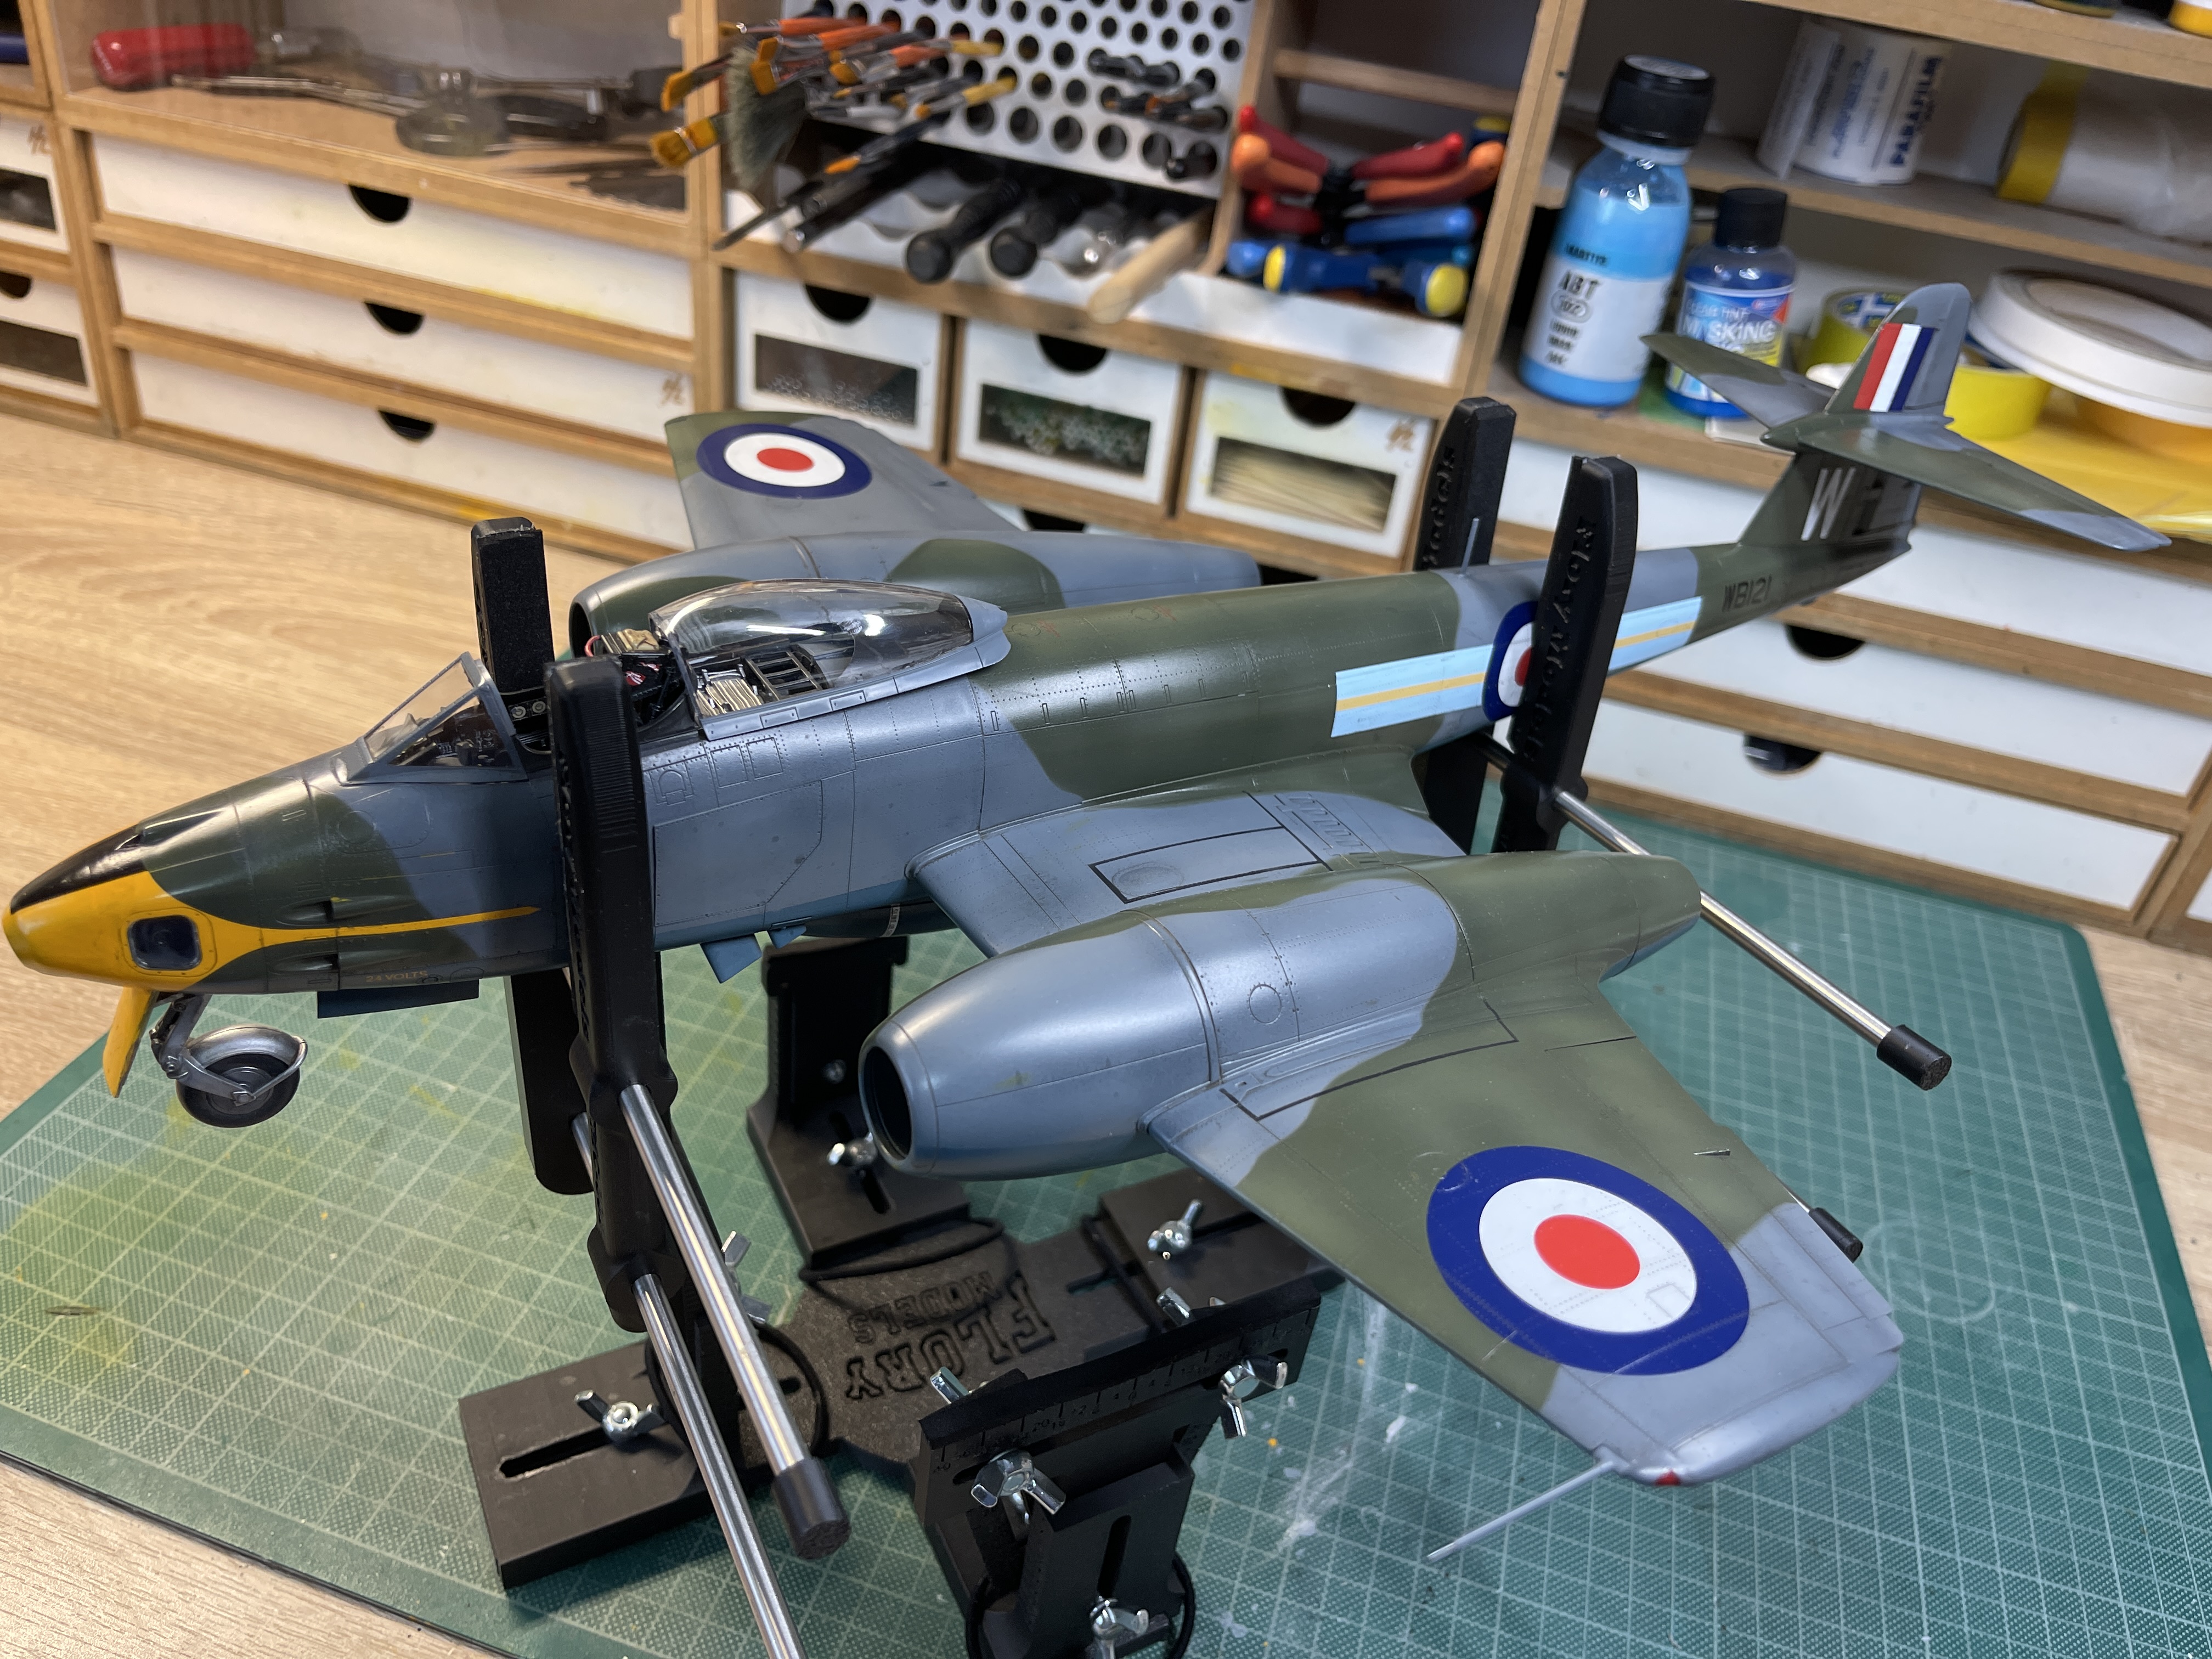
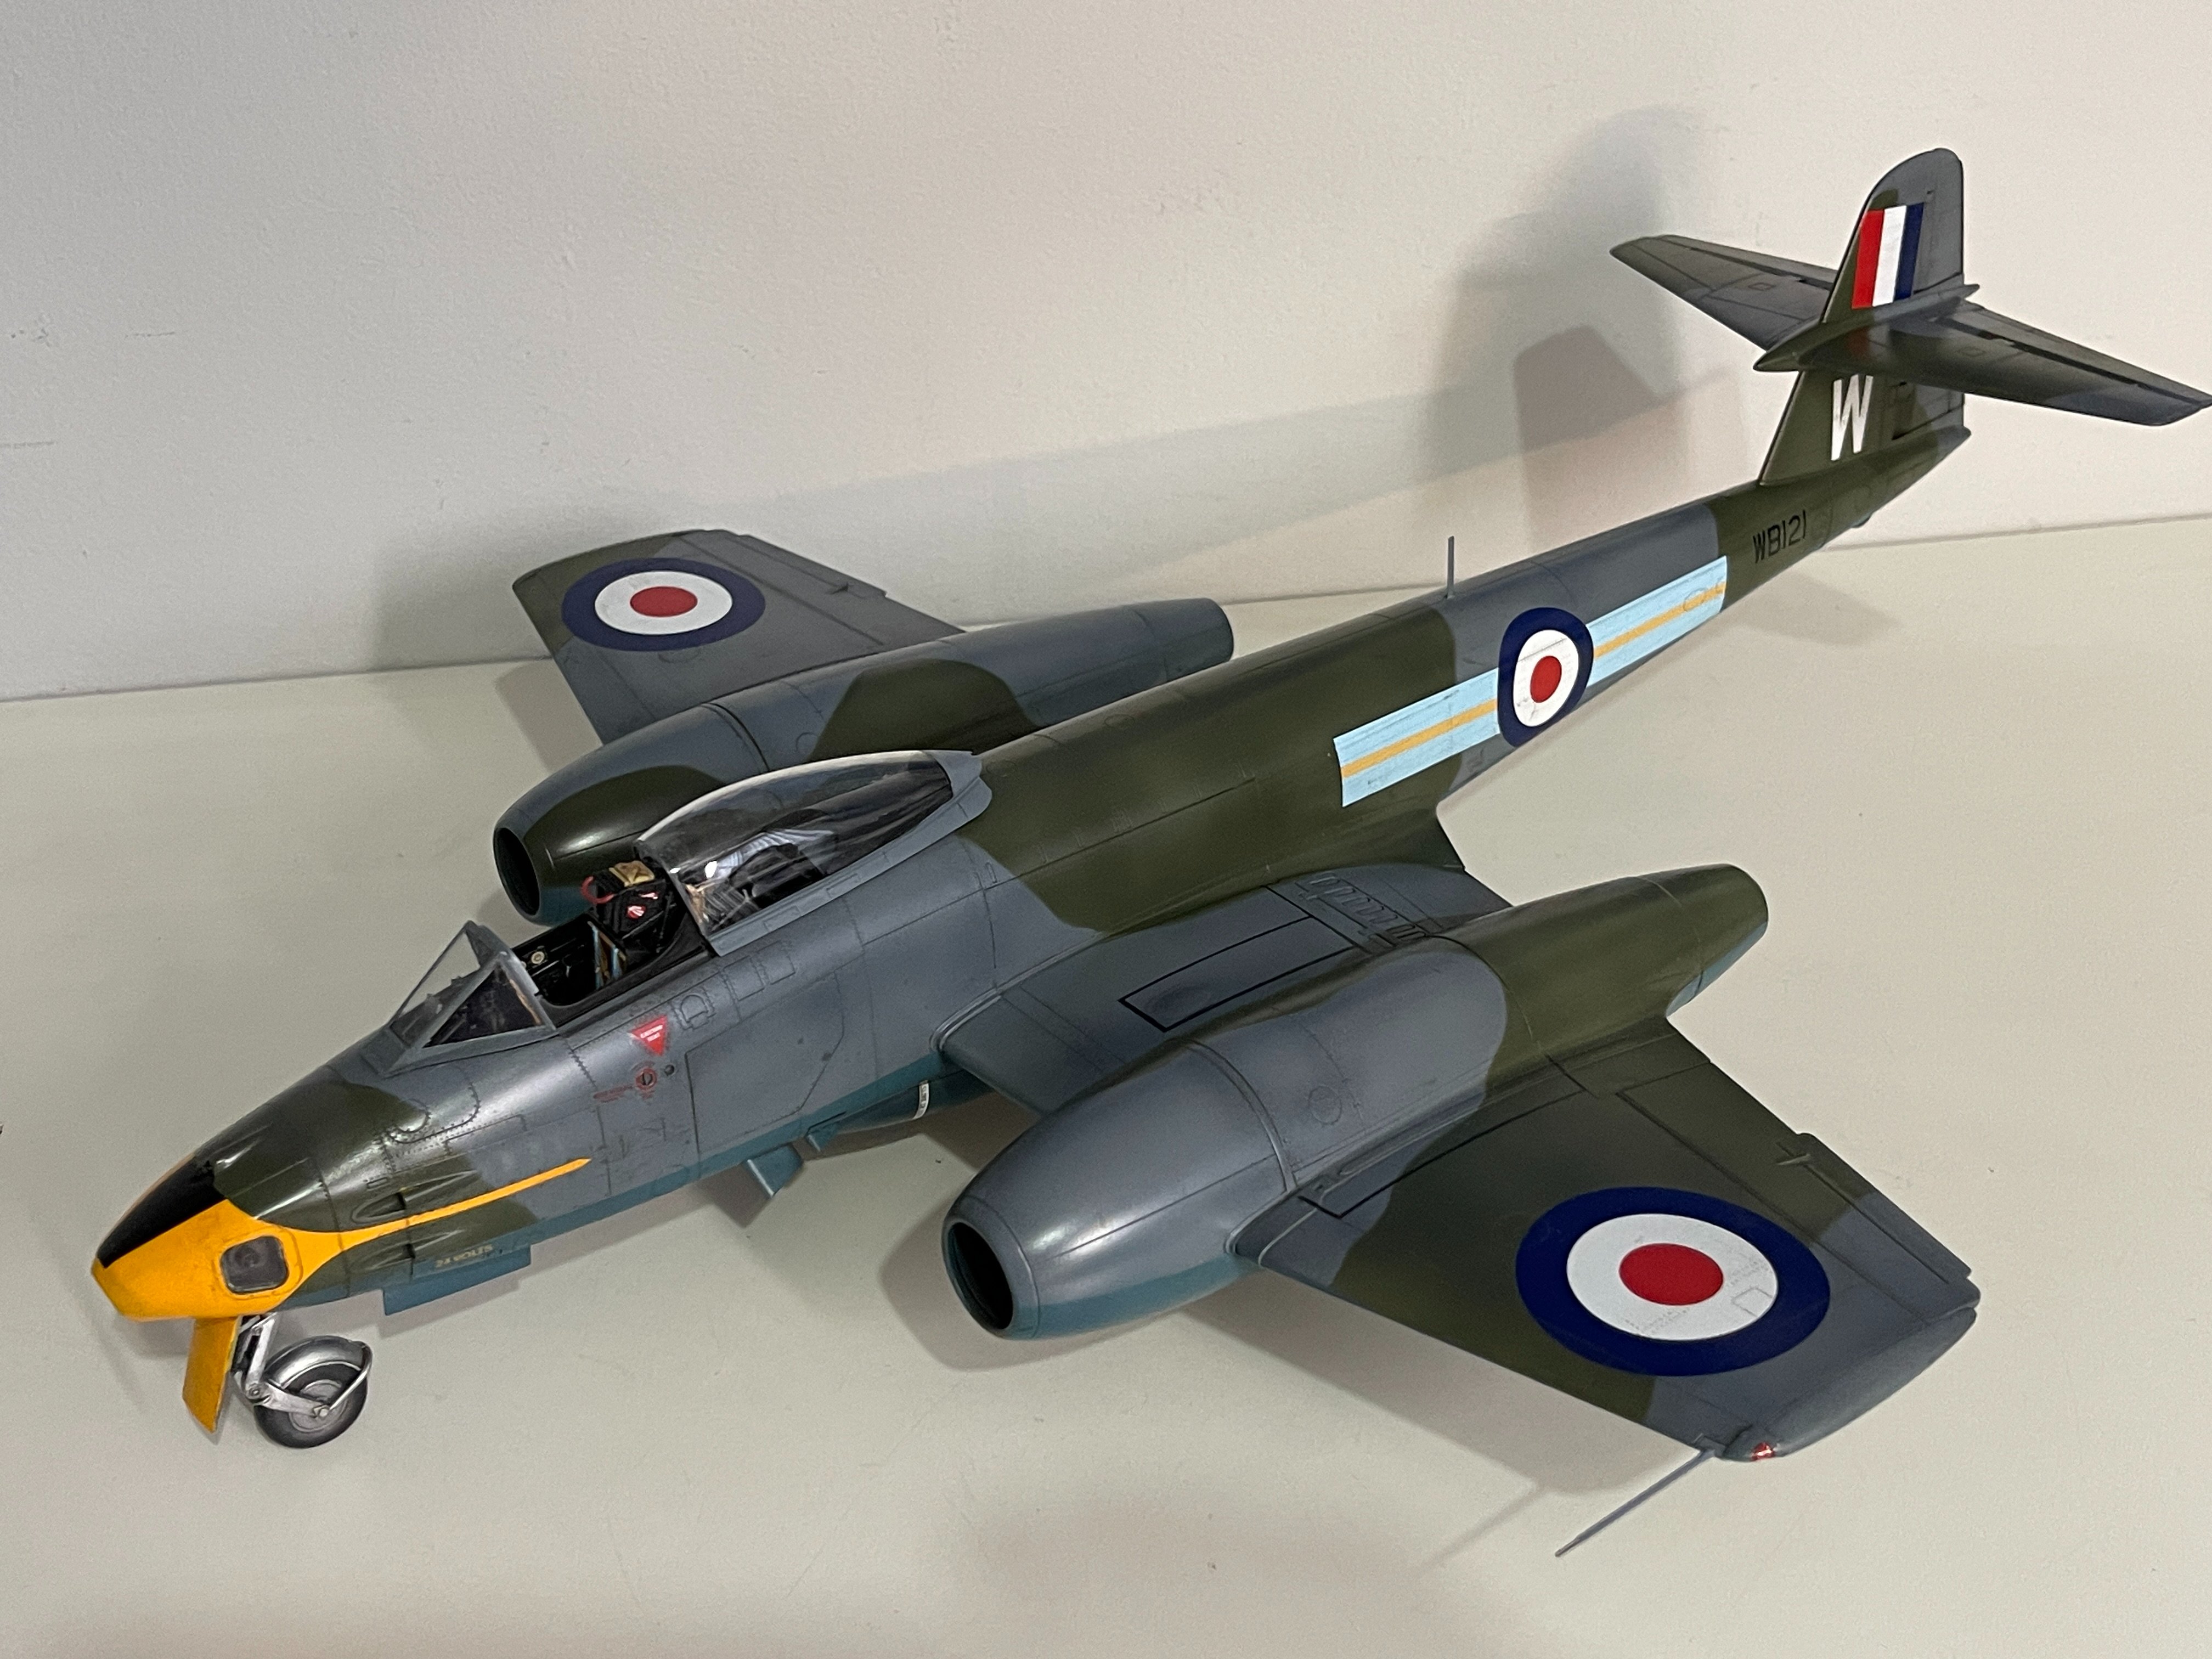
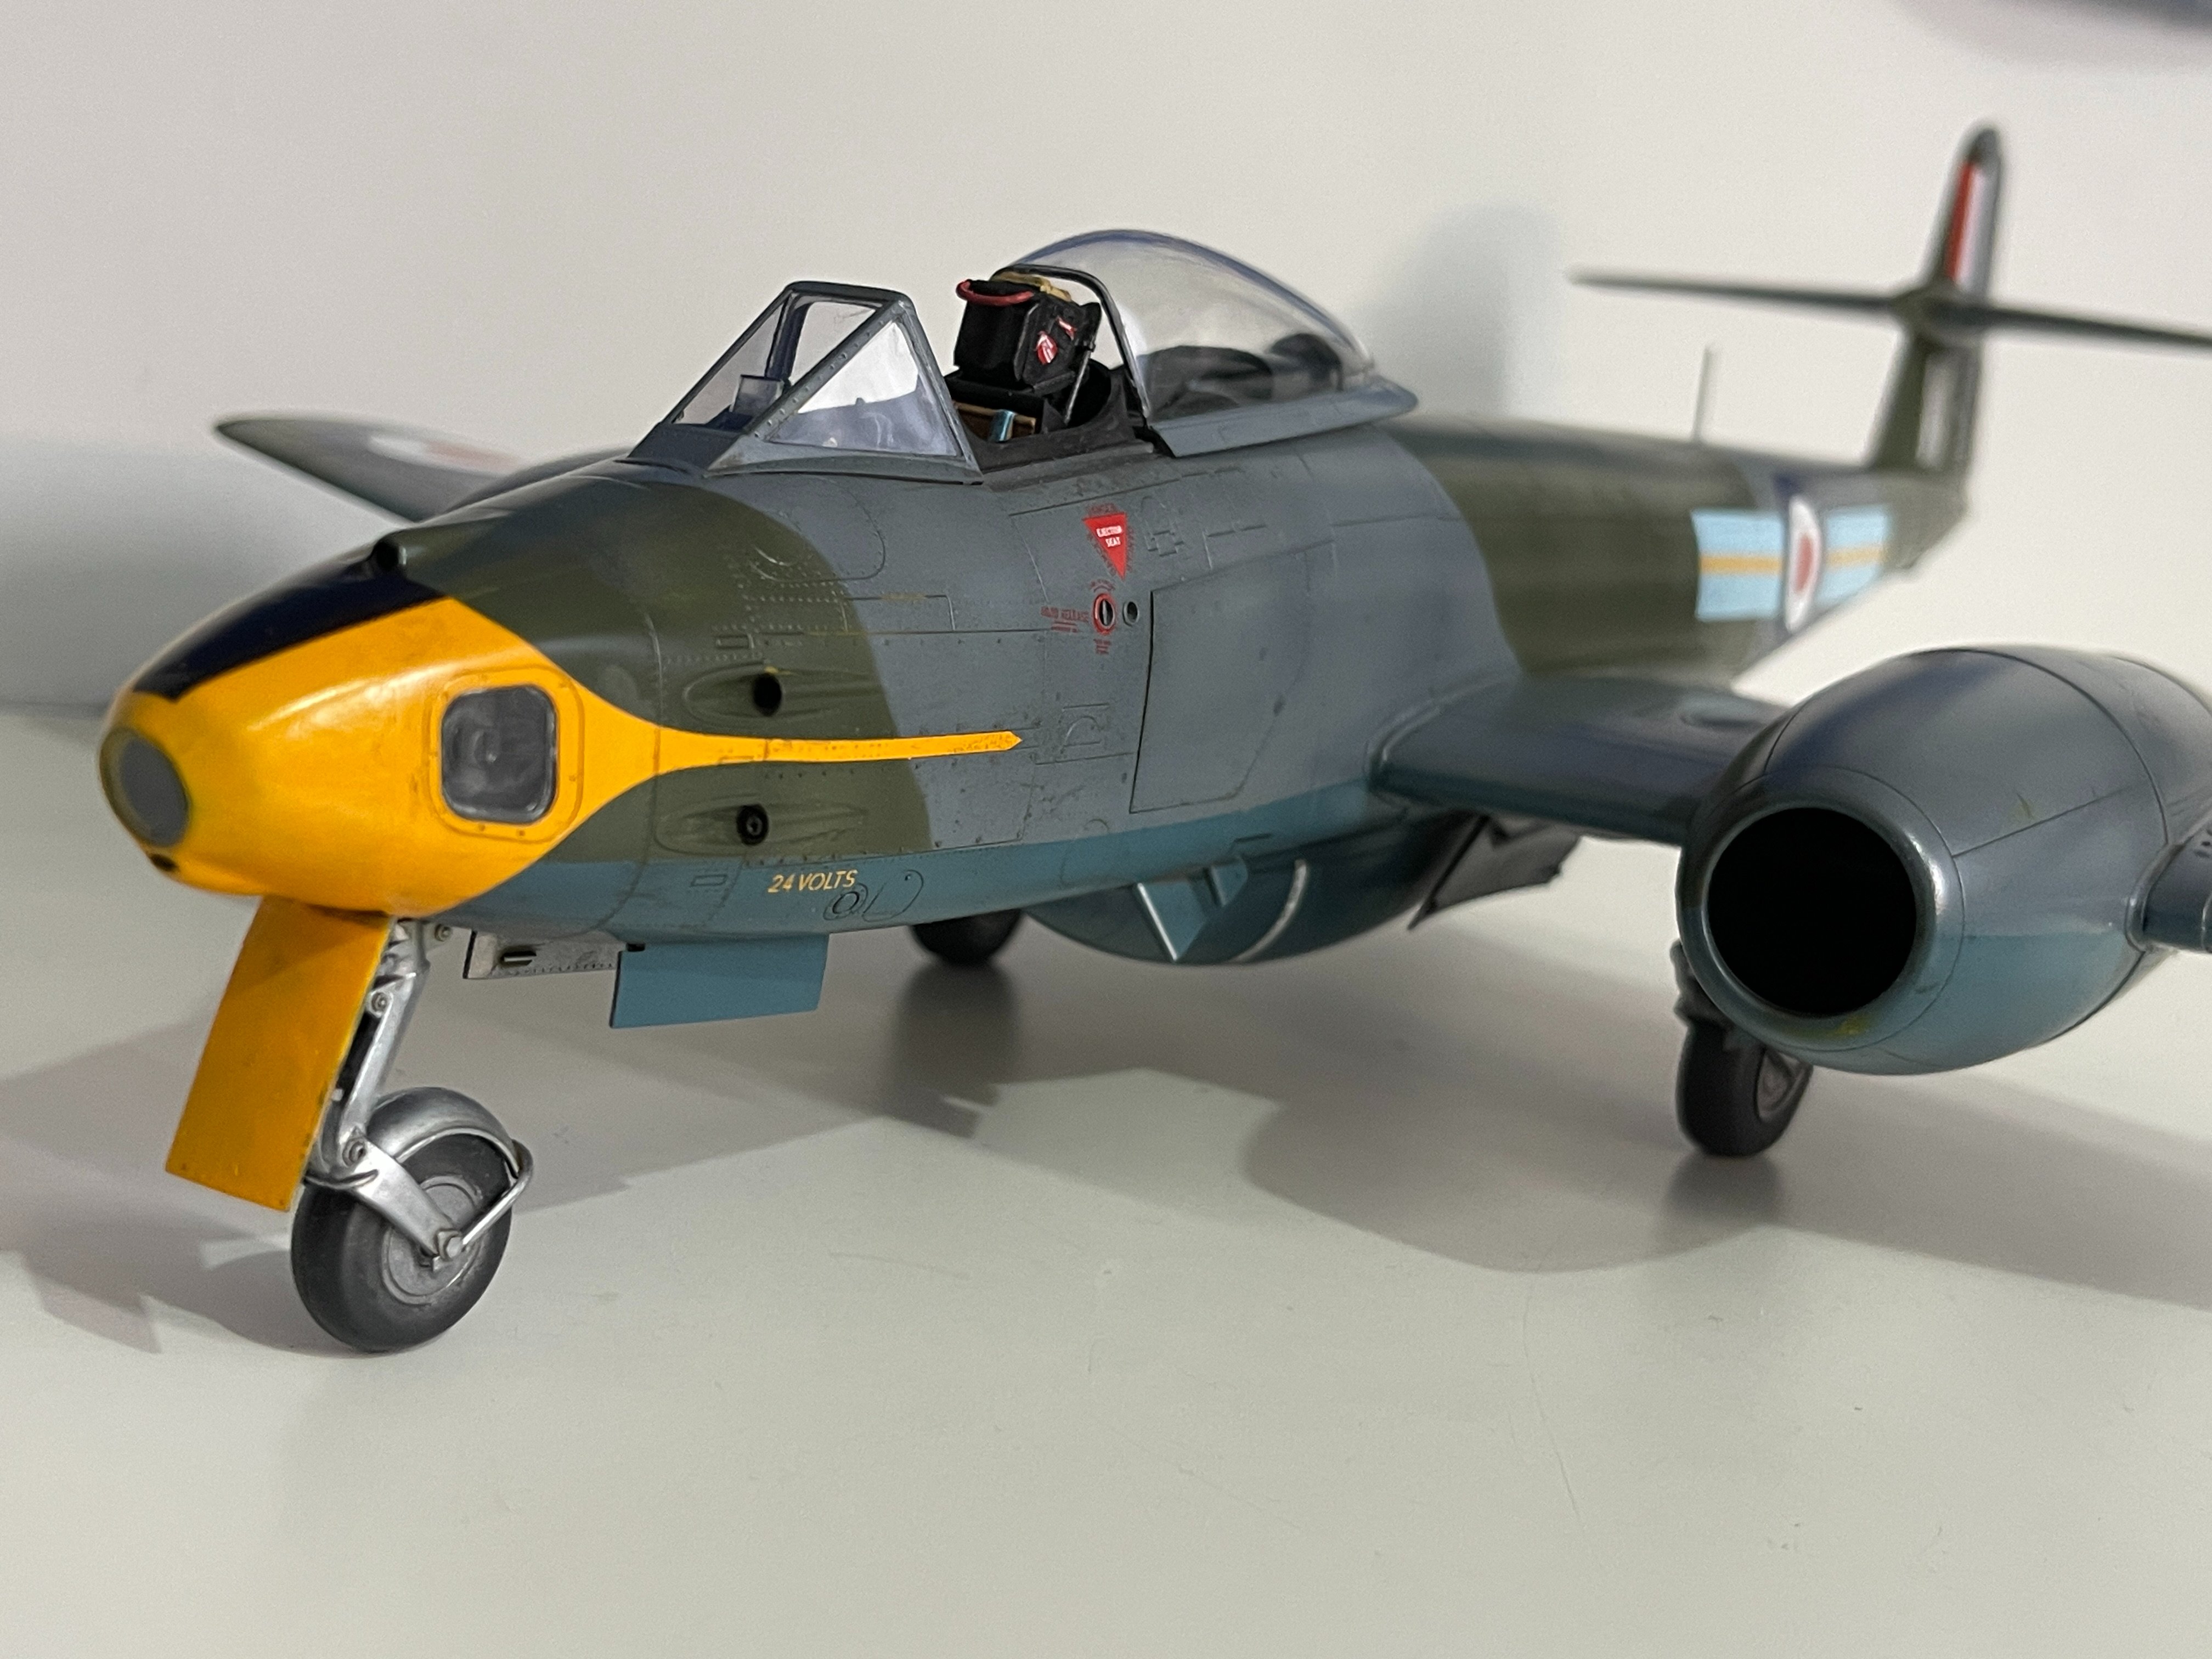
Thats it, all done……

Completed photos will follow.

A couple of observations.

I said before the build that Revell have turned a corner in quality and I can certainly confirm that. Any problems I had with this were all down to me. This was a joy to build and I loved every minute of it.

I like to be constructive though and I would just say a couple of things.
1/ instructions could be clearer in places
2/ There are some large ejection posts sticking up, none of these are a problem, all easily sorted and none in places where they will be visible, dealt with easily with cutters and sanders to ensure a good fit. But you just don't get these with Tamiya and it really is only these that give the game away that it not a Tammy kit!!
3/ I am not a fan of p.e.. A decent 3D detailing set would be better.

Overall the above criticisms really are scraping the barrel and none of that detracts from a great kit. Very well done Revell.
 
Onto the final fittings…..

The undercarriage first. The instructions are vague about how it fits to the wheel well. Not really a problem though. Looking closely at the wheel well and cross referencing to the superb reference book that came with the first edition and all was sorted. The leg, the covers and actuators all fitted superbly

View attachment 192155

I will need to set the flattened wheels into place with a drop of cement once this has all cured and I am happy to set it down on its legs.

In the meantime I turned it over and completed the last of the fittings.
View attachment 192154

A view from under.
View attachment 192153

In a couple of hours I will set it on it legs then fix the wheels into place.

Thats it, all done……

Completed photos will follow.

A couple of observations.

I said before the build that Revell have turned a corner in quality and I can certainly confirm that. Any problems I had with this were all down to me. This was a joy to build and I loved every minute of it.

I like to be constructive though and I would just say a couple of things.
1/ instructions could be clearer in places
2/ There are some large ejection posts sticking up, none of these are a problem, all easily sorted and none in places where they will be visible, dealt with easily with cutters and sanders to ensure a good fit. But you just don't get these with Tamiya and it really is only these that give the game away that it not a Tammy kit!!
3/ I am not a fan of p.e.. A decent 3D detailing set would be better.

Overall the above criticisms really are scraping the barrel and none of that detracts from a great kit. Very well done Revell.
Barry, what kind of jig is that? Plane looks incredible. You may be interested- I watched a YT about the history of Revell. Apparently when they first started they were meticulous about the engineering matching the actual vehicles. There was even a point where a politician had complained publicly against Revell stating that if our enemies wanted to see how something was engineered all they had to do was buy a Revell kit! Later as Revell transitioned and changed owners the quality went out the window.
 
Barry, what kind of jig is that? Plane looks incredible. You may be interested- I watched a YT about the history of Revell. Apparently when they first started they were meticulous about the engineering matching the actual vehicles. There was even a point where a politician had complained publicly against Revell stating that if our enemies wanted to see how something was engineered all they had to do was buy a Revell kit! Later as Revell transitioned and changed owners the quality went out the window.
Hi Ron
I did a thread about the jig recently. Look at the thread 'Flory Models Aircraft building jig'. It's a game changer.

You might find they are sold out so you sign up for an email alert when they are back in stock. Phil Flory has 3D printers working on these 24 hours a day.
 

Latest posts

Back
Top