You are using an out of date browser. It may not display this or other websites correctly.
You should upgrade or use an alternative browser.
You should upgrade or use an alternative browser.
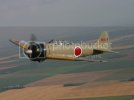
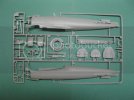
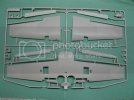
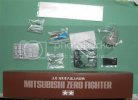
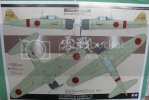
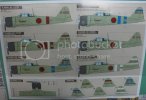
Tamiya 1/32 Mitsubishi A6M2B Zero Fighter Model 21 ZEKE
- Thread starter Bzzymatt
- Start date
TRM
New Member
- Joined
- Mar 18, 2011
- Messages
- 5,024
Nice review!!! Looking forward to the build! Good luck! I have a Zero build planned for June 1st possibly!!!! Going to be a Japanese Summer it seems!!! ;D
Chris S
Its a bit like being handcuffed to a lunatic !
- Joined
- Feb 14, 2011
- Messages
- 4,573
Cool ...look forward to this 
Chris.
Chris.
Glorfindel
Active Member
- Joined
- May 2, 2011
- Messages
- 1,502
Bzzymatt that's a great looking kit there. There are some nice panel lines there that I can see.
Thanks!! and yes there are very well detailed panel lines. I'm going to be heading to an IPMS competition this weekend to talk to my friend who is an expert on Japanese aircraft. I'll be able to get some color mixtures and everything for the metallic blue and such....I already have a technique for the metallic blue, but I want to see what my friend has to say. I may have to darken the metallic blue just a little bit.
O.k. here is the process so far. I'm enjoying the build, but the seat belts are just so irritating some times. 
The seat belts are made of like a piece of tape with a very poor adhesive on the back, but I'll have to glue them on when I finish assembling them.
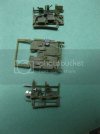
Still need to patch a few places
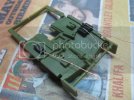
Copper wire was added for more detail
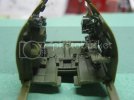
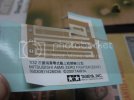
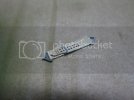
More updates will be available probably by early next week.
Matt
The seat belts are made of like a piece of tape with a very poor adhesive on the back, but I'll have to glue them on when I finish assembling them.

Still need to patch a few places

Copper wire was added for more detail


More updates will be available probably by early next week.
Matt
FlipFlop
I like my planes like my women - dirty!
- Joined
- Jan 31, 2012
- Messages
- 138
Nice quick start. Will be following.
Subscribed and liked.
Cheers.
Subscribed and liked.
Cheers.
Chris S
Its a bit like being handcuffed to a lunatic !
- Joined
- Feb 14, 2011
- Messages
- 4,573
The cockpit is looking very good  ...as are the belts . Keep at it
Chris.
Chris.
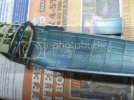
For many who did not know, the Japanese used this metallic blue as a primer...as it aged it would start to turn green. They used a red primer for the outside of the fuselage and wings, but note that the red primer was not used to make there insignias. My mixture is a layer of floquil old silver, then a very light coat of GTW Blue. After that dries I apply a very light coat of Tamiya clear green. The clear green will show up in areas that are still silver. To top it all off I applied a light layer of MIG black.
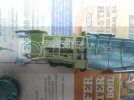
Checking to make sure everything is in order
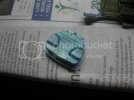
This is a better view of the clear green. Again it will show up where you didn't apply a lot of blue.
adampolo13
New Member
- Joined
- Dec 7, 2011
- Messages
- 2,633
Hey Matt,
Looks good buddy, I really like the blue green technique, kinda like a filter (I think...)
Anyways, any more progress on this one?
Later,
Adam
Looks good buddy, I really like the blue green technique, kinda like a filter (I think...)
Anyways, any more progress on this one?
Later,
Adam
Chris S
Its a bit like being handcuffed to a lunatic !
- Joined
- Feb 14, 2011
- Messages
- 4,573
Adam ,Japanese aircraft were painted a funny electric blue inside 
Sorry I missed the last bit ...coming on nice .
Chris.
Sorry I missed the last bit ...coming on nice .
Chris.
O.k. so there is one disadvantage to being my age....and that is school  I've been stuck doing test, reports and so much more that my work was being held up on this project. So here are some pics of the progress so far.
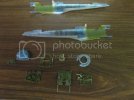
All the parts are starting to come along nicely
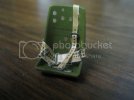
This was as good as I could make the seat belts from this kit. I don't really like these seat belts, but the only advantage they have over photo etched seat belts is that they are very flexible and the details don't chip off as easily as colored photo etch.
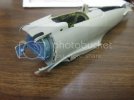
Giving the model a dry fit of the cockpit and fuel tank.
I know this is not a big update, but the model is coming along nicely Now that school is almost over the project will be coming along much faster!!!
Matt

All the parts are starting to come along nicely

This was as good as I could make the seat belts from this kit. I don't really like these seat belts, but the only advantage they have over photo etched seat belts is that they are very flexible and the details don't chip off as easily as colored photo etch.

Giving the model a dry fit of the cockpit and fuel tank.
I know this is not a big update, but the model is coming along nicely
Matt
Chris S
Its a bit like being handcuffed to a lunatic !
- Joined
- Feb 14, 2011
- Messages
- 4,573
Nice to see you back on this one  Tidy work on the belts ,they look great . Keep at it ..when you can ,school comes first
Chris.
Chris.
Chiefpettyofficer
...we all are victims of Shermans march to the sea
- Joined
- Dec 20, 2010
- Messages
- 903
Ah, the M2b. Nice Start on her 
BANZAI!
BANZAI!
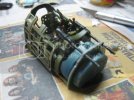
So. I finally got plenty of spare time back!!!
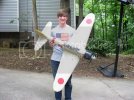
For those who didn't know, I am also a remote control pilot!! and since my mind is all about Japanese zero aircraft, why not get this monster for my collection!!! It is a 1400mm A6M2B Zero "Zeke" just like the one I'm working on right now. It is made entirely of EPO foam, has retractable landing gear, and split flaps!!
More updates on this project will be available soon. I'll be heading off to summer camp for a week starting this Sunday.
So I've had plenty of spare time to work on this zero once again!!! So far I finished the final touches on the cockpit, glued it into the fuselage, built and installed the vertical and horizontal stabilizers, and I'm almost finished with the engine!!!  Everything is coming along great!!!
So after looking around on the internet, I saw something that I want to try with this model that I think will be pretty cool after it's finished, but I want to keep it a surprise, so you'll have to wait until I'm done. I'm not sure if what I'm wanting to do will work, but rest assured it will not harm the model.
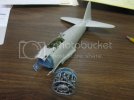
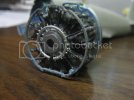
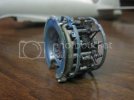
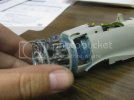
More updates soon!!!
Matt
So after looking around on the internet, I saw something that I want to try with this model that I think will be pretty cool after it's finished, but I want to keep it a surprise, so you'll have to wait until I'm done. I'm not sure if what I'm wanting to do will work, but rest assured it will not harm the model.


More updates soon!!!
Matt
JMac
cut. glue. paint. repeat.
- Joined
- May 24, 2009
- Messages
- 2,812
greyphantom1000
Member
- Joined
- May 19, 2011
- Messages
- 213
love the seatbelts

