Tamed Panther: “Cuckoo”

Scale Model Addict - Model Tips, Guides, Tools & Tech, Tutorials, and Community

Help Support Scale Model Addict:

Jakko

Well-Known Member
Joined
Oct 9, 2024
Messages
2,389
City & State/Province
Netherlands
With the models I want to finish before starting something new mostly done, I think I can safely start a thread about my next model :)

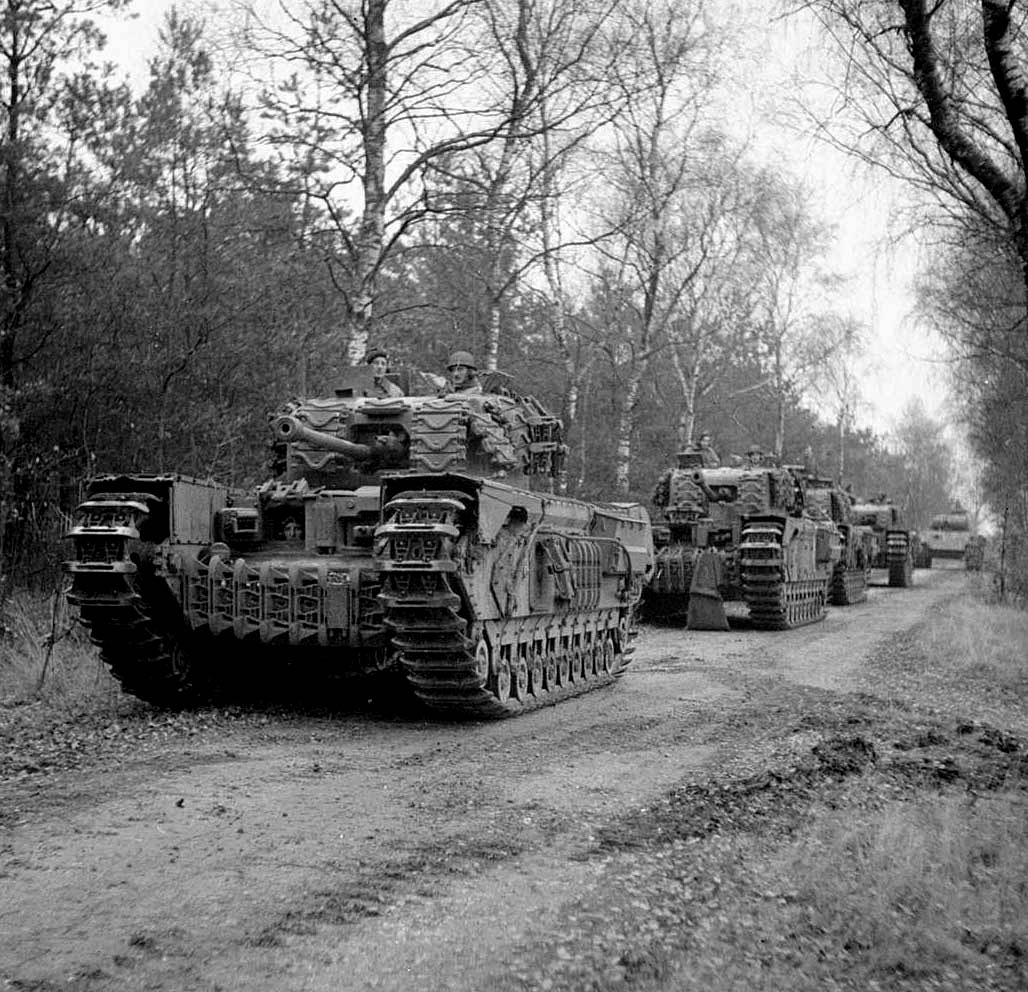
This will be a Panzerkampfwagen Panther Ausführung G of 6 Guards Tank Brigade — the specific tank better known as Cuckoo. Yes, a British Panther :) Here's a column of Churchills:

Churchills & Chuckoo.jpg


At the very back is an odd tank for a unit equipped with Churchills. Here it is as it came nearer the photographer:
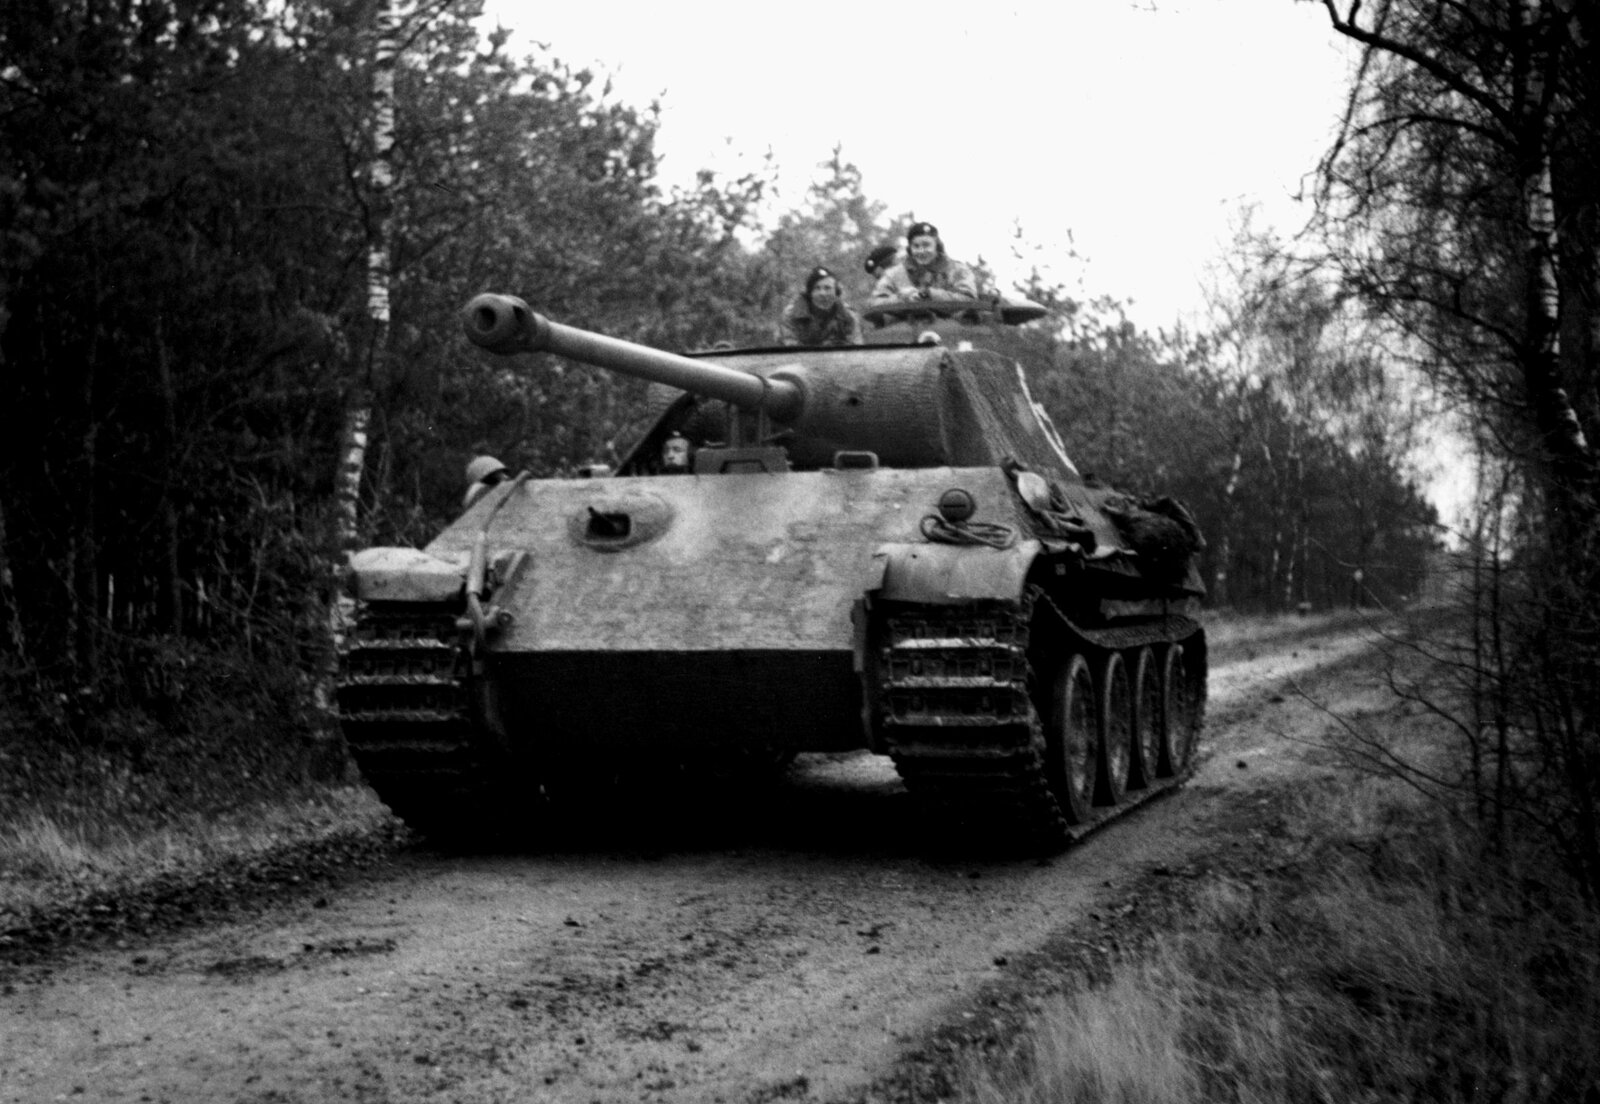
Cuckoo 1.jpg


Obviously a Panther Ausf. G with Zimmerit, and clearly not in German colours, with Allied stars and British tankers crewing it.

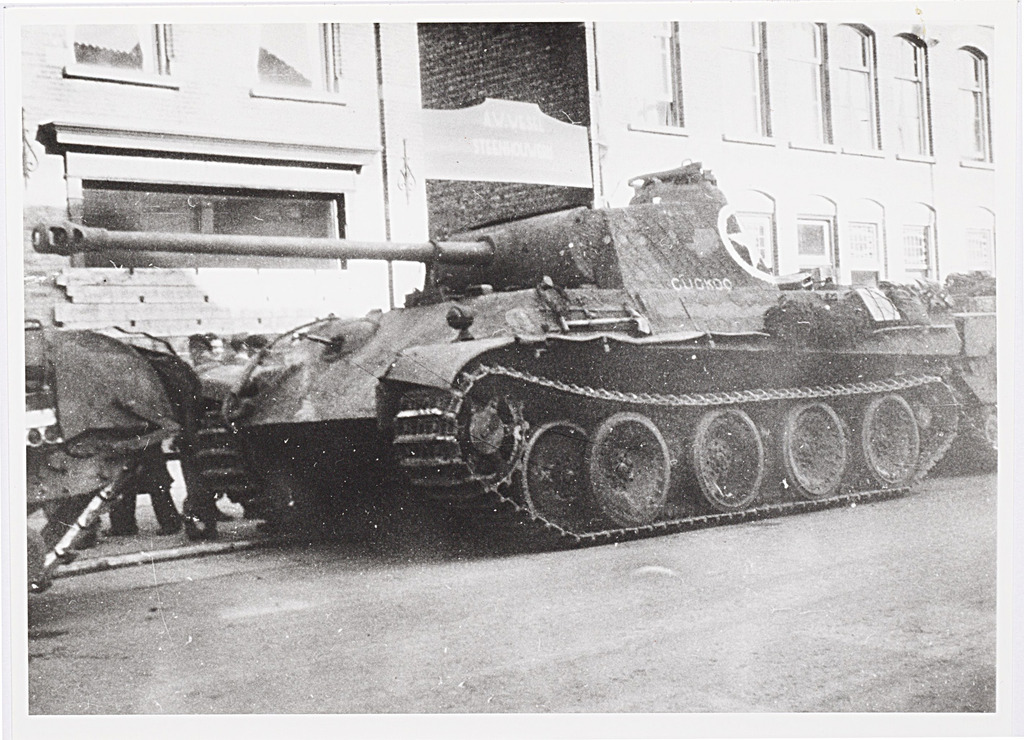
The history of this tank is pretty interesting. Using captured enemy equipment is not an extraordinary thing in war, but the Allies generally had little need to use German armoured vehicles because they usually had plenty of their own. In early October of 1944, 6 Guards Tank Brigade was in the southeast of the Netherlands, and during the fighting around the village of Overloon (where there is now a large museum), discovered an abandoned Panther that belonged to Abteilung 2107 of Panzerbrigade 107. Because it was in running order, it was incorporated into the brigade staff. Going by photos, it was repainted in (presumably) British SCC 15 olive drab, with large Allied stars on it and the name Cuckoo painted on the turret sides. This name probably refers to it being a vehicle in the wrong nest, so to speak, but also fits with the naming of HQ vehicles in 6 Guards Tank Brigade, which all had bird names.
Cuckoo in Tilburg.jpg


This photo was taken in the Dutch city of Tilburg (at approximately the marked location on this map, though the street pattern changed drastically since the war), which is not too far from where the tank was found, and nicely shows the name. It also shows a good deal of damage to the side skirt mounting rail. The other side was a bit more intact:
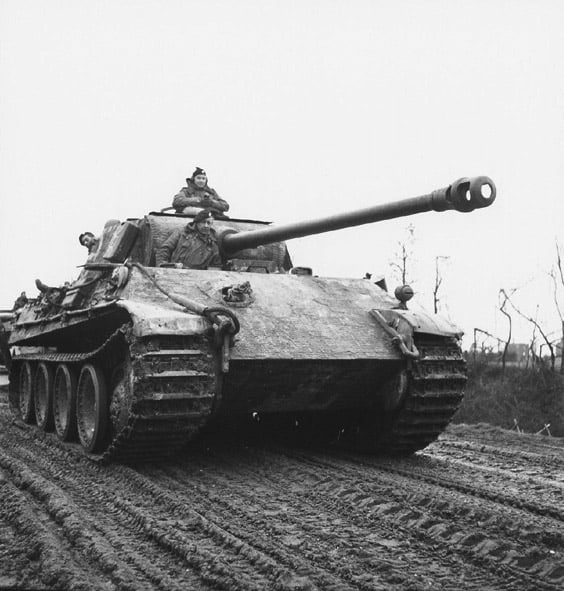
cuckoo 3.jpg


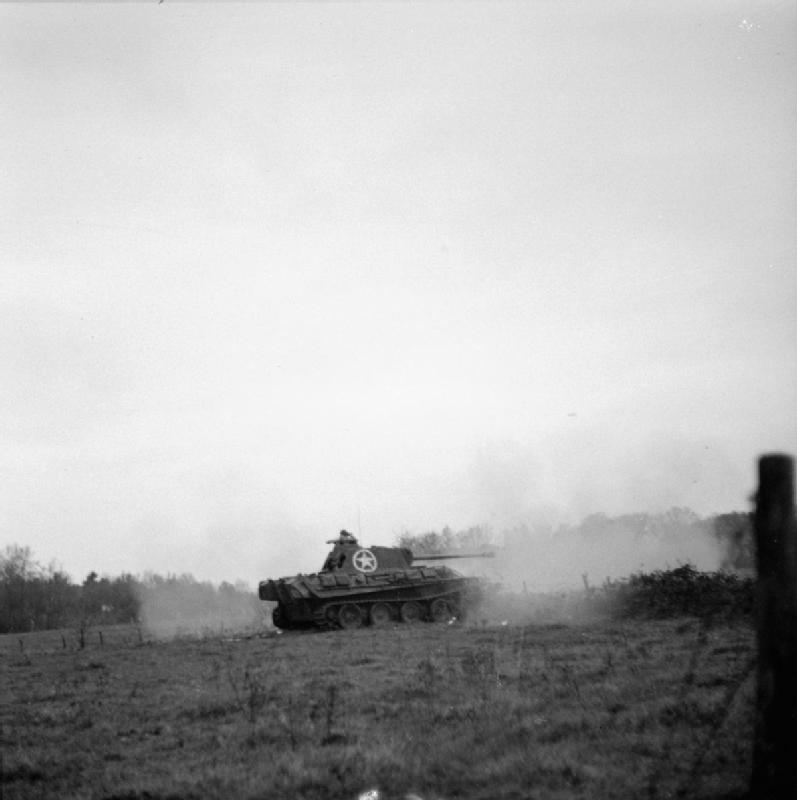
Cuckoo was first deployed in an attack on Geijsteren Castle, near where it was captured:
Cuckoo, kasteel Geijsteren.jpg


Apparently, it was valued highly by its new owners because its 75 mm gun proved much more accurate than the 95 mm howitzers of the Churchills that also took part in shelling the castle.

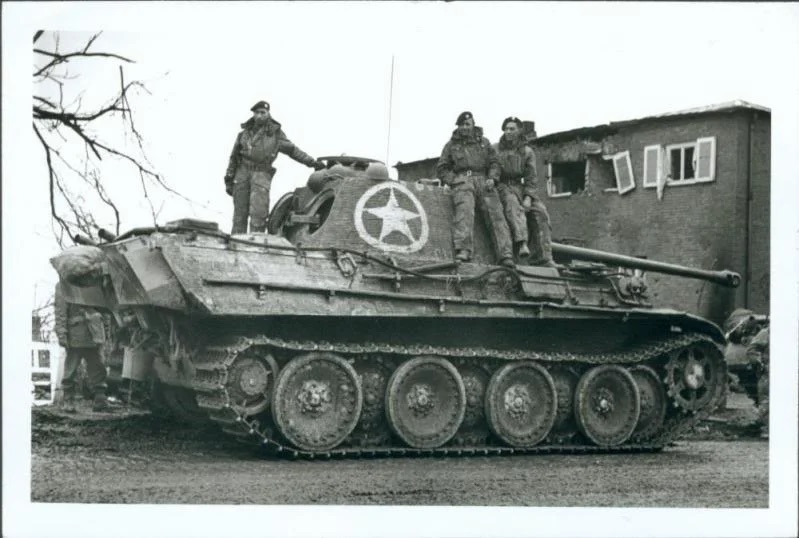
Cuckoo remained in use until the Battle of the Reichswald in February 1945, when the fuel pump failed somewhere east of Kleve, and because no spares were available, the tank had to be abandoned once more. This picture was taken in the town itself:
Cuckoo 2.jpeg


And here is film shot of the tank, in winter camouflage, which dates it to January of 1945 because it's known the tank was painted this way for Operation Blackcock in that month:

 
Apparently, it was valued highly by its new owners because its 75 mm gun proved much more accurate than the 95 mm howitzers of the Churchills that also took part in shelling the castle.
Awesome subject matter brother!

There was no need for the 2nd picture, it stood out GLARINGLY in the 1st!

The part I quoted above is a giant 'duh' though, the velocity difference from a (extreme) high velocity 75mm vs a 90mm howitzer is hard to even compare.

I look forward to this build with great interest.
 
Adds so much to learn a bit, and know the story!
Whenever I build a model of a real vehicle rather than a generic one, I like to place it into context :) This of course comes quite naturally, because you have to do much more research to get the details of an individual vehicle right.

There was no need for the 2nd picture, it stood out GLARINGLY in the 1st!
A lot of people apparently see the Churchills and don't realise there's an odd one out at the back :)

The part I quoted above is a giant 'duh' though, the velocity difference from a (extreme) high velocity 75mm vs a 90mm howitzer is hard to even compare.
Also, the German telescopic sights were generally reckoned to be much better than the British and American equivalents, which helped too. Plus the 95 mm howitzer was considered not overly accurate in the first place :)
 
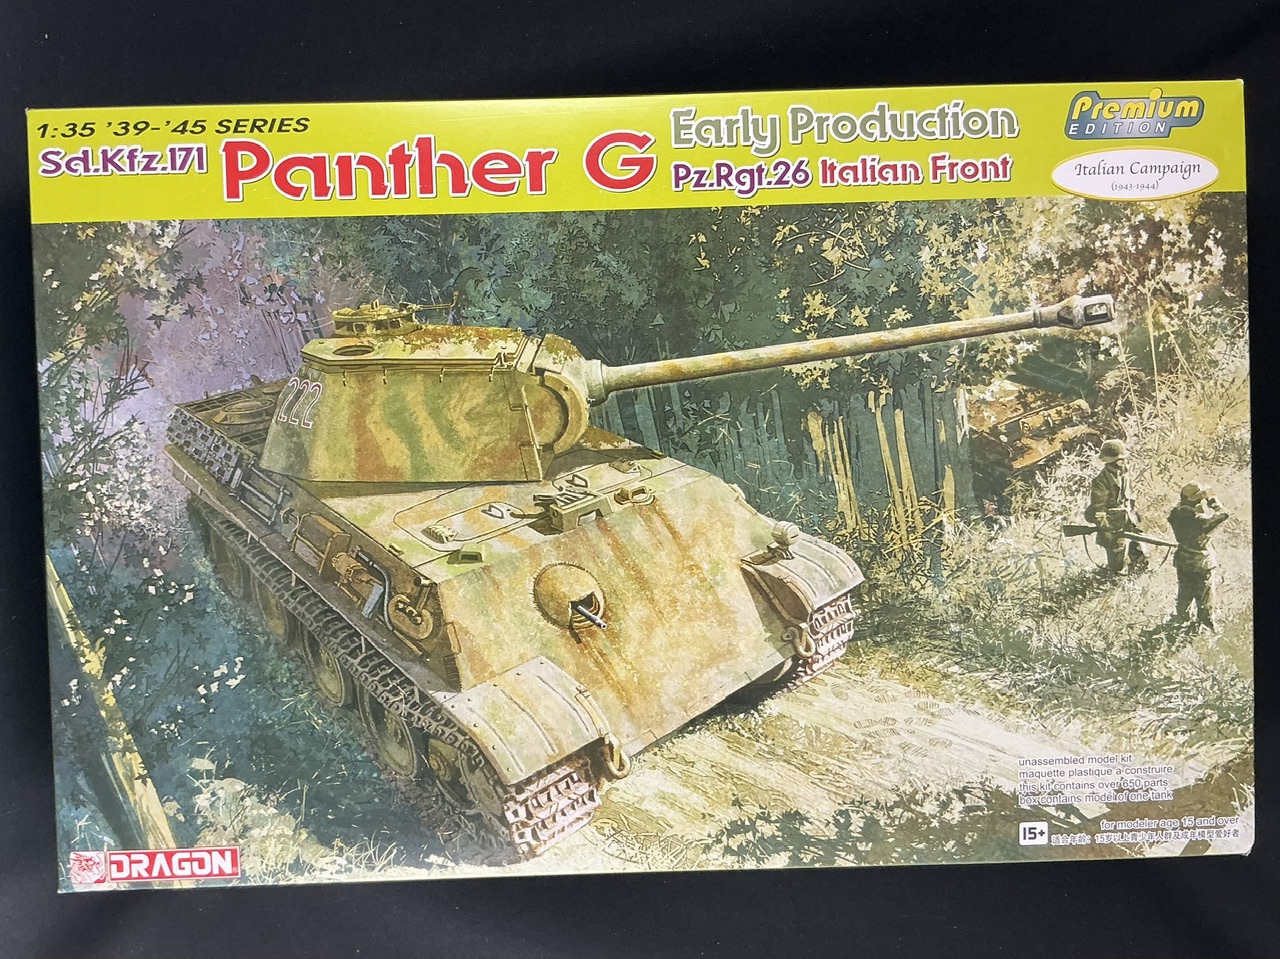
To build the model, I bought this Dragon kit:

IMG_2300.jpeg


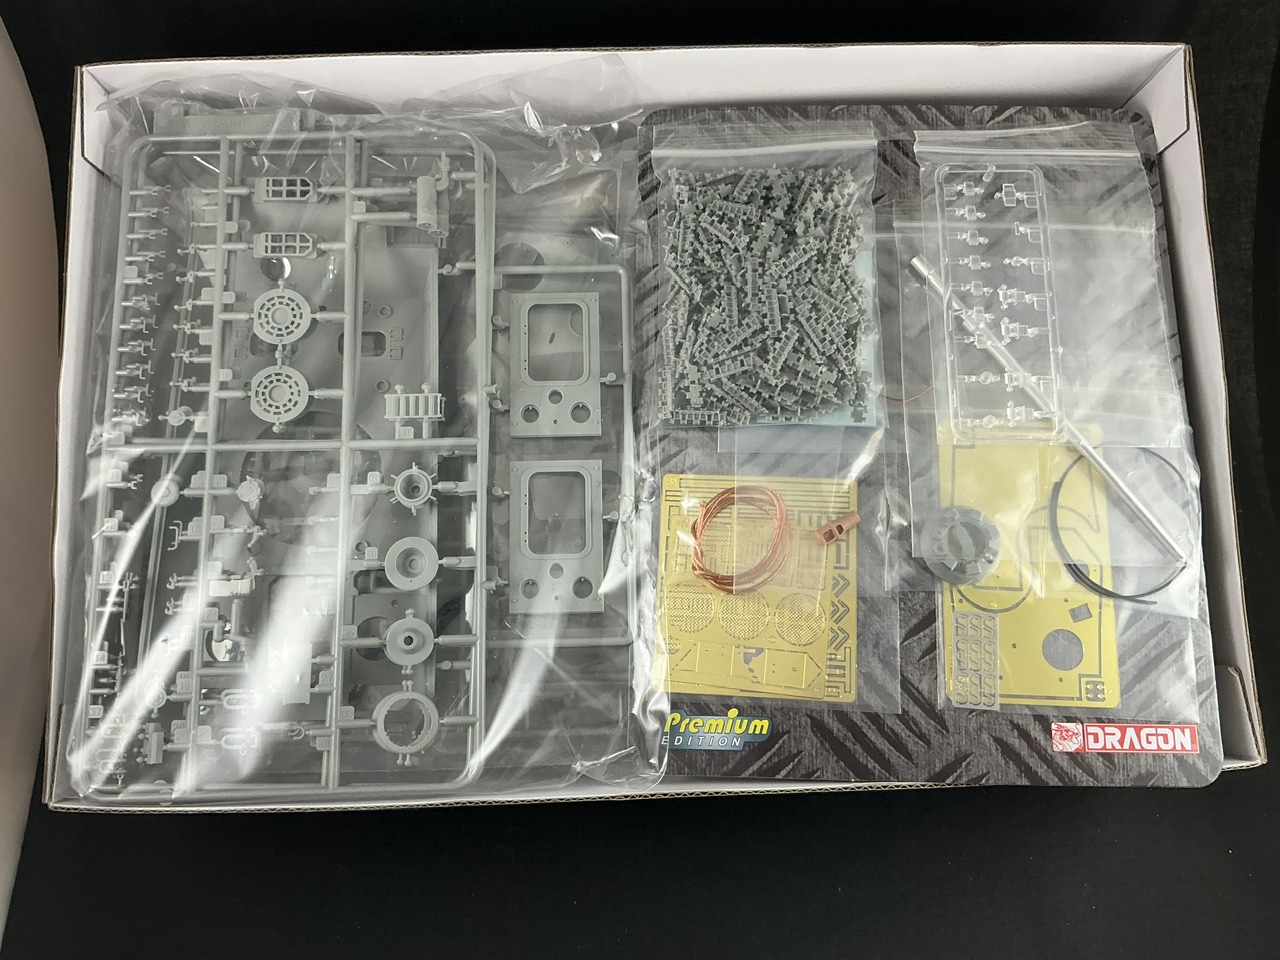
Cuckoo was an early Ausf. G, so this kit looked like a good choice. The box is well-filled with sprues and stuff:

IMG_2301.jpeg


It's the latest incarnation of this particular kit, and comes with fairly extensive etched brass, a turned aluminium gun barrel, twisted copper wire for tow cables and some 3D-printed parts.

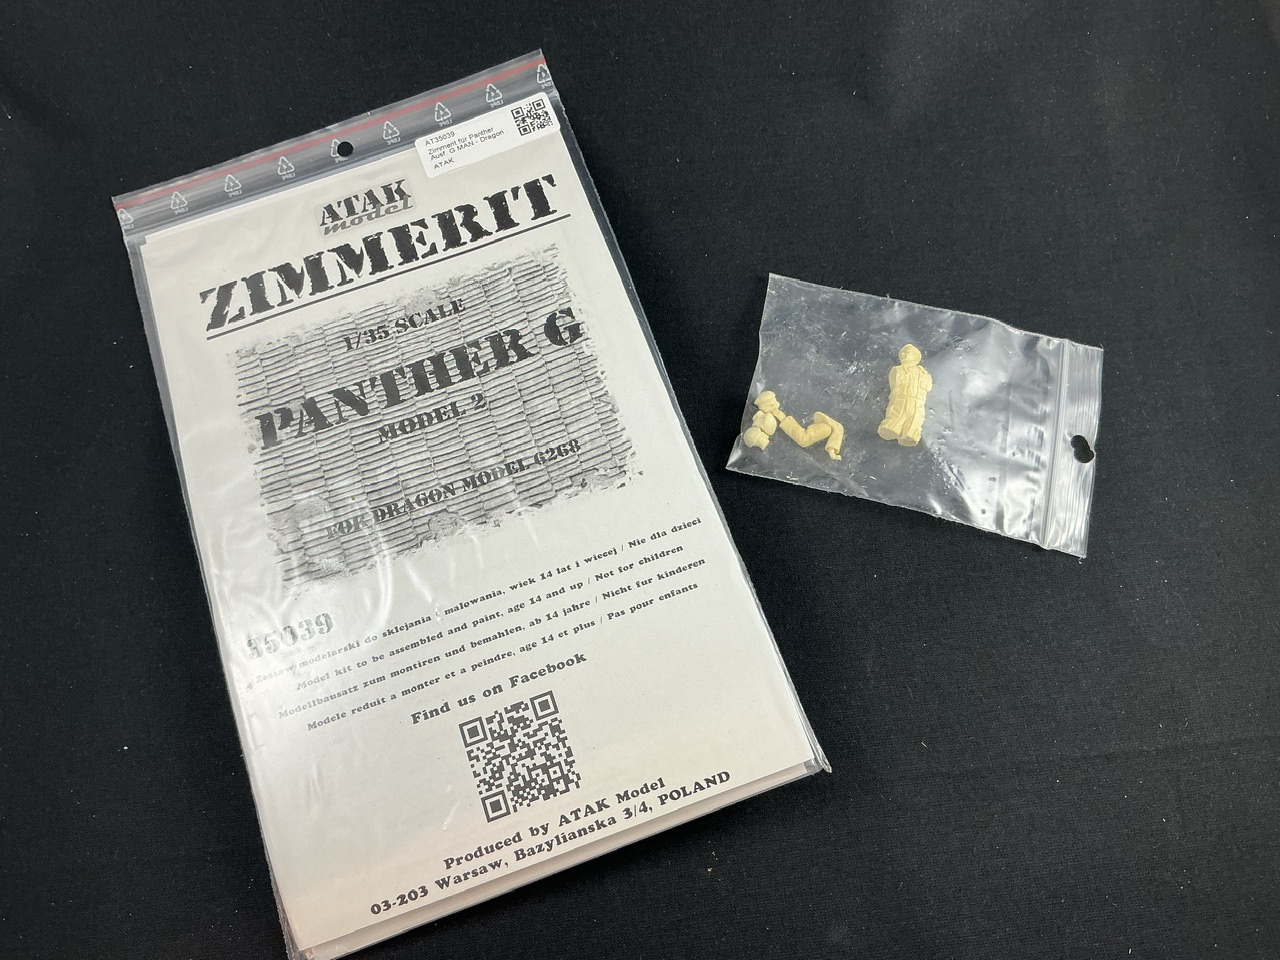
The tank was apparently produced by MNH, which those more knowledgeable about the Panther than I am, can tell by the Zimmerit pattern. Normally, I would just make Zimmerit myself from putty, but because of the details of the pattern are important to building an individual tank, I also bought an ATAK set intended for Dragon kit No. 6268 (mine is 6622, but I highly doubt any major parts are different):

IMG_2302.jpeg


The ATAK set includes a paper-thin resin sheet with Zimmerit "panels" you have to cut out, as well as a bag with some more three-dimensional parts like a gun mantlet and stowage bins with Zimmerit on them.

Also in the photo is an Ultracast British tanker figure who will likely end up in the commander's cupola :)

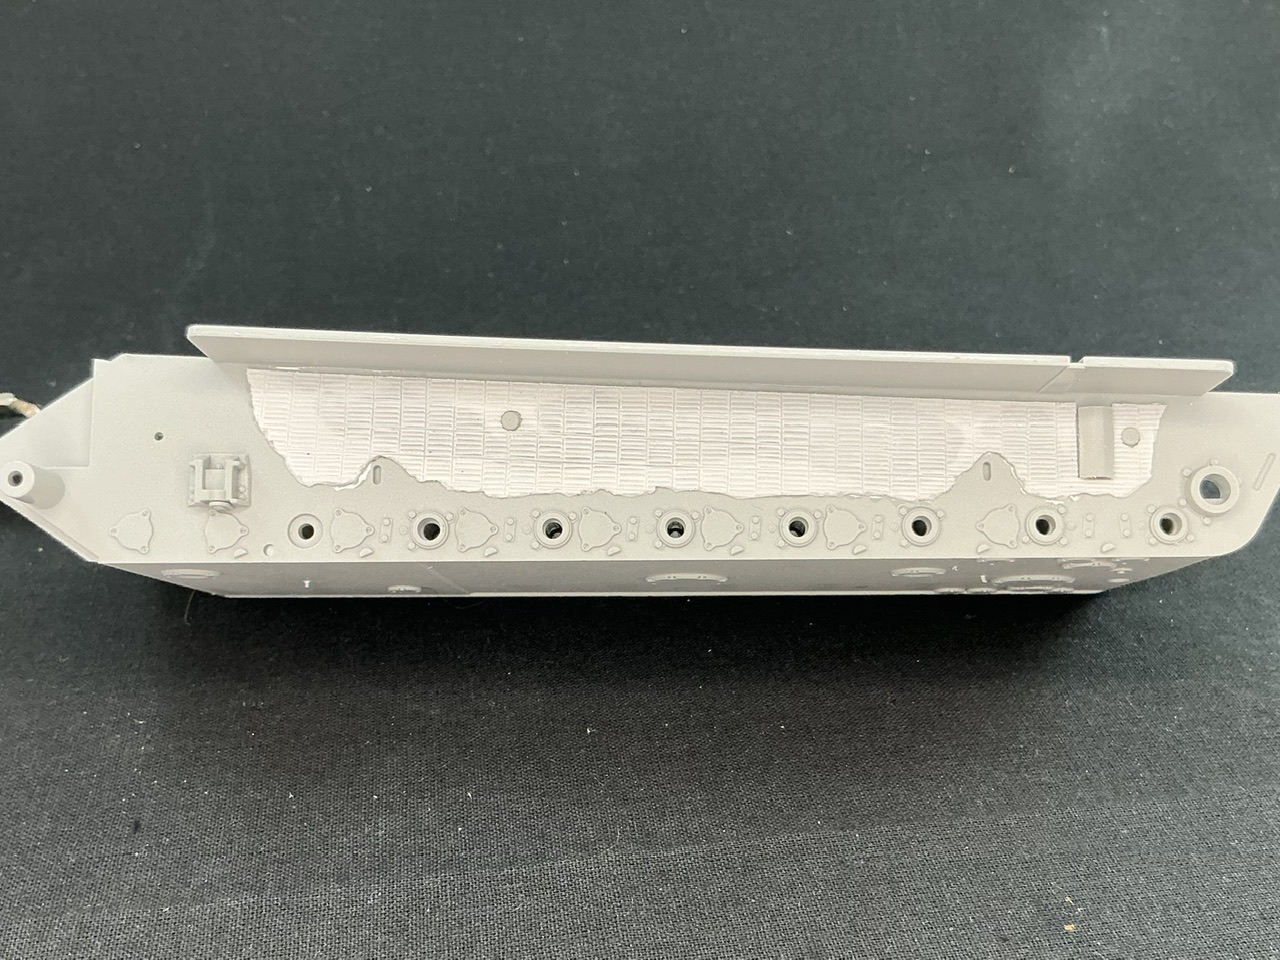
The instructions would have you start by fitting the suspension arms, but because there are Zimmerit parts for the lower hull sides, that is what I actually started with:

IMG_2303.jpeg


I attached plastic part A20 (the panel that pushes track pins back in), then cut out the Zimmerit for the hull side. I had to enlarge all three holes in it (for A20 and the two round things poking through) a little, but otherwise this was pretty painless. Another good thing about starting with these, I realised as I was cutting them out, is that if you mess up, it will all be safely hidden behind the wheels later :)
 
Dragon is known for instructions that aren't always as clear as they could be, and though I'm usually not overly troubled by that, I do think that in this kit, far too much is shown simply in place with only a part number pointing to it, which makes it very easy to miss the fact that you have to glue parts on at all. For instance, I didn't notice that the sponson floors are separate parts (C48 and C49) that must be glued to the lower hull. Those parts explain why, in my first picture of the kit under construction, the Zimmerit doesn't reach the sponson floor: that's because that isn't the sponson floor. Due to this, I had to cut away a sliver of the Zimmerit on both sides to make room for the floors. Had I noticed them earlier, I would have installed them before fitting the Zimmerit.

IMG_2304.jpeg


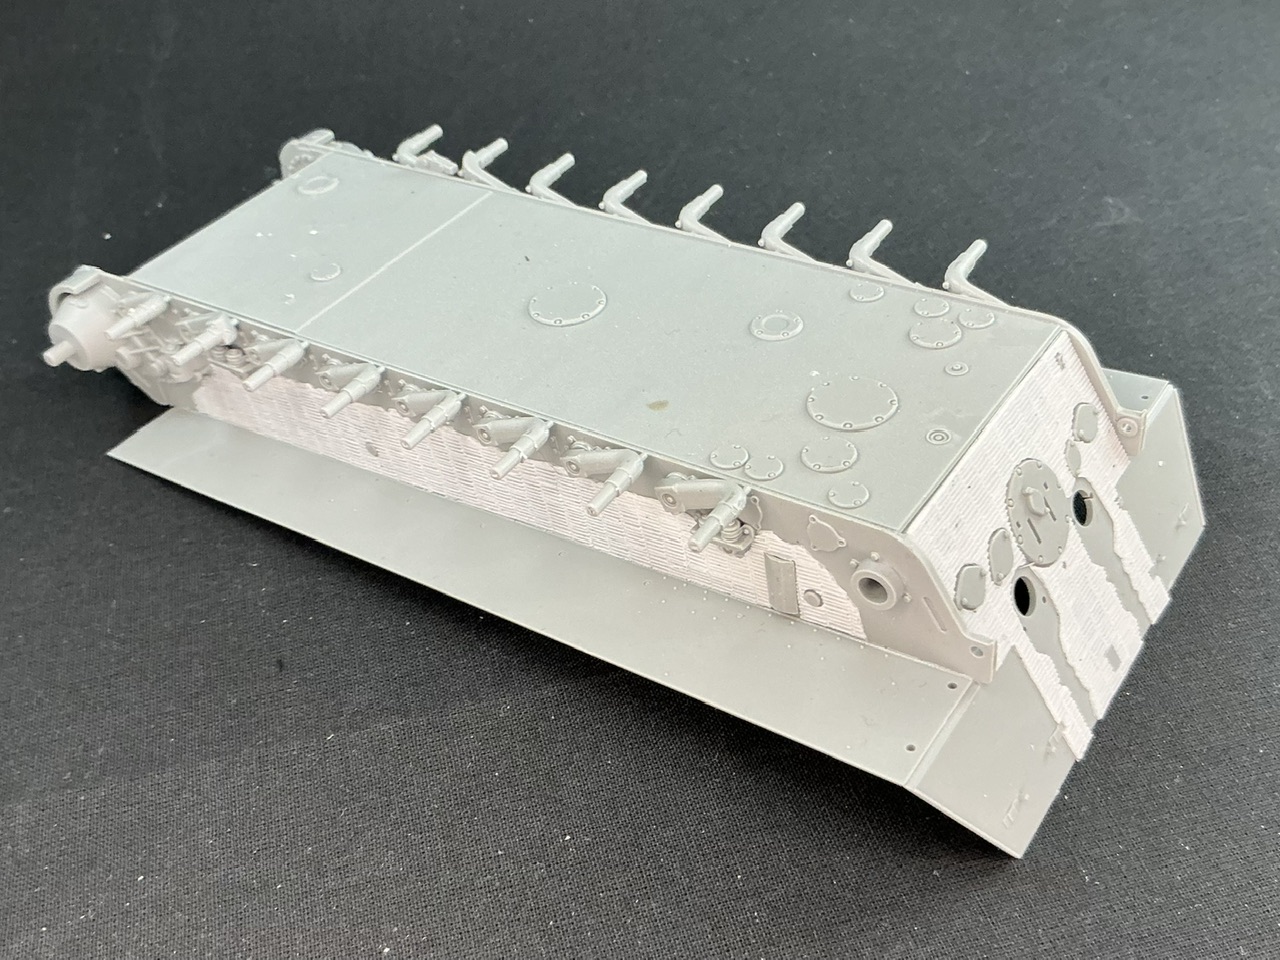
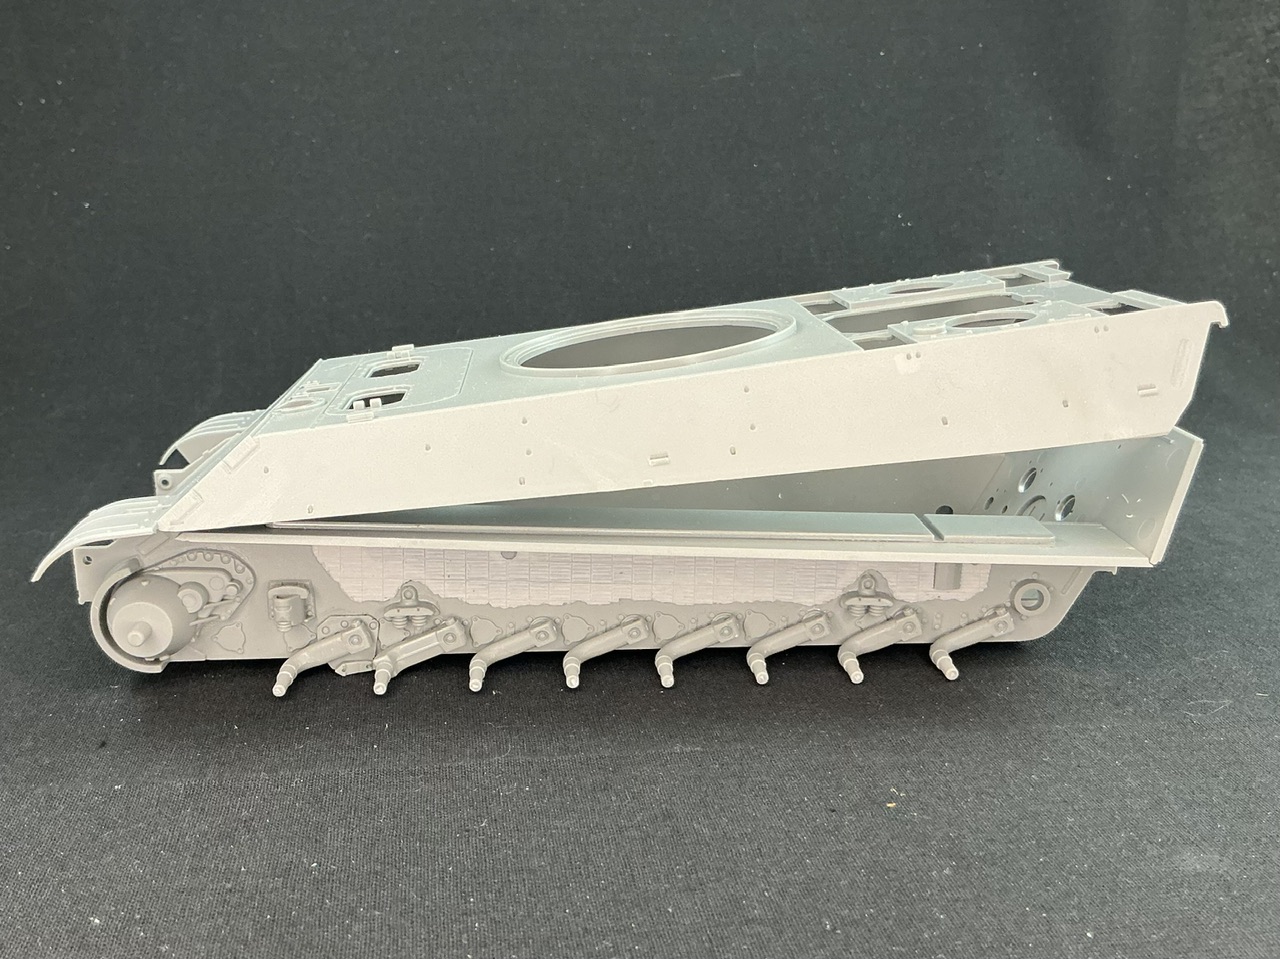
But they're on, as are the suspension arms. I cut the torsion bars off those because I don't see the point of working suspension at all (as an aside, the instructions don't even tell you that you could build the suspension as working if you want to …) and those lengths of plastic rod will come in handy some day :) I glued the Zimmerit to the rear plate before installing that in the lower hull, which proved to be a good choice. It took a lot of dry-fitting and fettling before the Zimmerit went on as it should.

However, something gives me the impression that the upper hull fit exactly as it should, but I can't quite put my finger on it …

IMG_2305.jpeg


;)
 
As an Amazon Associate we earn from qualifying purchases. Product prices and availability are accurate as of the date/time indicated and are subject to change.
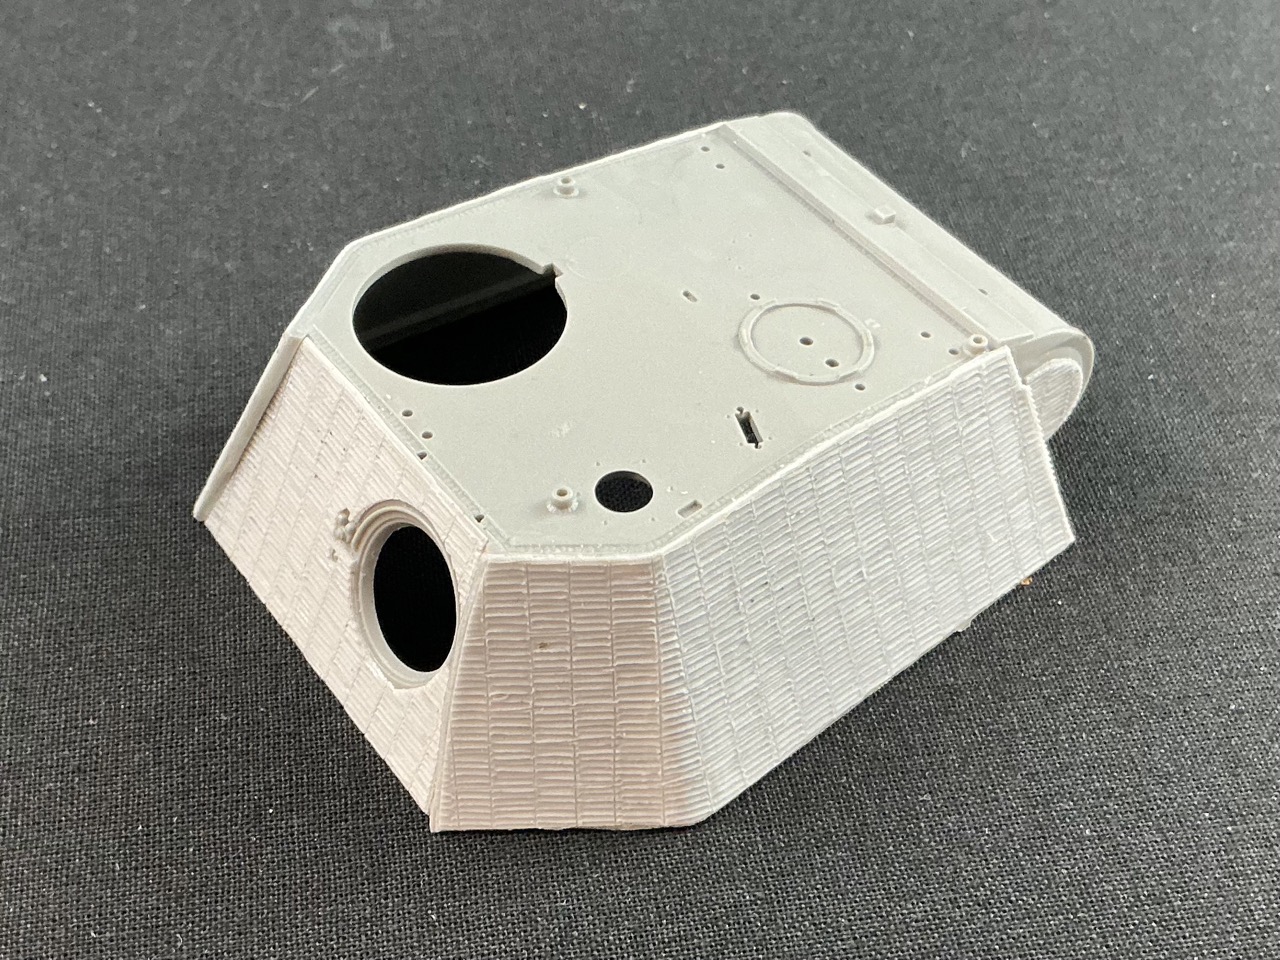
The Zimmerit is now also attached to the turret:

IMG_2307.jpeg


That was not as straightforward as it looks. The piece for the back required a lot of dry-fitting and fettling again, because I had glued the back wall into the turret first. With hindsight, it would probably have been easier to glue the Zimmerit to the back wall first, so that I could have trimmed it to match the chamfer on the back wall part once the glue had dried.

On the sides, I first glued the forward section, before the bend in the armour plate, and the rear part only once the glue on that had set. To get the rear section to fit neatly, I had to use a glue clamp, with a steel ruler between the Zimmerit and the clamp to spread the pressure more evenly.

BTW, you can see where there is no glue behind the Zimmerit:

IMG_2308.jpeg


The lighter spot in the middle, near the bend, is where no glue crept behind the resin.

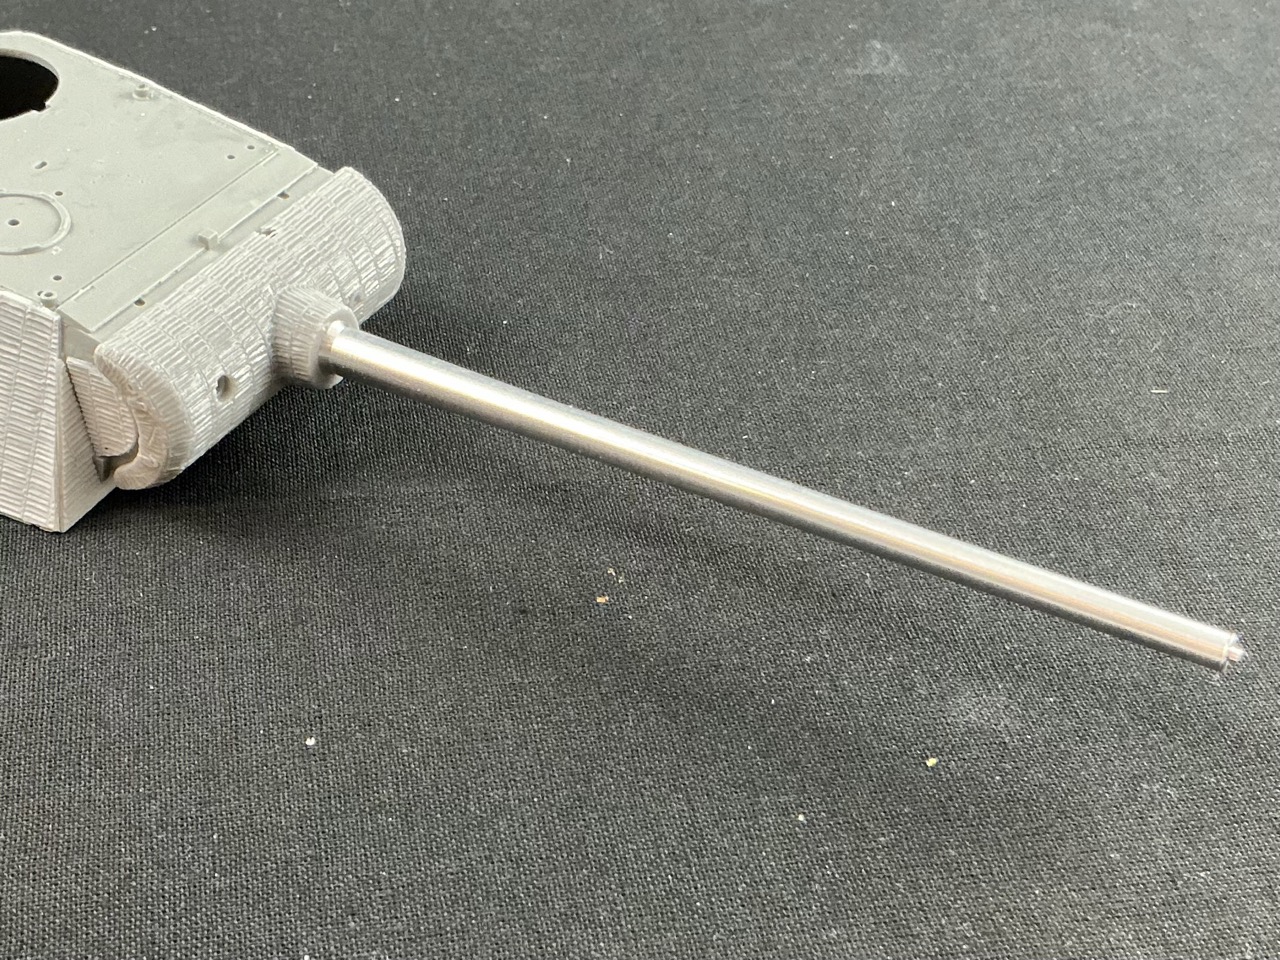
I also built the gun:

IMG_2309.jpeg


That isn't entirely straightforward. The barrel fits into the innards reasonably well, though with a bit of play, but to get the inner parts into the turret requires filing down the hinge blocks A31 and A32 a little, else they're very difficult to get into the turret at all. Also very odd is that there is a locating lug with a flat side on it on the front end of the gun, so that the muzzle brake will only fit one way. Yet the barrel rotates freely in the breech …

The gun shield is still loose, I'll only glue it on later. In the shield is an air bubble at the top edge, but that will be hidden by a rain shield that goes over the gun shield anyway, so I'm not worried about it.
 
If you only build North African things, then Zimmerit will not feature on your models, no :) It usually doesn't on mine either, but when it has, until now I've always made my own with putty. This ATAK set is certainly less messy and probably faster, but about as fiddly (though in a different way) and certainly a lot more expensive :)
 
Last edited:
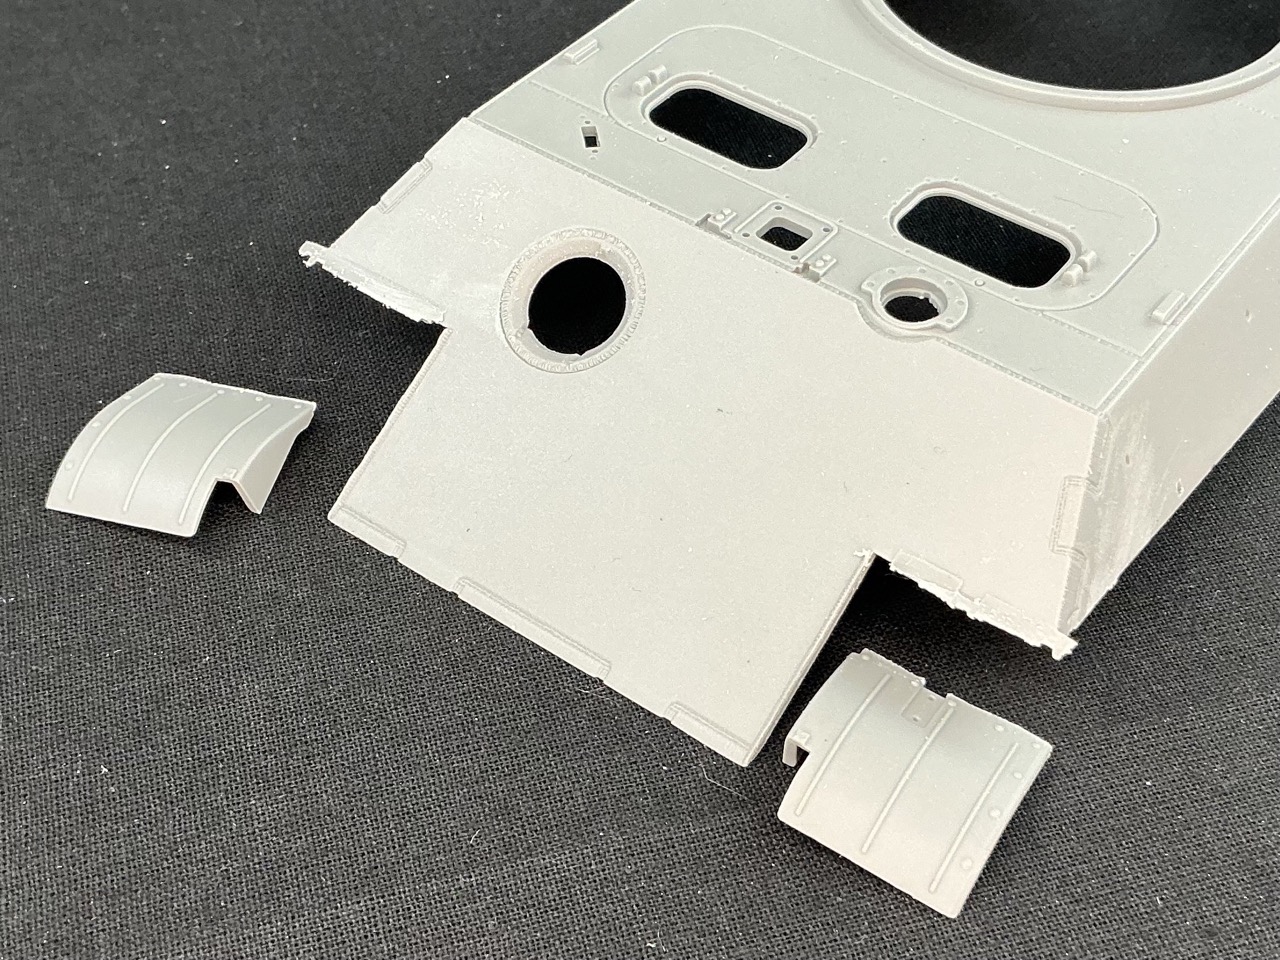
I had to take the mudguards off, because Cuckoo's are both bent and dented, which is hard to replicate with the plastic ones.

IMG_2312.jpeg


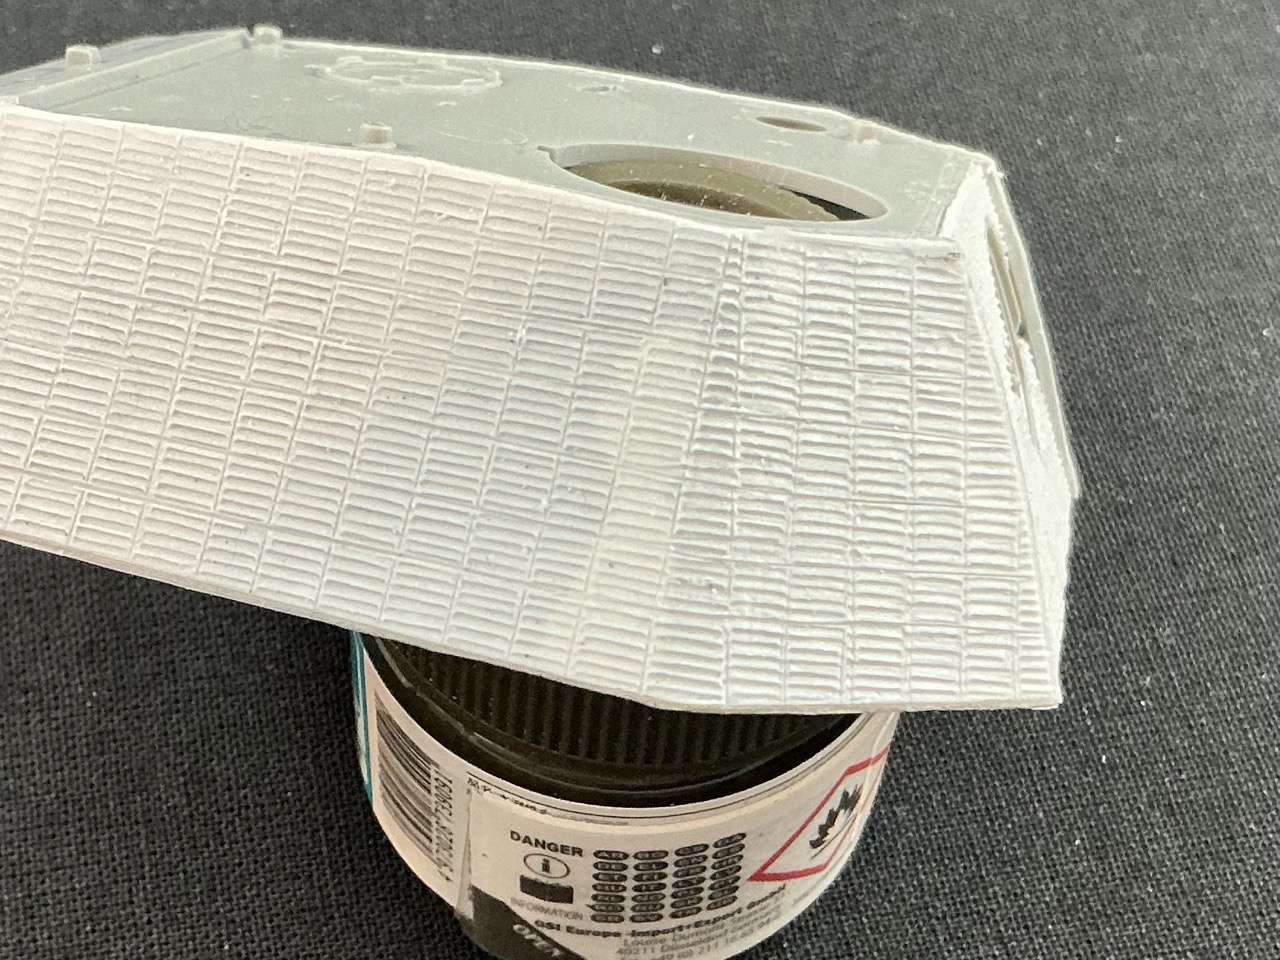
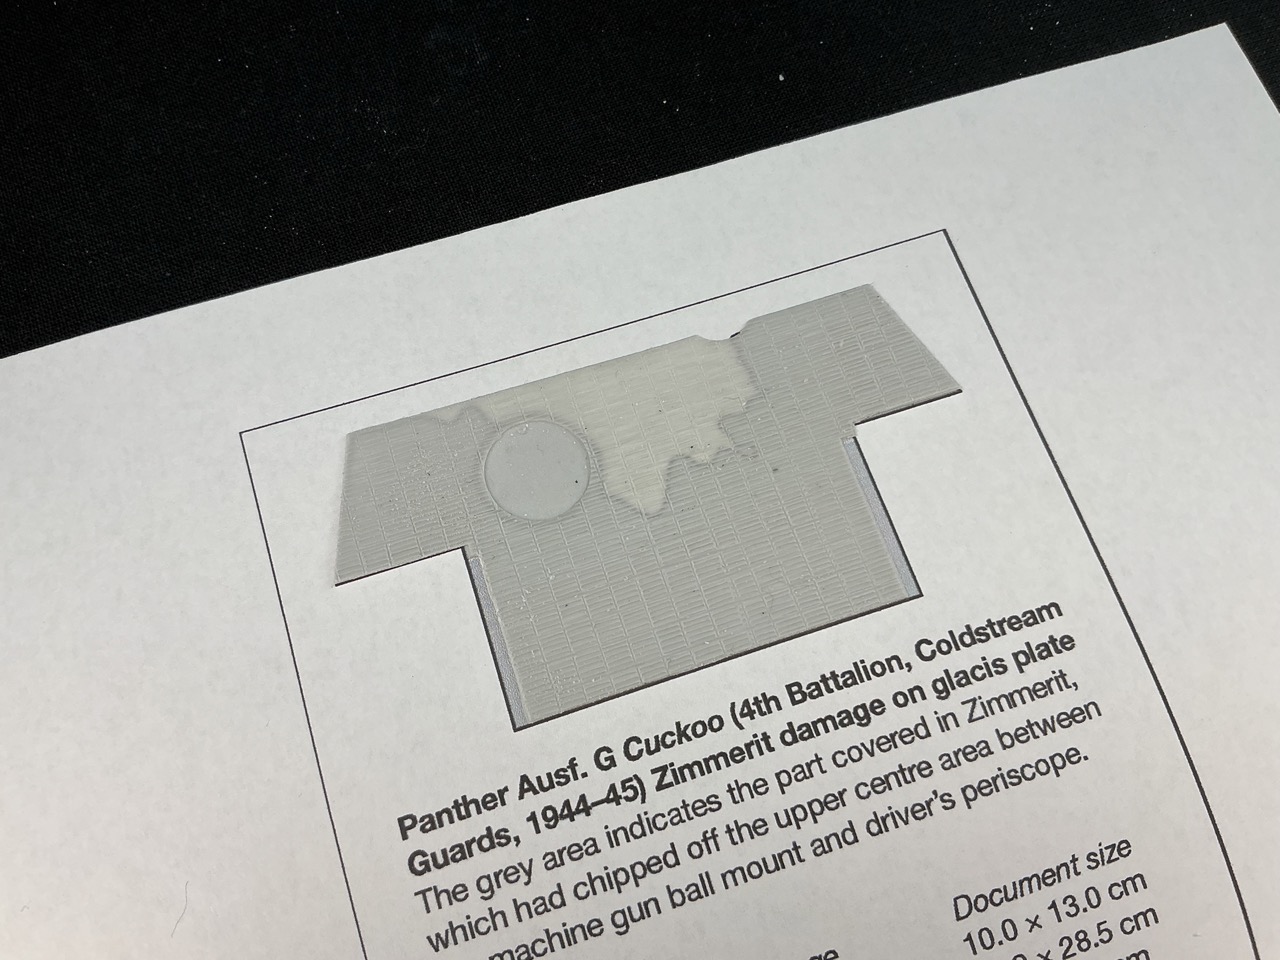
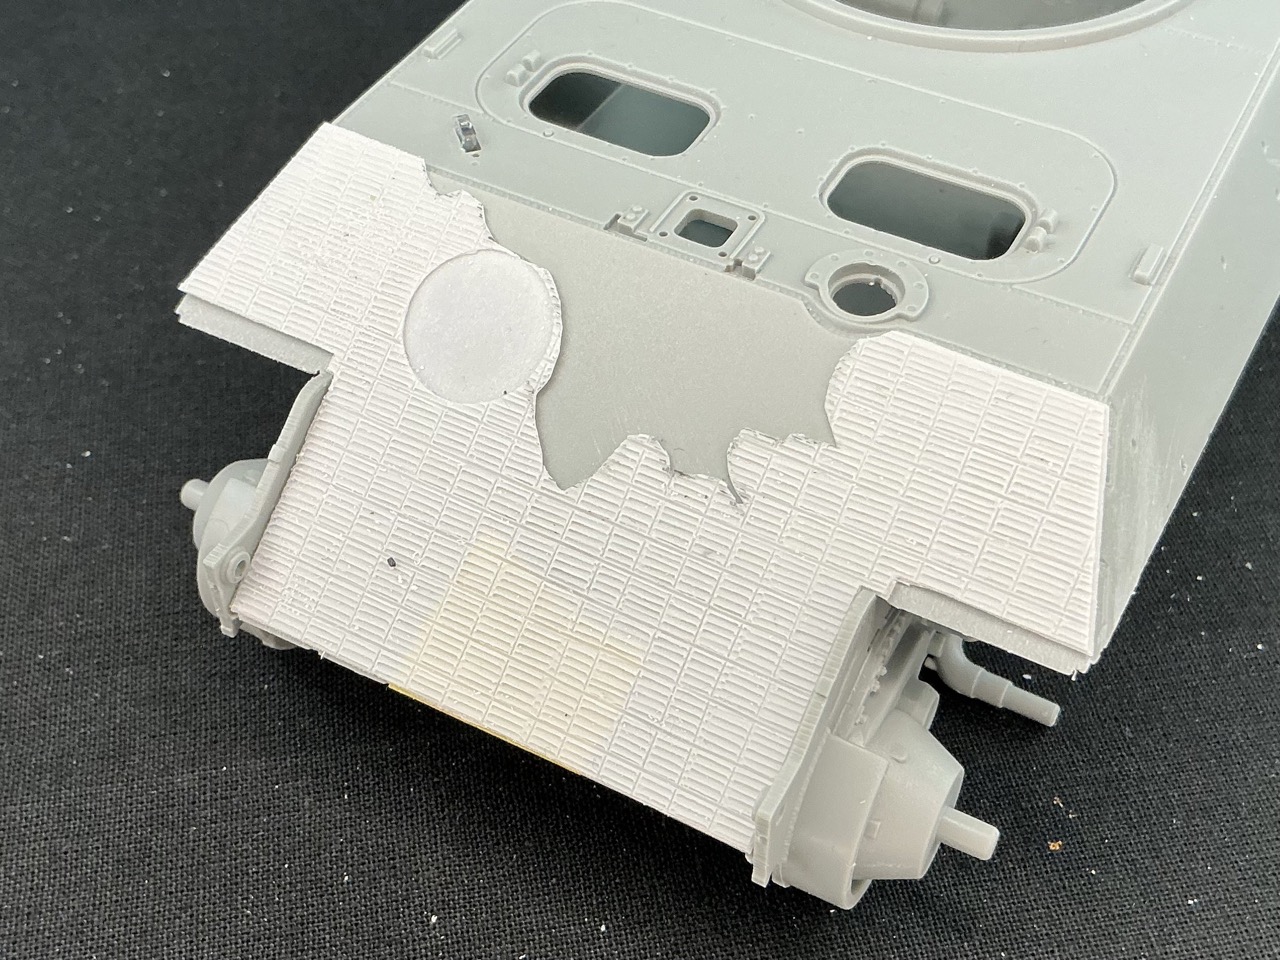
After I then glued the upper hull to the lower, I turned to the Zimmerit on the glacis. Pictures show that it was damaged towards the top, so I opened the well-known photo of the tank driving down a forest road in Photoshop, so that I could use the perspective crop tool to cut out the glacis and have a "straight-on" view of it. This let me stretch it to the correct dimensions horizontally and vertically, then trace over it in Illustrator. That way, I got a template that can be used to draw the extent of the damage on the ATAK Zimmerit (or on the glacis itself, of course). That template is attached to this message as a PDF file. The ATAK Zimmerit is translucent enough that I could just trace over the template with a pencil:

IMG_2314.jpeg


All that remained was to cut it out, make the edge a bit rougher and put it onto the model to take a photo:

IMG_2315.jpeg


It's not stuck down here yet, as I still had to cut out the opening for the bow machine gun, but once I did that I glued it on, and the rest as well:

IMG_2316.jpeg
 

Attachments

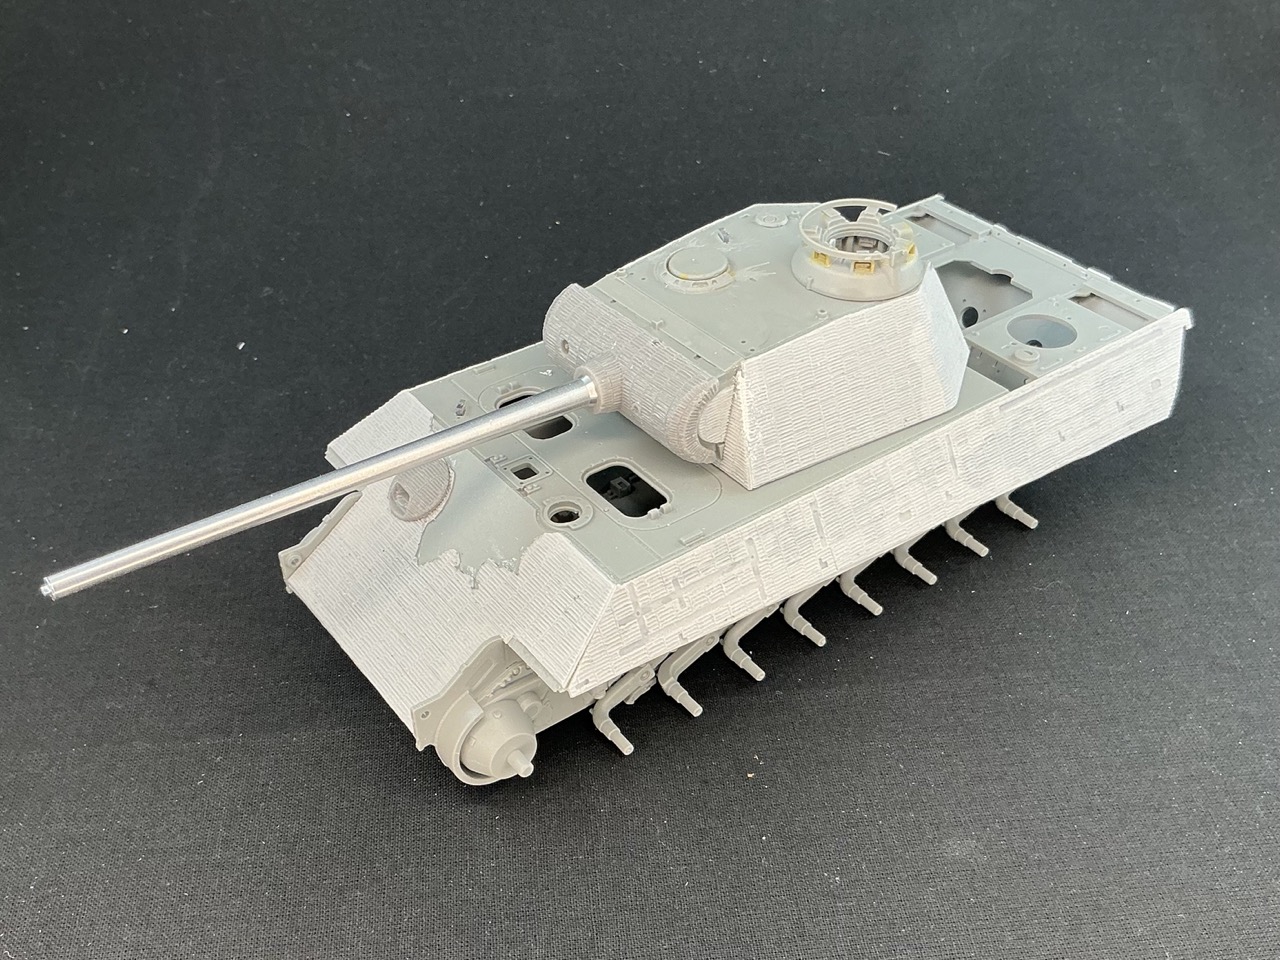
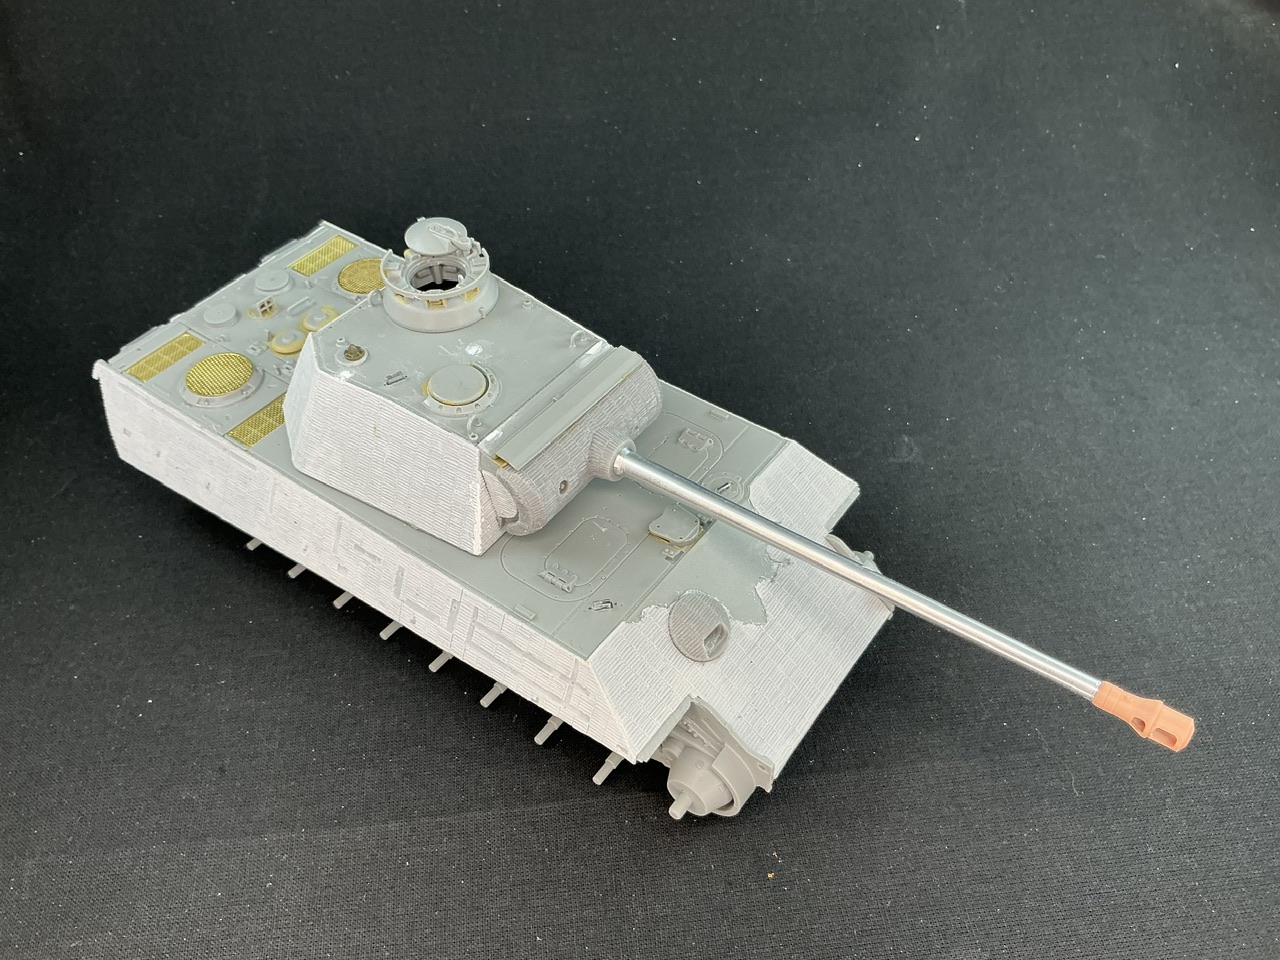
The turret is largely done now, except for a few details, and I also completed the engine deck (other than the German antenna):

IMG_2321.jpeg


The muzzle brake is a 3D-printed item that you get with the kit. One in plastic is also included, but with this one you don't have to remove a seam :) I put a British antenna base (from an Asuka Sherman) on top of the Nahverteidigungswaffe, in such a way that two bolts of the antenna base appear to line up with two bolts in that — and then I cut away the remaining four bolts and pricked little holes in their stead …

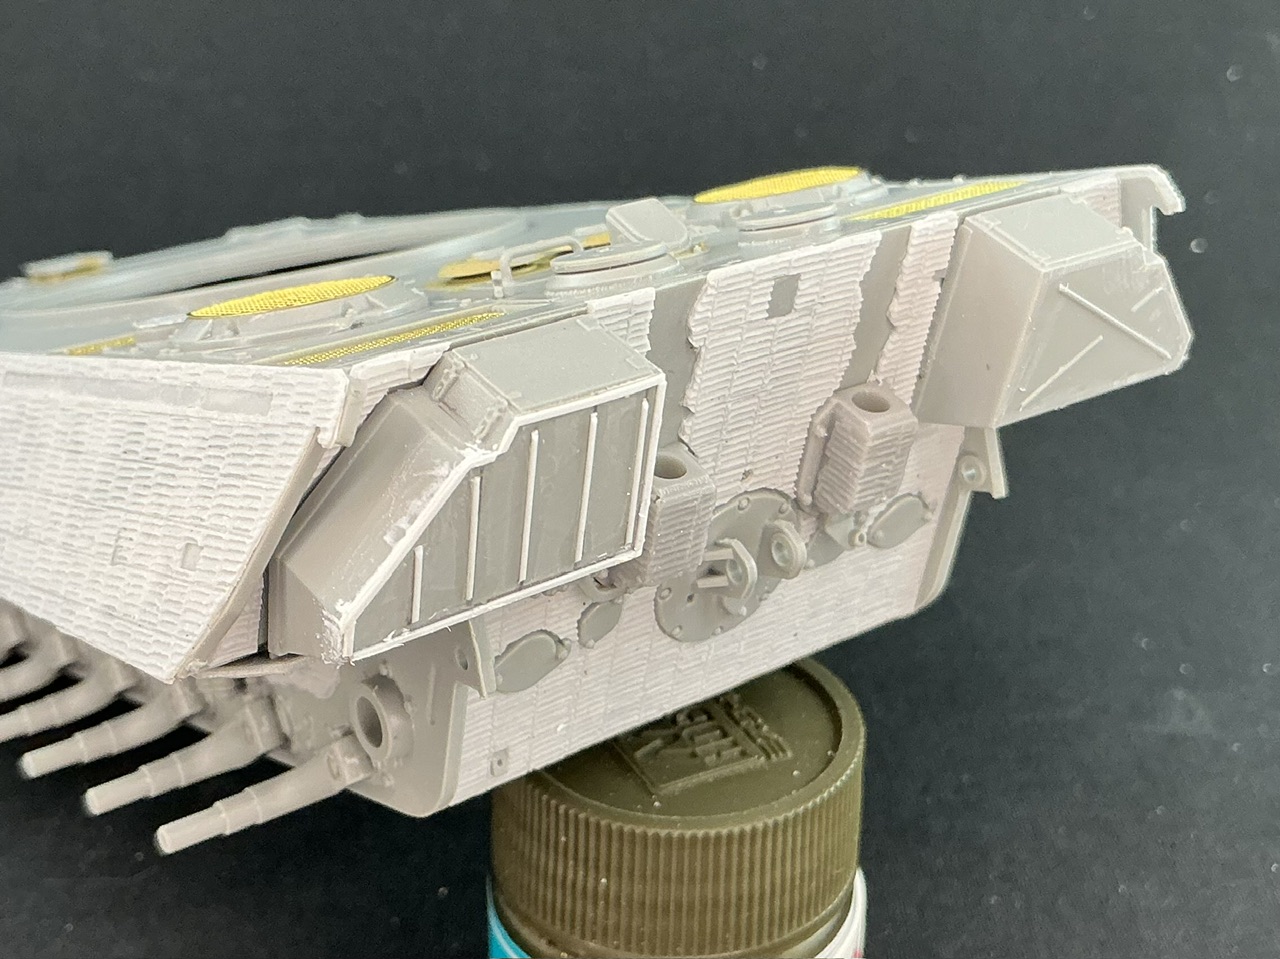
At the back, I converted the left stowage box to one with vertical ribs:

IMG_2322.jpeg
 
Contributing a feeling of real-worldness and visual interest!
If you're building a model of a real vehicle, this is the way to do it, if you ask me :) You see plenty of models of this particular tank if you just search for Panther Cuckoo but IMnsHO most of them are not particularly good replicas of it.

Dangit Jakko, too many masterpieces!
Nah, I'm not that great a modeller. I just try to build what I see in photos :)

I'm looking forward to you painting the exhaust and tracks the most.
I need to buy some track first :) The kit comes with separate-link tracks that have to be glued together, and I'm not a fan of those. I want to get some workable track instead and have one in mind, but haven't actually bought it yet. As I'll be at a model show for both days this coming weekend, I'll see if one of the traders there has a set (I suspect not, but you neer know), else I'll need to order it somewhere.
 
Outstanding and very interesting: not only the build but the research you did.
I never thought about building a real "historic" model, but I may follow your tracks and make one. Just need to find the right model and ensure I get enough historical information.
 
I've built a number, and quite enjoy trying to get the model to look as much like the vehicle in the photos as possible. The difficulty is twofold: one is finding enough photos that you can get a good understanding of the details of that specific vehicle, the other is that you may encounter unexpected things you have to alter or scratchbuild. In this case, that's mainly the front mudguards: they're dented and distorted, making them tricky to replicate.

I've also had models carrying things whose origin and/or purpose I could not discern, leading to some guesswork for how to actually build it. For example:

fullsizeoutput_1da8.jpeg


This Sherman had two squarish boxes on the mudguards, but they don't look like any part of a military vehicle I can place, so I just just worked out their dimensions and made something that looks like what I see in photos of the real tank. Even more enigmatic was the mat-like thing you can see at the top of the left side of the glacis (so upper right in the photo), with the track link lying on top of it. It looks like some wooden slats with string between them, but WTF it actually was, or why the crew felt the need to put it on their tank …? Your guess is as good as mine. So, some stretched sprue and plastic strip made a thing that looks like the pictures in which it can be seen, and that's about the best you can do.
 
Generic research into the vehicle will help with that. For Cuckoo, for example, you can tell it's a relatively early Panther G, because it doesn't have the chin to the gun mantlet — and it was definitely produced in October 1944 at the very latest, because it was captured late that month. This means that if I can't tell whether it actually had certain features or not, I just look at references to see around when those were introduced: if I feel it's too late, I use the early version (or take a guess at which one is the early version, because I'm quite far from being a Panther expert :) ).
 
In fact, I started building models a few years ago... and did planes and a few armored vehicle. Then made some dioramas to show them, but building something which has a real history is quite appealing. As said, will look into it.
 
building a model of a real vehicle
... when it comes to softskin vehicles, in many cases there were literally tens of thousands and more, for example the CMP60 variants, over 200,000 built in Canada alone.
I find that drilling in on a particular theater, operation, unit and sometimes individual, gives me even more reasons to care about a build... beyond the technical details and difficulty of assembly, which are in themselves very real factors affecting the enjoyment of a build.
If I'm successful, I think that reason to care is passed on to the viewer, adding human interest and relevance. A story.
I applaud your attention to those details, often answers to questions you must be asking yourself: Why? What? Where? When? Then the inevitable 'How' to answer those questions in your rendition of that particular vehicle.
 
You obviously know quite a lot..... Bravo
I've just read a reasonable amount about Panthers and own two good books¹ and a couple of decent ones on it :) However, I do know more than a little (and a lot more than most) about armoured vehicles in general, which helps a great deal in researching vehicles I'm not that knowledgeable about. Also a great aid is asking questions on sites like Missing-Lynx, where a lot of the real experts about many different tanks etc. hang out.

building something which has a real history is quite appealing. As said, will look into it.
My advice would be to give it a go. You have nothing to lose, really: if it doesn't work out, you can always just call it a generic example of the vehicle :)

If I'm successful, I think that reason to care is passed on to the viewer, adding human interest and relevance. A story.
I wouldn't go that for for the things I've built from photos, but I do like to show pictures of the real thing along with the model, which will help people make up their own story :)

I applaud your attention to those details, often answers to questions you must be asking yourself: Why? What? Where? When? Then the inevitable 'How' to answer those questions in your rendition of that particular vehicle.
Sometimes, though, you just have to say: "I don't know what this is or what it's for, but «this» is what I see in photos, so I'll just build something that looks like it." And then, chances are that later, you will discover you got it totally wrong :)


¹ Spielberger's Der Panzer-Kampfwagen Panther und seine Abarten and Culver & Feist's Panzerkampfwagen Panther.
 
You ain't wastin no time Ruckin on this one, excellent, Jakko!

You obviously know quite a lot..... Bravo
Ya, ya kinda gotta have your ducks lined up if you go against what Jakko says. No, he's not God, but he does his research. He might seem a little over the top at times, but it's the knowledge he carries in how to find the answers is what is beneficial to the subject matter at hand. He's corrected me a few times, actually very helpful. I mess with him from time to time, but he's a fine chap!

Ok, Jakko, I'll be expecting that check in the mail, any day now.:p ;)
 
You ain't wastin no time Ruckin on this one, excellent, Jakko!
I wish :) I had a bit of a setback with the model, explained below.

Ya, ya kinda gotta have your ducks lined up if you go against what Jakko says.
Thanks for the praise, though I'm far from infallible — especially if I rely on my memory instead of looking things up …

Ok, Jakko, I'll be expecting that check in the mail, any day now.:p ;)
Lucky escape for me there, then ;)


As for the setback …

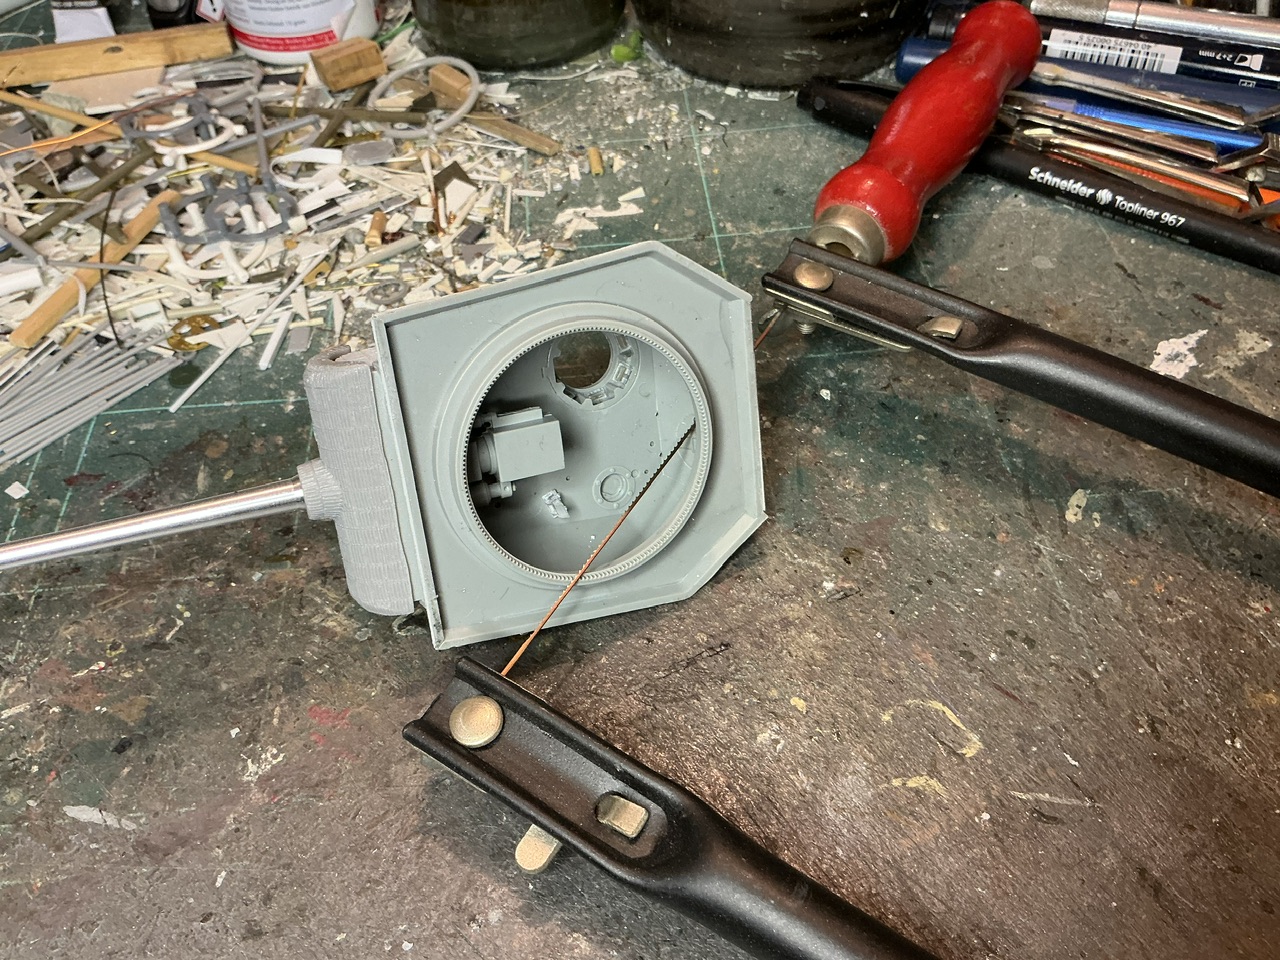
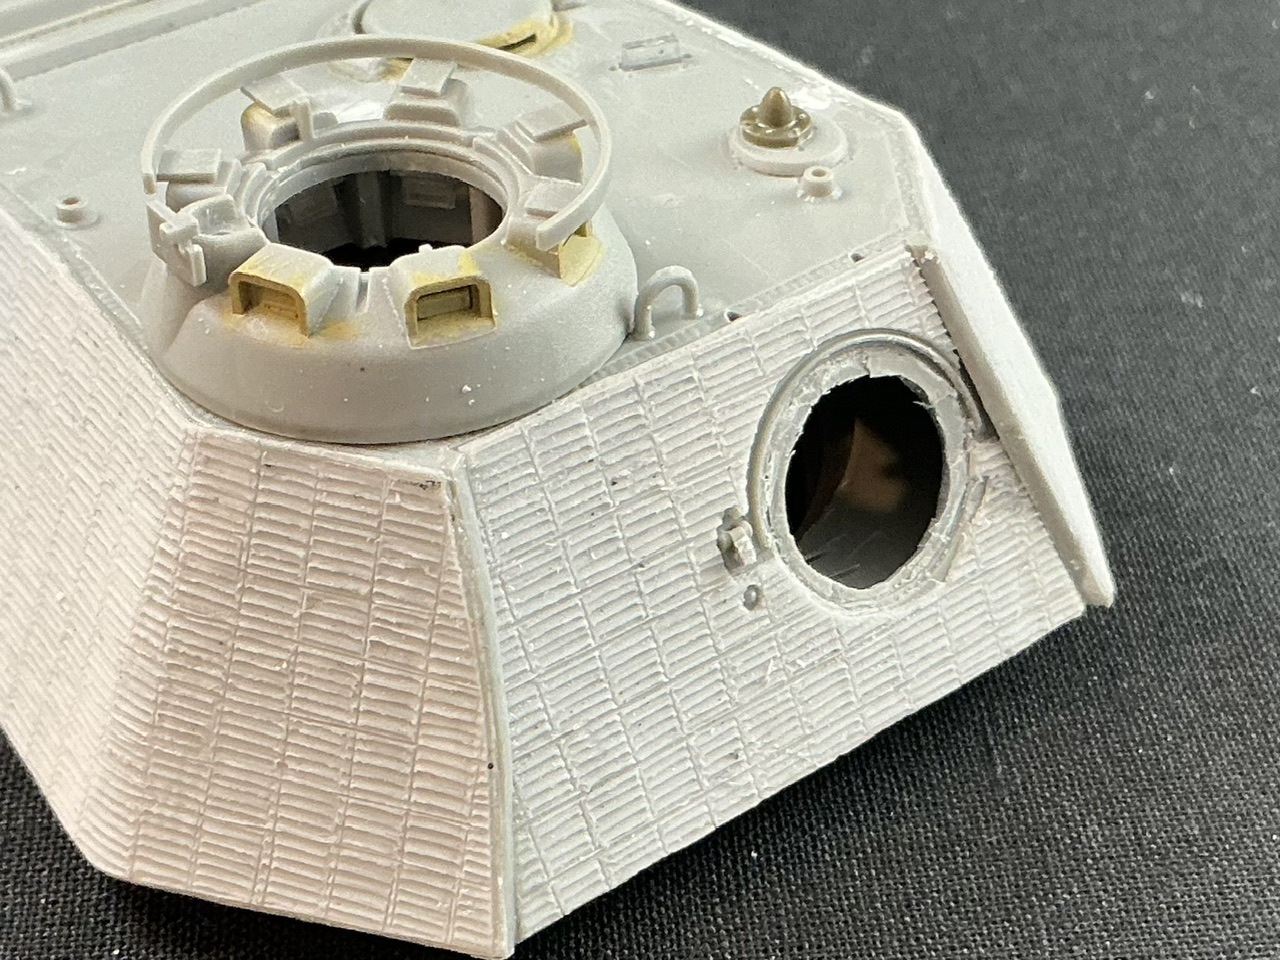
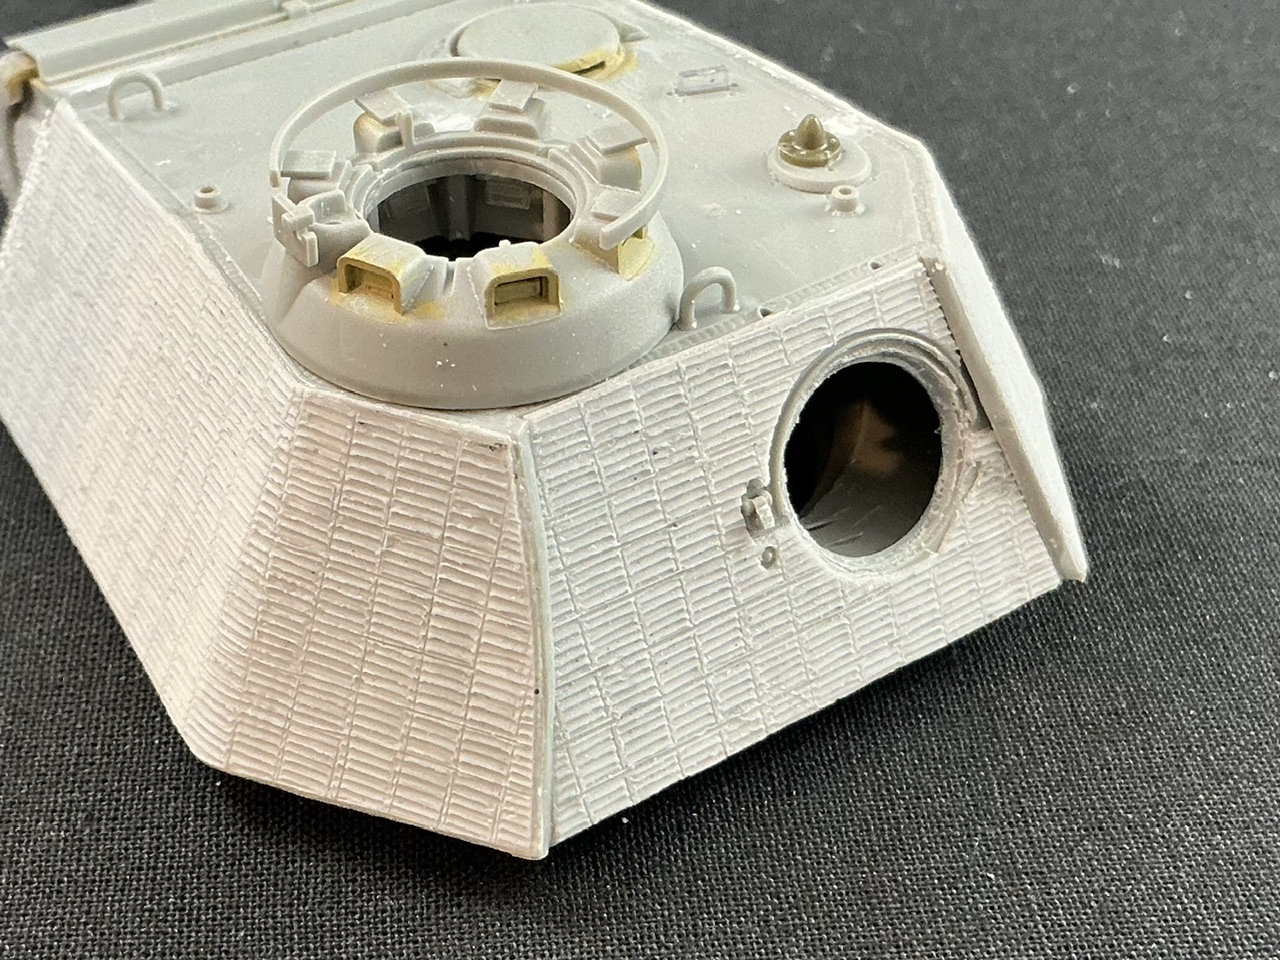
On Missing-Lynx, Tom Houman mentioned earlier tonight that an article in Trucks and Tracks says Cuckoo's loader's hatch was stuck in the open position … I glued it shut a few days ago, largely because I didn't feel like adding all kinds of stuff inside the turret that would be visible if it's open. And because I hardly ever just tack parts in place, it didn't want to budge at all anymore :( Time for rigorous solutions:

IMG_2332.jpeg


Drill hole, put jigsaw through and saw carefully, taking care to stay within the lines on the inside:

IMG_2334.jpeg


That's the easy part done. I then took a sharp knife and a half-round file to enlarge the opening to the diameter on the inside, because on the real Panther (and the model), the opening has a bevelled edge. But trying to add that in one step us asking for trouble.

IMG_2335.jpeg


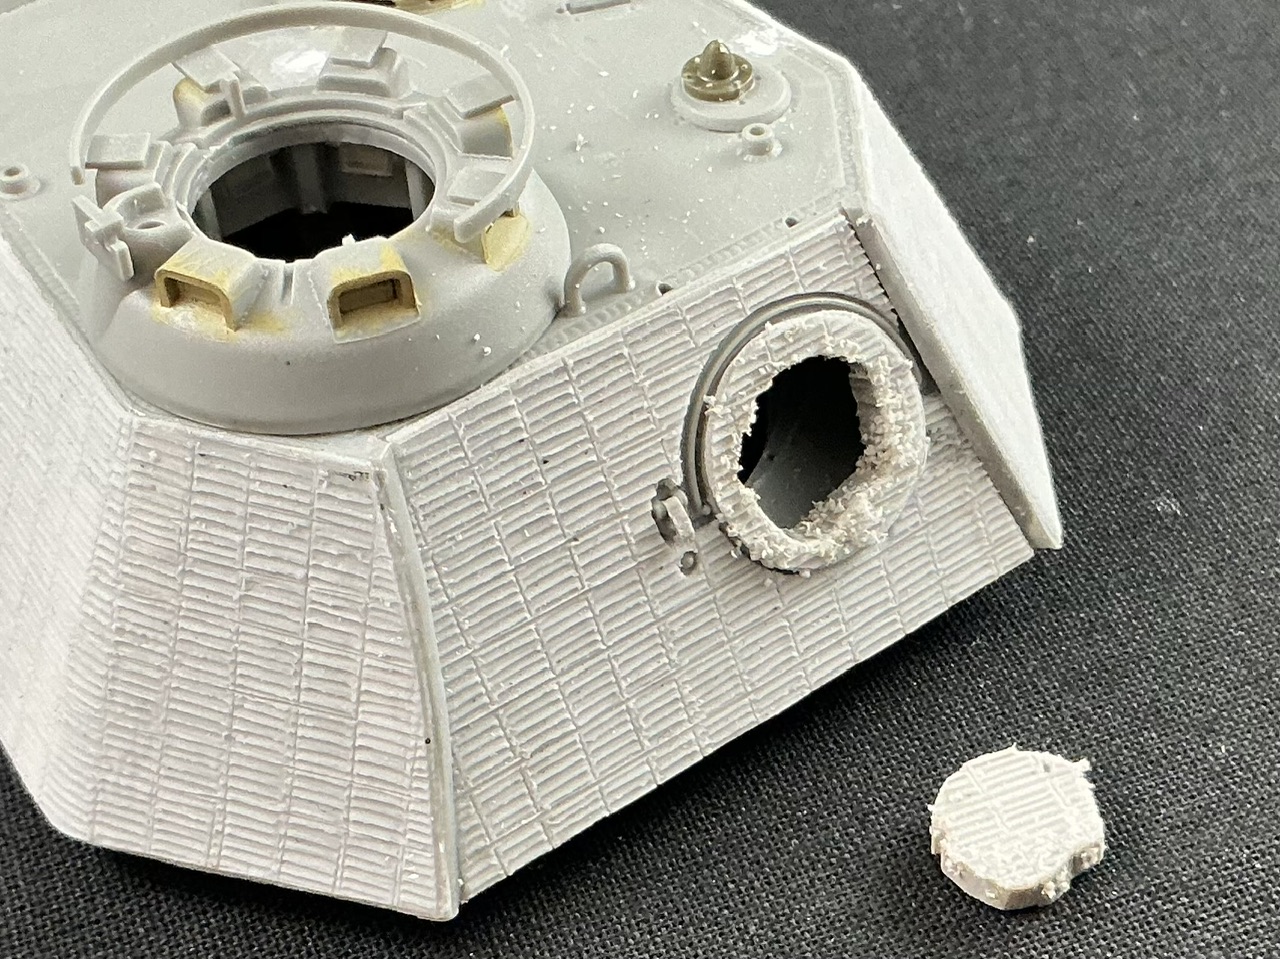
After that, I used three different shapes of blade (pointy, rounded and chisel) to remove the
remaining part of the hatch on the outside:

IMG_2336.jpeg


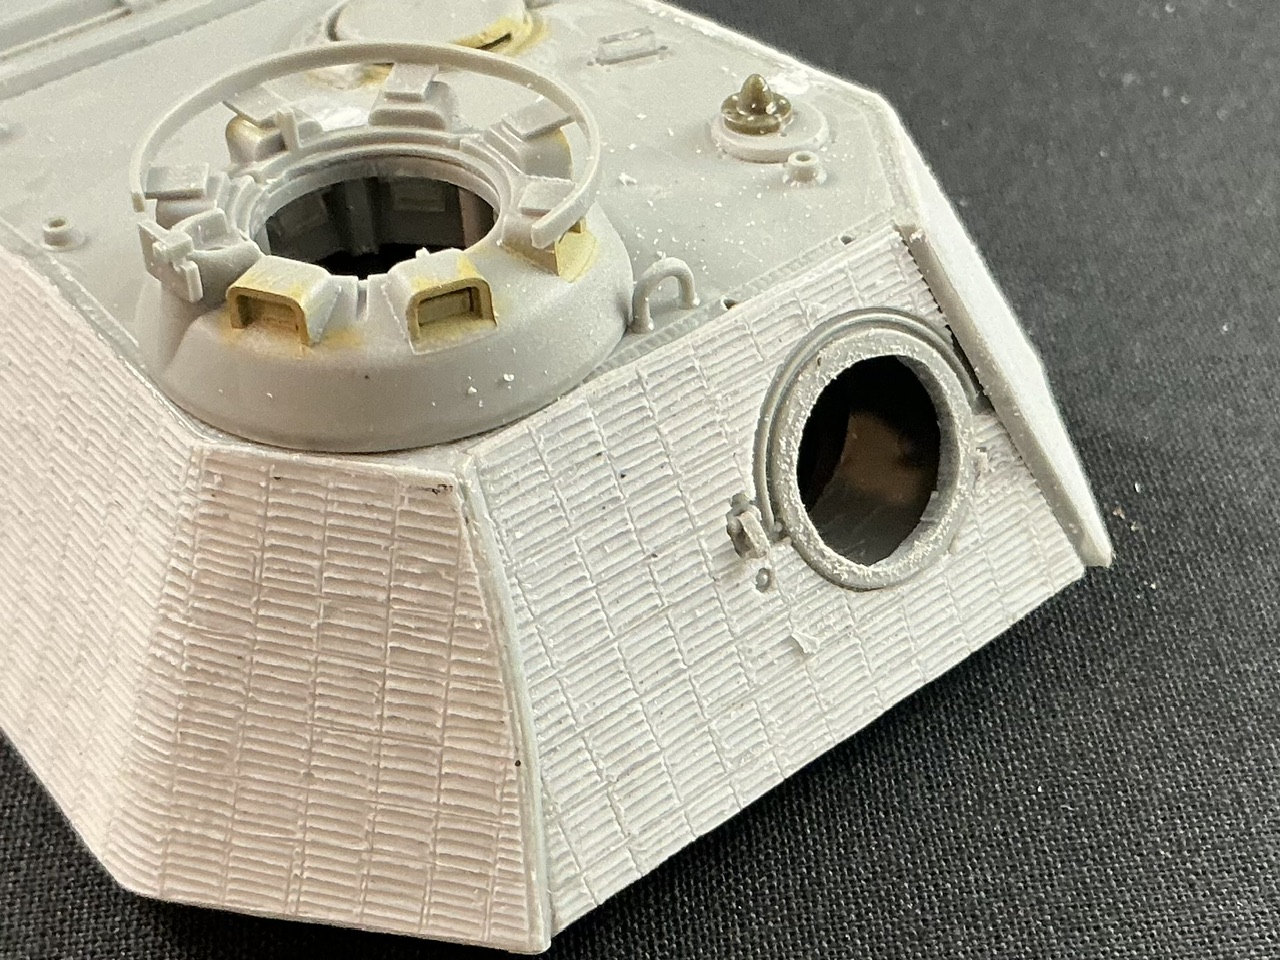
That's was mostly a matter of finding the right depth, where the layer of glue is. Once the outer part was gone, I had to try and restore the bevelled edge , which luckily went fairly easily because of that same glue layer:

IMG_2337.jpeg


This because once I had located it, I could simply follow it to get the last remains of the hatch out. I did feel a bit like an archaeologist, though, having to find and follow specific layers of material :) The edge still needs to be cleaned up a bit, but after half an hour of work (plus the time needed to decide that pressing or punching the hatch out wasn't going to work) I had had enough for today :)

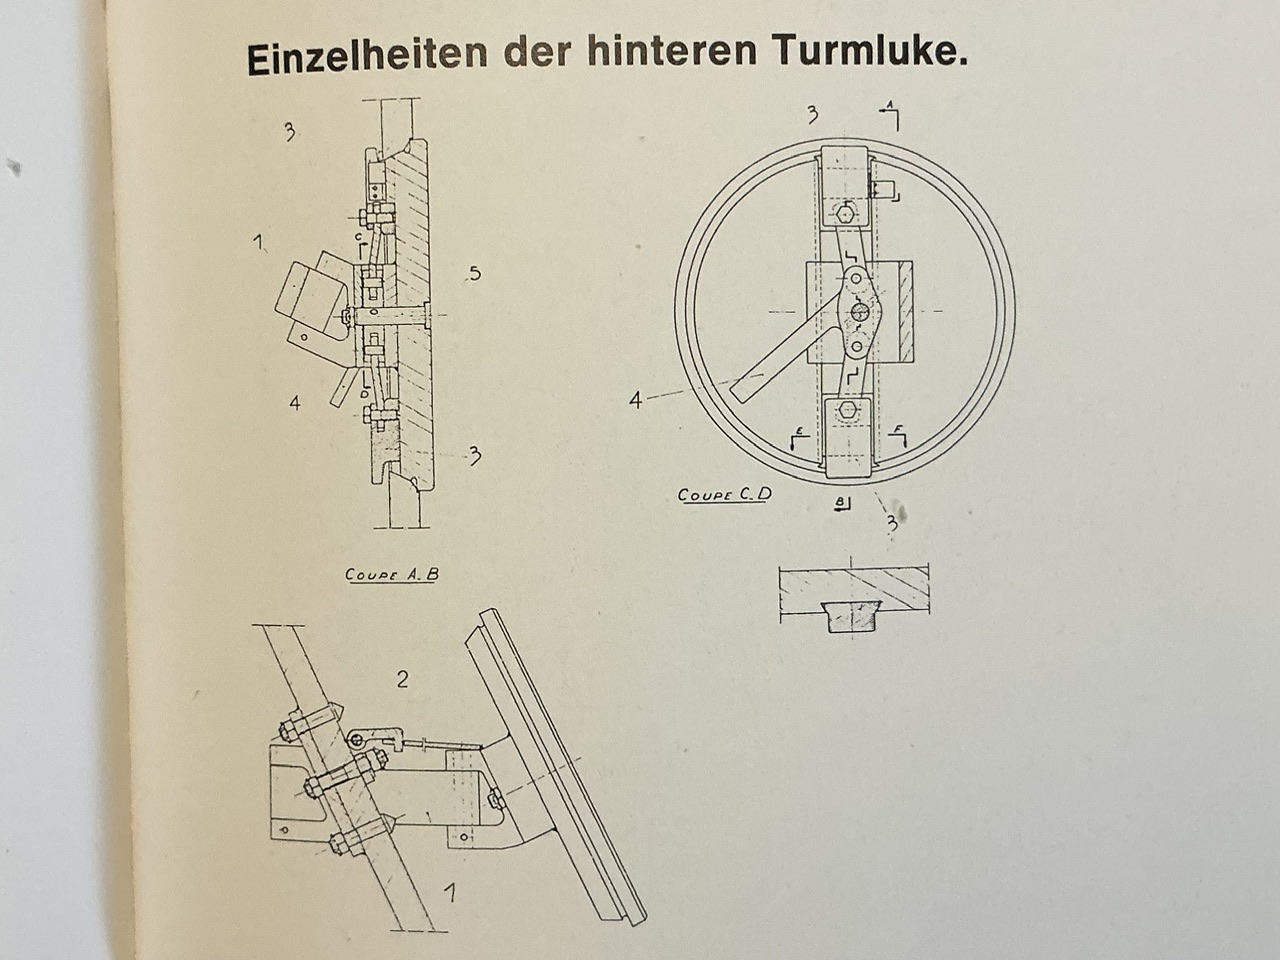
Now all I need to do is make a new hatch, but luckily, Spielberger comes to the rescue there with Der Panzer-Kampfwagen Panther und seine Abarten:

IMG_2338.jpeg
 
you could have used artistic license and let it go at that
I could, but then it would not have been a replica of Cuckoo that's as accurate as I can make it :) With which I mean the details of this particular vehicle — I never really care if every nut and bolt is on, or if things are properly to scale thickness, as long as they look right. But what I do care about with models like this, is that the particulars of the individual tank are represented. The hatch not wanting to close (for some reason that I don't know) is one of those particulars to me :)
 

Latest posts

Back
Top