Tamed Panther: “Cuckoo”

Scale Model Addict - Model Tips, Guides, Tools & Tech, Tutorials, and Community

Help Support Scale Model Addict:

The hatch not wanting to close (for some reason that I don't know) is one of those particulars to me :)
You sound about as anal retentive as me, at times. Understood and appreciated. My Harley and R75, same drive for accuracy. That really is the beauty of this "Sport", being as detailed, or not, as we wish. Ruck On, Bby!
 
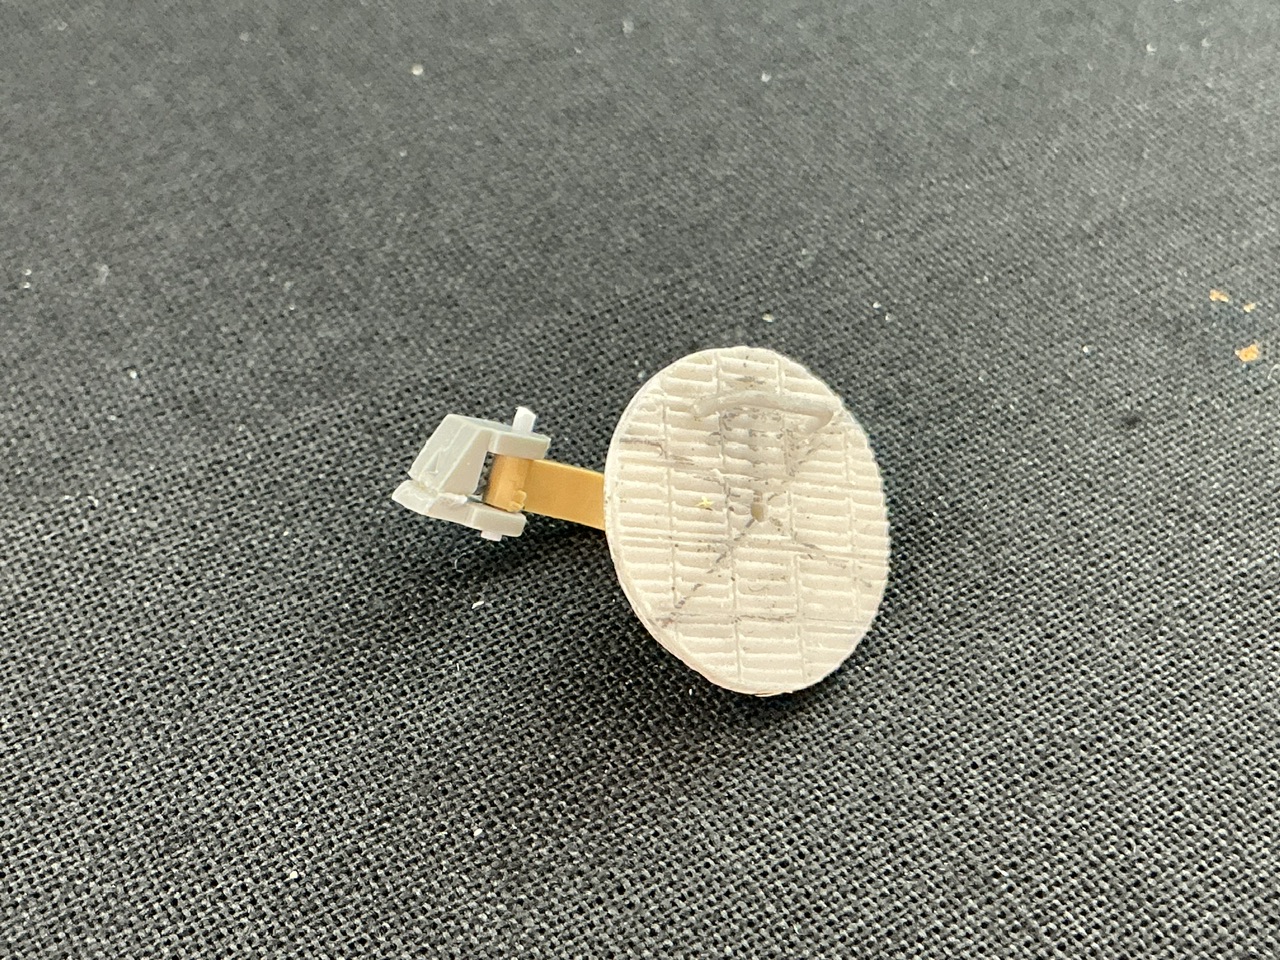
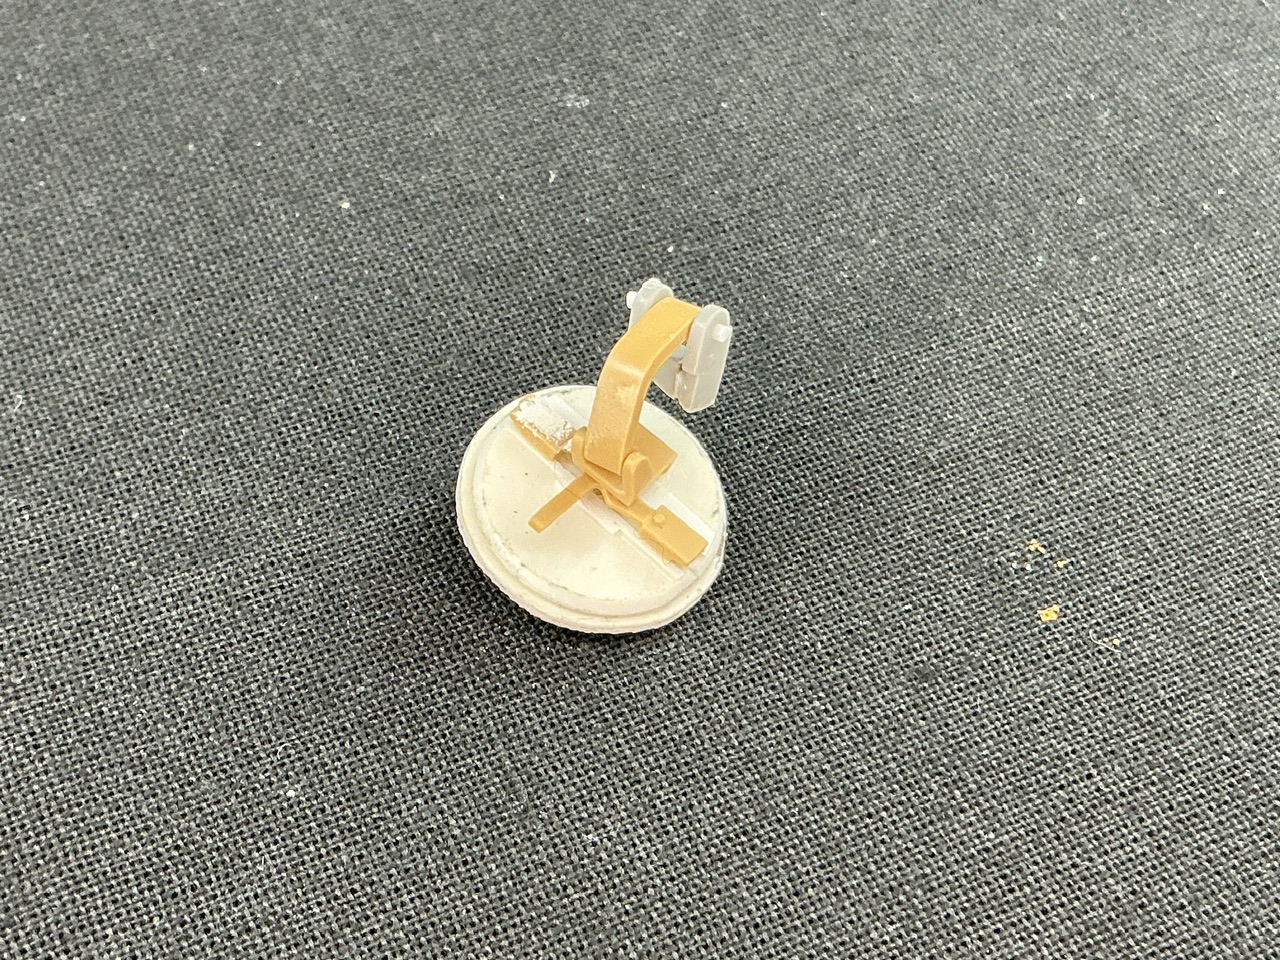
About two weeks have passed since I did any work on this model, but I finally got round to rebuilding the loader's hatch with parts given to me by another modeller (thanks, Rob!).

IMG_2400.jpeg
IMG_2401.jpeg


I first made the outer part of the hatch by punching a 15 mm disc from 0.75 mm plastic card and glueing it to the piece of Zimmerit I had cut from the glacis plate — there was just enough material to do that. I made sure that the lines in the Zimmerit pattern on the hatch match those on the turret, as I would expect them to on the real tank if the hatch is closed. The inner part of the hatch is a 14 mm disc of 0.75 mm card, but with the edges bevelled, and then glued to the outer part with a 13 mm disc of 0.25 mm card between them. In the centre of the outer part of the hatch, I drilled a hole for the lock that the real hatch has.

Some plastic strip on the inside formed the base for the locking mechanism and hinge. The tan parts are the ones that were given to me, and come from an RFM Panther kit, while the grey ones are from my own Dragon kit. This mainly because there were no parts for the hinge that sits inside the turret among the RFM parts I got. I drilled through the hinge bar to glue in some plastic rod to form a hinge pin that fits the Dragon hinge parts, though I needed to glue a plastic card shim in the latter because the RFM bar is slightly thicker than the Dragon equivalent.

It still needs a bit of plastic strip adding to represent the plate that the latch locks into, but it wasn't among the parts I got either, so I've decided to only make it once the hatch is in place.

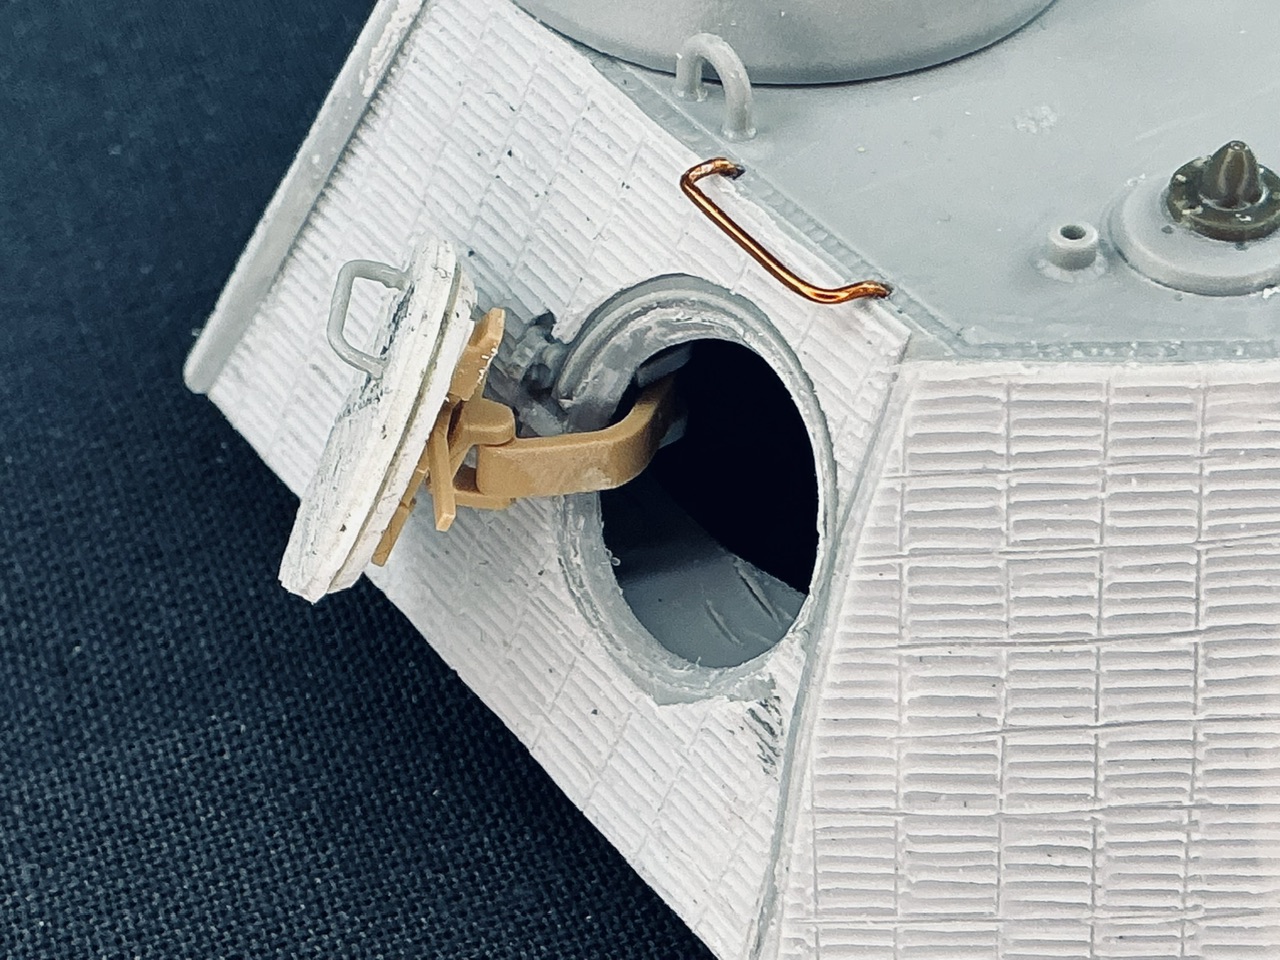
When all of this had dried, I glued the inner hinge to the turret:

IMG_2402.jpeg


The hatch can still open and close here, because that piece of strip I mentioned still needs to be added.

I also made a new handhold on the turret roof from copper wire, as a replacement for the kit part that went flying from my tweezers and was never seen again.
 
As an Amazon Associate we earn from qualifying purchases. Product prices and availability are accurate as of the date/time indicated and are subject to change.
And improving it, because the RFM parts are much more extensive than the Dragon ones. Dragon just gives you the hinge, nothing at all for the locking mechanism.
 
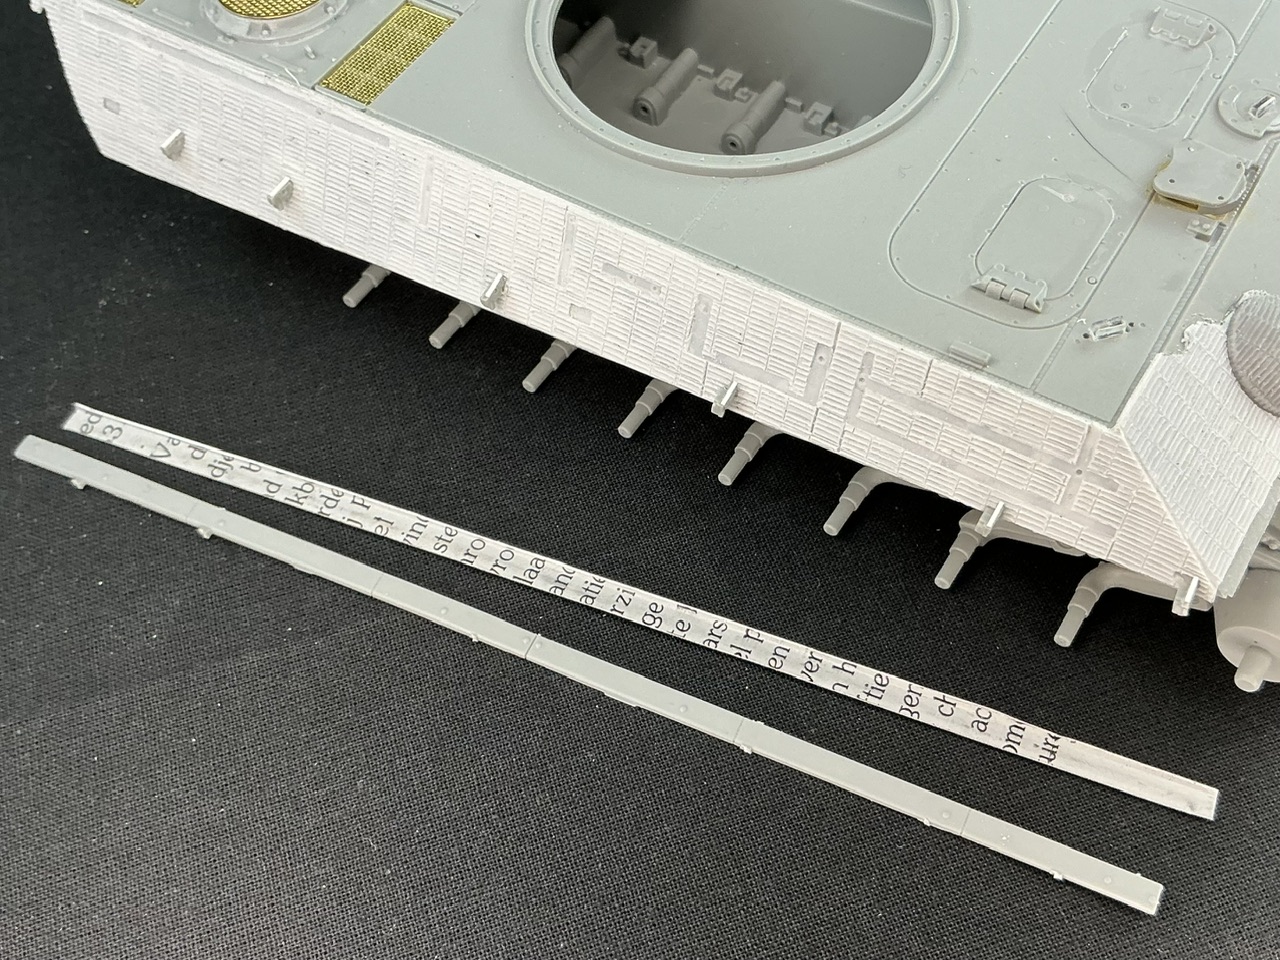
Tonight, I bit the bullet and finally started on the plates above the fixtures for the side skirts (which, of course, Cuckoo didn't have).

I took a piece of aluminium sheet and replicated one of the Dragon kit parts in it:

IMG_2425.jpeg


On the side skirt mounting bracket on the tank, that the strip will go on top of, I glues 0.5 mm square rod because the real ones are slightly taller, but Dragon's plastic parts are thicker so they compensated by reducing the height of the mountings.

That's one side, now the other :) I'm not much of a metalworker, so for those readers who also aren't, I'll explain how I made these. First, I placed the kit parts on the aluminium sheet so that I could mark its length and width with the tip of my hobby knife, because that's finer and therefore more precise than a pencil. I only marked the width at the ends, and not over the full length. Next, I cut through the plate over the whole width of the strip, to mark its full length. Don't cut through in one go, but just like plastic card, make several shallow cuts until you get through.

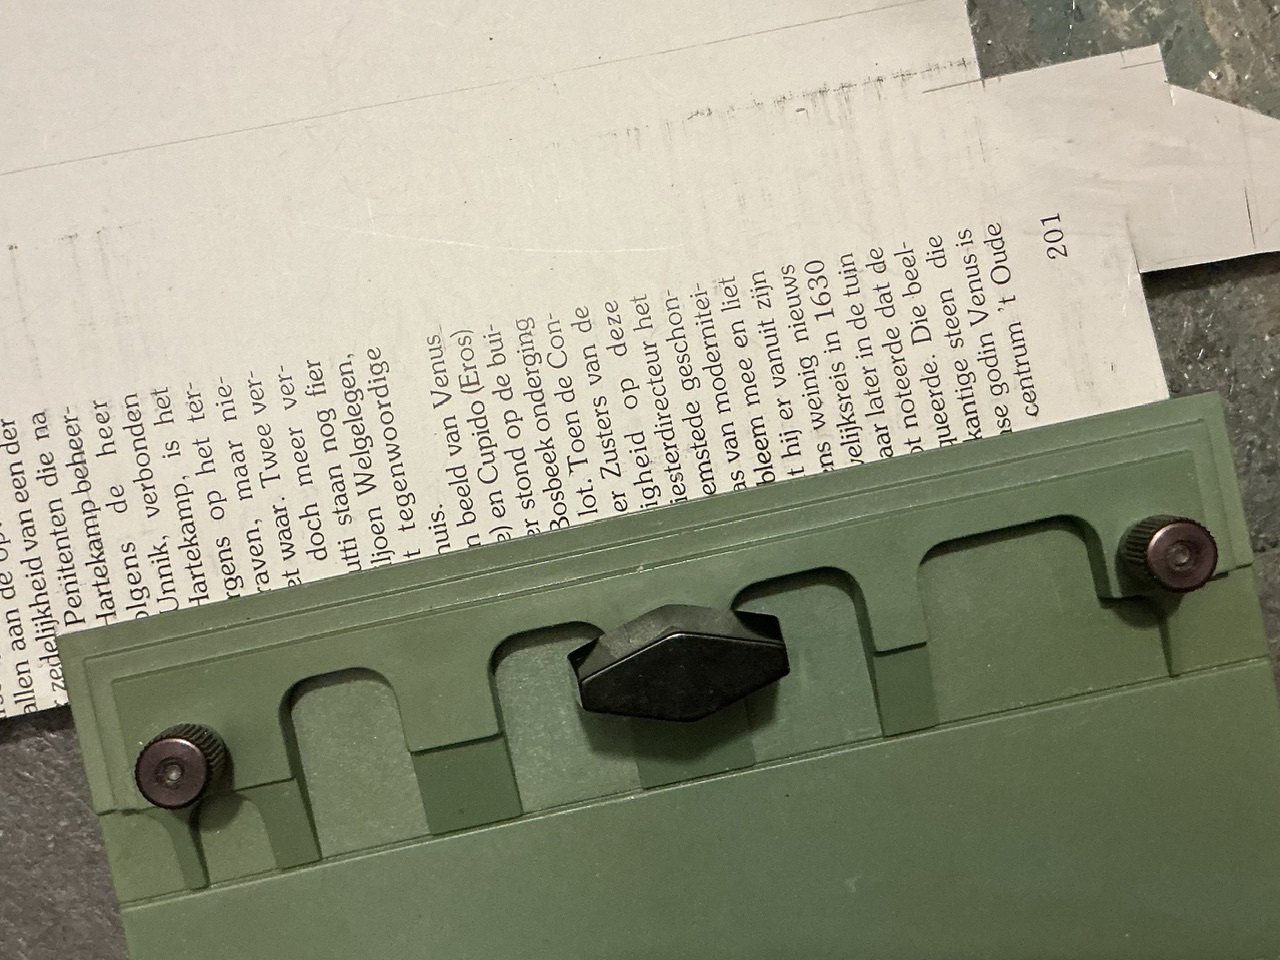
Then, I put the sheet into my Etch Mate, in such a way that the cut is just outside of the tool, and the lines I marked for the width were along the bend line:

IMG_2426.jpeg


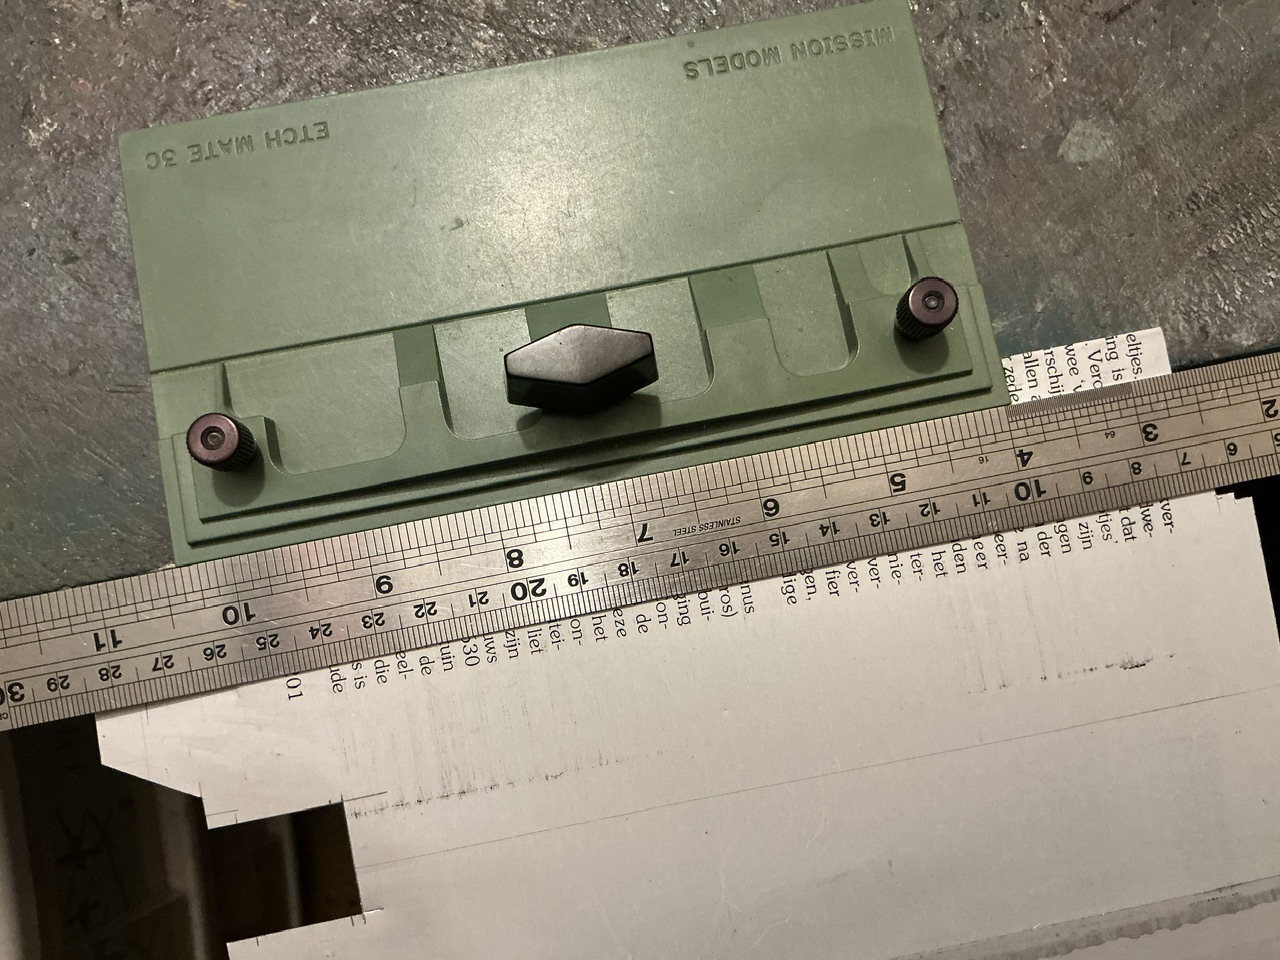
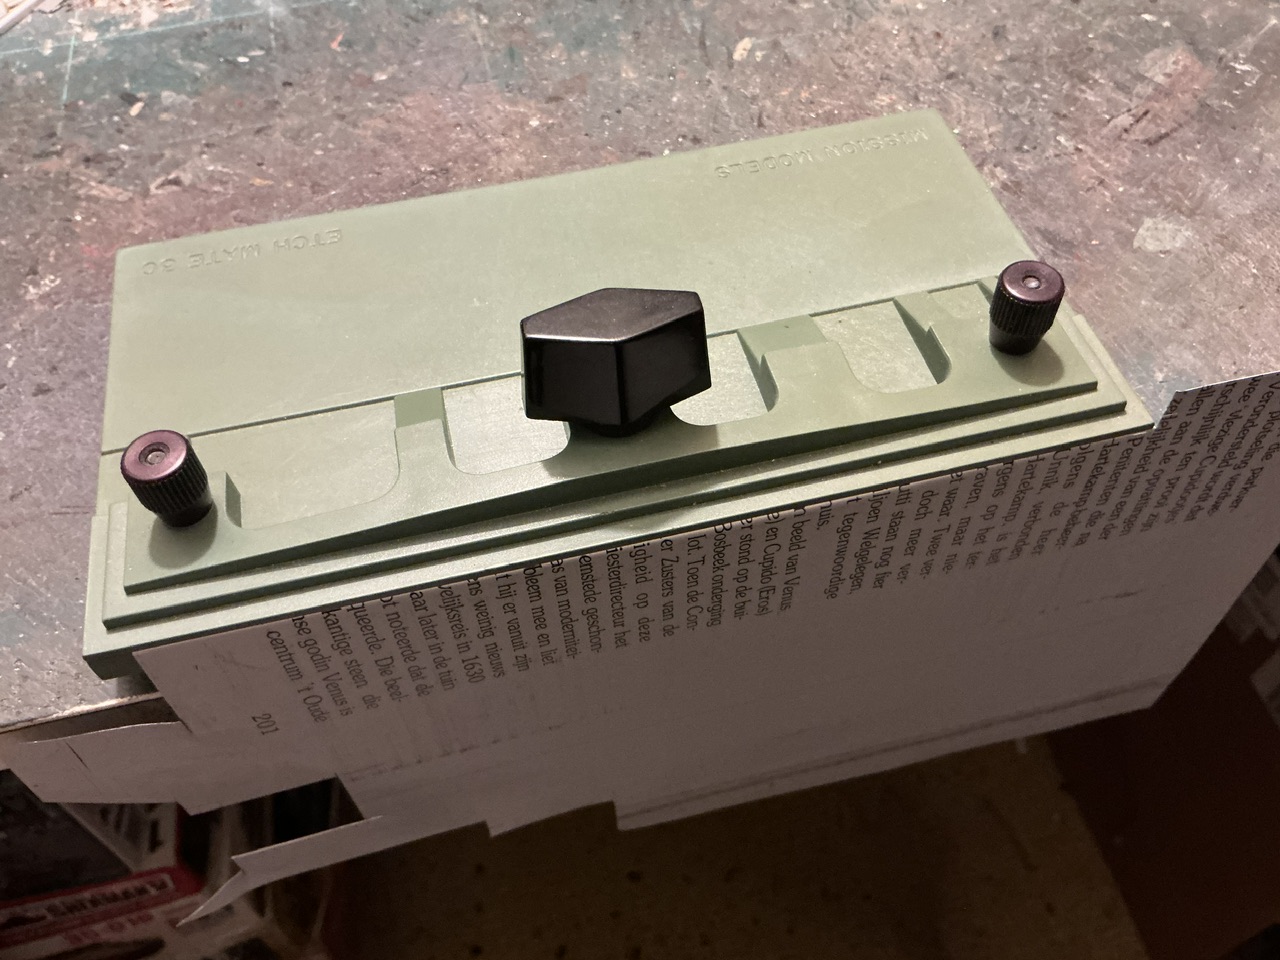
Note here that the part that's inside the Etch Mate is the piece of the sheet I need. Also, I'm using the back of the Etch Mate here, rather than its "surface". I then put it on the edge of my work surface and placed a steel ruler over it:

IMG_2427.jpeg


A careful but firm press down on it, rotating the ruler with the sheet (taking care to apply pressure equally), and we have:—

IMG_2428.jpeg


I nicely bent piece of aluminium sheet!

Problem number 2 was how to make a narrow, bent-down lip to it. I don't have any photos of that due to a shortage of hands to take them with, but basically, I put the sheet onto the work surface, bent strip upward, and placed a thinner steel ruler "into" the bend — the ruler horizontally on the surface, but with its thin side rather than flat. That allowed me to run a knife along it, pressing the knife against the ruler while pressing against the upturned aluminium and the ruler with a finger of my other hand. That scratched a line into the aluminium, at a distance of just over the thickness of the ruler away from the bend. Now, don't try to cut through the sheet, but wiggle the aluminium back and forth until metal fatigue causes it to break along the line.

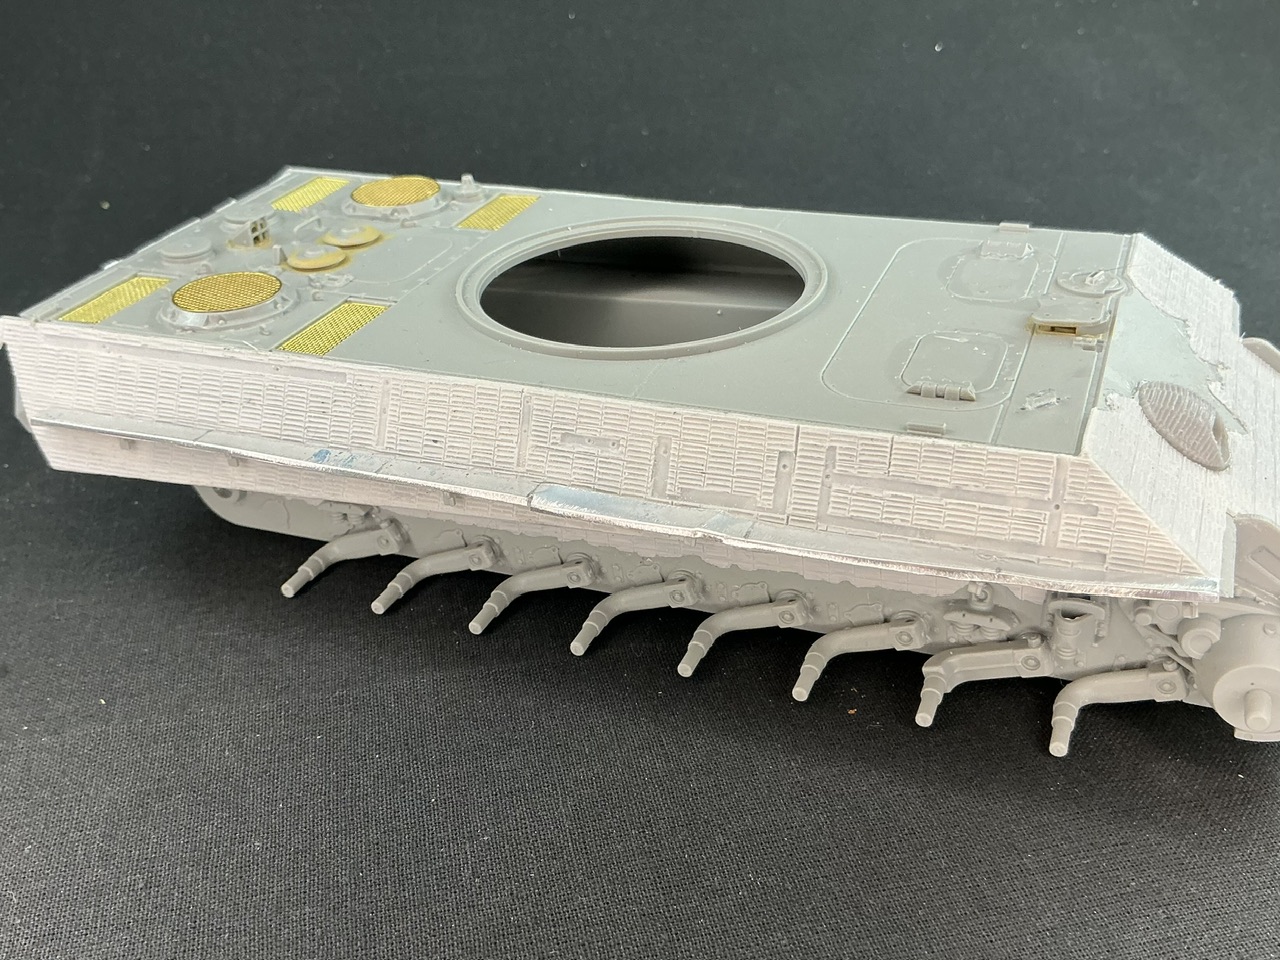
After some more work with a file to clean up the cuts, I could start fitting the strips to the tank, bending them to resemble those on the real thing, and then superglue them into place.

IMG_2429.jpeg
IMG_2430.jpeg


I looked closely at photos of the real Cuckoo for this and tried to replicate what I saw there. What I have is not 100% accurate, but I think it comes fairly close.

A side note to that: I was (almost certainly) going to paint this model in snow camouflage, but that's a no go now. After I had made (but not yet distressed) the left-hand strip, I noticed that Cuckoo at the time of the film shot of it pushing down trees, is entirely missing the strip on the left. When it was photographed near Geijsteren and in Tilburg it still did, so my model will now represent it as it was there instead.
 
Last edited:
metal fatigue causes it to break along the line
...nice use of the back of PE bending tool, and good advice on gentle scoring.
I was surprised to find similar results on metal tubing, just using a hobby knife to score around a tube without too much pressure, until the wall is thin enough to 'snap' pretty cleanly.
Again, the rigidity relative to thinness of metal sheeting is a big bonus for work at scale compared to styrene.
Good job!
 
Interesting captured Tiger tank…
Where? ;)

...nice use of the back of PE bending tool, and good advice on gentle scoring.
Thanks. If you need a 90-degree bend, it's usually much easier to use the back of the tool than the front — if only because pressing down is easier than trying to lift up from underneath with some flat tool.
 
Good advice, I'd have lifted the tool while keeping the large part flat on the bench. I do think your way is better, less stress or reliance on the clamping ability.
 
Doing that is how I ended up figuring out that it's easier to press down for folds like this :)

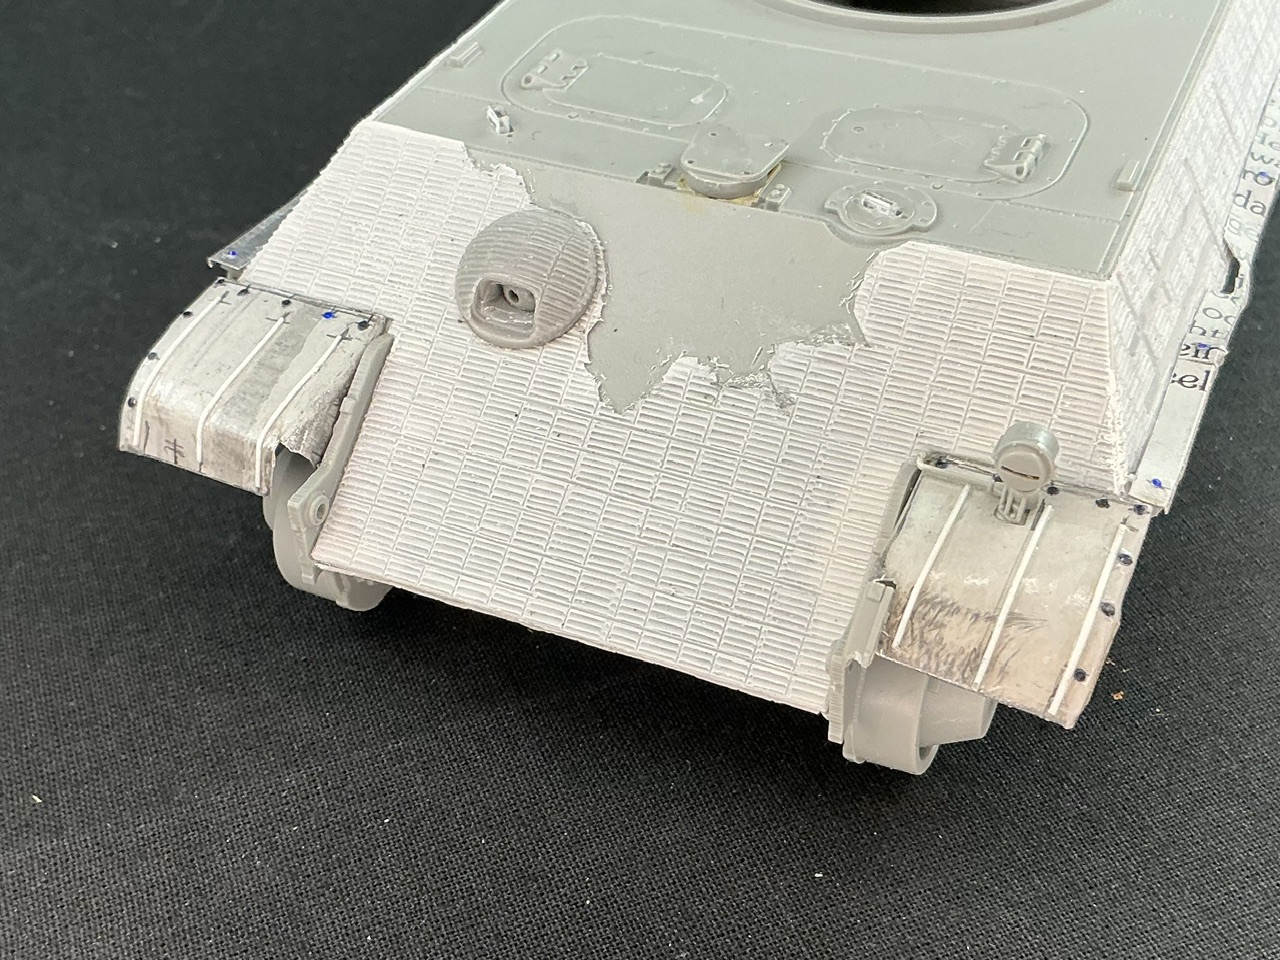
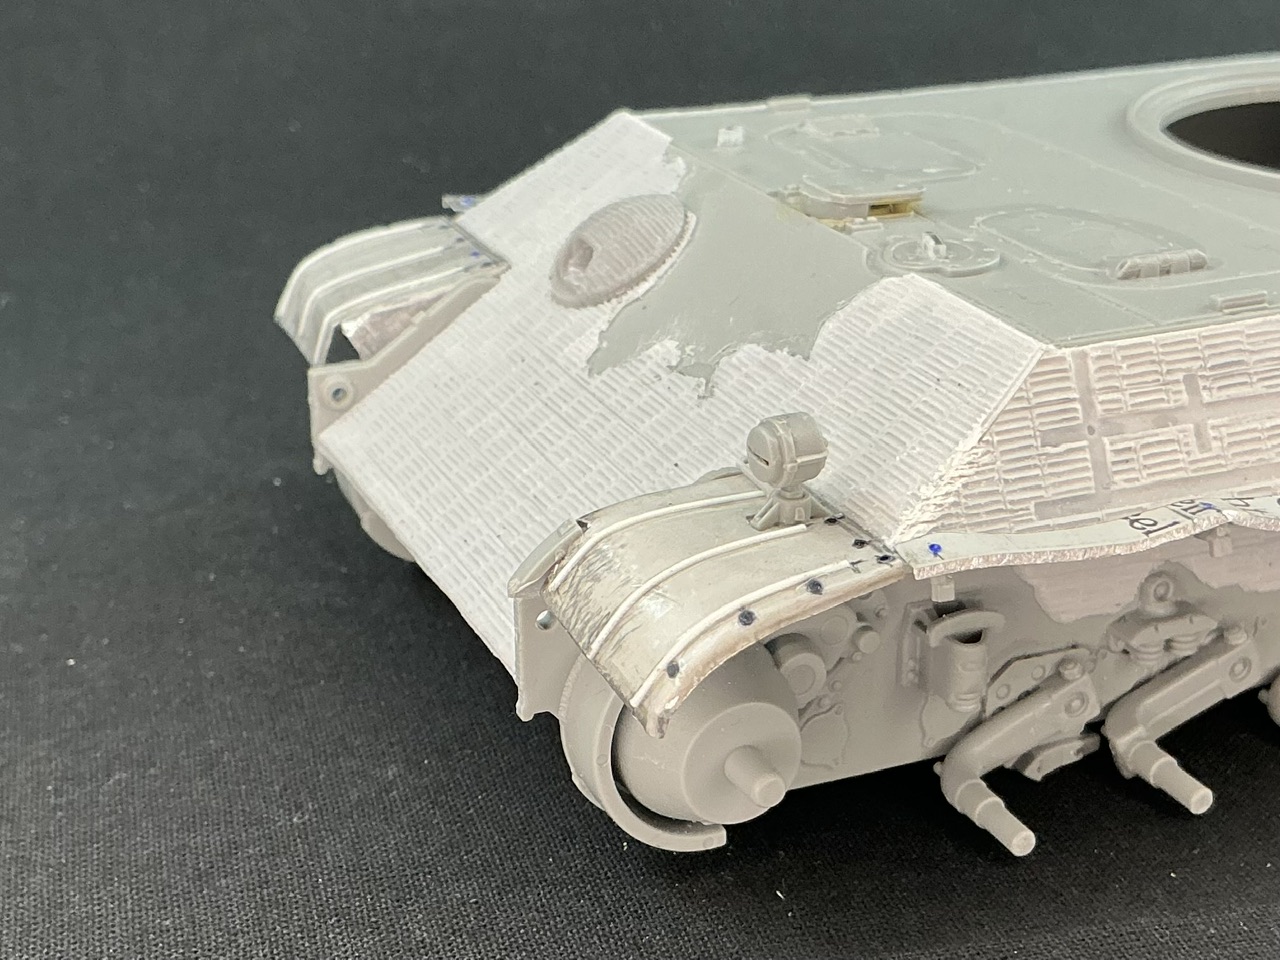
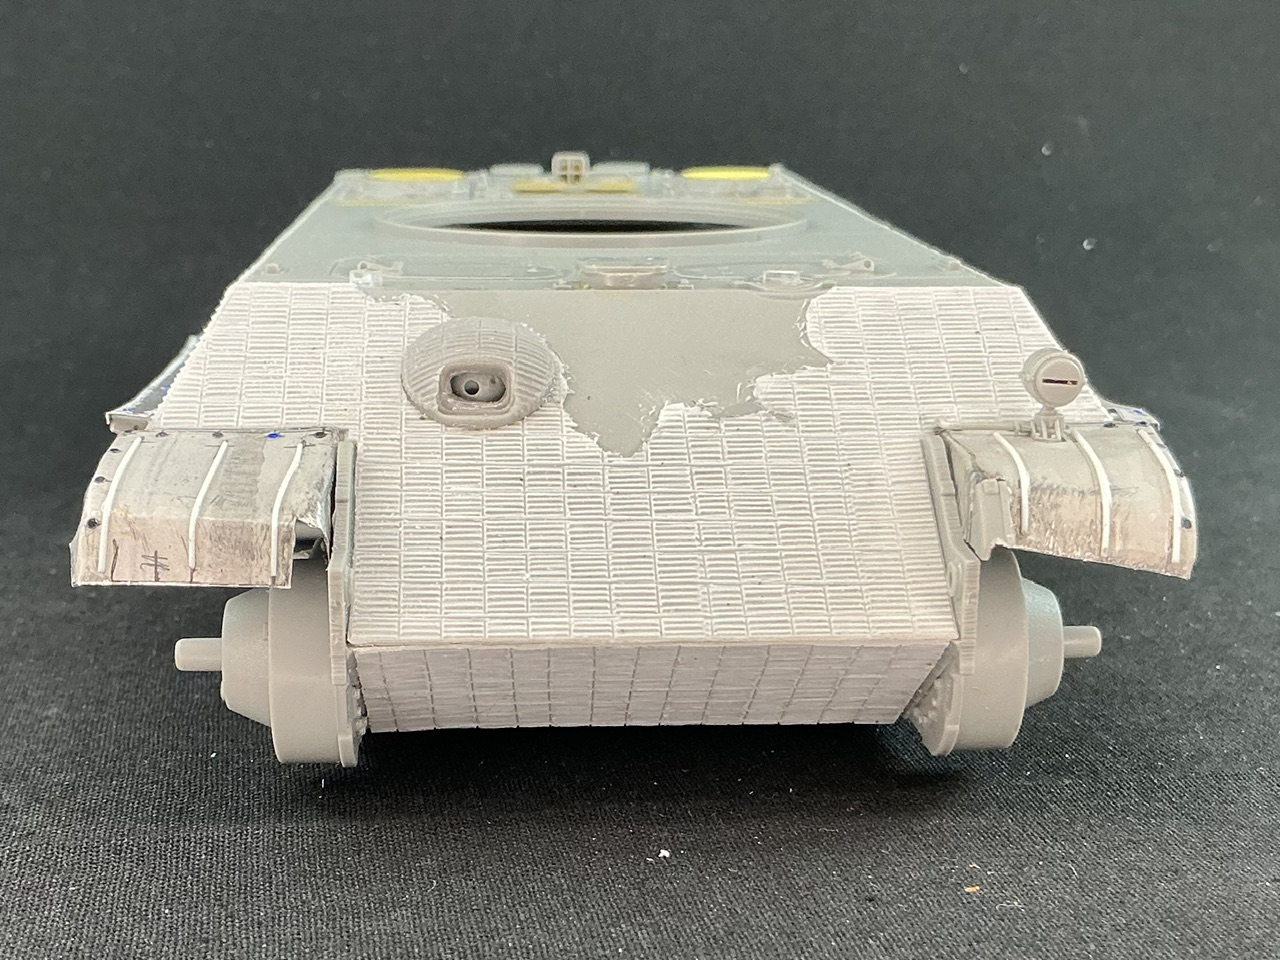
On to the front mudguards. I didn't see myself making these with my limited skills, but luckily, my father was taught metalworking in school long ago, and still enjoys making things from it. A while after I handed him the mudguards I sawed off the model and the aluminium sheet I used for the side skirt rails, he gave me back two copies of them in aluminium :) All I then had to do was cut them to size, dent them, and add strengthening ribs and rivets …

IMG_2431.jpeg
IMG_2432.jpeg
IMG_2433.jpeg


The ribs are 0.5 mm plastic strip that I scraped down on one side to make (more or less) half-round rod, while I made the rivets with a punch and die set. The headlight is from the kit, set on a piece of plastic card glued under the opening I cut in the left mudguard (to match the real tank). I did have to bend and slightly shorten the power cable, because as moulded it doesn't match the real Panther G.
 
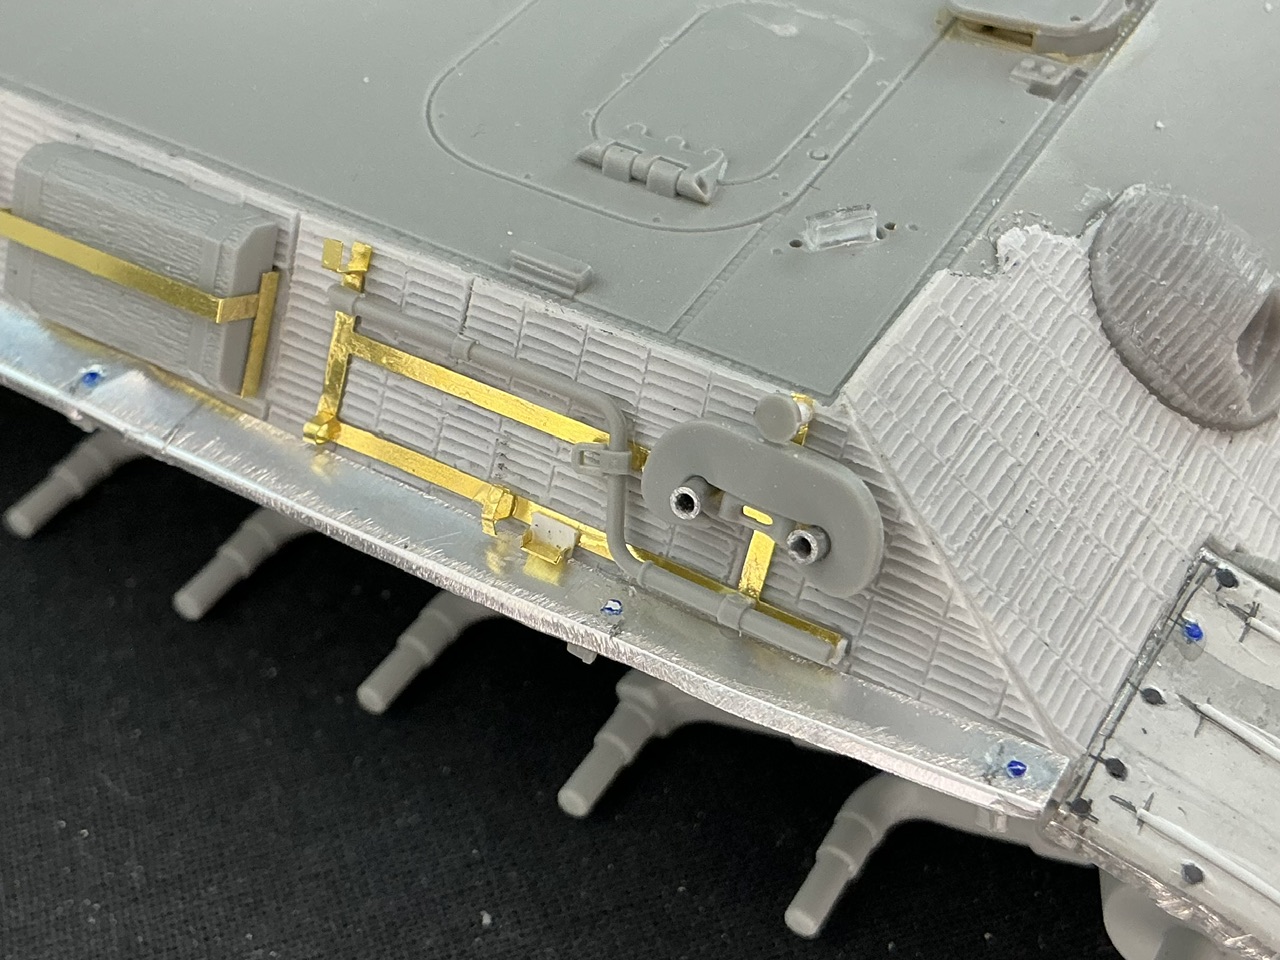
With the mudguards added, I can start working on the tool racks on the sides:

IMG_2435.jpeg
IMG_2434.jpeg


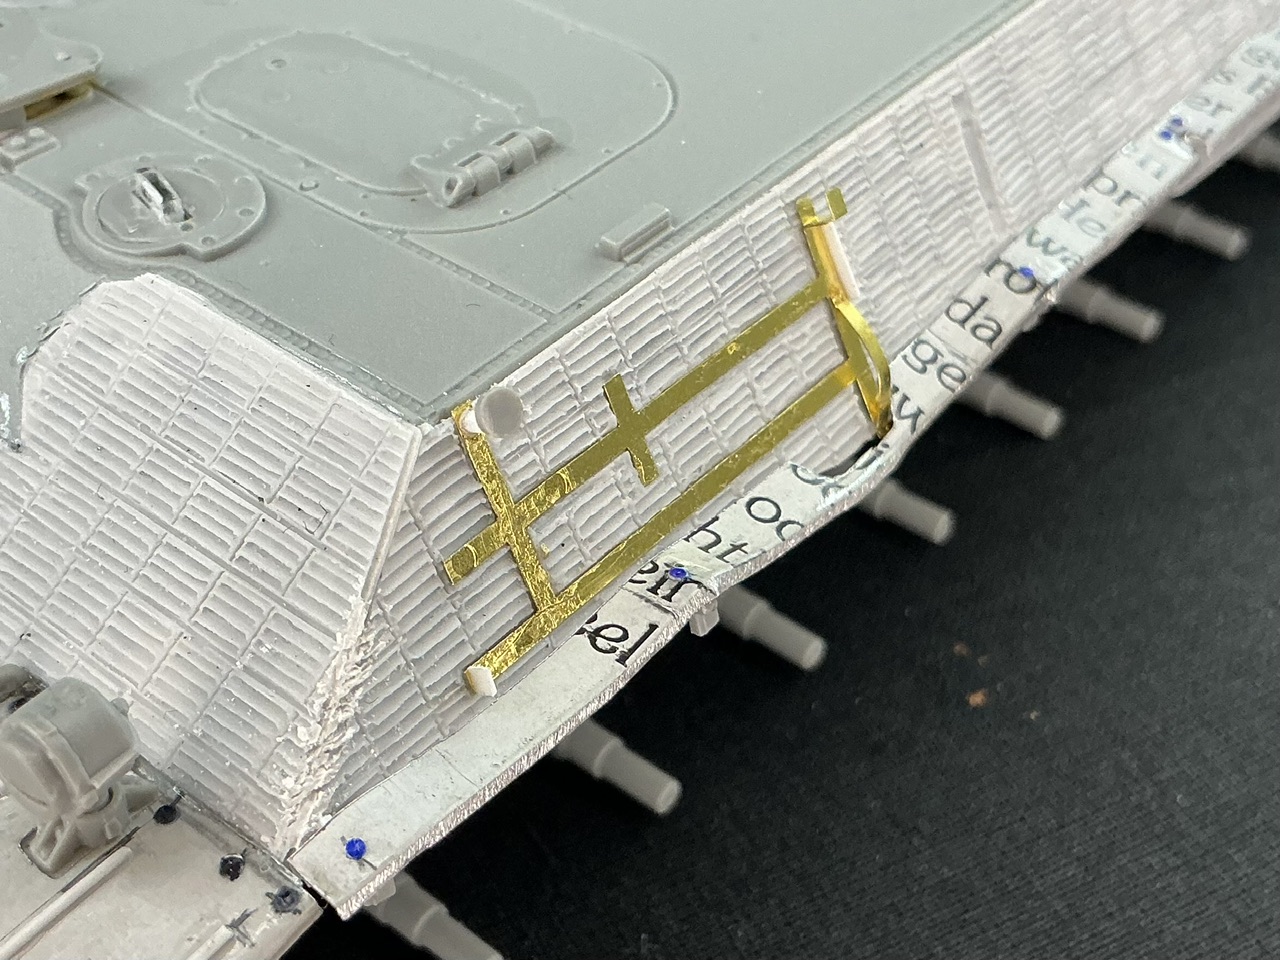
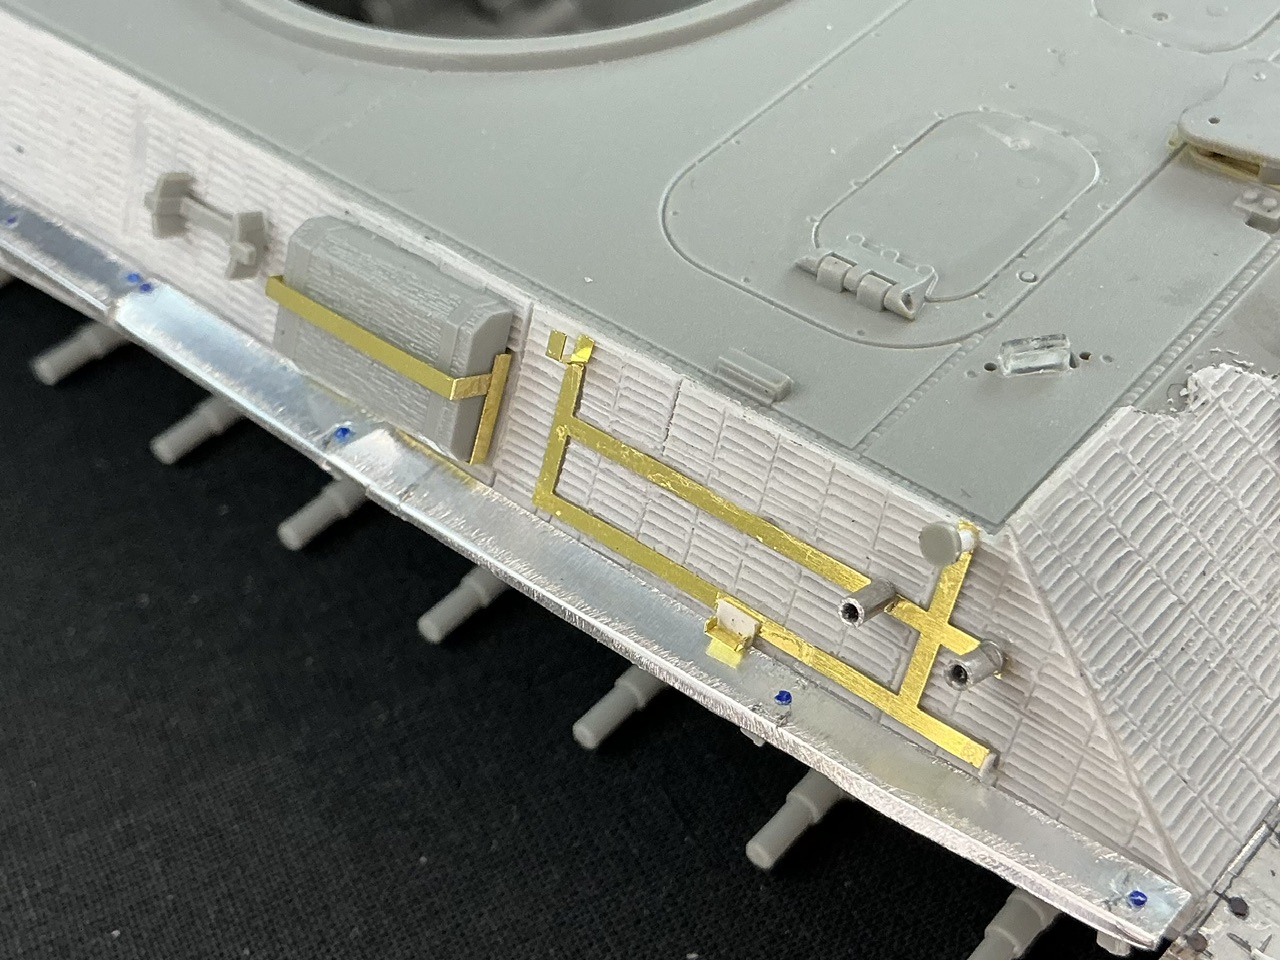
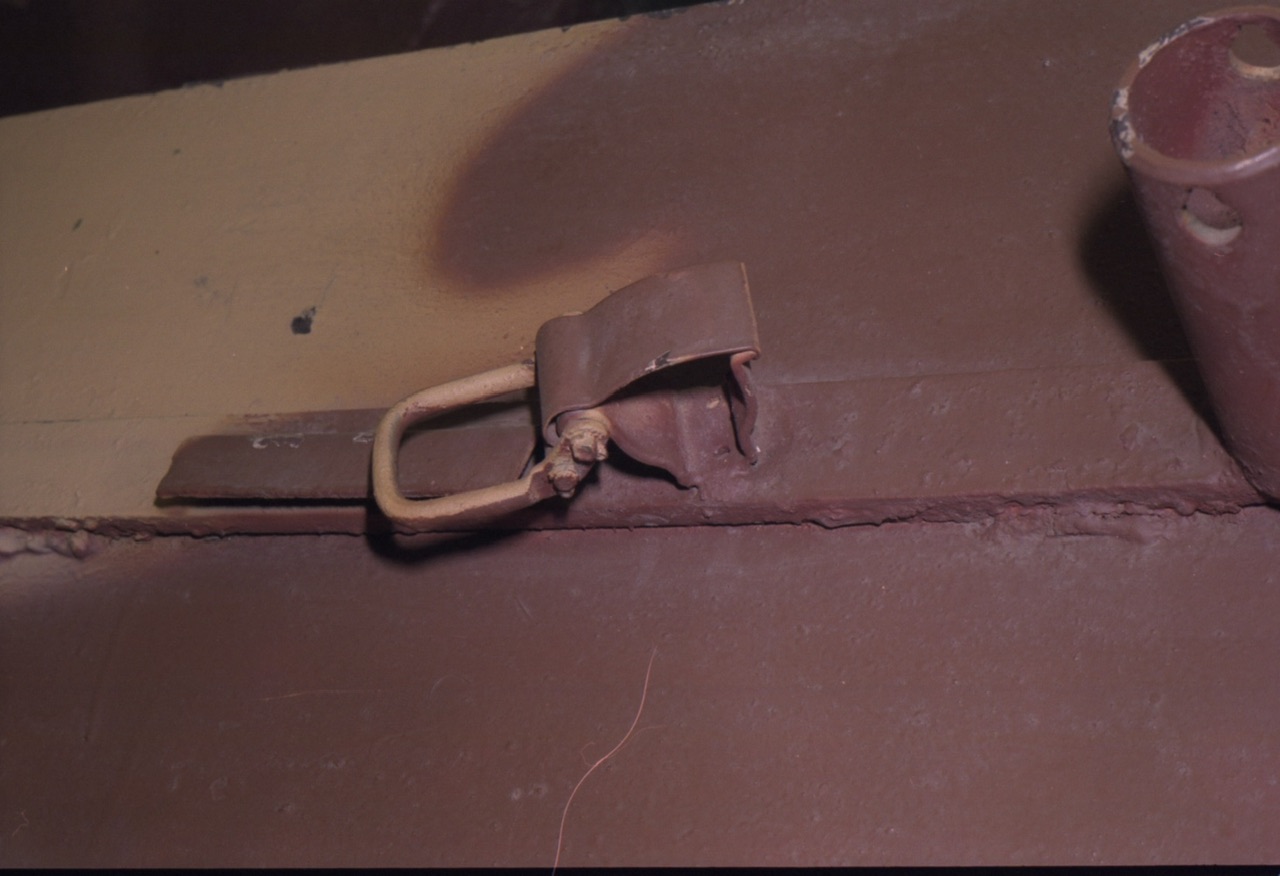
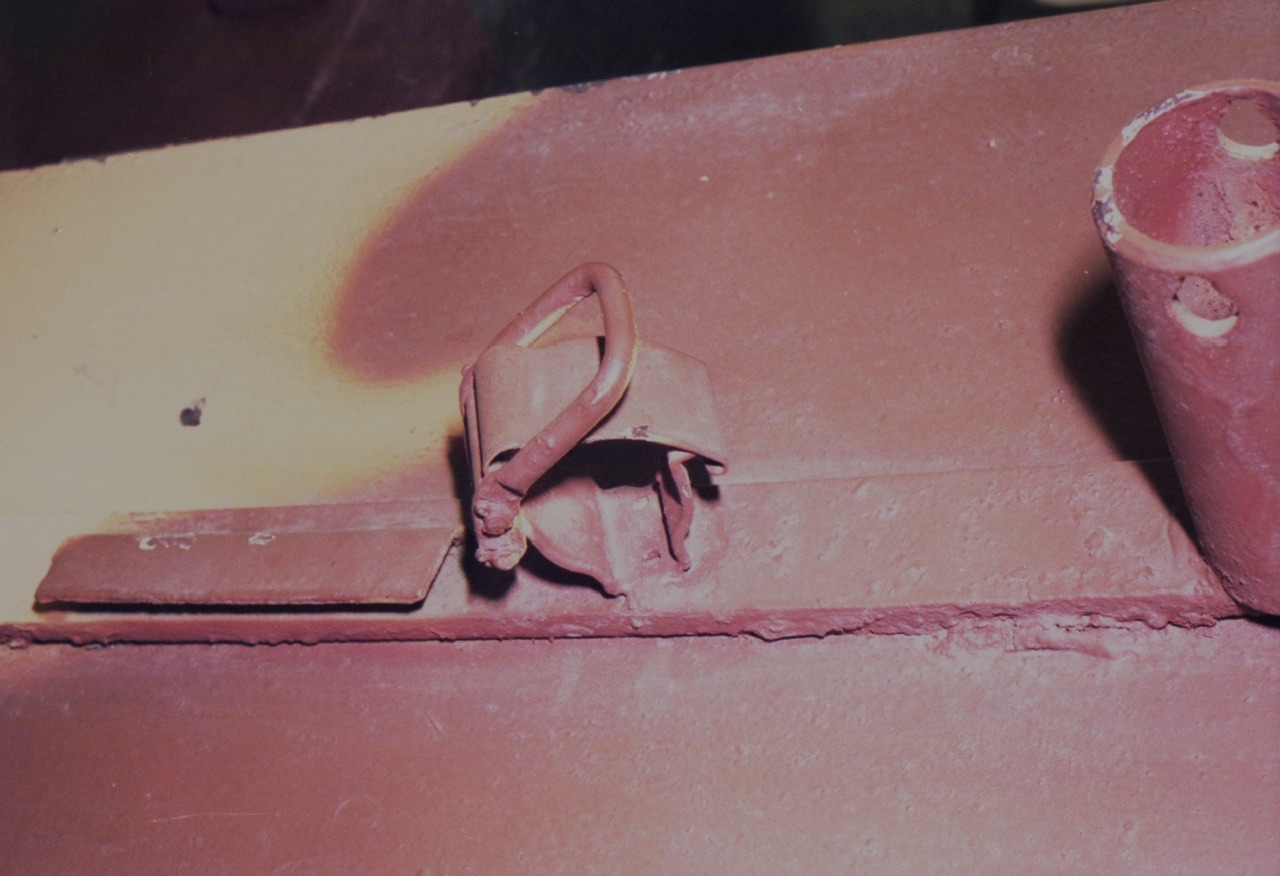
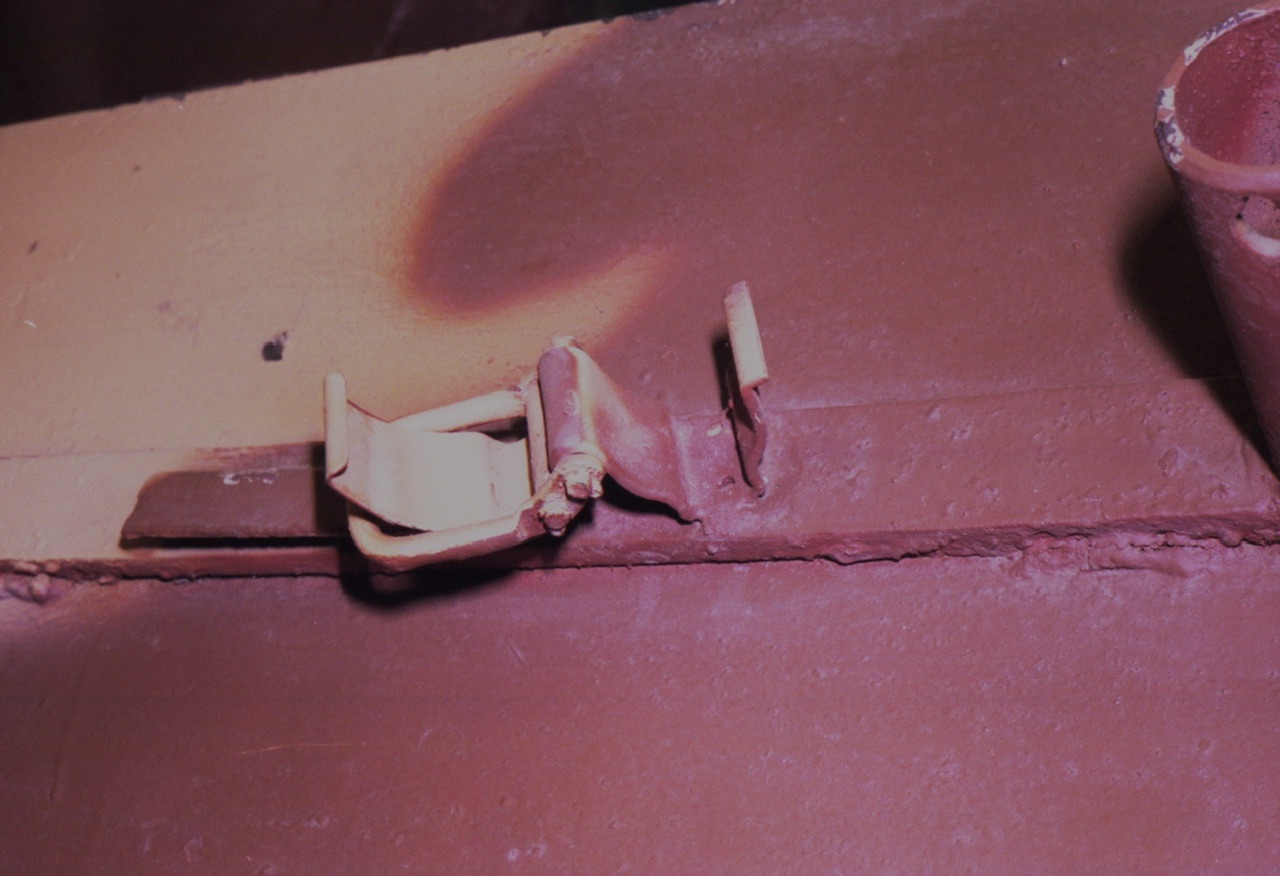
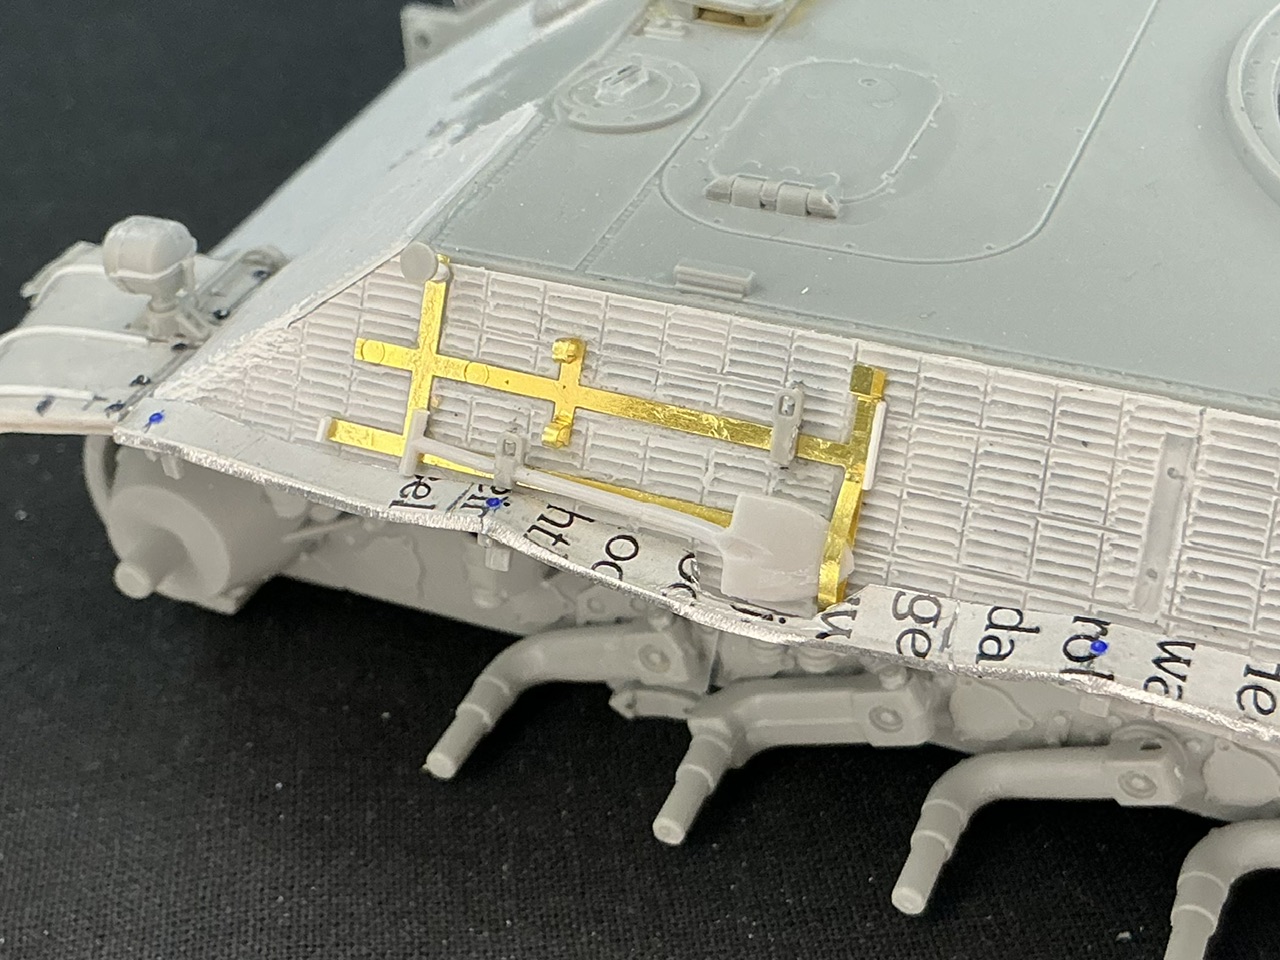
They're not yet done, because I didn't feel like making those little clamps tonight anymore, the ones that German armour modellers all seem to think are so important to add ;) With this kit, you get all of the tools and racks in both plastic and etched brass, but oddly, the bits of tube are not supplied for adding to the etched parts. I made them from 1 mm plastic rod for the upper ones (that the tow cable hooks onto when stowed), and 1.5 mm aluminium tube for the lower ones (for the tow shackle) — but the latter only on the right, because Cuckoo didn't have them on the left. Don't ask me why they're missing, but I can't see them in photographs. What's more, Dragon made two small mistakes with these tubes: the upper one on the plastic part is too long, the lower ones are too thin. For some other details Dragon missed, I used plastic strip.

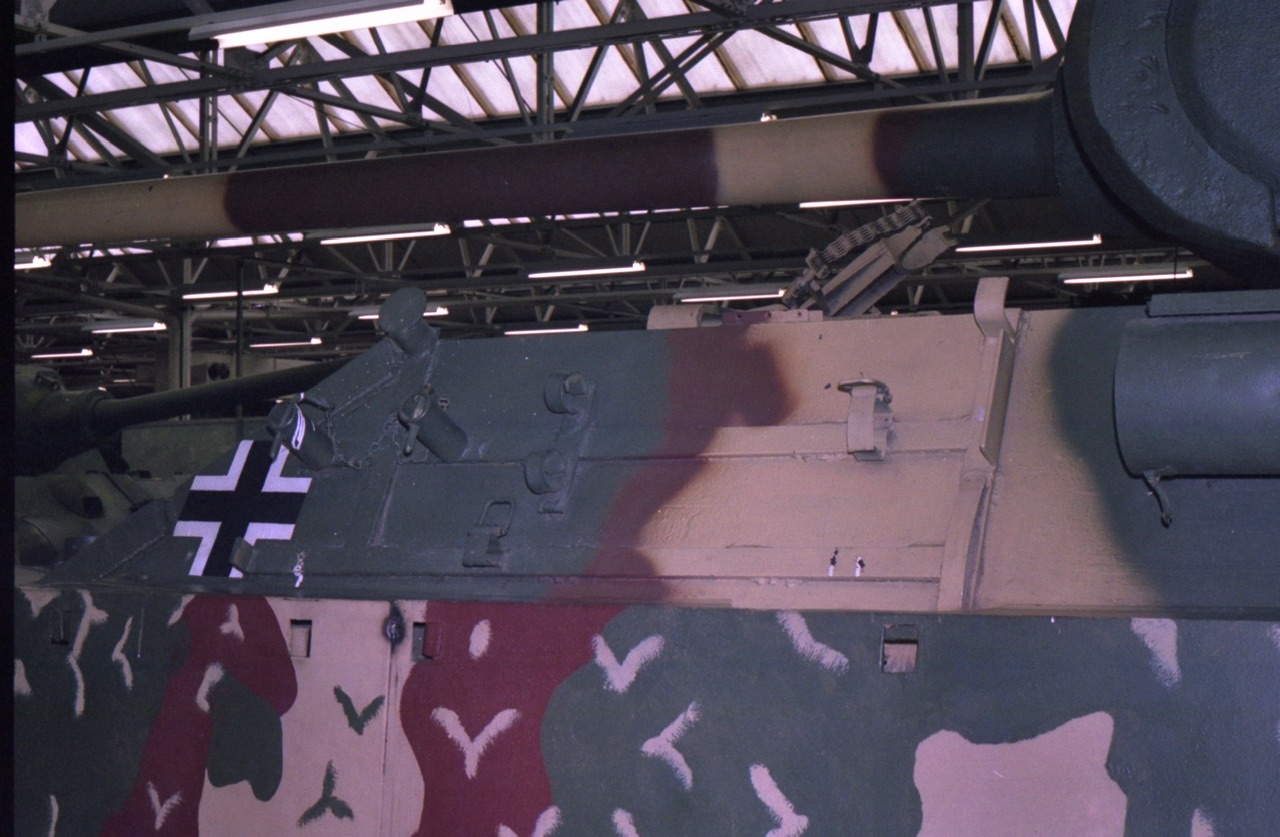
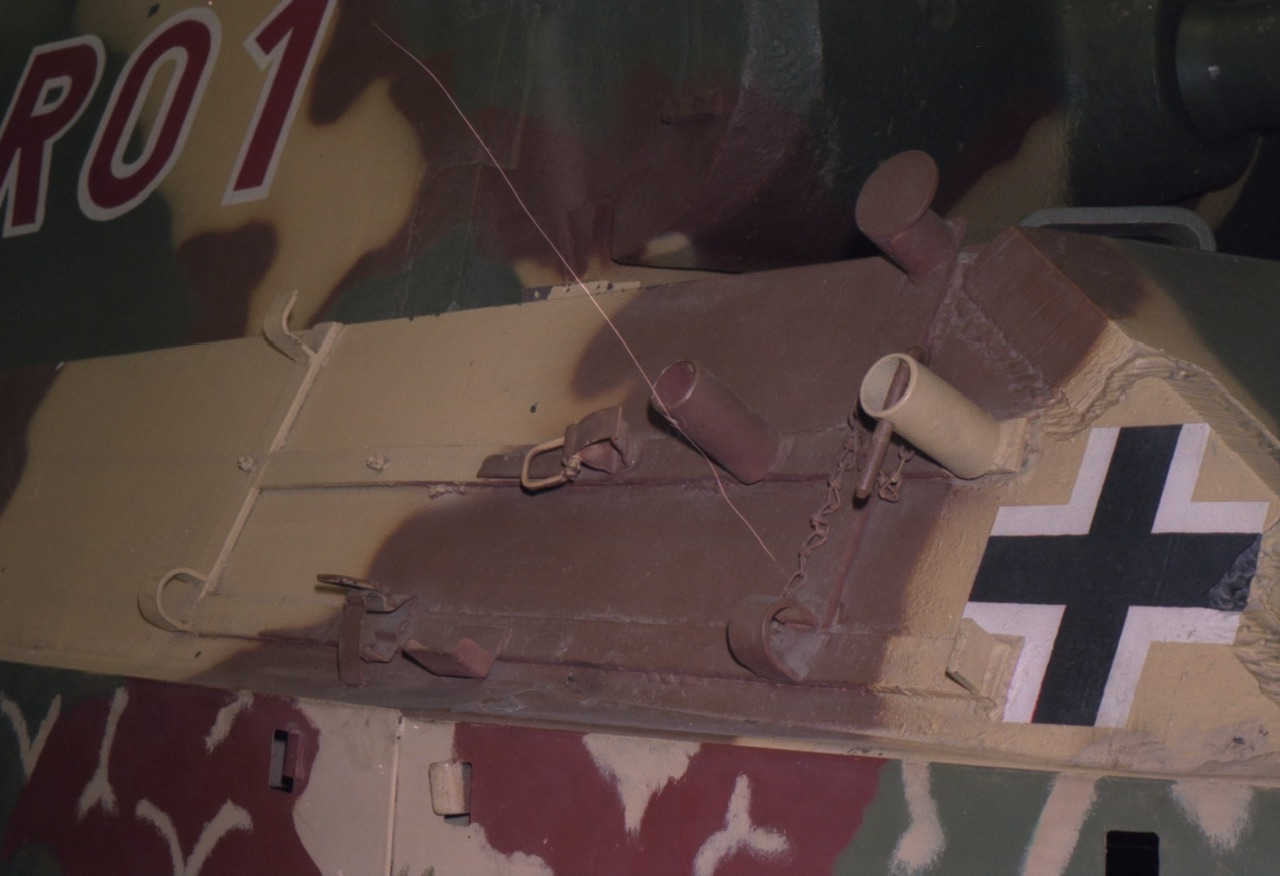
I know all of this because I have these:

fullsizeoutput_1a.jpeg
Panther 3.jpeg


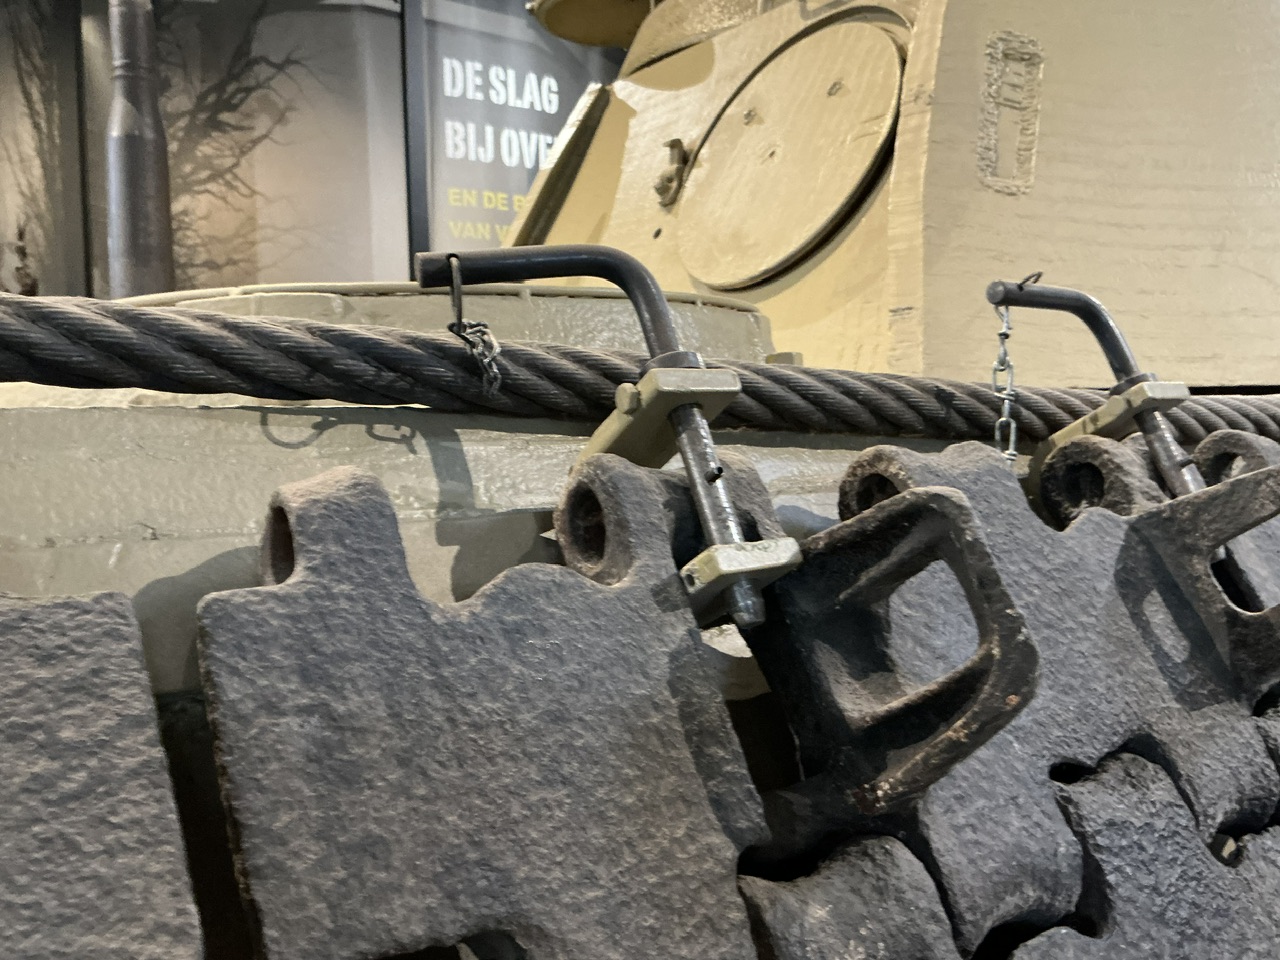
And this is how those tool clasps work:

Panther.jpeg
fullsizeoutput_5a7.jpeg
fullsizeoutput_5d8.jpeg


(Photos of the Panther G at Bovington, taken by me in the autumn of 2000. Never throw anything away :) )
 
Now that I've finished building my old-school Tamiya Panzer II and Piranha PWI, I can finally continue with Cuckoo.

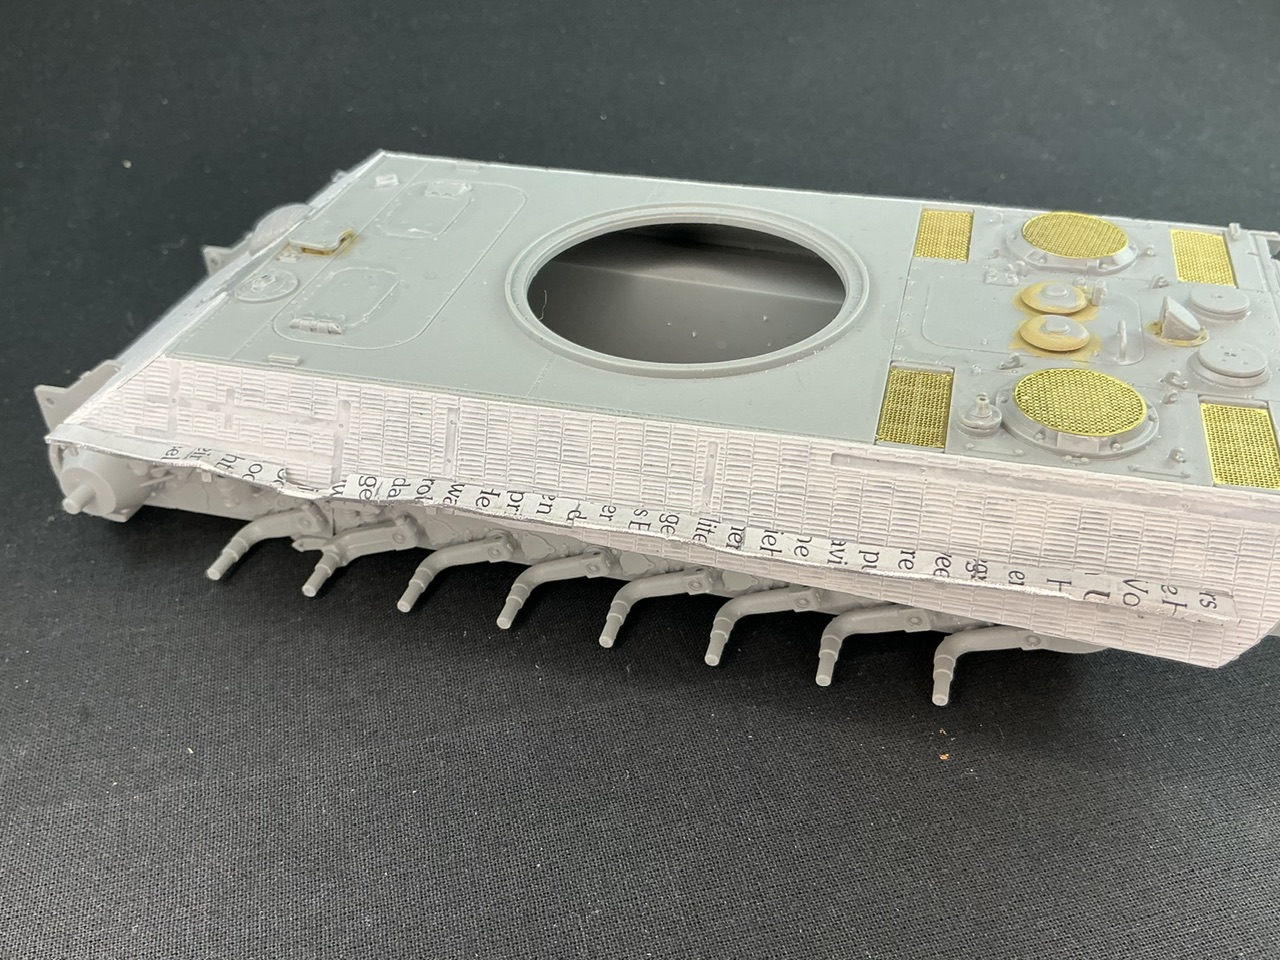
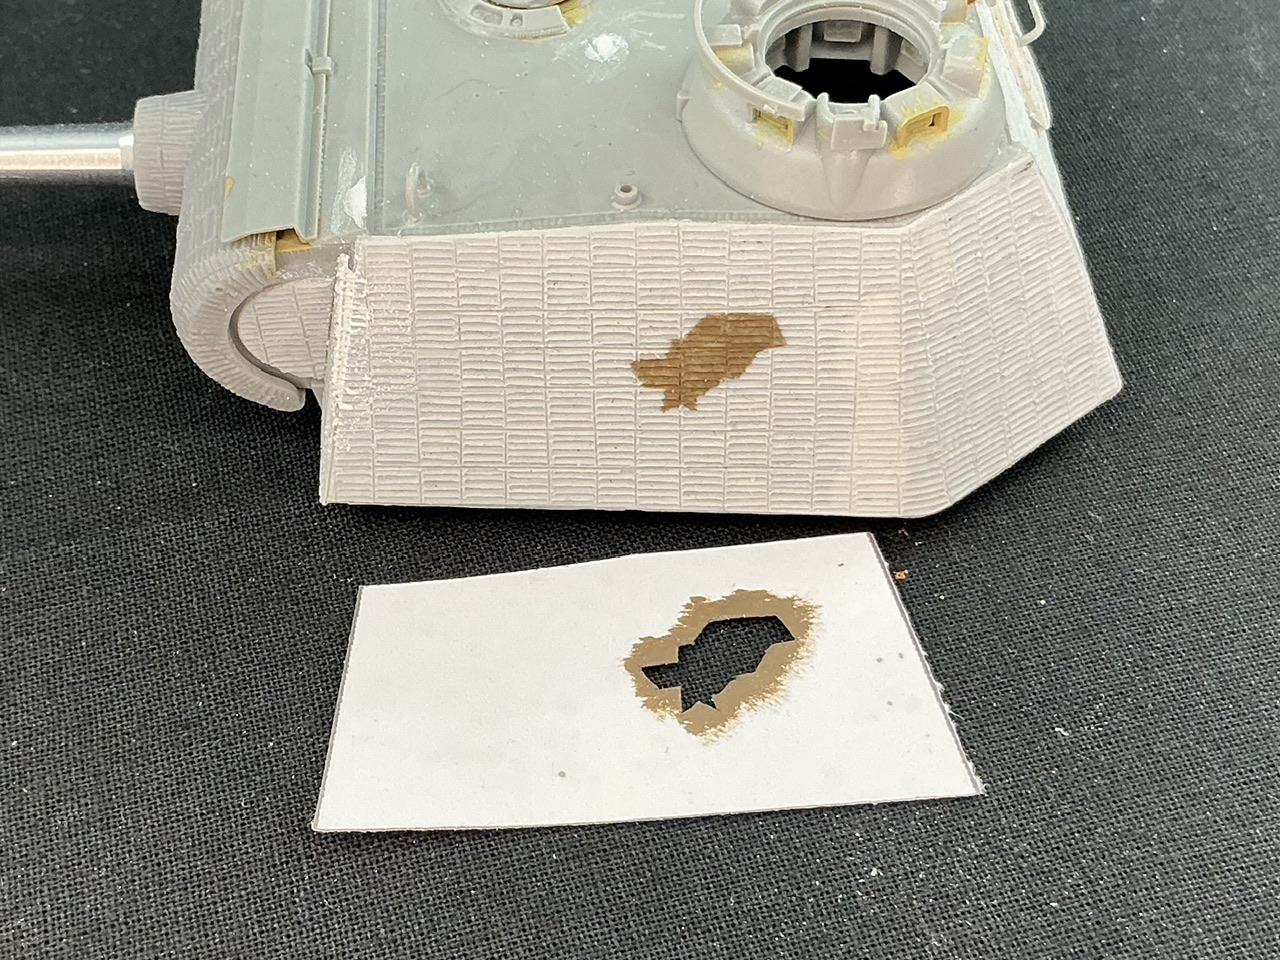
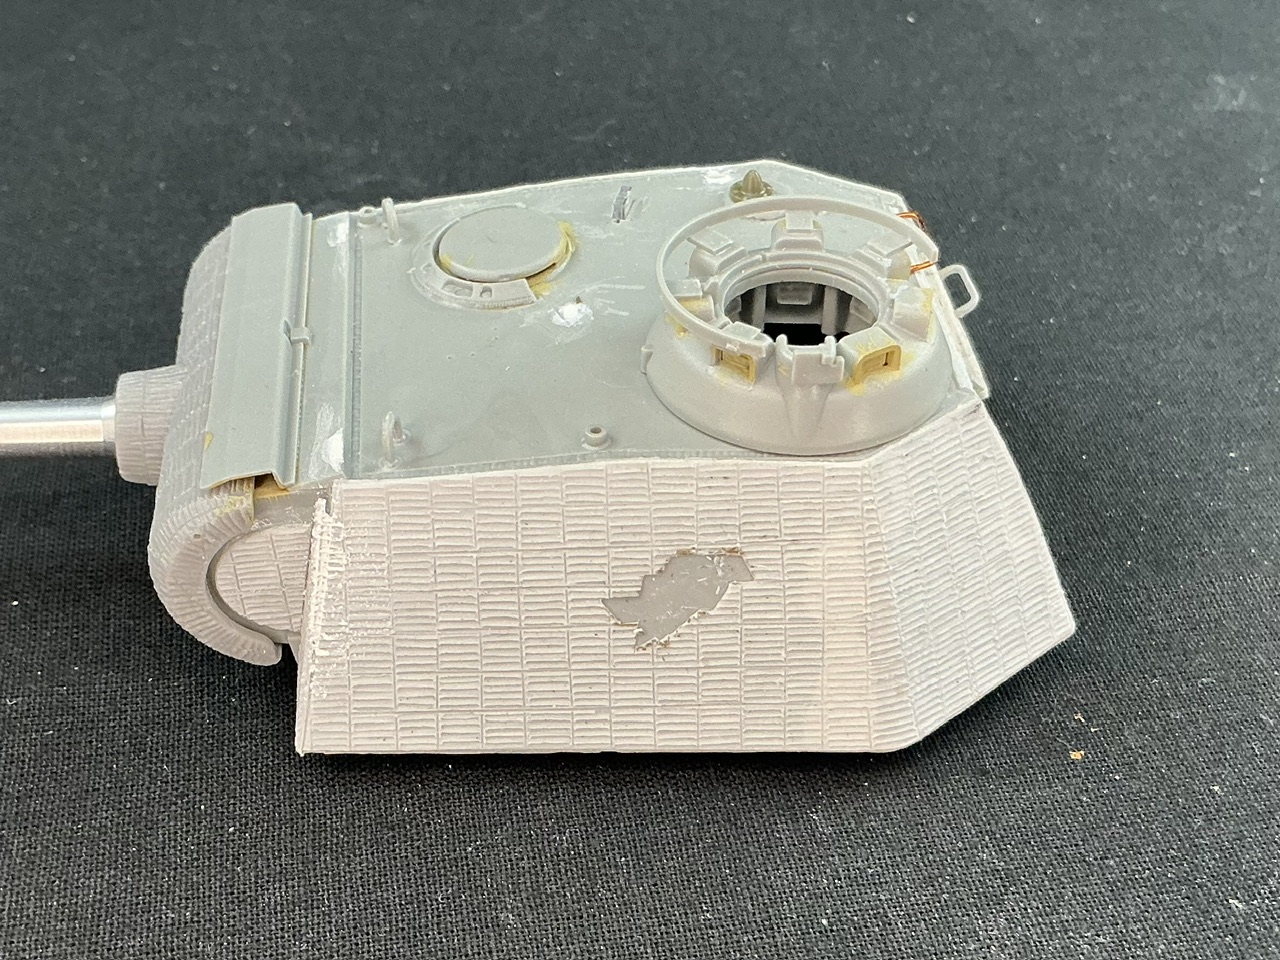
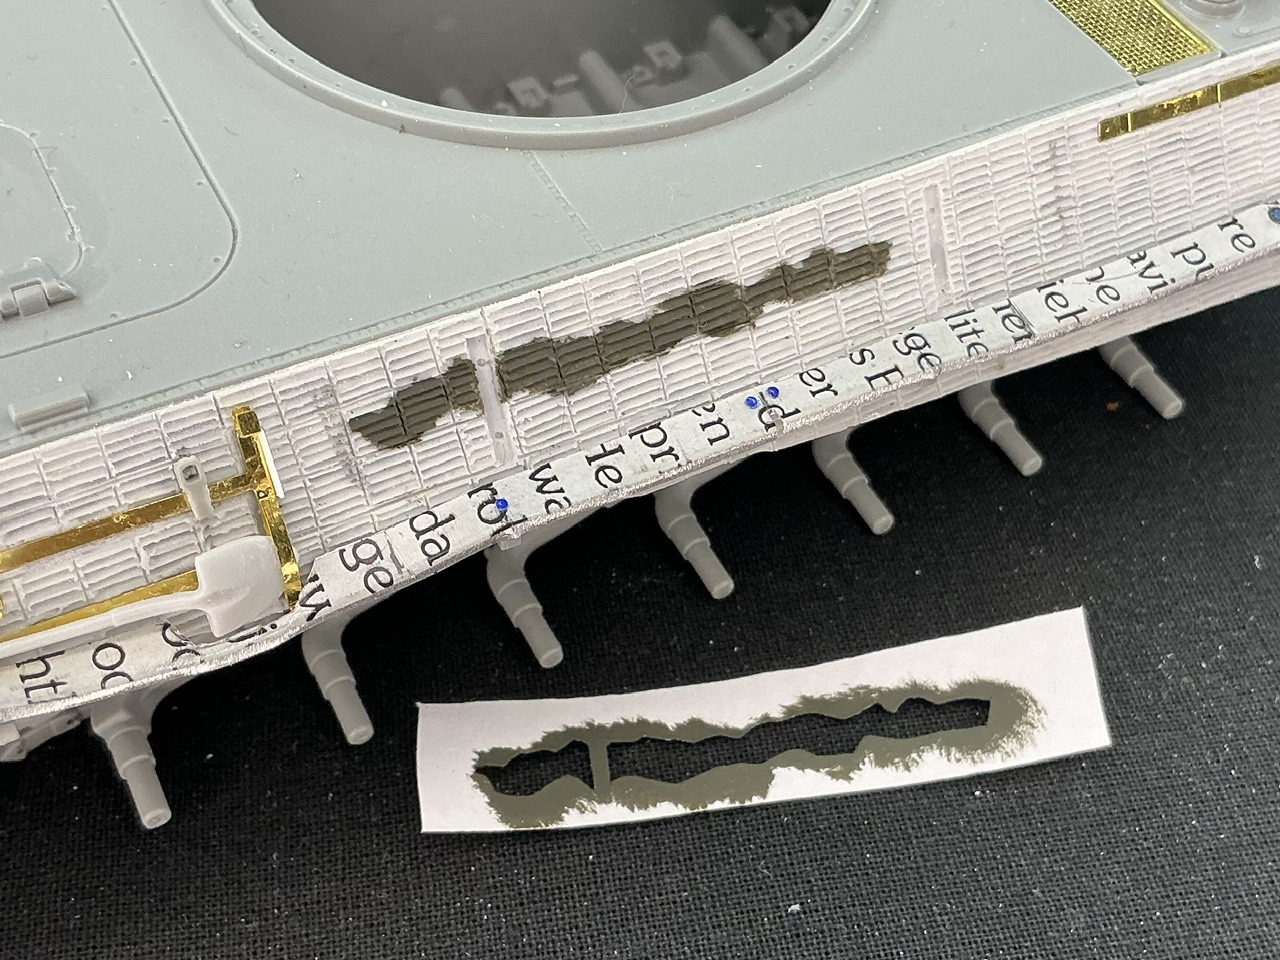
On the left side of the turret, a piece of Zimmerit had come off on the real tank. To replicate that accurately, I made a template much like for the hull front, again by tracing over a photograph and printing it out at 1:35 scale. By cutting it out, placing it over the turret side and dabbing paint through it with a brush, I transferred the shape to the model easily enough:

IMG_2551.jpeg


Then I just used a sharp knife to cut around the outside of the damaged patch, and then removed the bit inside that cut:

IMG_2552.jpeg


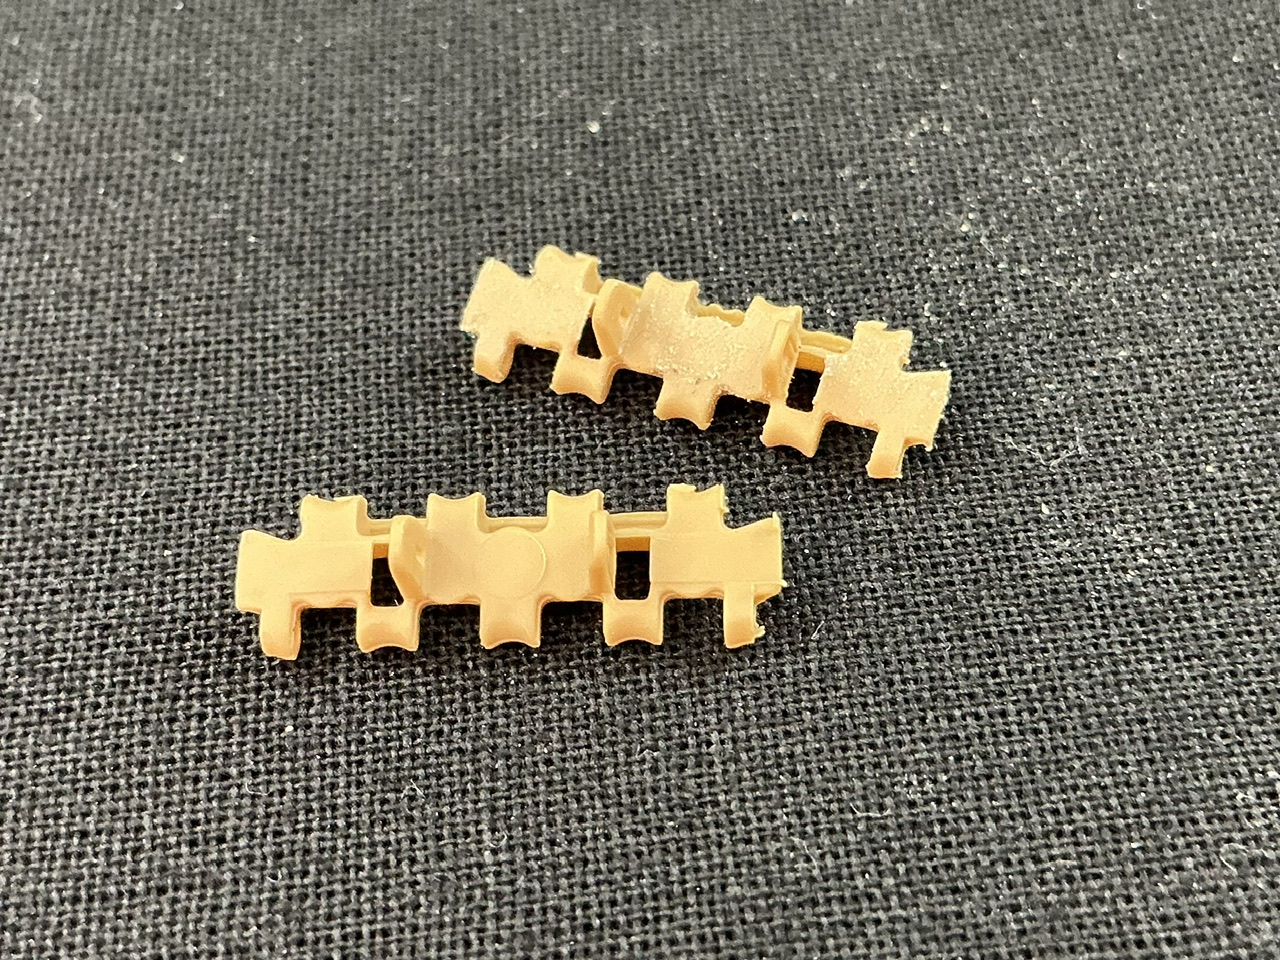
Over the last few days, I've been cleaning up links from a set of Rye Field Model Panther tracks. The Dragon kit I'm using for Cuckoo does have separate links, but they're the kind you have to glue, and I'm not a fan of those, so I bought a set of workable ones instead. The links of this are attached in pairs to a bit of sprue, which is easy and simple to remove. Unfortunately, though, there is also an ejector pin mark between the guide teeth and mould seams on either side of them because the teeth are moulded hollow (another advantage compared to Dragon's tracks).

Here at the front a link that hasn't been cleaned up, and at the rear, one on which I've filed down the seams etc.:

IMG_2550.jpeg


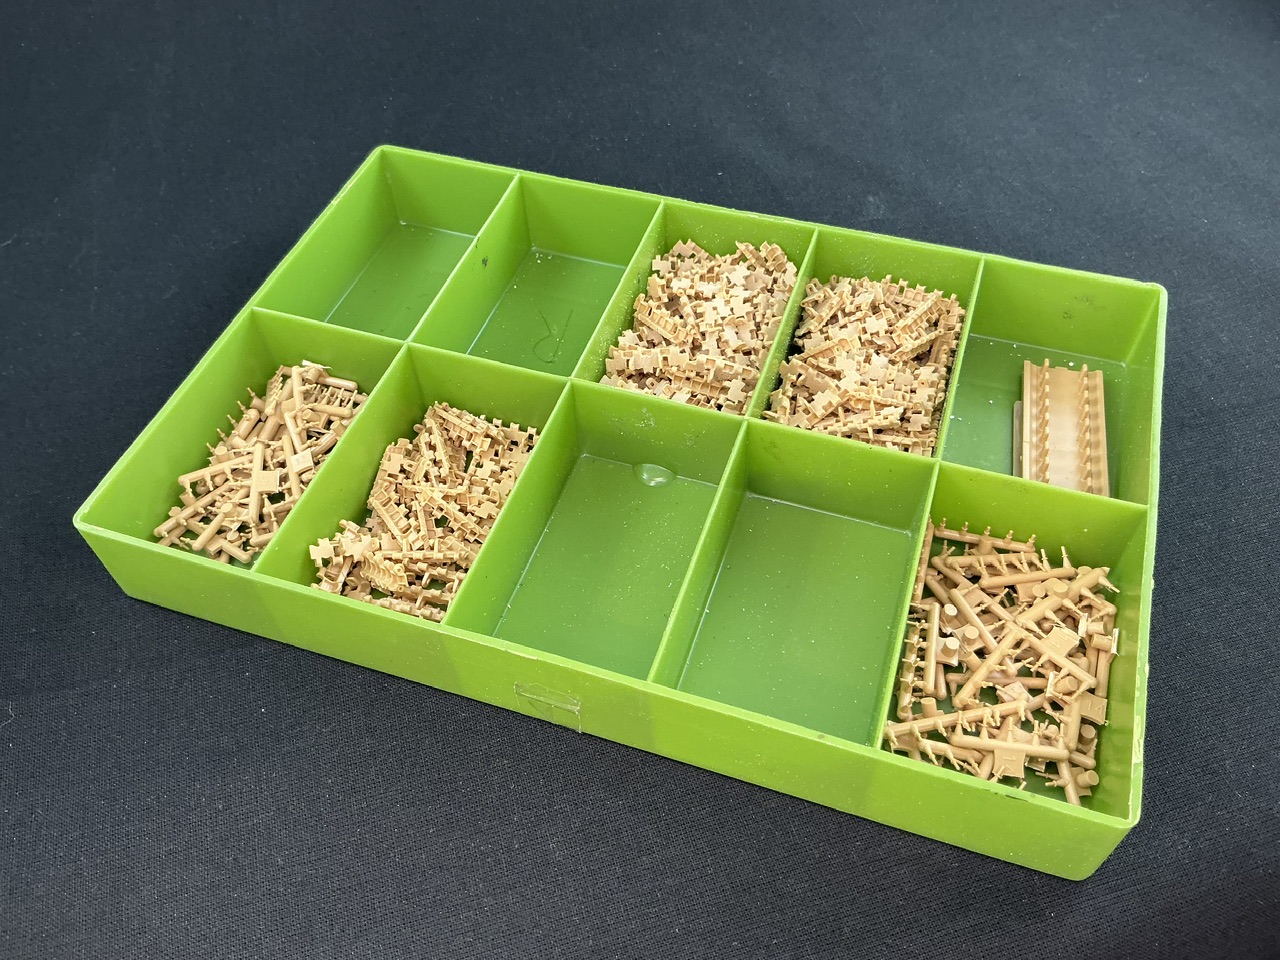
In this box, the links at the front haven't been cleaned up yet, those at the rear have been:

IMG_2549.jpeg


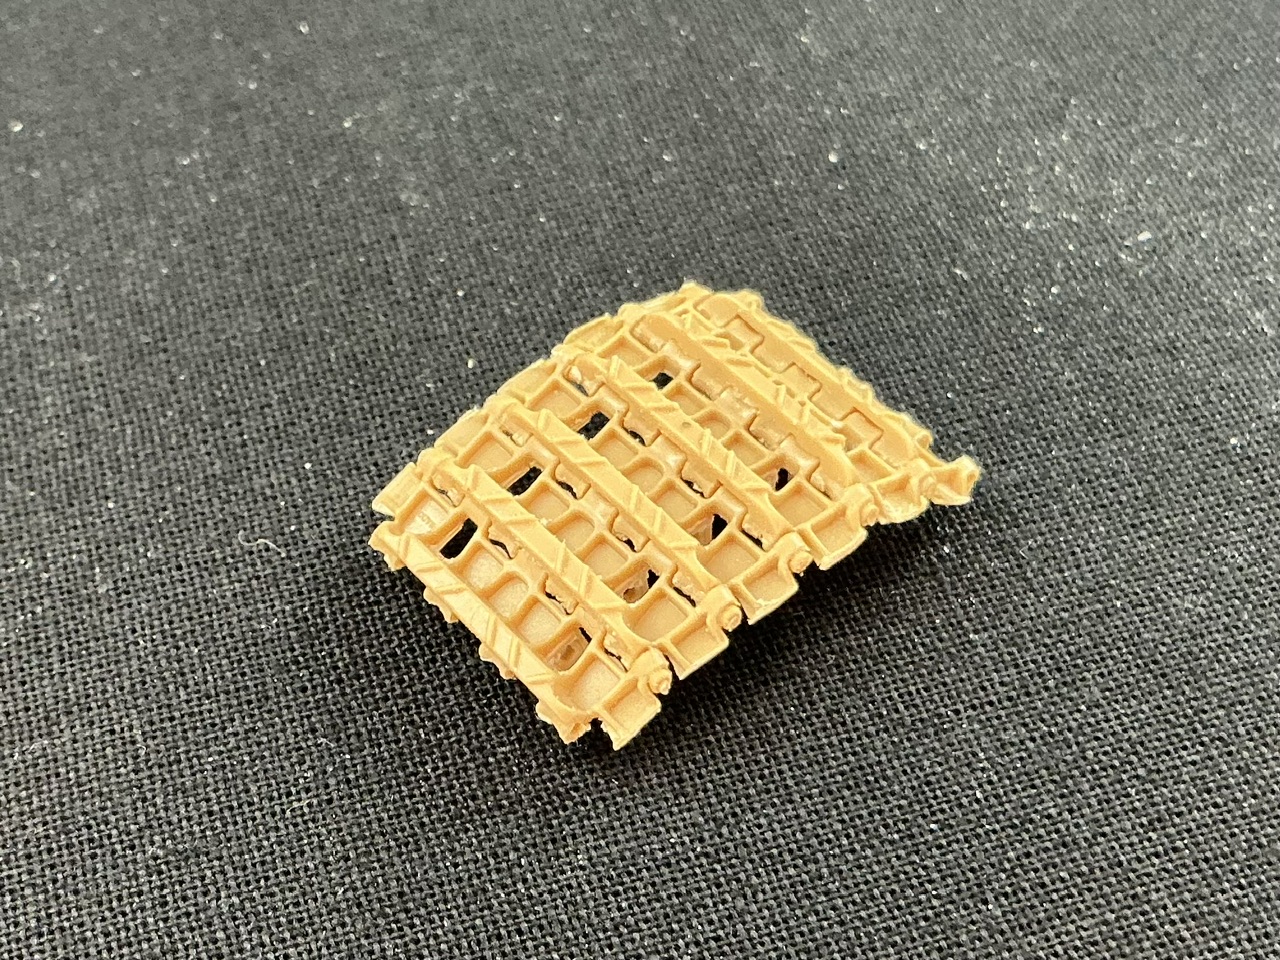
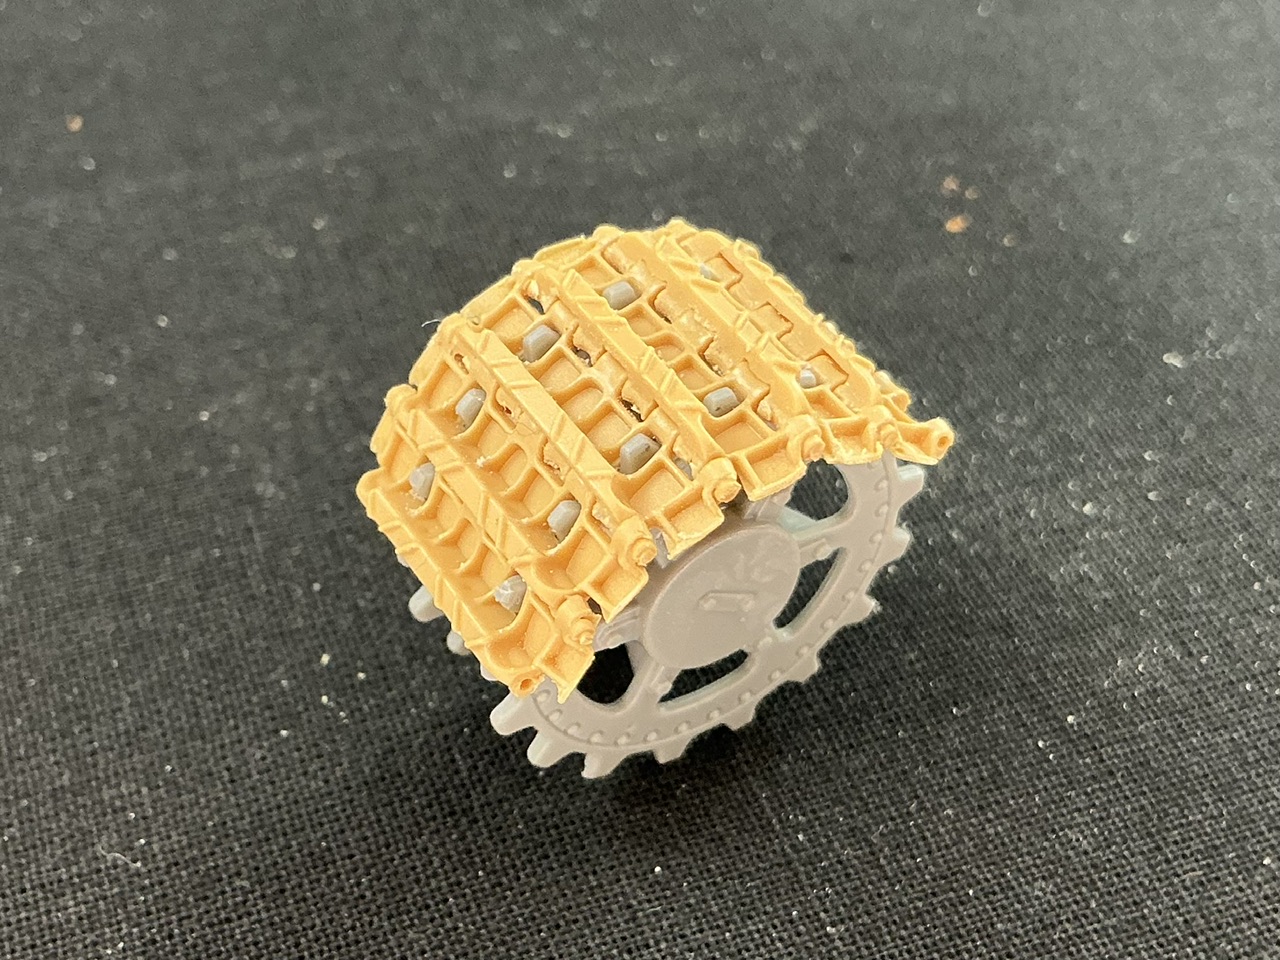
Not the greatest job to be doing, but I've had tracks that needed a lot more work. Once I had cleaned all of them up, I put six links together to see how that goes. The pins are in sets of five on bits of sprue, so you can insert those all at once if you put the links in the jig you can also see in the picture.

IMG_2553.jpeg


As always, it takes a while to find the best way to build them. One thing I'm disappointed in, is that the pins don't seem to want to stay in by themselves but need a tiny dab of glue. I don't much like that, but what can you do? At least they fit well on the Dragon drive sprockets:

IMG_2554.jpeg


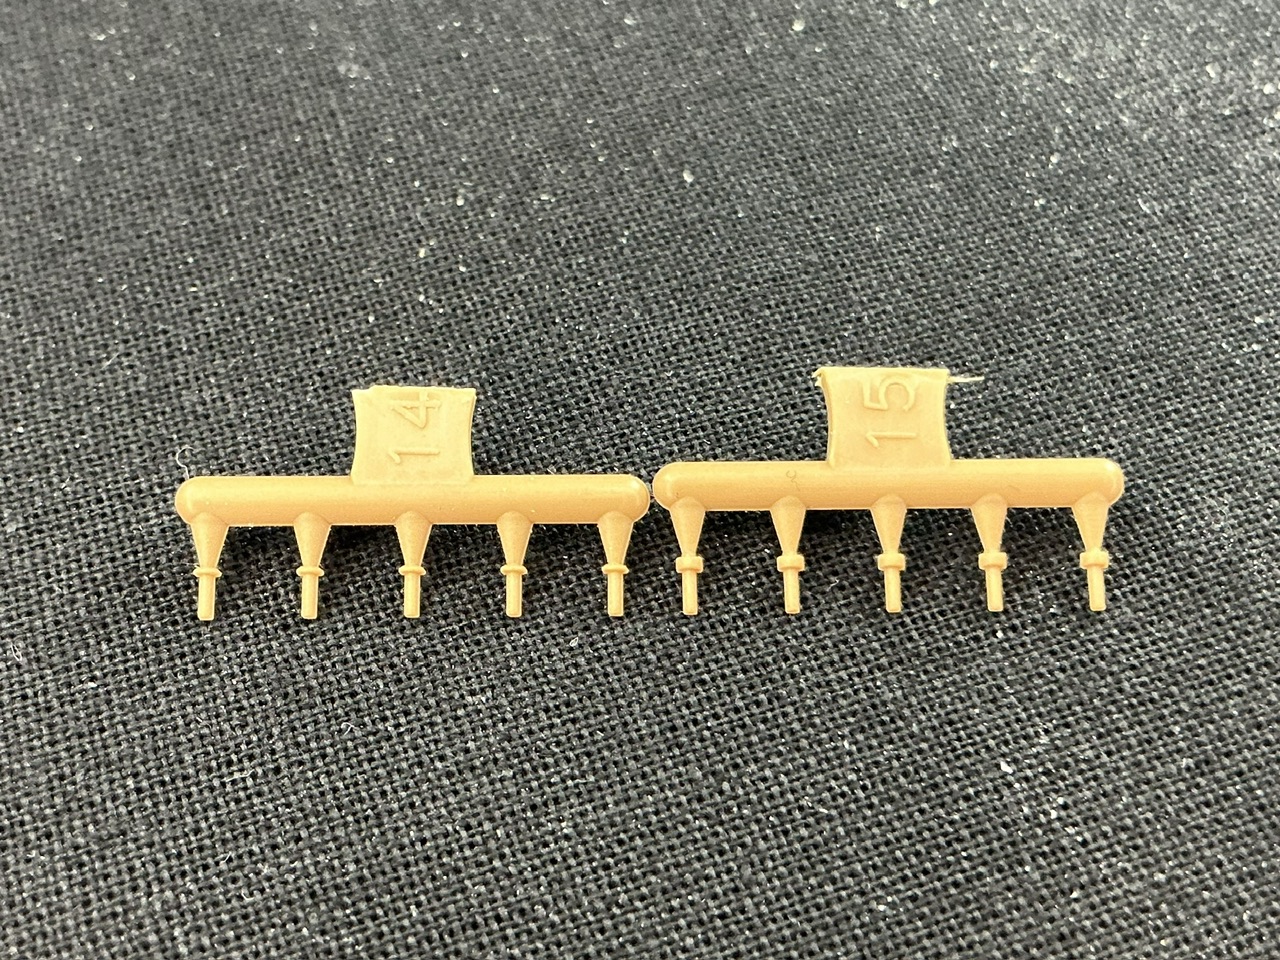
One thing to note is that there are two sets of pins: Nos. 14 and 15, and one of the two goes on the inside and the other on the outside of the track — so they're not the same on both sides of the tank! At first sight there doesn't seem to be any difference between the pins, but there is:

IMG_2555.jpeg


The heads on Nos. 14 are flatter than on Nos. 15, so you need to pay attention which ones you put where.
 
For me, it depends. Some tracks are just too difficult to put together (Bronco Sherman tracks, for example) and others don't want to stay together no matter what you try, and I have little patience for either of those. But ones that do fit, I will usually build without too much complaining :)
 
For me, it depends. Some tracks are just too difficult to put together (Bronco Sherman tracks, for example) and others don't want to stay together no matter what you try, and I have little patience for either of those. But ones that do fit, I will usually build without too much complaining :)
I tried a "AFV Kit" Pz-IV track set in plastic. I went back to the rubber bands on that one.

The Fruil (sp?) metal tracks for the Panther worked great.

Plastic linked tracks on the Merkava (Meng) and the Bradely (also Meng) went together great.

But I think modern armor is easier to reproduce than the WWII stuff.
 
I tried a "AFV Kit" Pz-IV track set in plastic. I went back to the rubber bands on that one.
A Panzer IV is one where I would definitely not use single-piece, soft-plastic tracks :) The way the track hangs between the return rollers makes tight tracks look wrong to me.

Fruil (sp?)
Friul :) Originally Friulmodelissimo when the company was based in Italy, then it changed its name to Friul Model, but I'm not sure anymore if that was before, with or after the move to Hungary.

But I think modern armor is easier to reproduce than the WWII stuff.
Most modern vehicles have much larger track links, so less fiddly work, yes. These Panther links are a good size too, Sherman tracks are doable, but I wouldn't want to assemble, say, Universal Carrier workable track unless the links just clip together.
 
Because the tracks are on hold while I wait for thicker glue and I also can't continue on the Archer because I'm waiting for someone to print and send me snatch hooks for the tow ropes, I tackled another job I wasn't looking forward to: Cuckoo's tool racks.

IMG_2568.jpeg
IMG_2569.jpeg


In the first photo, you can see a brass tool clamp — or actually, two of the three parts for one. By the time I had those in position, I really didn't feel like doing the other seven, so I went looking for another way to make them. I found that in cutting off the plastic tools from the clasps they're moulded onto, so that I could drill out the clasps and for the non-round ones, carve the hole bigger with the tip of a knife. That proved much easier than fiddling around with tiny etched parts, so I'm glad I took this route instead. The one at the left front, I cut away after taking the picture and replaced it by a plastic one.

A few details about Cuckoo here:
  • At the right front the towing shackle is stowed upside down while the axe and fire extinguisher are missing. During the fighting around Geijsteren there was a squarish object where the latter is supposed to go, but I haven't figured out yet what that was. Towards the end, in Cleve, only the starting crank and the towing shackle were still in this rack.
  • At the right rear only the tool for adjusting the idler wheel is still present, but the hammer and crowbar are gone. In Cleve there is a crowbar, but that is in the wrong clasp (the one for the hammer) on the right and it's stuck through the bracket for the hammer's head on the left. The idler adjusting tool is still there in Cleve, in its proper clasp on the right but also stuck through the hammer's bracket on the left.
  • At the left front, there is nothing in the rack at all except for a British shovel — not a German one, as can be seen from the T-handle, because German shovels had a knob at the end of the handle. The one on my model comes from a set of British paratroopers from Master Box. I cut the handle in two so I could glue it to either side of the clasp.

IMG_2570.jpeg
 
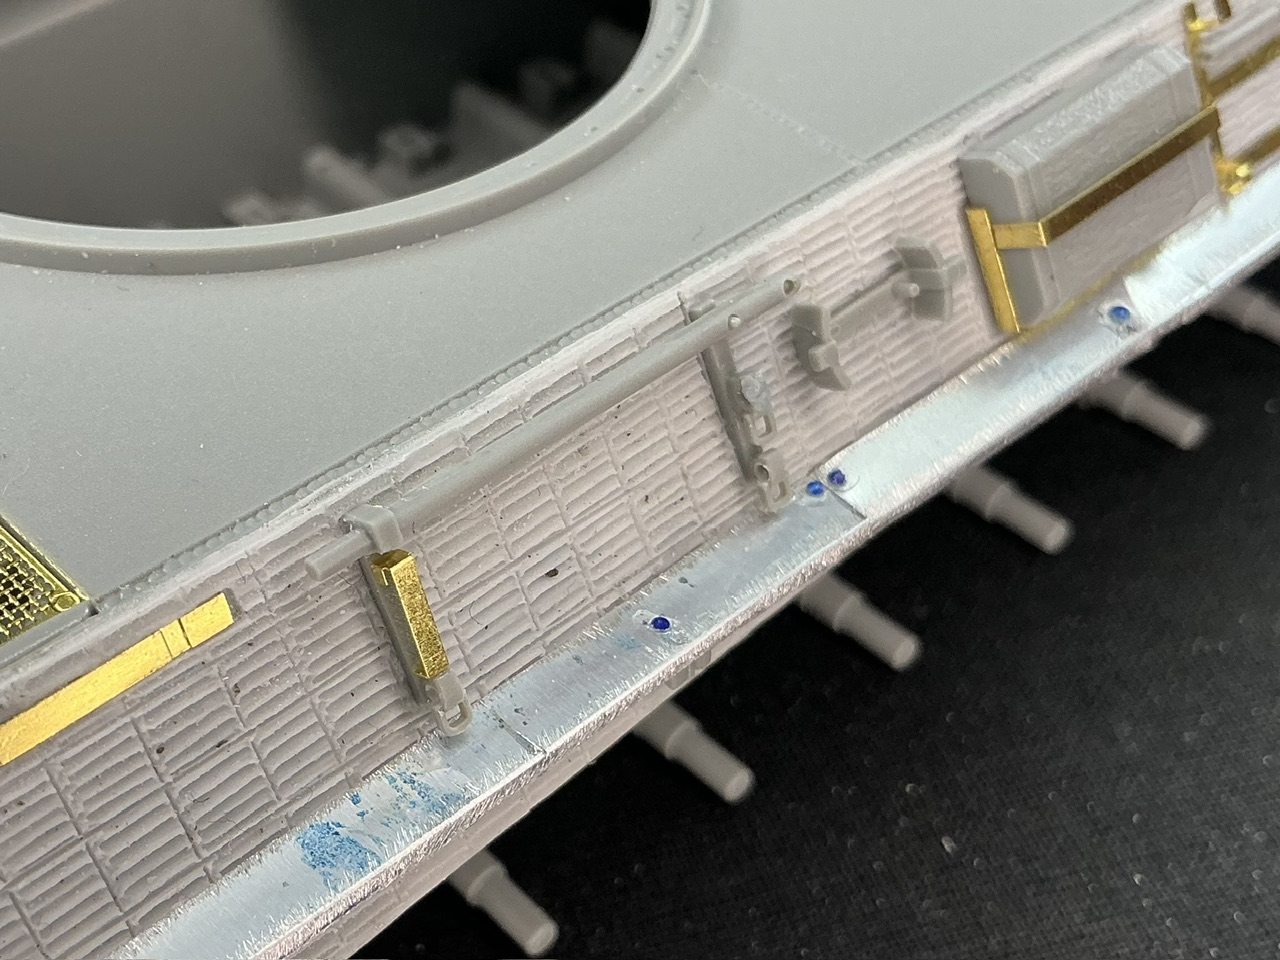
While I was staring at photos to figure out the crap tied to the sides of the tank, I noticed that there was no Zimmerit in the area covered by the tube for the gun cleaning rods and spare antennas (which was missing on Cuckoo), so I tackled that in the time-honoured manner: open the photo of Cuckoo in Tilburg in Photoshop, cut out the side, correct its perspective and resize to the correct dimensions for the model, then switch to Illustrator to trace over the missing section of Zimmerit and print it out. Then I just had to cut it out and use it as a paint stencil:

IMG_2572.jpeg


This is not the full length, because in the photo from Tilburg there's something tied to the side of the tank (my working theory is that it's a camouflage net) that obscures the rear part.

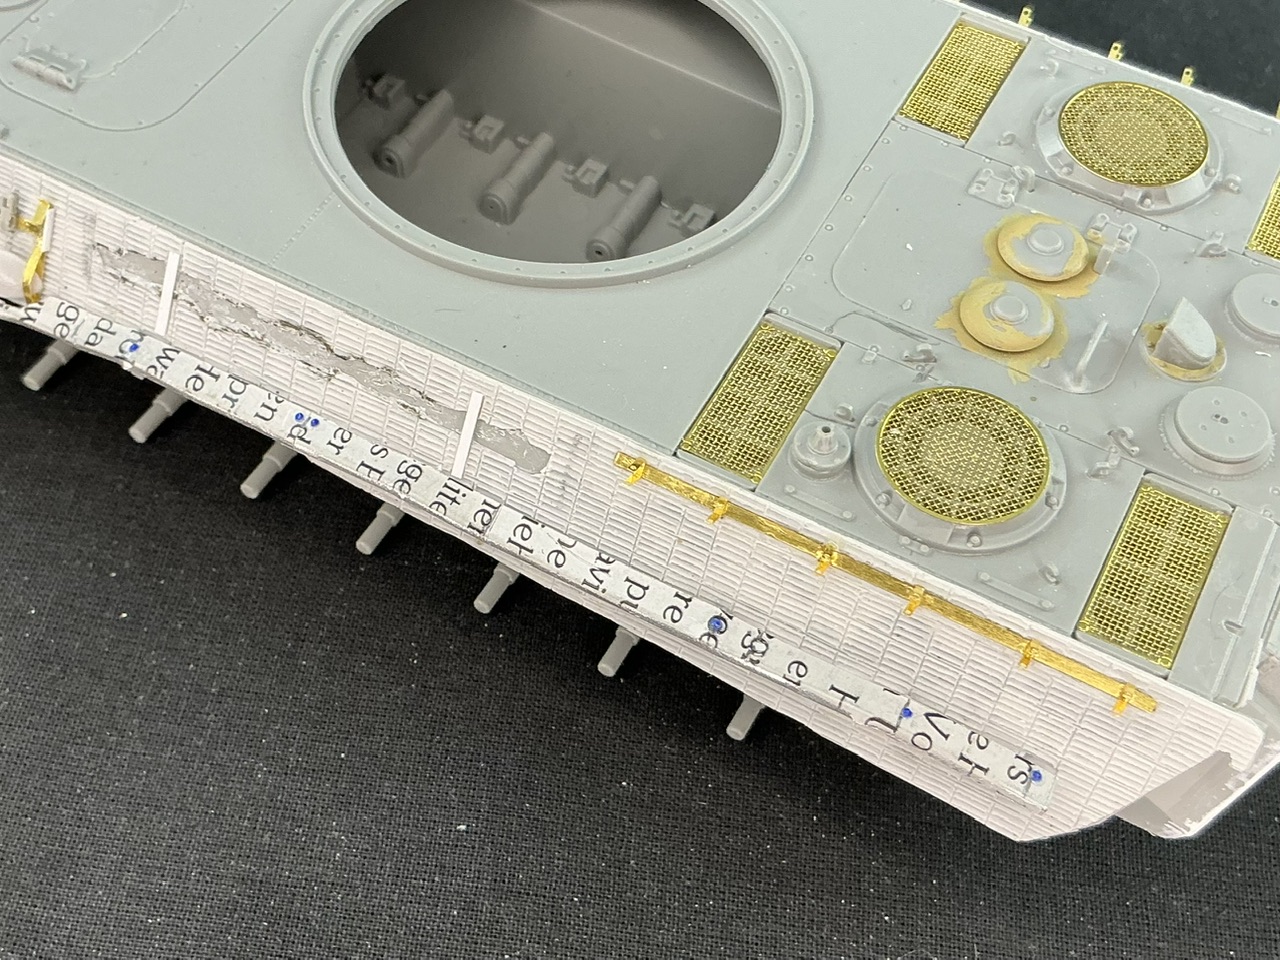
All that was left was to cut it out on the model:

IMG_2573.jpeg


Trickier than expected, partly because the Zimmerit turned out to be glued down quite well and partly because I had to take extra care because of all the other details already attached to the hull. My advice: do this before you stick the Zimmerit to your model :) The part at the back is speculative, and simply cut to match the rest. I then glued plastic strip into the recesses for the brackets that held the tube, as the remains of those.

I also added the hangers for the spare track links at the back, twelve nice little fiddly bits to clean up, fold and glue down … Now to add pins through some of them, but I don't think I will add those to all of them. So here's some appropriate reference material:

IMG_2279.jpeg


This is the Panther in Overloon, whose details are very similar to Cuckoo's (which is not at all surprising, as they were lost around the same time in the same area). However, those little bolts on the sides will not be on my model :)
 
Thanks :)

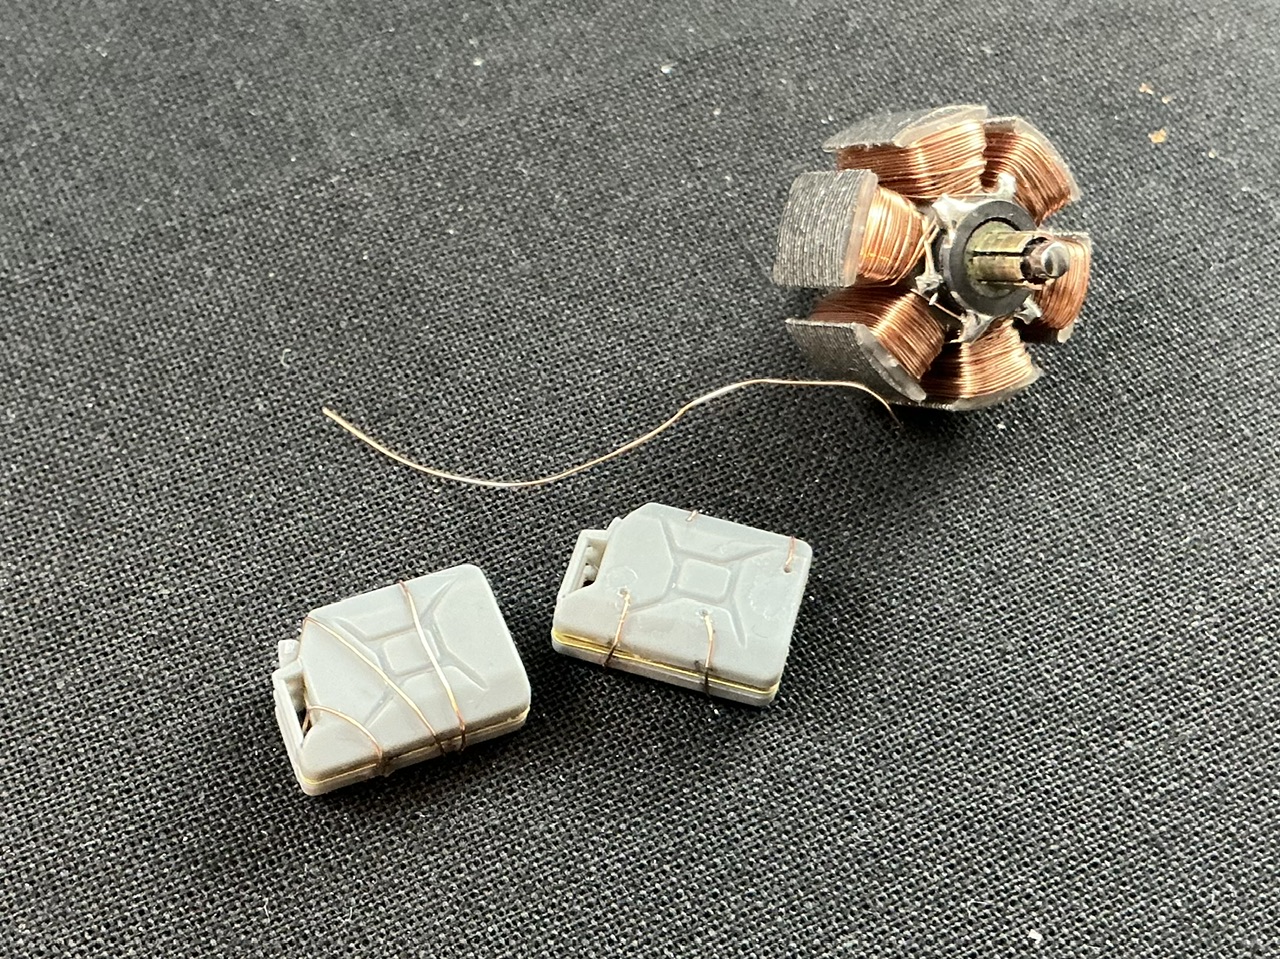
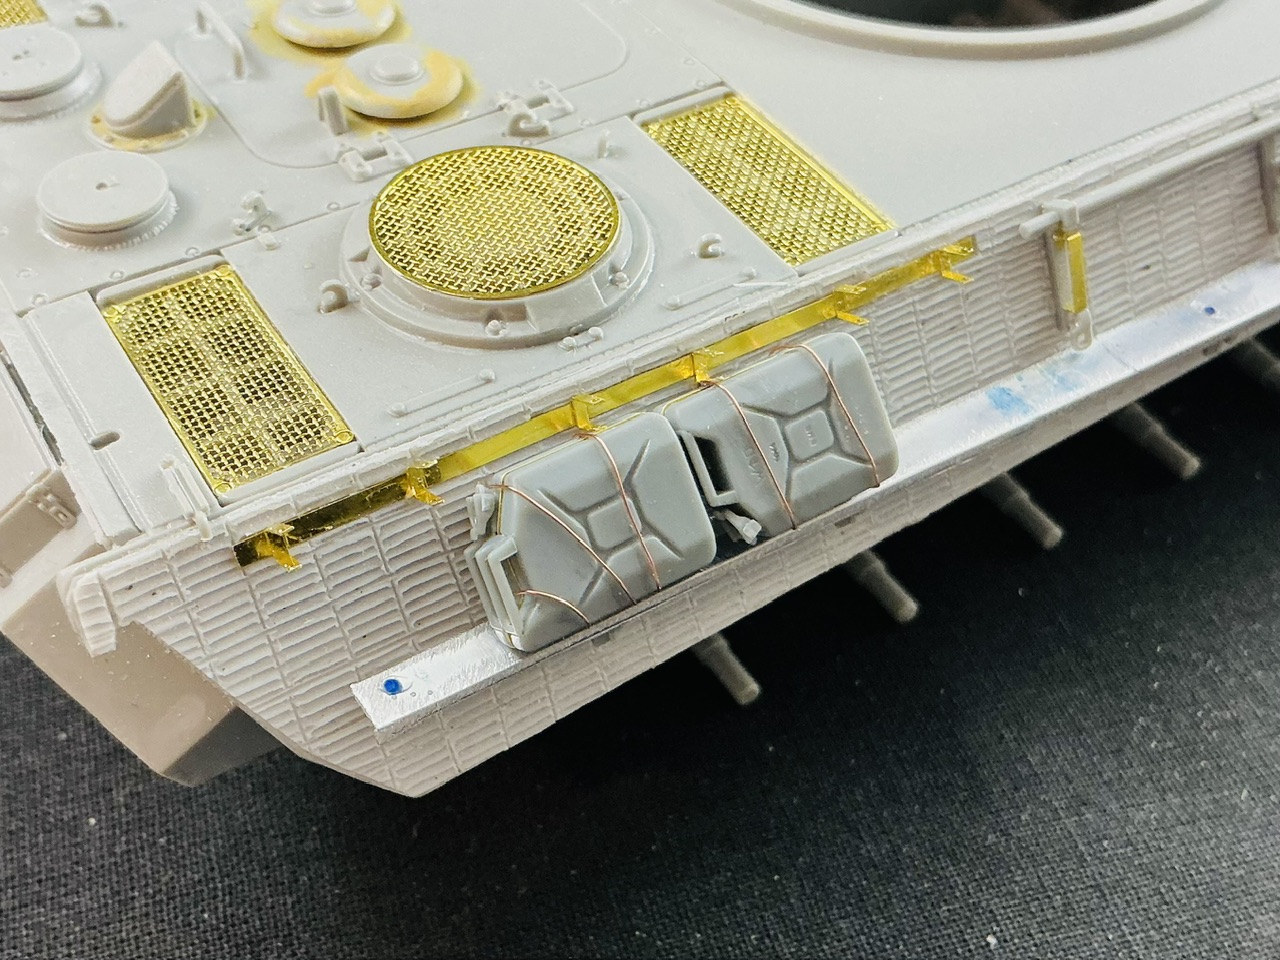
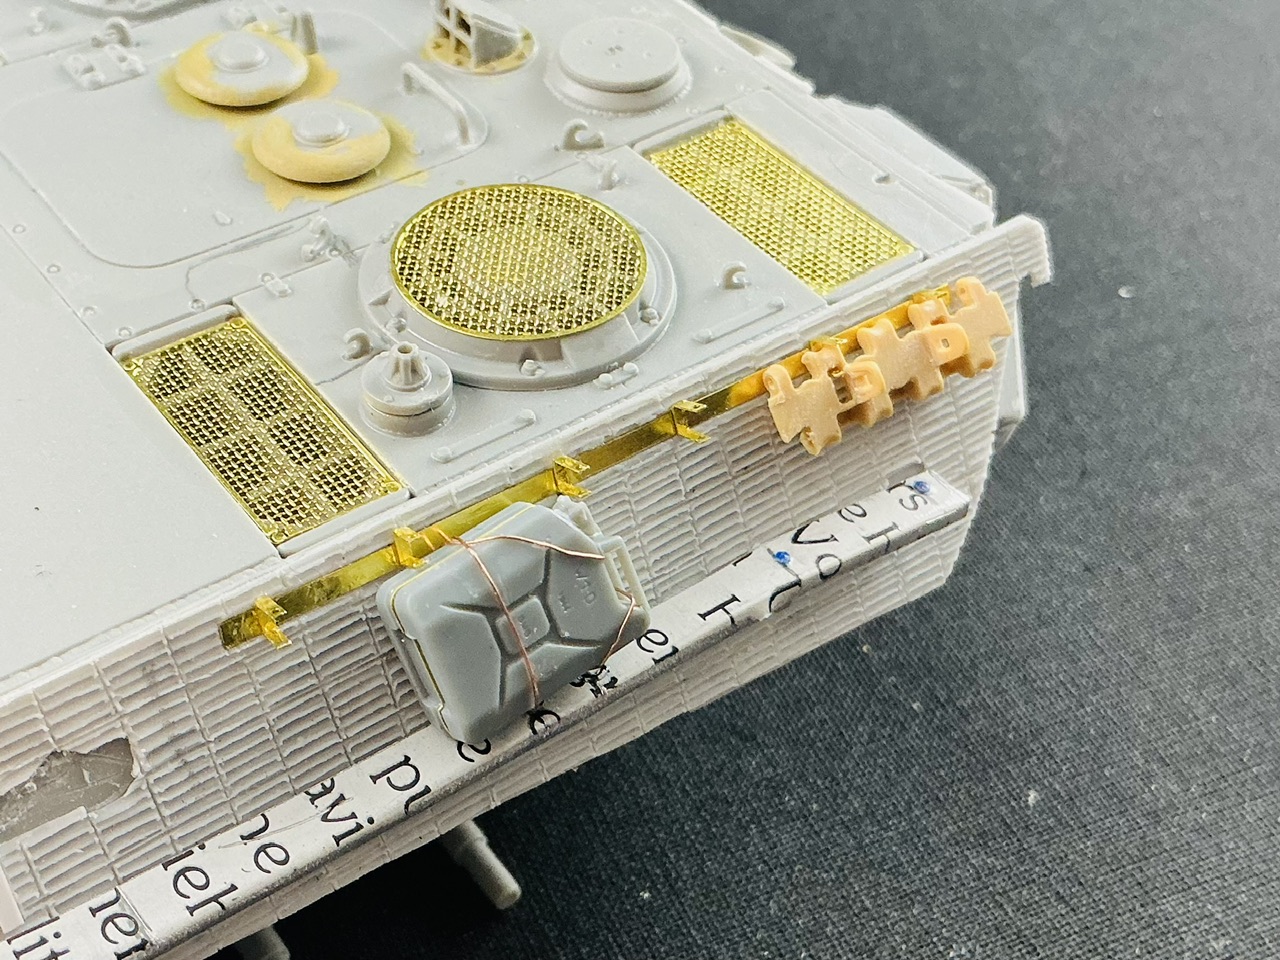
Next step is the stowage. I started with the jerrycans, because it's clear what they are and they're easy to find. I built three of them from a Bronco set with British accessories, then put copper wire around them to replicate the string/rope that they were tied up with on the real tank. Here two of them, with the the source of the copper wire:

IMG_2575.jpeg


I drilled small holes in the back of the jerrycans to stick the wire into, which you can see on the one on the right, because this is easier than trying to wrap it all the way around. If you do that, it moves around easily and is hard to glue in place.

The wire comes from the rotor of a small electric motor, but I have no idea where that came from :)

On the tank:

IMG_2576.jpeg


And the left side, with a track link from RFM:

IMG_2577.jpeg


I wanted to drill out the holes for the track pins in it, but that didn't want to cooperate. Oh well, we'll do without, then.
 
Last edited:

Latest posts

Back
Top