
Pricey is right! Not as bad as metal tracks tho.Thanks Ron. You won't regret trying these tracks out. They're pricey but.....they are worth it.

You are using an out of date browser. It may not display this or other websites correctly.
You should upgrade or use an alternative browser.
You should upgrade or use an alternative browser.
1/35 Tamiya Panther Type G--Completed 31 January 2026
- Thread starter mustang1989
- Start date

locomotive
Well-Known Member
- Joined
- Mar 2, 2025
- Messages
- 337
Looking at photos from the war, there really is no such thing as too much.Just didn't know how much was too much when applying
They led a hard life and didnt get valeted very often.
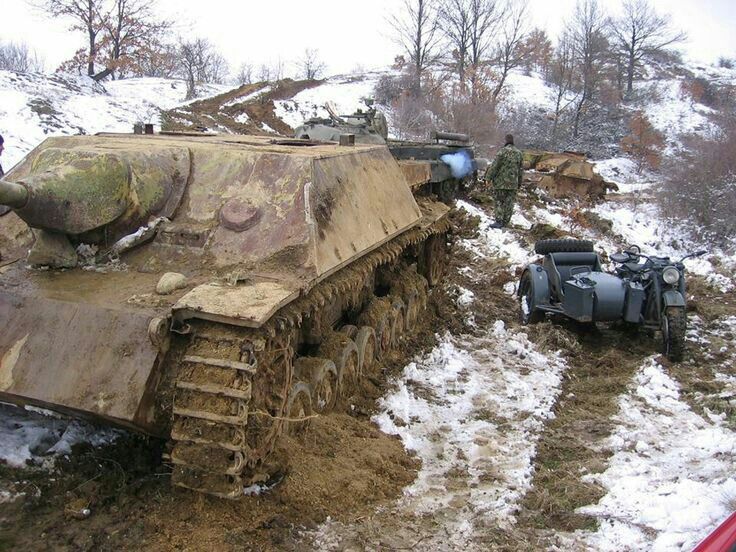
Are those tracks broken? Look loose at front.Looking at photos from the war, there really is no such thing as too much.
They led a hard life and didnt get valeted very often.
View attachment 175128
locomotive
Well-Known Member
- Joined
- Mar 2, 2025
- Messages
- 337
Yeah it looks that wayAre those tracks broken? Look loose at front.

Jakko
Well-Known Member
That's not a photo from the warLooking at photos from the war, there really is no such thing as too much.
 I've never seen it before, but this is a Jagdpanzer IV that's being recovered after (I think) having been buried somewhere in Russia or thereabouts for 80 years or so. The army green vehicle in the background, that a puff of smoke is just coming out of, is an upgraded T-55 of some kind. Further in the background is a StuG III hull with no running gear on it, which also suggests it's being recovered from where the stripped hull was left during the war.
mustang1989
Well-Known Member
- Joined
- Aug 6, 2022
- Messages
- 552
Thank you for the pictures @locomotive . Those do look post war but it gives me an idea of just how dirty these things can get when being freshly recovered for future reference.


![Pampers Sensitive Baby Wipes, Clinically Proven, Fragrance Free, Unscented, Water Based, Hypoallergenic, Multi-Use, Hand Wipes 336 Wipes Total (6X Flip-Top Packs) [Packaging May Vary]](https://m.media-amazon.com/images/I/41KLBHu9CAL._SL500_.jpg)






As an Amazon Associate we earn from qualifying purchases. Product prices and availability are accurate as of the date/time indicated and are subject to change.
mustang1989
Well-Known Member
- Joined
- Aug 6, 2022
- Messages
- 552
Spent a LOT of time with these tracks trying to get the right look without messing them all up. I mean.......I wanted 'em dirty but not filthy. Even coming home after being stuck, while the hull would still have some mud on it, the tracks would shed most of that as the vehicle was being driven. I put a light coat of grit on the tracks and wiped the excess off of the track cleats. Then I came back over them with a light coat of Dark Weathering Pasted thinned with some oderless thinner for oils. I believe I have the results I was after now with a perfect balance of residual mud on the tracks. All I have to do is set track tension across the tops of the road wheels and this side is done.


mustang1989
Well-Known Member
- Joined
- Aug 6, 2022
- Messages
- 552
Thanks bud.Good work so far. It is looking very nice.
I managed to get the L/H side of the track skirt section painted up and then worked on painting and initial weathering on the pioneer tools. I spent a little more time this morning working on it which added up to around 2+ hours bench time total.
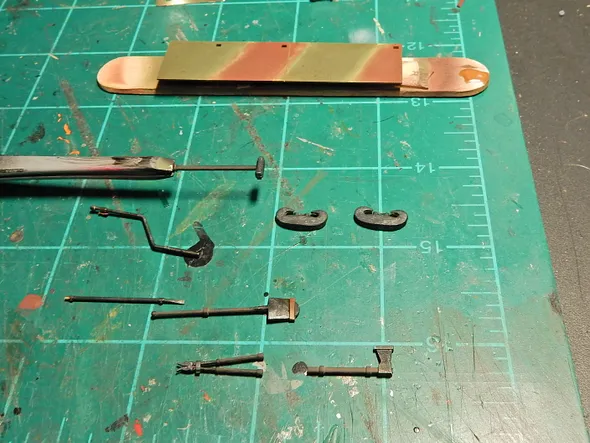
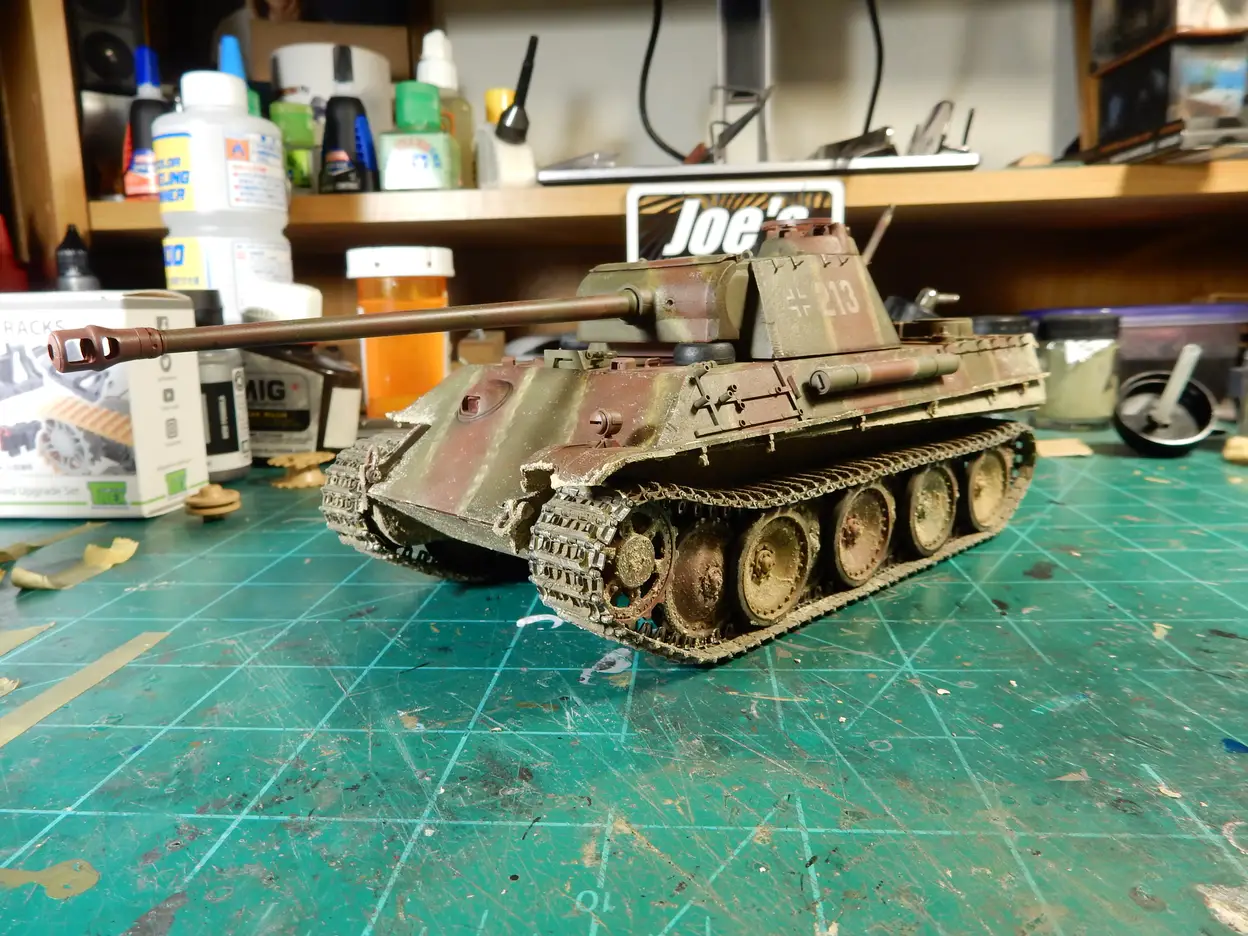
I installed almost all of the tools and gave them a used look since she had just recently gotten freed from being stuck in the mud. I've also got a couple of side skirts installed as well. I'm going to go back over the side skirt a little and tone the residual mud trailing down from the shovel a bit. Got a little carried away with that so I'll clean that up a bit a little later on.
mustang1989
Well-Known Member
- Joined
- Aug 6, 2022
- Messages
- 552
I've been going fairly slow so I don't get as much wrong with the build.
I'm down to the short list now with only the spare road wheel painting & weathering, exhaust muffler shroud painting & rust effects, turret machine gun paint, detailing and install, odds & ends like canteens and individual equipment install and finally the driver commander figure paint up and install left to do.
Current progress pictures.


I'm down to the short list now with only the spare road wheel painting & weathering, exhaust muffler shroud painting & rust effects, turret machine gun paint, detailing and install, odds & ends like canteens and individual equipment install and finally the driver commander figure paint up and install left to do.
Current progress pictures.

Funny how quickly we forget doing 'the long list'! Sometimes I think if I remembered I might reconsider my choice of hobbies!the short list

That's a nice looking tank!I've been going fairly slow so I don't get as much wrong with the build.
I'm down to the short list now with only the spare road wheel painting & weathering, exhaust muffler shroud painting & rust effects, turret machine gun paint, detailing and install, odds & ends like canteens and individual equipment install and finally the driver commander figure paint up and install left to do.
Current progress pictures.
mustang1989
Well-Known Member
- Joined
- Aug 6, 2022
- Messages
- 552
All too true. lolFunny how quickly we forget doing 'the long list'! Sometimes I think if I remembered I might reconsider my choice of hobbies!
Thanks Ron.That's a nice looking tank!
Forgot to post this up. Got one of the spare road wheels mounted to the rear of the turret yesterday. Gonna try and wrap this puppy up in the next couple of weeks.

Looks great!All too true. lol
Thanks Ron.
Forgot to post this up. Got one of the spare road wheels mounted to the rear of the turret yesterday. Gonna try and wrap this puppy up in the next couple of weeks.
mustang1989
Well-Known Member
- Joined
- Aug 6, 2022
- Messages
- 552
Thanks Ron.Looks great!
I can't believe I'm actually saying this folks, but this build has now come to a close. I have learned a great deal with this build and never thought I would build an armor subject but after watching all of the good builds here in the past as well as the present, I can now say that I have pulled off what I would like to call a successful outcome.
After stocking up on all of the paints, weathering mediums and supplies........ I went to work. I used markings from Star Decals to depict a Panther in East Prussia in January...ish of 1945 which is why you'll notice the winter camouflage spare road wheels on the sides of the turret and aft part of hull. Paint scheme is of a late war type as well. To help the base kit out some, I used 3D printed resin tracks from Panzerwerk Design. These things are so easy to put together that it's almost a crime. Tedious.....yes.....but go together very easy and make for a fully workable track. I also used some Tamiya photoetch on the build as well as an Eduard printed MG34 machine gun for the turret. The OOB tow cable was replaced by an offering from Eurekai Model Accessories and the OOB gun barrel was replaced by one from Aber.
Thank you guys for all of the support and comments along the way


Very impressive! Do the tracks get glued or were they the type that snap together?Thanks Ron.
I can't believe I'm actually saying this folks, but this build has now come to a close. I have learned a great deal with this build and never thought I would build an armor subject but after watching all of the good builds here in the past as well as the present, I can now say that I have pulled off what I would like to call a successful outcome.
After stocking up on all of the paints, weathering mediums and supplies........ I went to work. I used markings from Star Decals to depict a Panther in East Prussia in January...ish of 1945 which is why you'll notice the winter camouflage spare road wheels on the sides of the turret and aft part of hull. Paint scheme is of a late war type as well. To help the base kit out some, I used 3D printed resin tracks from Panzerwerk Design. These things are so easy to put together that it's almost a crime. Tedious.....yes.....but go together very easy and make for a fully workable track. I also used some Tamiya photoetch on the build as well as an Eduard printed MG34 machine gun for the turret. The OOB tow cable was replaced by an offering from Eurekai Model Accessories and the OOB gun barrel was replaced by one from Aber.
Thank you guys for all of the support and comments along the way
mustang1989
Well-Known Member
- Joined
- Aug 6, 2022
- Messages
- 552
They merely snap together with two retaining pins per track Ron. That reminds me. I may need to glue the bottom runs of tracks to the bottom of the road wheels. lolVery impressive! Do the tracks get glued or were they the type that snap together?
Thank you for the comments bud.

Great job on this one.

kevin
Well-Known Member
That looks pretty darn good!

Great build. PanthermanThanks Ron.
I can't believe I'm actually saying this folks, but this build has now come to a close. I have learned a great deal with this build and never thought I would build an armor subject but after watching all of the good builds here in the past as well as the present, I can now say that I have pulled off what I would like to call a successful outcome.
After stocking up on all of the paints, weathering mediums and supplies........ I went to work. I used markings from Star Decals to depict a Panther in East Prussia in January...ish of 1945 which is why you'll notice the winter camouflage spare road wheels on the sides of the turret and aft part of hull. Paint scheme is of a late war type as well. To help the base kit out some, I used 3D printed resin tracks from Panzerwerk Design. These things are so easy to put together that it's almost a crime. Tedious.....yes.....but go together very easy and make for a fully workable track. I also used some Tamiya photoetch on the build as well as an Eduard printed MG34 machine gun for the turret. The OOB tow cable was replaced by an offering from Eurekai Model Accessories and the OOB gun barrel was replaced by one from Aber.
Thank you guys for all of the support and comments along the way
Nice!
Thoughtful selection of AM accessories to pimp your ride!
Think there'll be more armour now that you nailed this one?
Thoughtful selection of AM accessories to pimp your ride!
Think there'll be more armour now that you nailed this one?
user 22148
Well-Known Member
- Joined
- Oct 3, 2024
- Messages
- 497
That's a superb bit of work Joe - well up to your usual excellent standards!
mustang1989
Well-Known Member
- Joined
- Aug 6, 2022
- Messages
- 552
Sorry for the late reply fellas. Been out of state for the past week and a half and had some other stuff going on in the background in real life.
Thank you all for the very kind and generous comments.
Thank you all for the very kind and generous comments.

Dr. Armor_72
Active Member
- Joined
- Aug 2, 2025
- Messages
- 41
For a first build it is quite well done. What will be the next one?
mustang1989
Well-Known Member
- Joined
- Aug 6, 2022
- Messages
- 552
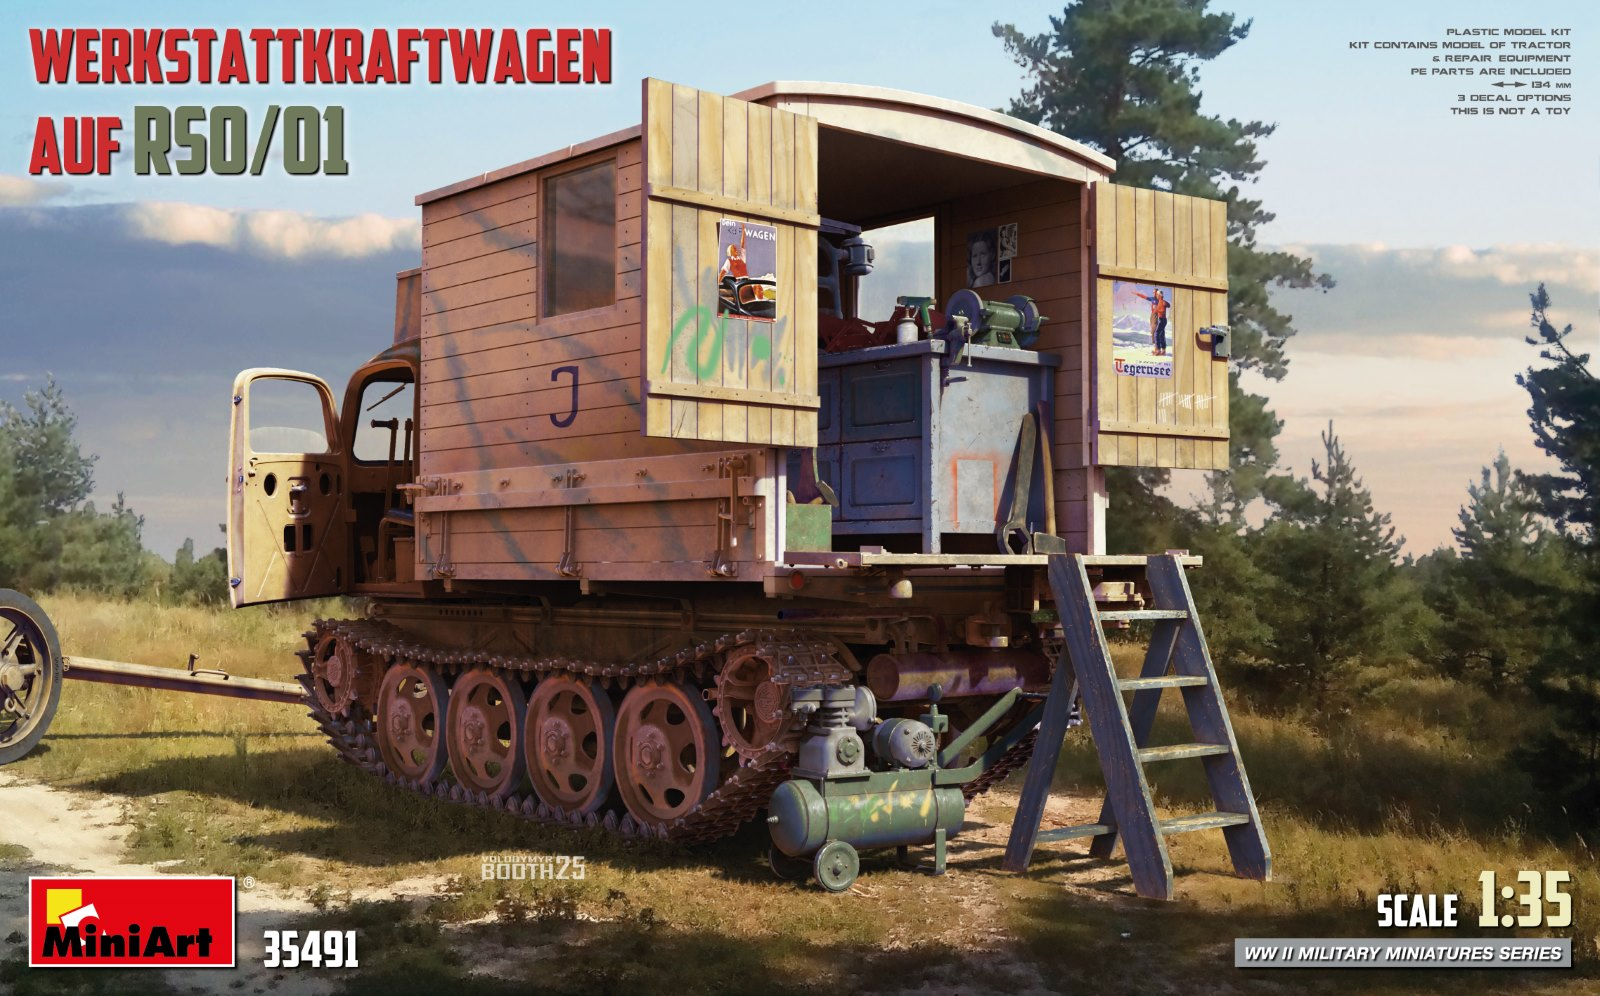
Thank bud. Should be coming up pretty soon. Gonna take on a MiniArt Werkstattkraftwagen Auf RSO/01. Pretty cool looking kitFor a first build it is quite well done. What will be the next one?
Dr. Armor_72
Active Member
- Joined
- Aug 2, 2025
- Messages
- 41
Oh no! I know those kits. The number of parts is so big that ... . So, you have to be patient.Gonna take on a MiniArt
Mini Art / Maxi Part!those kits

mustang1989
Well-Known Member
- Joined
- Aug 6, 2022
- Messages
- 552
Oh no! I know those kits. The number of parts is so big that ... . So, you have to be patient.
LOL!! I hear you both and thank you for the heads up. Believe me......I've got a good heads up about these and have dealt with kits with fewer parts counts that I've increased tenfold with AM PE and resin items.Mini Art / Maxi Part!
I'm gonna go slow with this one.
Dr. Armor_72
Active Member
- Joined
- Aug 2, 2025
- Messages
- 41
That is totally true!Mini Art / Maxi Part!

If you are in a hurry, you are in the wrong hobby.I'm gonna go slow with this one.
That tank is a beautiful build.


