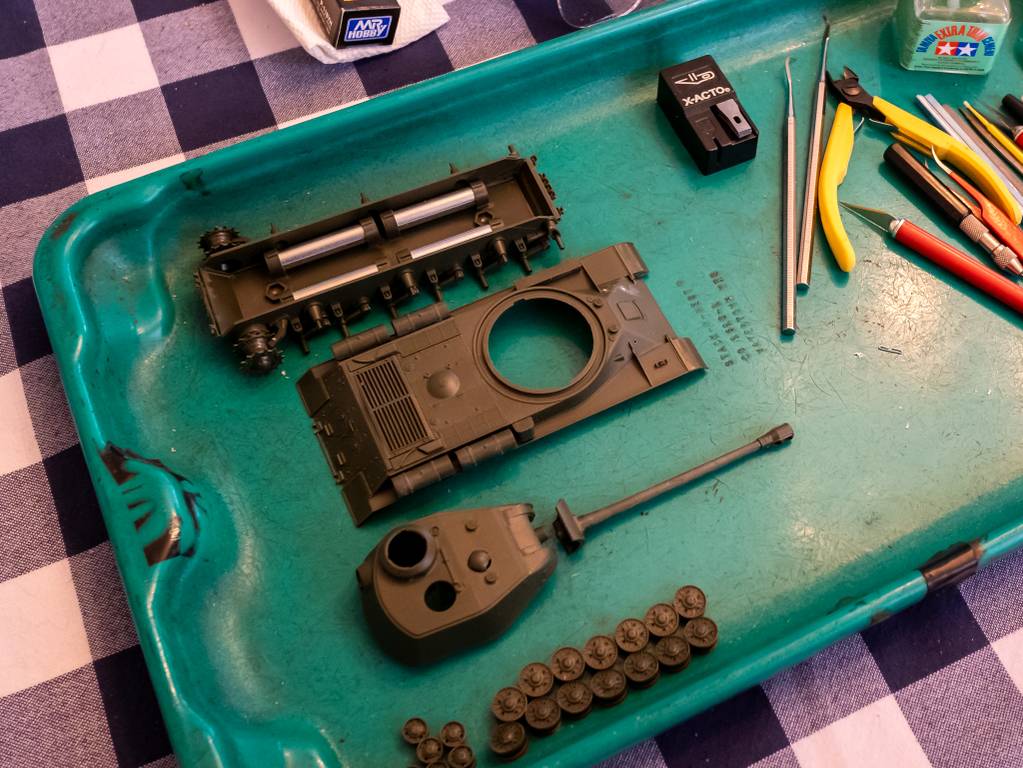
Tamiya Panther Ausf.D construction question

Scale Model Addict - Model Tips, Guides, Tools & Tech, Tutorials, and Community

Help Support Scale Model Addict:

Dr P

Member
Joined
Jun 2, 2024
Messages
8
Starting to assemble the Tamiya 1/48 Panther Ausf.D (32597) and have run into a problem.
In the second step, it shows an orientation for part C7 but for the life of me, I cannot figure out how that can be achieved.
No problem with C6 but the arm on the side for C7 blocks it from seating flush.
Not being the most skillful of modelers and at an advanced age, all the help I get is greatly appreciated.
Thanks.
 
That's pretty impressive injection molding creating that entire lower hull with swingarms and details in one drop .
 
it shows an orientation for part C7 but for the life of me, I cannot figure out how that can be achieved.
Never having built this kit, I took a look at the instructions that @urumomo kindly linked to (saving me the trouble of finding them myself :) ) and it looks to me like C7 should simply fit into the recess moulded into the lower hull. There seems to be really only one way it can go, so if it doesn't fit, it sounds to me like you've got it turned the wrong way somehow?

That's pretty impressive injection molding creating that entire lower hull with swingarms and details in one drop .
The lower hull is die-cast metal. Many of these 1:48 scale Tamiya kits have that, and though I didn't know whether this particular one did, the fact that the instructions say to use superglue for everything that glues to the lower hull, proves it :)
 
The lower hull is die-cast metal. Many of these 1:48 scale Tamiya kits have that, and though I didn't know whether this particular one did, the fact that the instructions say to use superglue for everything that glues to the lower hull, proves it :)
Ah , I didn't look at any text , just the parts .
that still requires a fancy , multipart mold and additional equipment .
Why do they do it in a zinc alloy ?

was Tamiya the manufacturer that included a slab of metal in some of those smaller kits for added mass ?
 
Last edited:
...was Tamiya the manufacturer that included a slab of metal in some of those smaller kits for added mass ?
Tamiya did, and the other makers who collaborated in the Waterline Series of 1/700 ship kits. They included a white metal bar to glue to the waterline base. I never use it, myself.
 
As an Amazon Associate we earn from qualifying purchases. Product prices and availability are accurate as of the date/time indicated and are subject to change.
that still requires a fancy , multipart mold and additional equipment .
More fancy than just making a multipart mould for plastic, I would think, because they now need a metal moulding machine as well. (Unless they outsourced it, of course, but I kind of doubt Tamiya would.)

But the odd thing with lower hulls in general is that Tamiya and Italeri were making them in a single piece in the 1970s and '80s already, but it wasn't until the late '90s or so that Dragon began making a lot of noise about their "slide moulding" technology that was nothing more than what Tamiya and Italeri had been using for those hulls for decades. And in recent years, the hulls in a lot of AFV kits are no longer one-piece but need to be built up from flat plates — even from Tamiya.

Why do they do it in a zinc alloy ?
I've been wondering about that since I read about the first releases in this line when it was new. I guess it's to give the model some weight, but I can't see the point of that either, because who cares if a model has anything approaching scale weight?

Dragon also uses a metal hull in some of their 1:72 scale armour kits, but in that case it's because those are/were also sold ready-assembled, as well as in kit form. Using a hull with as much detail as possible moulded on then saves expensive labour costs at the factory.

was Tamiya the manufacturer that included a slab of metal in some of those smaller kits for added mass ?
If I'm not mistaken, in later 1:48 scale AFV kits, they've gone off the metal lower hull and use a plastic one, but also include a simple metal bar to put into it to give much the same weight.
 
to give the model some weight
... I know it sounds hokey, but working with a solid resin body of an armoured vehicle, I was surprised to be impressed by the weight; the extra heft translated into a more believable representation than a featherweight one that my brain screamed is just a plastic model!
 
Same :) I find that most plastic models weigh enough, but maybe for those of us who live in very draughty houses the weight will help? ;)
 
Thanks for all the replies and advice.
It came down to me not understanding the instructions well enough.
The pieces were attached to the end of the hull, not the sides.
I was trying to align them with the tiny pins coming off the sides of the hull.
Being an old man is not for the frail for sure.
Again, thanks.
 
Same :) I find that most plastic models weigh enough, but maybe for those of us who live in very draughty houses the weight will help? ;)
Until you build a nose-gear unit like a B-25, then you add a pound of lead to the nose :-)

(probably less, but it seemed like more!)
 
I've only ever built one B-25, very long ago, and was surprised it came with a clear support to put under the tail. Once it was built I discovered why it was needed, and wished I had worked out how much weight to put into the nose instead.
 
If I'm not mistaken, in later 1:48 scale AFV kits, they've gone off the metal lower hull and use a plastic one, but also include a simple metal bar to put into it to give much the same weight.
A year or so ago, I tried a couple 1/48th tank kits from Tamiya. Both of them had weights to add to the chassis.
The Churchill had a couple of flat metal bars, and the JS-2 had 4 round metal bars, held on by plastic cap things.
I like the extra weight, but turns out I don't like 1/48th Armor.

Photo of the JS-2 weights
CGeD8y.jpg
 
Why would they add weights to a plastic tank? Not meaning the one with the metal hull, just wondering why a 1/48th tank needs it. To sit down flush on the tracks maybe, so they are not working visually as springs?
 

Latest posts

Back
Top