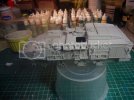
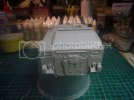
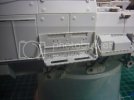
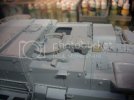
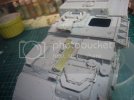
Stryker M1113 MEV

That is looking super sweet Shane :)....Im liking all the detail on it ,cant wait to see the paint .....Keep at her ;)

Chris.
 
looks good man. i kinda fancy one me self but no time for it!
 
- Chris, thanks for your kind words mate :), dont worry only the best for my stryker :p

-Spud, cheers bud ! whenever you get the time give of em a try you wont be disapointed ;)


shane
 
L.L. ,


I've missed a lil' but coming along Famously !! This is a Cool lookin AFV !! All of that Boly detail is Hungry for a washin' !!

Keep-On-A-Truckin' !!
 
Thanks for the kind words lads,

ive been building away squeezing a few minutes here and there, these long days are fairly taking it out of me :( but its getting there quite steadly, should have a major photo update of what ive done with the superstructure and commanders copula by friday night hopefully.

Im not intending on using the kits wheels as i lost a part to the carpet monster :-[ so it gave me the prefect reason to try an aftermarket resin set ;)........i hope to order that set early next week

also many smaller assmeblies have yet to be built including the Miles 2 battle simulation gear, and weapons sation and few other fragile parts that i will leave off till the end of the build

then bring on a bit of groundwork ;D

shane
 
ya see if ya built it in side insted of in the garden ya wouldnt have lost a wheel to your so called carpet :)
 
spud said:
ya see if ya built it in side insted of in the garden ya wouldnt have lost a wheel to your so called carpet :)

((lol)))....never seen a garden carpet monster before ;D

Look forward to the update Shane ,bit of a bummer losing that part ,but the resin wheels are nice ,it'll make a difference in the end ;)

Chris.
 
Spud, hahaha smart arse ;D , ill have you know my work space is hardly the garden lawn :p
P1090632.jpg


chris, they should make a nice difference but its still a pain that i lost it :(


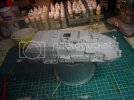
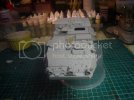
build update, as promised here what ive done to date on the MEV just a few more small assemblies before the painting can begin ;D

P1090638.jpg

P1090639.jpg

P1090640.jpg

P1090641.jpg

P1090644.jpg

P1090645.jpg

P1090648.jpg

more to follow soon


shane
 
Excuses!!! she is looking mighty fine even if u lost a bit :)
 
Nice clean build Shane ..looking the doggies mate ;)...could you not scratch the missing part ??

Nice little work space btw ;D

Chris.
 
that sign on the left there should be inspiration for you ;D
 
Spud - me and my excuses hehehe :p

Chris - thanks for the kind words mate, as for the missing part is a part of wheel assembly so scrathing it is a little tricky....well for me any way ;)


Schweinhund227 - the part i lost was A47 the outer wheel face, you happen to have a spare by chance ? :)


shane
 
Howdie all :)

just been working on resin crew figure today, he's currently under the push at the moment ;) so while i allow the undercoat to set, i just thought id do a quick update on what ive done today, spent a lot of time today working on the etch assmeblies which is for a rather nerve racking experience :-\ my fingers are almost glued togther at this point :p

ill plenty of WIP photos to upload soon


see you then


shane
 
- Spud i know what you mean buudy :-\ but luckly the etch parts were big enough


build update:

got a rake done today on the build, tackled all the etch which was slow delicate work and head wrecking at times i can tell ya....but i referred to the Irish method of detailing. Swear at it till does what you want it do ;) LOL....i have issues lol :p

so instead of flooding this post with photos, ill take just one etch assmebly tonight to talk about...as its very late and college in morn :(

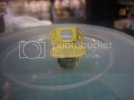
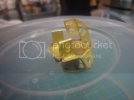
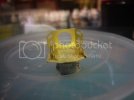
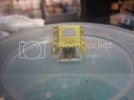
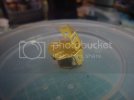
first major etch challange was the mount for the weapons station which houses a load of smoke grenades, and for the most part is made up of largely etch parts, i had a little trouble with it, but thats down to my own lack of experiance with etch, but this is what i got after an hour abouts of building
P1090656.jpg

P1090657.jpg

P1090658.jpg

P1090660.jpg

P1090663.jpg

still to go on are the many smoke dischargers which ill have on by the next update :)

then i got to the part was looking forward to the most... figure painting baby 8)
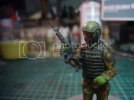
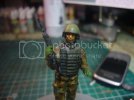
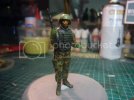
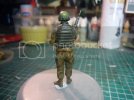
always found this part of the hobby my favorate and most enjoyable. For the entire painting process i used Vallejo paints, burnt seinna acrylic and satin varnish to seal everything. After an afternoon of painting and taking plenty of breaks i was left with this, i opted not to go for ACU camo and went to woodland camo and a OD coloured MOLLE vest
P1090695.jpg

P1090694.jpg

P1090696.jpg

P1090699.jpg

in all im very happy with him, the only thing i may come back and go over is picking out a few more highlights to the face and maybe add a little more graphite to M4 carbine

more to follow soon


shane
 
he looks ok dont he. and when i ciss teh etch it gets fecked in the bin
 

Latest posts

Back
Top