Scratchbulding a Banshee (Wing Commander IV)

Great update, I was wondering how things were going with the Banshee.
I hope you're feeling better.
 
Aaand the next update! :eek:

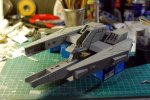
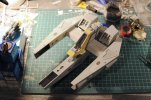
The last weeks have been really slow regarding the overall progress. I continued to detail it with tiny tank parts here and there. It took ages and the progress is still nigh invisible. :'( When putting everything temporarily to its place, the banshee looks like this:
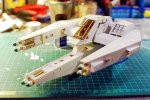
Banshee_33.jpg

One of the most important new things I added were the bridges, which connect the engines to the main fuselage. I hesitated a bit building these, because I wanted to glue the main wings to the fuselage first, to be able to measure the size of those bridge things. Well everything worked out quite nicely and the engines can be glued on to those things now. Or maybe after painting, because otherwise it's hard to reach the areas around the engines once they are mounted. Hm.
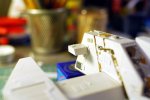
Banshee_34.jpg

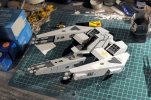
Next up was adding some sort of Mount to the underside of it, where a brass rod will hold the banshee in place. At first I was not sure, if my mount will hold the weight of the banshee, but after testing it I was happy to see that everything worked as I hope it would. :D I also added lots of greeblies to the underside. Since the underside of the fuselage is rarely seen anywhere, I got a bit crazy and added quite much. :D

Banshee_35.jpg

Other than that a few leadwire cables followed into the cockpit. Now everything seems to be ready for a paintjob, yet I want to let pass a couple of days to be sure that I did not forget anything. I may also try physical damage on it as well. I guess this will be much fun.
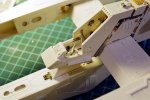
Banshee_36.jpg
 
Wow, "greebly" central. ;D

Really looks great with every thing coming together.
 
Jaw dropping to say the least!!! Best build thread I've ever seen, You work is fantastic!!!! ;)
 
Time for a little upate! :eek:

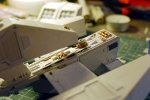
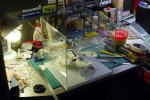
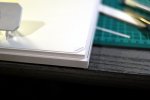
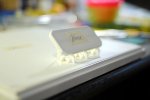
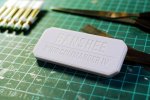
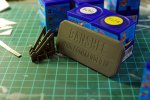
I ordered an aquarium to put over my banshee, so that I don't have to dust clean it every single day. To hold the Banshee as well as the aquarium glass in place I cutted a 25 x 25 cm plate, which is 1 cm thick and put another plate ontop of it. The top plate is now 3 mm smaller, because the aquarium glass is 3 mm thick and thus the aquarium fits perfectly on the base now. Pfew. Along with that I also built a custom name plate for my Banshee. I cut out the words Banshee and Wing Commander IV out of thick foil and sticked it to the plate. That way the name looks recessed or even engraved. I'll try to colour that plate very decent with dark grey and let the letters stand out only by a little drybrushing and a dark wash.

Pfew. Next up: Paintjob!

Banshee_37.jpg

Banshee_38.jpg

Banshee_39.jpg

Banshee_40.jpg
 
Alright! I primered my Banshee. Looks quite ok so far. It's my first Airbrush experience ever and I have to say... it's a bit weird. I thought it's quite faster than brushing it all with a brush, but... well... I have to clean it quite often and it's generally a bit tricky. But I guess with time comes confidence and I'll be a lot faster soon. Also I will already primer sub assemblies. I noticed that it's very hard to reach certain places, with the airbrush. :(

Banshee_41.jpg

Here's the logo plate, which will get a dark wash for the letters to come out a bit more and an additional drybrush for the edges to come out more. Other than that, it'll be only dark grey like at the moment.

Banshee_42.jpg

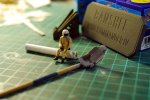
Here's the pilot with his beige space suit and dark boots. He is still waiting for some more paint (especially details like his vest and other stuff) and of course a dark wash, as well as a dry brush or highlighting with oil paints. I still have to decide on that. It'd be a first for me. :eek:

Banshee_43.jpg
 
We really need one of those smily face things where the jaw hits the floor. I simply am gob smacked. Please apply every word of praise in the dictionary and apply to your skills and your model.

Never in a bazillion years could I do something like that.

So cool
Gary
 
elend said:
Alright! I primered my Banshee. Looks quite ok so far.

Wow, I wish my "awesome" looked like your "ok" ;D
Fantastic!
 
Very very impressive !!!

Your Hard work paid off !!! she is a Beauty !!!

Man !!! She will turn Heads at Model shows for Sure !!!


Take care ! and
My Hat to you !

Norm.
 
Hey peoples, long time no see! I haven't been working on the Banshee anymore, since I am currently moving into a new apartment. That will be done soon, though and I'll be able to work on the Banshee again. Woo!
 
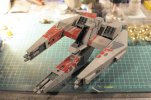
So, people. I moved into a new apartment and thus didn't have the time I wanted to continue my Banshee. Now I did, though and those are the results. I airbrushed another much lighter coat of grey on it. After that, I painted several places with dark grey to make them look more dirty and dark, once the Banshee gets washed. Also I used a bit of drybrushing here and there. Next up was the cockpit, which got a weird Nato Oliv color, which turned out quite dark. But beneath the toned cockpit glass (which still makes me worry a bit) you won't see too much anyway.

Banshee_46.jpg

Banshee_47.jpg

At this point it looked still quite artificial and unreal. The contrasts were too stark and... well it's just weird. But it wasn't finished yet. Next step for me was to add those red markings on the Banshee. I also like to call it warpaint. The masking took me quite some time, but I got it right eventually. And yes, it's actually that assymetric. The right wing (left on the picture) didn't have that zig zag shape. Dunno why. But I think it looks cool. The chipped paint of the markings were done with maskol, which smells quite funny. For my next Model I do have to learn that hairspray technique, though, since the chipped paint looks a bit too rough for my taste.

More pictures soon!

Banshee_48.jpg
 
That is really cool. It's inspiring me to do a scratch build (someday).

Looks great. :)
 
This whole build...
Wow is only a three letter word. It seems like it deserves a word that has three hundred words.

I hope wow will do.
 

Latest posts

Back
Top