Overall Paint Strategy-When, what how

DocXMAS

New Member
Joined
Jul 20, 2023
Messages
2
Hi everyone I am just getting back into building models after a long (4o year) break. My 9 year old son is interested in all things world war II. We are building the Sherman Easy 8 and I have no idea how to start painting. I have all the paint, brushes and an airbrush but I do not have a strategy. HOw do you decide when to paint what part? Do you prime everything? Is it best to paint small parts before they are cemented? I have looked on line for some general guidance but so far havent found anything.
 
Last edited:
It depends, and there's not really a right or wrong answer, but whichever works best for you, and your son.

I start by looking at the kit and seeing how hard it's going to be to paint things at different points in the process. If I can prime the whole kit on the sprues at the start, and not create a lot of work for myself downstream, I'll do that. If there are areas I won't be able to get to once they're in place, I'll prime and paint them, then install them.

With an airplane or a tank, I'll prime the interior and interior parts, assemble them, and then close up the fuselage or the body. It's easy to plug openings like cockpits or hatches with damp paper towel or facial tissue, then prime the exterior.

The downside to priming on the sprues is that as I remove parts as I build, I usually have to clean up the sprue attachment points and then decide to touch up the primer at that spot, or not.

I usually do prime everything, but remember that priming isn't just a surface prep to improve adhesion of finish color coats. Priming can reveal flaws in the surface that you might not otherwise see. It can make it easier to see fine seams or gaps that you might have missed, and which you may want to address before applying finish colors. With water-based acrylics, like Vallejo or Andrea acrylics, or craft-store acrylics (the kind you find at Michael's, HobbyLobby, WalMart) like Americana, Folk Art, or Apple Barrel, it definitely helps those paints adhere to the surface. Enamels and lacquers are chemically "hotter" and can adhere to the styrene well on their own.

But again, for me, it always comes back to what makes sense, what makes less work, during the process.

Hope that helps!
Brad
 
This guy does a video build that may be helpful for you. When I jumped back into this I spent a lot of time watching youtube videos.
 
Hi everyone I am just getting back into building models after a long (4o year) break. My 9 year old son is interested in all things world war II. We are building the Sherman Easy 8 and I have no idea how to start painting. I have all the paint, brushes and an airbrush but I do not have a strategy. HOw do you decide when to paint what part? Do you prime everything? Is it best to paint small parts before they are cemented? I have looked on line for some general guidance but so far havent found anything.
Probably the best way to learn is by getting it wrong. I have only been modeling for 20 odd months and got so much wrong it's frightening but I feel I'm a better modeler now because of it.

Main thing is that you and your son have a laugh and enjoy it.
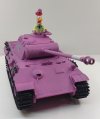
The craziest builds are usually the most satisfying and memorable. Pantherman
Forgot to add the photo.
 

Attachments

  • 20221010_202202.jpg
    20221010_202202.jpg
    159 KB · Views: 1
Do not follow the instruction sequences.


I cut all the parts for each sequence & clean them up.

Bond together (Glue) as much as possible. Some may have
to wait until later. Depends on the number of colours.
For instance cockpit seats paint before fitting as they are
a different colour.

Fit any PE

I batch prime all. Even small bits as it gives a much better look
to the final paint finish.

Also try to get as many items together for a session saves a lot
of airbrush cleaning

Mist coat of final colour.

Finish coat final colour.

Where decals are to be used gloss varnish.

Detail painting by hand ie hand parts on
pilots control stick.

Decals placed.

Matt varnish.

Those are the general sequences I follow.

But. Some you have to work out what is best as you progress.

Do not prime first. You will have to scrape primer away to be
able to bond the plastic to plastic which wrecks the primer
edge on to be paint face.
(ie cement is not a glue it softens the plastic edges to to enable bonding).


Laurie
 
Last edited:
Advice

Masking tape.

Always cut a clean line on the edge that is receiving the paint.

Tapes have, in general, a slight seepage of stiky stuff present on the edges.
Gives a not perfect paint edge.

Cutting a new edge gives a good clean paint edge.

Get a 6mm thick tape. Cutting as above this is the only size you need.

Laurie
 
To add to Laurie's fine advice on laying out masking tape, I use a tip I got from Fine Scale Modeler a few years ago. After laying down the masking tape, run a brush of clear paint along the seam that will be painted to that you are assured a perfect seal. I have been using this technique on water lines for 1/700 scale ships with excellent result.
 
To add to Laurie's fine advice on laying out masking tape, I use a tip I got from Fine Scale Modeler a few years ago. After laying down the masking tape, run a brush of clear paint along the seam that will be painted to that you are assured a perfect seal. I have been using this technique on water lines for 1/700 scale ships with excellent result.
Yes I do that scott using a very thin coat matt varnish. This helps in releasing.

I use an American Razor blade to score lightly the perimeter before removing the masking tape.

Laurie
 

Latest posts

Back
Top