NYLON GAG MK 1 - FINISHED
- Thread starter The Nylon Gag
- Start date
The Nylon Gag
New Member
- Joined
- Nov 14, 2011
- Messages
- 829
Re: NYLON GAG MK 1?
Evenin,
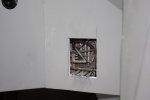
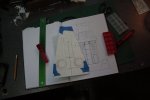
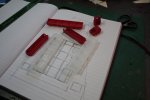
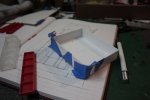
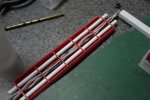
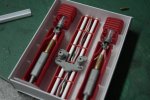
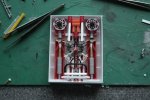
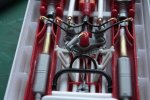
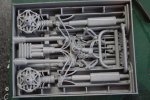
Quick photo update, installed the tubs in the wings, made greeblie tub for the 'backbone of the ship. Will install vents over this on top of the wings.
Enjoy, comments please.
Lost my mojo a bit at the moment, had a car crash, i'm fine but it shook me up a bit and killed my truck and all because of some other guys road rage, i juist love driving in Miami.
At 6am its like Beggers Canyon on a busy school day, with drivers who do their driving test in a parking lot, i kid you not.
Any hoo, enough of my gripe's,
Don't worry be happy ;D
Gag
Evenin,
Quick photo update, installed the tubs in the wings, made greeblie tub for the 'backbone of the ship. Will install vents over this on top of the wings.
Enjoy, comments please.


Lost my mojo a bit at the moment, had a car crash, i'm fine but it shook me up a bit and killed my truck and all because of some other guys road rage, i juist love driving in Miami.
At 6am its like Beggers Canyon on a busy school day, with drivers who do their driving test in a parking lot, i kid you not.
Any hoo, enough of my gripe's,
Don't worry be happy ;D
Gag
Jamaicanmodels69
New Member
- Joined
- Apr 17, 2011
- Messages
- 604
Re: NYLON GAG MK 1?
I know this thing is big but when you see the
size of the detail assemblies, you really get
the idea of how big it is! Looking excellent
sorry to hear about the accident glad your ok!
I know this thing is big but when you see the
size of the detail assemblies, you really get
the idea of how big it is!
sorry to hear about the accident glad your ok!
Grendels
Active Member
- Joined
- Nov 24, 2009
- Messages
- 9,092
Re: NYLON GAG MK 1?
Nice work on the greeblies!
Sorry to hear about the accident. I live in a college town, and there are usually two things going on. Students on their phones, and old people driving well under the speed limit. When the mix the results are interesting.....
Nice work on the greeblies!
Sorry to hear about the accident. I live in a college town, and there are usually two things going on. Students on their phones, and old people driving well under the speed limit. When the mix the results are interesting.....
ModelMakerMike
"It's Slobberin' time""
- Joined
- May 28, 2011
- Messages
- 1,838
Re: NYLON GAG MK 1?
AWESOME STUFF!!!!
AWESOME STUFF!!!!
ScreamingSamuraiStudio
New Member
- Joined
- May 13, 2009
- Messages
- 257
Re: NYLON GAG MK 1?
Damn, sorry to hear about the accident and loved the Beggar's Canyon reference also. There's a section of IH-10 here in San Antonio that I have been calling Beggar's Canyon for a couple of years now..Glad to see someone else has put the reference to good use.
I am totally envious of your scratch building techniques. I wish I had that ability, but everything that I have tried ends up looking as bad as Mickey Rourke's face.
The Nylon Gag
New Member
- Joined
- Nov 14, 2011
- Messages
- 829
Re: NYLON GAG MK 1?
A Very Good Evening to my visiting Herd bretheren ;D
Thank you so much for your kind words, it means alot that you take the time to comment
Got a Major Mojo Boost ;D from all the positive posts so i've forged ahead with the back spine section.
First i had to cut the internal wing supports away so the tub would fit.
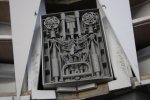
Made a piece for the back bone with cut out for the tub to show thru.
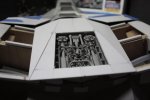
Made a frame
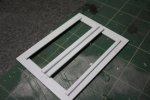
Cut some vent supports
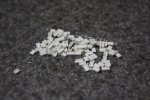
Glued in position and sanded to length.
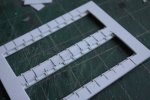
Glue vanes.
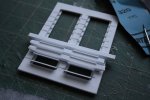
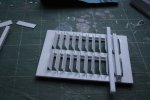

Make additional frame around the vents.
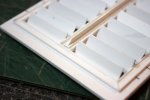
And in position

Thats it for tonight,
Thanks for stopping by, comments welcome
Gag
P.s Loving the Spring Contest Scott.
A Very Good Evening to my visiting Herd bretheren ;D
Thank you so much for your kind words, it means alot that you take the time to comment
Got a Major Mojo Boost ;D from all the positive posts so i've forged ahead with the back spine section.
First i had to cut the internal wing supports away so the tub would fit.

Made a piece for the back bone with cut out for the tub to show thru.

Made a frame

Cut some vent supports

Glued in position and sanded to length.

Glue vanes.


Make additional frame around the vents.

And in position

Thats it for tonight,
Thanks for stopping by, comments welcome
Gag
P.s Loving the Spring Contest Scott.
ModelMakerMike
"It's Slobberin' time""
- Joined
- May 28, 2011
- Messages
- 1,838
Re: NYLON GAG MK 1?
Even MORE awesomeness.
Stop already.
lol
Even MORE awesomeness.
Stop already.
lol
Jamaicanmodels69
New Member
- Joined
- Apr 17, 2011
- Messages
- 604
Re: NYLON GAG MK 1?
WOW love those vents amazing details on this beast....damn!
WOW love those vents amazing details on this beast....damn!
schweinhund227
New Member
- Joined
- Jun 24, 2009
- Messages
- 2,511
Re: NYLON GAG MK 1?
Wow ! huh ! yeah ! Wow !
Massive project ! Nice work !
Keep it up ! looks very unique and interesting...
8)
Wow ! huh ! yeah ! Wow !
Massive project ! Nice work !
Keep it up ! looks very unique and interesting...
8)
The Nylon Gag
New Member
- Joined
- Nov 14, 2011
- Messages
- 829
Re: NYLON GAG MK 1?
What is happening my Heardies , ;D
Thank you so much for your comments, i really appreciate you taking the time to comment ;D
Had quite a productive week,
tried to take my time on the airlock,
cuz i wanted it to look like it would work,
Used some tank suspension bits and a few motorbike bits.
I'm quite happy with it. ;D
What do you guys think?
First i made a box,
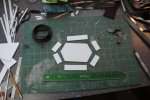
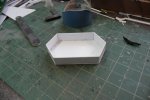
I used a piece from some swimming pool pump accessories as my actual airlock/door frame assembly.
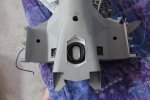
Positioned the springs together with the airlock/door frame,
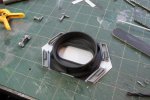
Made a door,
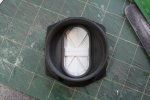
Added some details,
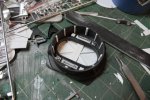
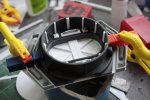
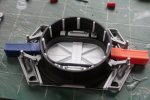
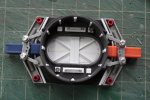
Put the assembly in the box and added frame work around the outside,
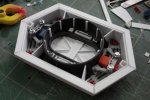
Added the side bits and an outer frame work,
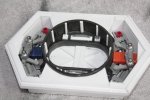
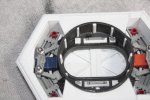
And in its final position,

And finally, the money shot ;D wet primer, Mmmmmmmmmmmmmmmmmm primer,
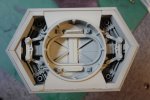
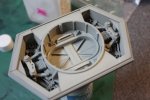
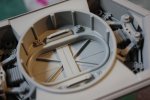
Will probably add some lighting later, also this is going to be the access point on the bottom, so it will be held in place with magnets.
Thanks for stopping by,
comments welcome and much appreciated
Gag
What is happening my Heardies , ;D
Thank you so much for your comments, i really appreciate you taking the time to comment ;D
Had quite a productive week,
tried to take my time on the airlock,
cuz i wanted it to look like it would work,
Used some tank suspension bits and a few motorbike bits.
I'm quite happy with it. ;D
What do you guys think?
First i made a box,


I used a piece from some swimming pool pump accessories as my actual airlock/door frame assembly.

Positioned the springs together with the airlock/door frame,

Made a door,

Added some details,


Put the assembly in the box and added frame work around the outside,

Added the side bits and an outer frame work,


And in its final position,

And finally, the money shot ;D wet primer, Mmmmmmmmmmmmmmmmmm primer,


Will probably add some lighting later, also this is going to be the access point on the bottom, so it will be held in place with magnets.
Thanks for stopping by,
comments welcome and much appreciated
Gag
Glorfindel
Active Member
- Joined
- May 2, 2011
- Messages
- 1,504
Re: NYLON GAG MK 1?
WOW! That is some awesome scratch building. But....wait.........
WHERE'S THE CHOPPER!!!
WOW! That is some awesome scratch building. But....wait.........
WHERE'S THE CHOPPER!!!
The Nylon Gag
New Member
- Joined
- Nov 14, 2011
- Messages
- 829
Re: NYLON GAG MK 1?
If you are refering to that cutting whatsit, i don't got one.
 are my cuts that bad,?
I s'pose that would explain the 1/8" kink to the right on everything ;D
Seriously are they that bad?
Gag
If you are refering to that cutting whatsit, i don't got one.
I s'pose that would explain the 1/8" kink to the right on everything ;D
Seriously are they that bad?
Gag
Jamaicanmodels69
New Member
- Joined
- Apr 17, 2011
- Messages
- 604
Re: NYLON GAG MK 1?
Da bomb update again! ;D
Da bomb update again! ;D
Similar threads
- Replies
- 24
- Views
- 1K
