MG RGM-79 GM Sniper

Kewl stuff.
Looking really good!
A few years ago, I saw someone on-line someplace, maybe even Ebay, was selling Thruster bells that were made of metal. They looked great!
I don't recall who it was, but I thought they looked good.
I can't wait to see yours all finished and painted. :)
 
Your a brave man to be doing all that scribing. Looking great so far! What scriber are you using? Are you using any tape as a guide?
 
steezy said:
Your a brave man to be doing all that scribing. Looking great so far! What scriber are you using? Are you using any tape as a guide?

Wondering that myself. I'd give anything for one of those BMC chisels....
 
ModelMakerMike-Thanks man. I really appreciate the compliment. There are a couple small companies out there that make metal thrusters and detail parts. I bought a bunch of metal thrusters from this site called MechaSkunk a few years ago, really cool stuff, they went out of business unfortunately, none of them are the right size for this build though.

Steezy & Sunsanvil-Thanks guys. I use a couple different scribers along with dymo tape. I'll post a pic of them in this post.

Grendels-It certainly is. For me its one of the less enjoyable aspects of building but at the same time it can really set an otherwise plain model off the charts.

Cool. So, Got a little more done this week. Hopefully I can get everything ready for primer by the end of this week, if not, definitely by next week I should be on to painting.

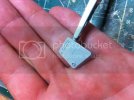
I worked primarily on the skirt armor this week, adding some detail and more scribed panels. Here we have the the two front skirt pieces.
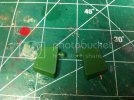
001-61.jpg

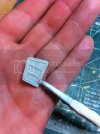
After a scribing session and added some bolts from Wave
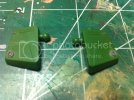
002-63.jpg

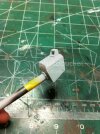
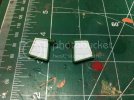
Here is the underside of those parts. As you can see the the bottom of the bolts I added are visible since I had to drill through the part. So I want to build this up to hide the bolts and also add some interest to the underside of the parts.
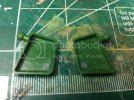
003-57.jpg

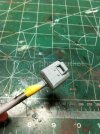
Started with blocking everything out with some sheet styrene siding.
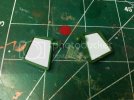
004-51.jpg

Added some styrene rod to give it some more character.
005-46.jpg

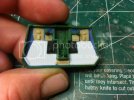
Added some bolts to the rear skirt. Originally, I wanted to scribe some panels into this piece but I ended up breaking the part into two pieces. Once I repaired the fracture and smoothed everything out again, I figured I should just leave well enough alone ;)
009-26.jpg

Again, to hide the underside of the bolts and add some interest to the underside of the part, I built it up with some styrene and bits from the spare box. The blue stuff is Aves.
011-14.jpg

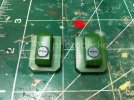
I then added some Kotobukiya parts to the side skirts to make them a little more interesting.
010-21.jpg

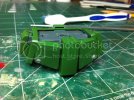
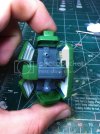
Here we have the skirt assembly all modded up and ready for some primer
012-19.jpg
013-11.jpg

I think the underside looks a lot more interesting
014-8.jpg

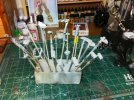
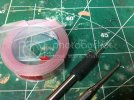
For the guys that were asking about my scribing tools, I primarily use two different scribers in conjunction with one another, along with dymo tape. I tend to eyeball the position of the scribe most of the time but for more complex patterns like on the shoulders I'll make a template out of sheet styrene.
gvjk.jpg
The pointy tool with the rubber grip is a Hasegawa scribing tool. I always use this to make my initial lines. Then I'll deepen and refine the line with the the other tool which is a scriber made by Squadron.

Well that is all for now fellas. More to come next week. Hopefully we'll see some primer on her.
 
Hello again my fellow herders. Been a minute since my last update on this project. Work and life just dont seem to care about my models. oh well. progress is progress 8)

I am finally done with all the mods and everything is prepped for paint. I did not get to primer this week like I had hoped, but at least everything is finally ready. check it...

Scribes, scribes, and more scribes...the upper leg armor paneled out.
005-47.jpg
004-52.jpg

Some more rivets from Wave
006-41.jpg
003-58.jpg

I had the most trouble modifying the feet parts. The plastic is very thick on these parts. Since I dont have a drill bit big enough to make a whole substantial enough for the rivets I have to use my no. 11 blade to carve the hole out big enough. That is why there is a lot of putty going on these parts. Still need to touch up a bit, but I'm pretty happy with them
007-36.jpg

and here we have what I refer to as the "part bush." All ready for a good primer session. 8)
008-36.jpg

Thanks for looking. Until next time. Peace.
 
That part bush is what scares a lot of people away from these models.

All the extra details will just help push this one over the top. Nice work!
 
Grendels-This is true. The part bush scares a lot of modelers. I dont know why though. Its not like its extremely difficult to do, its just tedious. But then again modelling is tedious. I guess it just depends on how badly you want to build and paint giant robots! I got it bad! but anyway, thank you for the nice words Grendels, you da man.

Steezy-Im still not exactly sure what colors im going to use. Im planning on doing a light to dark green gradient effect on all the armor. The frame parts are going to most likely be metallic steel. Probably do some gun metal on the rifle and generator.

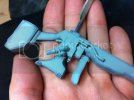
So I finally started priming the sniper this past weekend. I got two of the bushes primered up. I did not get everything primed yet. Im using Vallejo grey primer. Airbrushing primer is a new game for me. I generally use spray can primers, which would only take me about 10 minutes to primer the whole kit but airbrushing takes a good deal longer. So i've been breaking it up into separate sessions. I have one more bush to take care of. So far everything is looking pretty good.
001-62.jpg
002-64.jpg

Closer look at some of the detail. Sorry the color is slightly polarized.
007-37.jpg
008-37.jpg
005-48.jpg
006-42.jpg
004-53.jpg
003-59.jpg

Thanks guys. Check ya later!
 
Oozing wickedness! The additions look great, especially primed.
 
ModelMakerMike-Thanks bud! Its been a lot of tedious work for such minor details but seeing primer on it finally really is a nice pay off.

MR ITO 67-Thank you kind sir!

JMac-Thank you for the kind words my good man!

Cool beans. A short update. So, I got a good bit of painting done in the last few days. I've been using nothing but Vallejo Model Air paints for the duration of this build and this is my first time working with them, and I must say, I love these paints. I'll admit, it definitely takes a little getting used to airbrushing them, especially, in my opinion, if you work primarily with Tamiya paints, as I do, because these spray much differently. It takes a bit of fiddling with air pressure and thinning ratios to get it just right. Once you find that sweet spot, which is really not that difficult to do, just a little trial and error, boy do these paints sing.

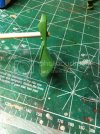
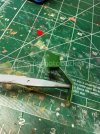
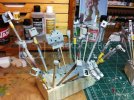
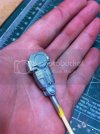
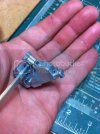
I sprayed all the inner frame parts with Vallejo metallic steel. Just photographed a couple parts to give an idea.
001-63.jpg
002-65.jpg

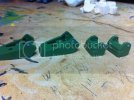
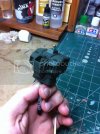
I then base coated all the armor parts with Vallejo olive yellow. This is my first color coat. I'll spray a lighter shade of green on top and shade it toward the edges to add a gradient/shadowing effect.
003-60.jpg

More to come very soon!

Peace
 
Grendels-You said it brotha! This is the best part of building a model, for me anyway. I love the painting process, finally getting to see the results of hours of work is what keeps me coming back to bench ;)
 
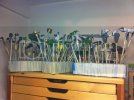
So I've been really busy painting all week and that's pretty much all I did yesterday ;D I really want to wrap this thing up. I still have a small batch of parts that have yet to see paint because I ran out of alligator clips :p I think it'll be done by the end of this week. Starting to think about the base also...

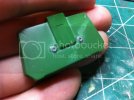
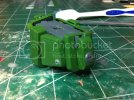
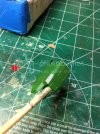
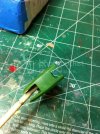
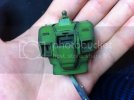
I got all the armor parts shaded up. the top color is Vallejo Lt. Camo Green. Just photographed a couple parts.
IMG_1354.jpg
IMG_1357.jpg
IMG_1358.jpg
IMG_1359.jpg
IMG_1360.jpg

I then base coated the rifle, back pack, and generator with Vallejo German Grey and then shaded with Vallejo RLM Blue wich, to me, looks, kind of like a Sky Grey.
IMG_1361.jpg

Thats it for now fellas. As always thank you so much for checking it out and commenting.

Later on!
 

Latest posts

Back
Top