Jaitea's Falcon Projects

Thankyou very much guys!

I've started making the landing gears, I want to be able to display the ship landed or flying, so the legs need to be removable.

The original legs with the kit are actually pretty good:
originallegs.jpg


If you compare them to the blueprints for the full-size set:
halfres.jpg


I removed the housing tubes from the original Gear boxes and trimmed them down a bit:
locators.jpg


I bought some brass rod & copper pipe to use as stronger legs:
rods2.jpg

rods.jpg


The removed plastic rods:
legh.jpg


The rod & pipe cut to length, also a metal rod (laser guide rod from an old DVD player):
legsv.jpg


The legs slotted in.....
slotin.jpg


......I used a magnet to hold them in:
magnetl.jpg


Thanks for looking

John
 
eh up buddy,hope you have less agro on your legs than mine mym8,lookin sweet good buddy!!cheers peza
 
You're right there Peza, the build has just sllooowwwed down making these!!!

So nothing much to post....

...so instead, I'm going to talk about my first inspiration to modify the MPC Millennium Falcon Kit

In the November 1997 issue of Sci-fi & Fantasy Models:

scan5y.jpg


In the issue Darren Peters explained how he accurised the AMT/Ertl Falcon kit, he gives measurements & valuable advice.

The first modification he made was trimming the height of the sidewalls by 4mm, next he gave details on how to correct the curvature of the hull, he cut a section of EMA tubing approx 62mm in length & 82.5mm outer diameter and attached it directly to the fuselage after fitting the Turret plates. The docking walkways were removed to allow the hull to adjust to it's new shape.

He cut the cockpit section off the upper hull, he fashioned a new walkway by cutting 45mm diameter EMA tubing to the same length as the one he had just removed, except for the tubing that connects at the rear of the cockpit. the walkway should have a long side of 48mm and a short side of 22mm.

He scratchbuilt the canopy's cone-shaped area by wrapping .020 plastic sheeting into a cone, using the kit's original piece as a guide.
He trimmed the resulting cone to 28.5mm in length. He transcribed the new windows to the cone & added additional cross members.

image1jkz.jpg


image6tv.jpg


He rebuilt the scanner/antenna support arms & added the Empire/Jedi landing gear boxes.

He used the same technique he had used to make the cockpit canopy to make the docking ring cones.....he went with a circular base of 51mm, tapering down to 45.5mm for the outermost circle.

He dremelled out the clear plastic from the turret windows to keep constancy with the cockpit frames.

Hope these measurements help

John
 
eh up buddy,wow that`s a blast from the past,i did that coversion to my amt/ertel falcon years ago have you made the side walls narrower also?cheers peza ;D
 
It's amazing how many in this community remember that magazine & got inspiration from it.

A similar conversion by another person who was inspired by the Darren Peters mod, is documented on the Starship Modeler site.....John Martin's build in 2006:

http://www.starshipmodeler.com/starwars/jm_mf.htm

At the beginning of my build I was considering using the existing sidewalls & cutting them down, but eventually I scrapped them and made the walls from scratch

John
 
I've slowly made the rear legwork, it would help if I had a sharper/newer hacksaw blade!

legsboth.jpg


John
 
So far so good,...the rear legs have ended up the same height & it looks level:

gears2.jpg


gearue.jpg


Adding some details to the legs:

gears3.jpg


The magnets worked out OK to keep the legs in

gears4.jpg


Once the front one is done, I'll see if I can find some way to attach the open gear doors to them.

Thanks for looking

John
 
Thanks peza & Quaralane for your support....it feels like this thread is in the outer arms of the galaxy,....I have to go back in now and again to the busy site centre to see whats happening! ;D


The pieces of the front undercarriage:

middle1.jpg


Just pushed together, (bird cage baffle not finished yet)

middle2.jpg


middle3i.jpg

middle4.jpg


Cutting out the baffles are tedious, here's how the first one turned out......hmmmm....looks like it's been chiseled out of stone:

bafflecutout.jpg


I used this blueprint to create a template:

halfres.jpg


The test turned out OK....just some parts needing removed & printed at 29% of it's original size:

papertemplate.jpg


test2ld.jpg

smaller30.jpg


I've printed the 5 baffles on acetate:

acetate.jpg


The image, I printed it at 29% of its size:

testgroup.jpg


I spent a good part of Saturday experimenting with the acetate....no good, it doesn't glue too well, then I tried printing on thin plasticard, I made two baffles & was reasonably happy with them until I put them on the legs.....they just look homemade....late on Sunday night I returned to the original kit part, I filed off all raised lines & details and stuck on one of the templates (printed on sticker paper) I now had a better 'official' guide to cut out the design.

.....done one:

newlegs.jpg


Now doing the rest....as I said....stuck graphic onto part....cut out the details with a blade,....removed unwanted paper, then sprayed with primer to make painted on markings....remove the rest of mask paper....drill out holes, then make into shapes with blade:

p1050722copy.jpg


Gotta keep on going, get these done so I can move on

John
 
eh up buddy.keep the faith they look mint!just keep thinking tht the number is goin down and not up!!!!
cheers buddy peza
 
This looks great Jaitea. I first saw your thread on the RPF which lead me here. Thanks a ton! Your YT-1350 looks really cool. Thats not a design you see every day. Its too bad you called it quits, it'd be neat to see it finished.
Great looking Falcon! I really love the amount of time you've put into that beauty.
 
Thanks very much for your comments Quaralane & peza,.....great comment Shortsonfire79, I recently went back to that pointy YT-1350 & changed the engines quite a bit, you can see the update here:

http://www.scalemodeladdict.com/index.php/topic,8421.msg131865.html#msg131865

It's been a fiddly couple of nights & I've finished the Baffles....they are OK
(I might look into the PE ones)

Here are some images....there will be cables etc hanging out the bays etc

baffles3.jpg

baffles2.jpg

thebaffles.jpg


I had to get myself some help.......

a29ff.jpg


legstt.jpg


Just two feet to do, I'll be glad to move on

John
 
Wow J! Great build mate! Wonderful detailing. Really liking the landing gear. :) :D ;D 8)
 
Thanks very much guys, I really need to get back to this build.....I feel like I'm cheating on it!

John
 
OK, I'm back (just a bit of painting to do on the McQ Falcon)

Heres a photo of some of my addiction ;D
piggyback.jpg

Got the 1/144 FineMolds Falcon on ebay for under £30 + £5postage from inside the UK,......couldn't resist it

It is a beautiful model & makes me really appreciate the fantastic work done by all who built & modded this kit on this site....the micro work that Scratchy has done on his.....and the scale defying paint job John Simmons done on his.

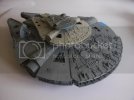
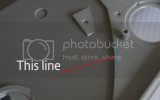
I think I might modify the mandibles & jawbox like I've done on my 1/72.....speaking of which I tried a new technique of detaching the mandibles on my other 1/72 Falcon......If you look on the inside of the kit where the mandibles join the main hull you can see a machine line moulded into the plastic:

Thisline.jpg

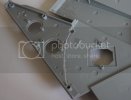
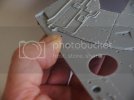
If you cut along this line down to the level of the hull, youll find if you hold the model up to the light that the mandible & hull is now nearly separated & cutting with a fine blade from the outer side of the model is really easy without damaging details:
cutbellow1.jpg
BreakThrough.jpg

Last night I finished off the landing gear feet for the MPC Falcon:
NewFeet.jpg
NewFeet2.jpg

It's great to get back to working on these kits

Thanks for looking

John
 
Definitely have a lot of Falcons going on there.
Nice tip about the mandibles for those who may want to modify theirs.
 
eh up buddy,
nice work on the legs mym8,i feel ya pain!
keep up the top work...cheers peza ;)
 

Latest posts

Back
Top