D3A1 Val 1/48 Hasegawa competition build

Thanks suavetomcat. I definitely be able to learn allot from watching your build progress!!!
 
I think you're doing a great job as it is mate, but if there's anything I can help with, or if I've brushed over something you'd like to know more about, just give me a shout. I'm only to happy to help if I can.

Chris
 
Very nice work on the Vals' office space. Looks sharp.

Jason
 
Thanks Jason.

It's been a few days since I updated the build, but I have been working away at it. So here's where I'm at.

I got the two fuselage halves together, and cleaned up any seams. I got the wings together complete with their resin inserts for the wing folds. Again all seams were filled, sanded, and panel lines re-scribed were needed. The wings and the fuselage were joined leaving a rather nasty join on the belly of the Val where the wings join the tail. I filled it with Super glue, before sanding and polishing the crap out of it! I'll see what it looks like after I get some primer on her.
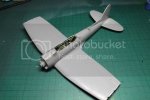
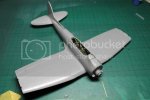
IMG_0499_zpsvym2pgmc.jpg

IMG_0502_zps7wnu68tq.jpg

Hopefully you can make out the glass effects from using the Micro Krystal Klear.
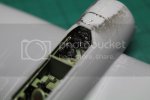
IMG_0501_zpsho0iyfeh.jpg

I decided to cut all of the other parts off the sprues, and clean them up before priming. I put a few sub assemblies together like the propeller, the cowling, and the dive breaks.
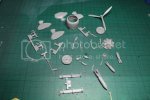
IMG_0504_zpsefj5egcx.jpg

The exhausts weren't looking great so I hollowed them out a little using a drill and a sharp blade. I dropped a little Tamiya extra thin in to smooth out the sides.
IMG_0505_zpsjb32mhz7.jpg

That's is for now. I'm hoping to get this masked and everything primed over the next couple of days! then it's time for some colour. I'm looking forward to this one as I'll be airbrushing nearly all the markings on.

Thanks

Chris
 
Excellent work mate . I know I've seen a lot of your work in the flesh , but its great getting to see the detail work close up in the pics . The office looks da bomb :)

Chris.
 
Whoa man. I missed the last update. That cockpit & stuffs looks totally fantastic. I didn't know their was a 1:4 kit available in this subject. ;)
 
Thanks guys, I appreciate it! Got a coat of primer on everything and I've a couple of seems to touch up. I'll get some more photos on soon though. Tell you what though, having to take photos as I build is certainly keeping my bench tidy.... Sort of! :D

Chris
 
This build is sweet- not only because it's a dive bomber ;) but also because you're doing such good work here-- well done!
 
Thanks Jeeves :D. I do love a good dive bomber myself. Hopefully get an update on the build this evening.
 
A quick update on the build.

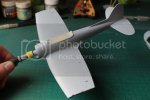
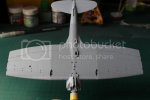
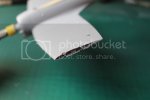
I got a coat of primer on everything. I fixed any seams that were still visible before touching up the paint.

IMG_0510_zpsimt7uh21.jpg

IMG_0512_zpsoc2hoztv.jpg

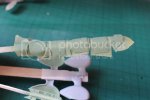
The resin wing insert turned out quite well.

IMG_0511_zpsks1ji4ag.jpg

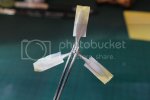
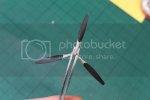
To give the primer plenty of time to cure, I decided to make a start on some of the other sub assemblies. I started with the Val's prop. I gave it a coat of flat black, before masking off the back surface. I then sprayed them with Vallejo silver. I will give the hub a slightly different shade and a dark wash to bring out the detail.

IMG_0519_zpsrrpnffwu.jpg

IMG_0522_zpsh0m9yfyo.jpg

I masked the canopies with the Eduard precut masks. With an aircraft like the Val, they were a blessing!!!! I then sprayed them with the interior color, Tamiya XF-71.

IMG_0509_zpszfhizzm7.jpg

IMG_0520_zpsr5blcger.jpg

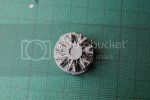
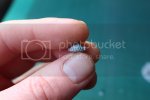
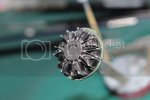
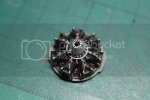
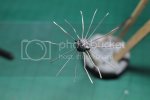
Next up was the Engine. There's not a lot on show once the it's placed inside the cowl. But I did want to add a bit more detail to the kit part. I decided to add some ignition wires using fuse wire. I would have preferred something slightly thinner but It was all I had at hand. Hopefully with a bit of paint it'll look okay tucked away under the Val's hood.

IMG_0513_zpstfsuxfnq.jpg

IMG_0515_zps1rpaucax.jpg

IMG_0525_zpshubfwv0n.jpg

IMG_0527_zpsbrzgh2wv.jpg

IMG_0530_zpsxqlosza3.jpg

That's enough for one day..... I'll get the engine finished over the next couple of days and report back!

Chris
 
Outstanding. I really like that "the primer is down and looks good" milestone in a build.
 
Thanks guys. I know what you mean Jason. There's certain stages during a build, and the first big satisfying one is the primer stage!
 
Thanks Scott. I'm glad you're enjoying the build. I got the engine finished today so I'll hopefully get some more shots up over the next day or so.
 
Saweet ;D Looks good mate , the wing folds do look very neat ! ...Great pics too !

Chris.
 

Latest posts

Back
Top