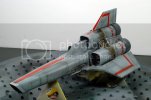
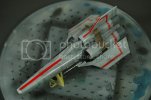
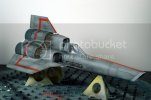
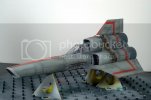
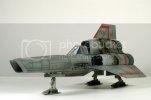
Colonial Viper MkI

The masking is a bit fiddly, but trying to get those decals down straight is worse.

After I test fitted the sub assemblies, I noticed that the two wing wing mounted cannon were aiming slightly lower than horizontal. It's particulary notciable since the cannon are directly in front of the two open access bays which perfectly follow the horzontal plane of the fuselage. The wings are slightly warped, so softened them with a heat gun and coaxed them up a bit. This wasn't quite enough, so I carefully broke the glue line where the top of the fuselage meets the front of the intake section and added a styrene shim to push the nose down a little. This straightened everything out and the shim will be hidden by the rear section of the canopy.
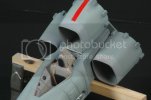
FillerStrip_zpsb48f057d.jpg
 
The secondary weathering stage - After painting in the engine plumbing and other details, I applied various colours of pigment powder and sealed that down with a layer of Future. I added a few drops of gloss white acrylic paint to the gloss coat to lighten up the overall look of the paint finish and to tone down the bright red/orange stripes a bit.
GlossCoat1_zpse391aa05.jpg
GlossCoat_zps566348e8.jpg
 
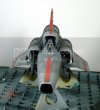
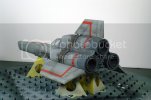
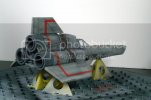
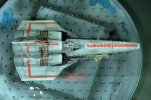
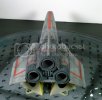
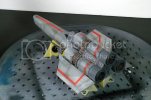
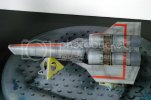
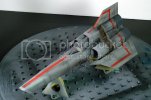
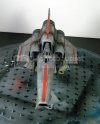
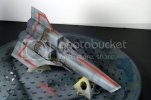
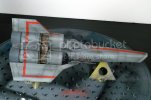
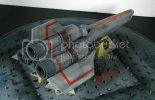
Well, it's 99.9% finished. I haven't installed the landing gear and landing gear doors yet, I'm going to cast copies of those to use on my old Revell/Monogram Viper kits. In the meantime, here are a few test shots of the (almost) finshed product. The weathering was finished off with burnt sienna, black, and grey washes sealed in with a couple of coats of Liquitex matte varnish. I added a couple of drops of white acrylic paint to the matte coat as well to lighten the finish even further.
DSC_31772337_zps928e7c32.jpg
DSC_31792339_zpsacd3f699.jpg
DSC_31802340_zps60ae4694.jpg
DSC_31822342_zpsc42bf209.jpg
DSC_31832343_zpse9d91931.jpg
DSC_31942354_zpsc2a5efae.jpg
DSC_31922352_zps7f02e743.jpg
DSC_31912351_zps5e340e84.jpg
DSC_31902350_zps1b0df054.jpg
DSC_31892349_zpsfc7febf1.jpg
DSC_31882348_zps8f7c2ce2.jpg
DSC_31872347_zpsfee9b056.jpg
DSC_31862346_zps0c410932.jpg
DSC_31842344_zpsc4b882ab.jpg
 
Just outstanding work. It looks like you could walk up and jump in. Bravo!
 
Nice job!! This thread actually provoked me in buying this kit. One question I hope you don't mind answering I am new to using pigments and was wondering did you just apply them with a brush dry or wet with some water? I have a few AK pigments but also I think I got the mud set.. Not sure if I should invest in some other types. Really love the paint job and weathering and how you simplified the stripes and masking.

Thanks for showing and nice pics!
 
Excellent work, could use some marking here and there but lookin' real fine! :)
 
builder101 said:
Nice job!! This thread actually provoked me in buying this kit. One question I hope you don't mind answering I am new to using pigments and was wondering did you just apply them with a brush dry or wet with some water? I have a few AK pigments but also I think I got the mud set.. Not sure if I should invest in some other types. Really love the paint job and weathering and how you simplified the stripes and masking.

Thanks for showing and nice pics!

Thanks, Builder. It's a great kit, you'll enjoy it.
Pigments are really easy to use and I feel they're perfect in this application to give a grimy look. For this particular model I applied them with a dry brush (I used mostly black pigment). The method I use is to dip the brush into the pigment and then wipe off the excess on a piece of paper (you can use the brush to pick up what falls onto the paper so you don't waste too much). Then just scrub the brush on the surface of the model where you want the pigment to accumulate - I like to apply it in several lighter coats until it builds up to the level of weathering you're looking for. The great thing about pigments is that if it's not going the way you want, you can easily erase them with a q-tip, or a moist paper towel. After you're happy with how the pigments look, you have to seal them in place with some sort of clear coat. My method is to apply the pigments, seal them with a gloss coat, apply a wash over the gloss coat, and then seal that with a matt coat. Until you seal the pigments, you have to be careful of fingerprints, they'll show up in the pigment powder like you wouldn't believe - I always wear latex gloves when using pigments. You can also use pigments disolved in some sort of solvent - mineral spirits work really well. This is usefull if you're trying to replicate dirt/mud and dust that's accumulated in a recessed area. It works like a wash only it looks more 3-dimensional; I didn't use the "wet" method on this model. I hope this was helpful - cheers and happy building.
 
Mr.Max said:
Excellent work, could use some marking here and there but lookin' real fine! :)

Gotcha, Mr. Max. I agree with you that it looks like something's missing; I finished this Viper to resemble the full-sized mock up as seen on screen and it displayed no markings.

I have plans to make another Viper in the re-imagined BSG style and that one is going to sport a bit more decoration... maybe even an RCS thruster or two.

Cheers.
 
I think your paint and weathering are absolutely perfect on this viper. Great work!
 
Awesome imformation, I will need to pick up a few more colors of pigments as I have only used them once to apply mud which I used white glue and water. I really like how you captured the streaks and weathering on this. I can't wait to get time and finish a kit I have been working on way too long and start this one. I hope you post more pic's when completed. Again nice job!!
 
Wow! It took a while, but I finally got around to casting copies of the landing gear and then installing the originals on this model. I can at last call this one DONE.
ViperMk12_zpsf26fe473.jpg
 
Nice work mate!! It's one of our most beloved models. We built it some time ago, and enjoyed it very much http://moviekits.net/viper/

Cheers!!
 
Could not wait till I saw another update it really looks great. I want to thank you again for the thread I am just about finished with mine. Just need to install and paint the pilot. I opted to light it and build a base. I left some of the stripes off painted some of my own mix of orange and chipped a bit but opted to not paint a lot of marks. I need to pick another one of these vipers up. This thread really inspired me to build and helped a great deal.

Thanks!
 

Latest posts

Back
Top