Colonial Viper MkI

Splashcoat

New Member
Joined
Oct 9, 2010
Messages
421
Here's a W.I.P. look at my build of Moebius' 1/32 Colonial Viper MK1:

Box art and a snazzy art card of Ralph McQuarrie's viper concept design:
BoxArt_zps5b8b52ba.jpg
img176_zps5e669d10.jpg

Stock Cockpit:
StockCockpit_zps1e84cb2a.jpg

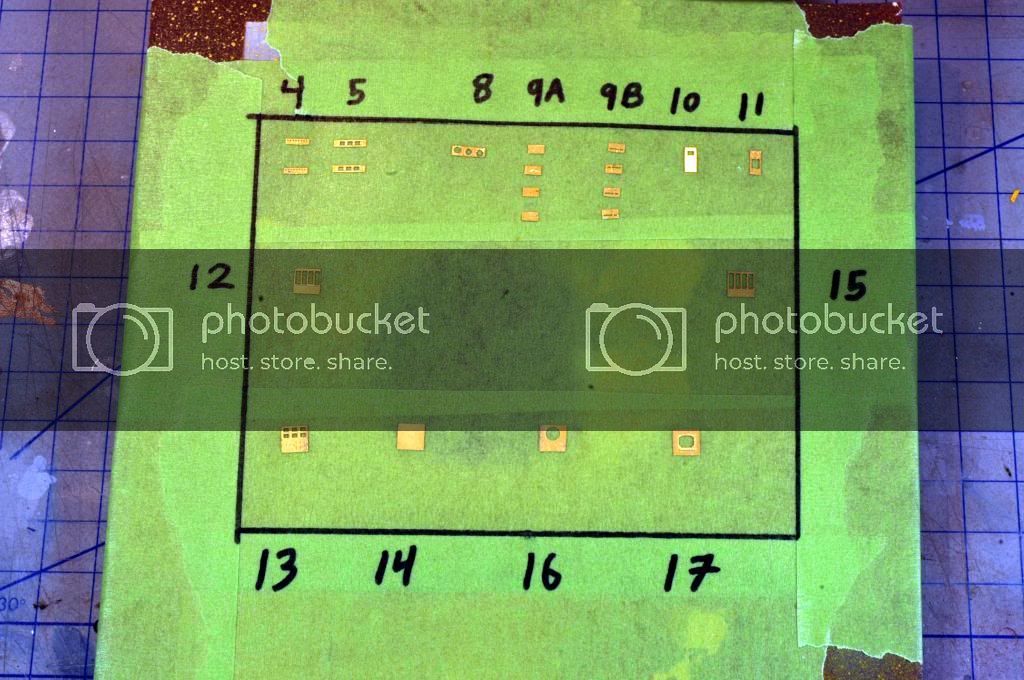
I removed the molded detail from the cockpit tub and re-faced it with ParaGrafix's photoetched set:
CockpitPaneling_zps37d47df4.jpg
PhotoEtchedCockpitPanels_zps4c04aaef.jpg

MeltedScreen_zps013fc2b4.jpg

I opted not to use the pilot figure; so I made some cushions from styrene to dress-up the pilot's seat.
ViperPilot_zps6c52a42d.jpg
SeatCushions_zps5c52dfdc.jpg

My initial inspection of the kit revealed that the manufacturer's mark on the side of the fuselage is going to have to go:
FuselageText_zpsfdcf8586.jpg

The kit features a clear insert for the engine exhausts. I'm not planning on lighting this kit so it will be painted:
EngineInserts_zps8771a564.jpg

Engine assembly - Moebius has engineered a fanstastic alignment/locking tab system into this part of the kit:
LockingTab_zpsd34f2322.jpg

I covered the stand attachment slot with a length of styrene channel:
StandSlot_zps872ad3bc.jpg
 
I'm looking to get this kit, can't wait to see if its worth it.

Great start!
 
This is a great kit , only slightly let down by the decals , as they are quite thick , shiny and reluctant to adhere to the model ! I'm just finishing up my build and as I'm attaching the guns , I've noticed that on mine at least , they are pointing down , rather than in a horizontal position . I think this is due to the part of the wing where the guns attach is warped . It's not a HUGE problem , as I'll simply remove the tabs on the wings and cement the guns in the correct position , but if I'd noticed before assembly , I could have sorted it then . Be sure to test fit the guns and check the wings for warpage ! Other than that , it goes together with no issues and needed minimal filler , as the parts went together perfectly . ;)
 
It's a great kit with very few construction problems. I'm scrapping the decals and painting on the Go Faster Stripes, I also find them a little weak.

The cannons on my Viper also aim slightly below the horizon. I attribute this to wing warpage and also due to the fact that the fuselage/engine joint is slightly out of square. The latter could have been my fault. Stay tuned here to see how I straightened it out.
 
This kit's construction is very straightforward and no modification is required apart from the cockpit. So now on to the fun part... paint!

The kit is very well engineered and can be built and painted in sub-assemblies. Starting at the front; the nose intake cone is a darker grey than the rest of the fuselage so it will be painted separately. After painting the intake grille a dark metallic colour, it was masked off with tape using a molded line on the back of the part as a template for the mask. The recessed line is exactly the same size and shape as the grille and makes a pefect guide to cut the mask - coincidence?
IntakeMask_zps1e83951e.jpg
NoseIntakeMask_zpsae590db6.jpg

I pre-painted the intake fans and masked them off prior to installation in the inatke scoops. The fit is very tight - they practically snap in, so you can get away with doing it this way.
IntakeFans_zps98fd85c7.jpg
IntakeScoops_zps46c5287d.jpg

Sub-assemblies masked and primed:
SubAssembliesPrimed_zps48ff77f4.jpg
 
I'm not going to use the kit decals for the red and grey stripes; rather, I'm going to paint the markings. I'm going to keep the grey primer for the stripe around the engine intakes, I masked this off prior to painting the main body colour.
Tri-IntakeMasked_zps4e6ebfb5.jpg
 
Grendels said:
That photoetch kit looks to be a must. Thanks for sharing!

ParaGrafix's set also includes three inserts to replace the kit's engine exhaust; the value of these is questionable to me as the kit part is very highly detailed as is. It's also molded in clear plastic, so no modification is needed for lighting. However, it's worth the price of the PE set for the cockpit panels alone. The set is nicely designed; three large pieces make up the cockpit tub and then seperate panels are attached to that with acetate dislplay screens (also included in the set) sandwiched inbetween.
 
Quaralane said:
Coming along nicely.
Going gear up, or gear down with her?

Thanks, Quaralane. I'm going to go with Gear Down; before I paint them, I want to cast copies of the gear to use on my old Revell/Monogram kit so I've put them aside until I get around to doing that. Also, the pieces which comprise the gear are an incredibly sloppy fit and need a fait amount of clean-up work after assembly. I'm perplexed about how bad the fit of these pieces is, the rest of the kit practically snaps together.
 
Cheers, Ozzman.

I'm skipping the decals and painting on the Go Faster Stripes with a custom mix of Tamiya Red and Orange. First... a great deal of masking:
StripesMasked1_zps9d39bc50.jpg
StripesMasked_zps995c68bb.jpg

Looks faster already:
StripesPainted_zps88aaaee0.jpg
 

Latest posts

Back
Top